
howtosimply.com/guides/how-to-check-and-free-up-storage-on-a-mac/ · Checked October 2026 · MacBook Neo · macOS 27.0.1
In this guide
Open System Settings, General, Storage. The bar shows what fills the disk; Recommendations and the (i) buttons free space. System Data is the last row and has no (i) button. On ours it was 32,57 GB, more than macOS itself (30,58 GB).
4 of 4 steps with real screenshots · 1 official source below
- Device
- Mac
- Shown on
- macOS 27.0.1 (MacBook Neo)
- App
- System Settings
- Path
- System Settings › General › Storage
- Real screenshots
- 4 of 4 steps
- Checked
- October 2026
- Sources
- 1 official, linked below
Step by step
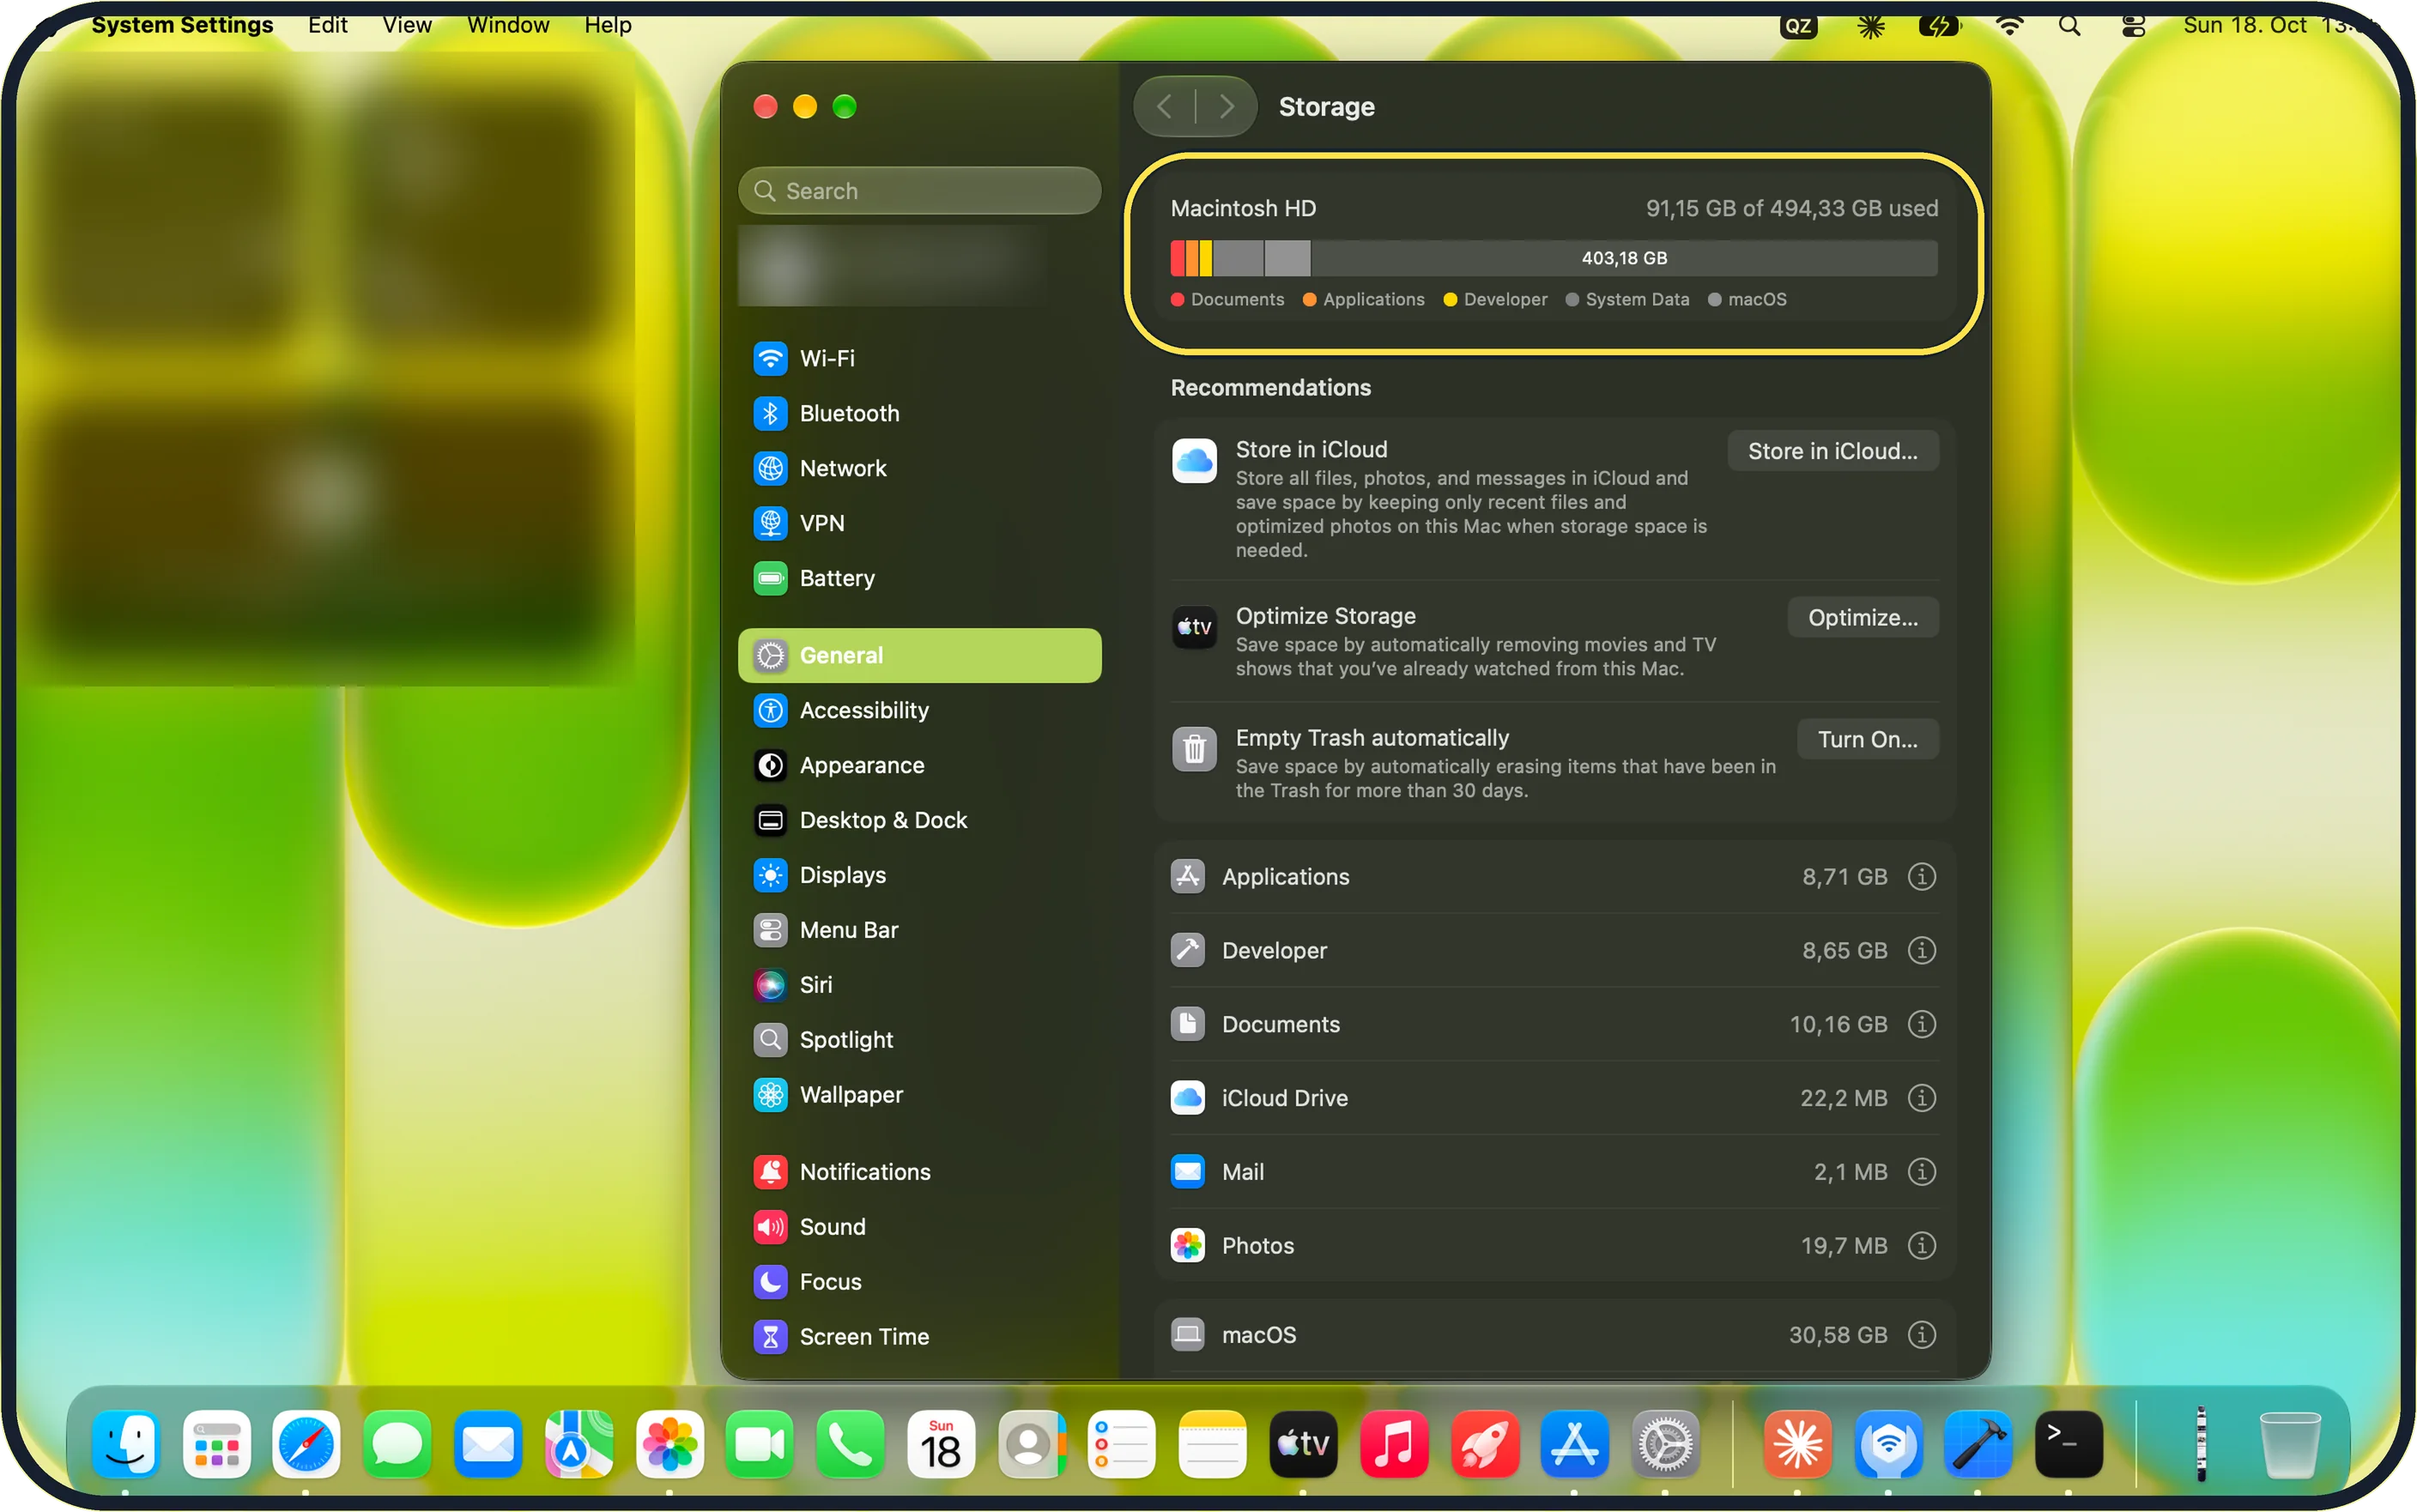
Zoomed in on the setting. Tap to see the whole screenTap the picture to see it full size Open Storage
Choose Apple menu, System Settings, General, Storage. Wait for the bar to finish.
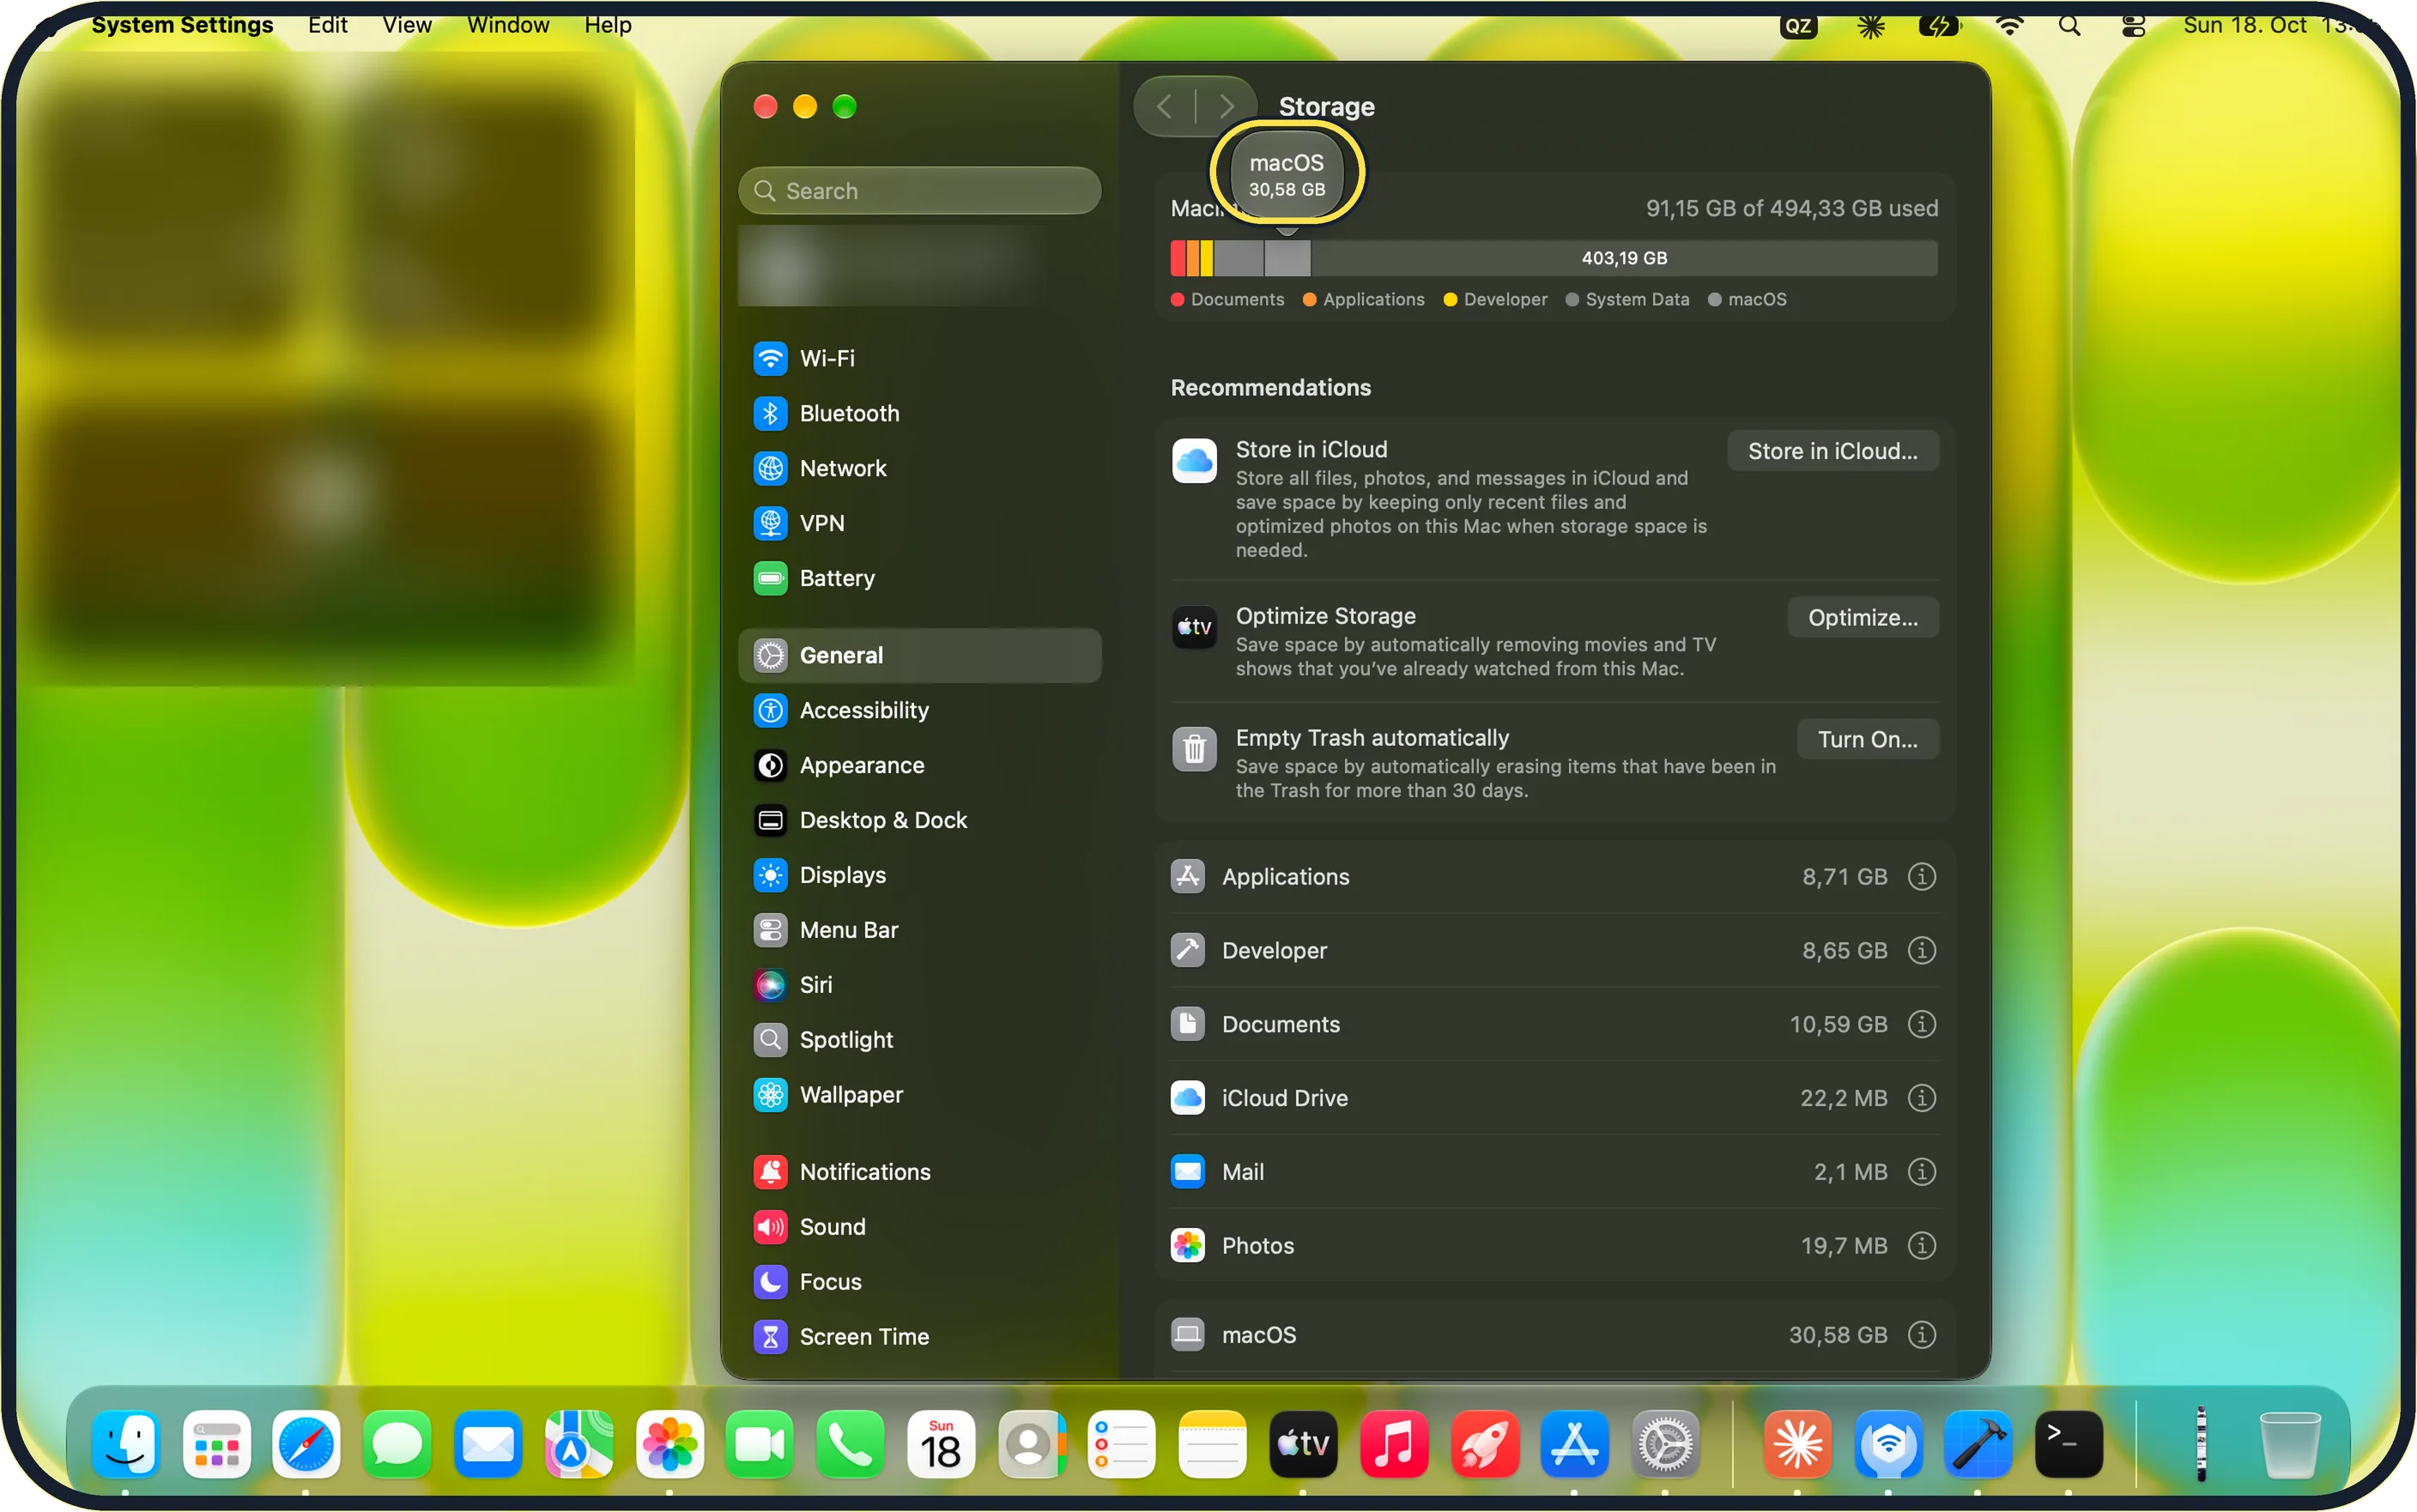
Zoomed in on the setting. Tap to see the whole screenTap the picture to see it full size Hover over the bar
Each colour shows its size. macOS was 30,58 GB on ours.
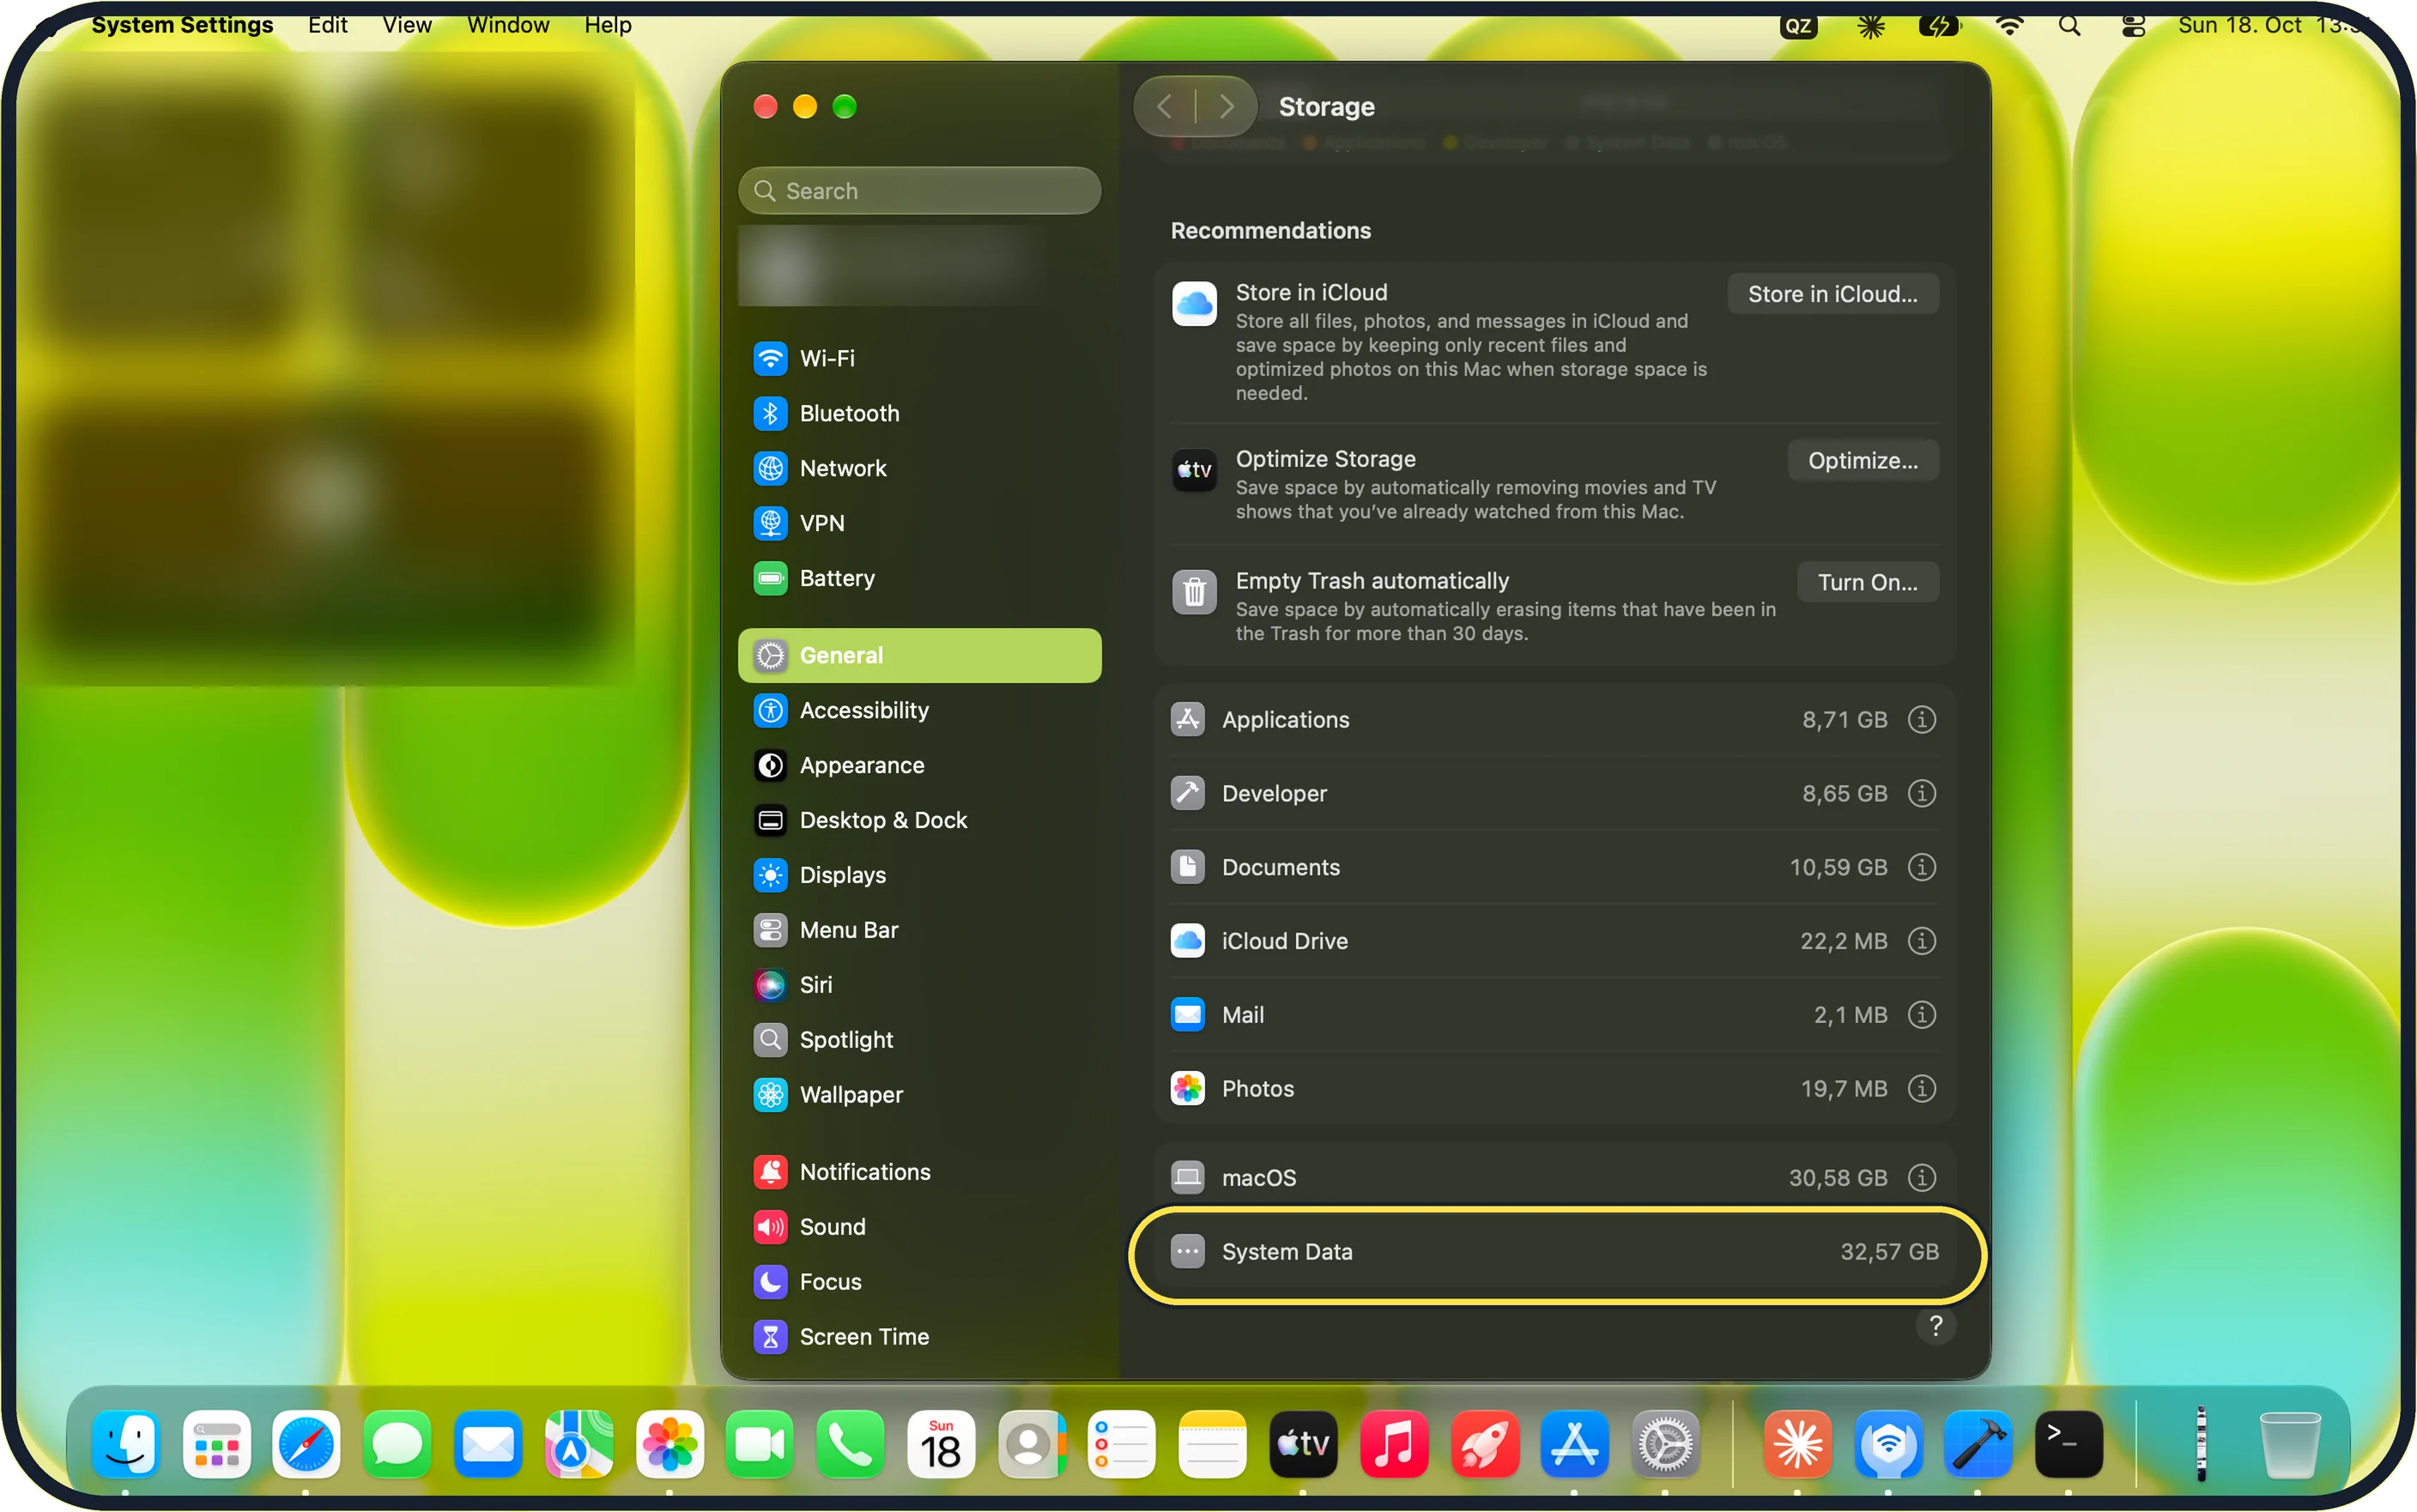
Zoomed in on the setting. Tap to see the whole screenTap the picture to see it full size Find System Data
It is the last row, with no (i) button: you cannot open it.
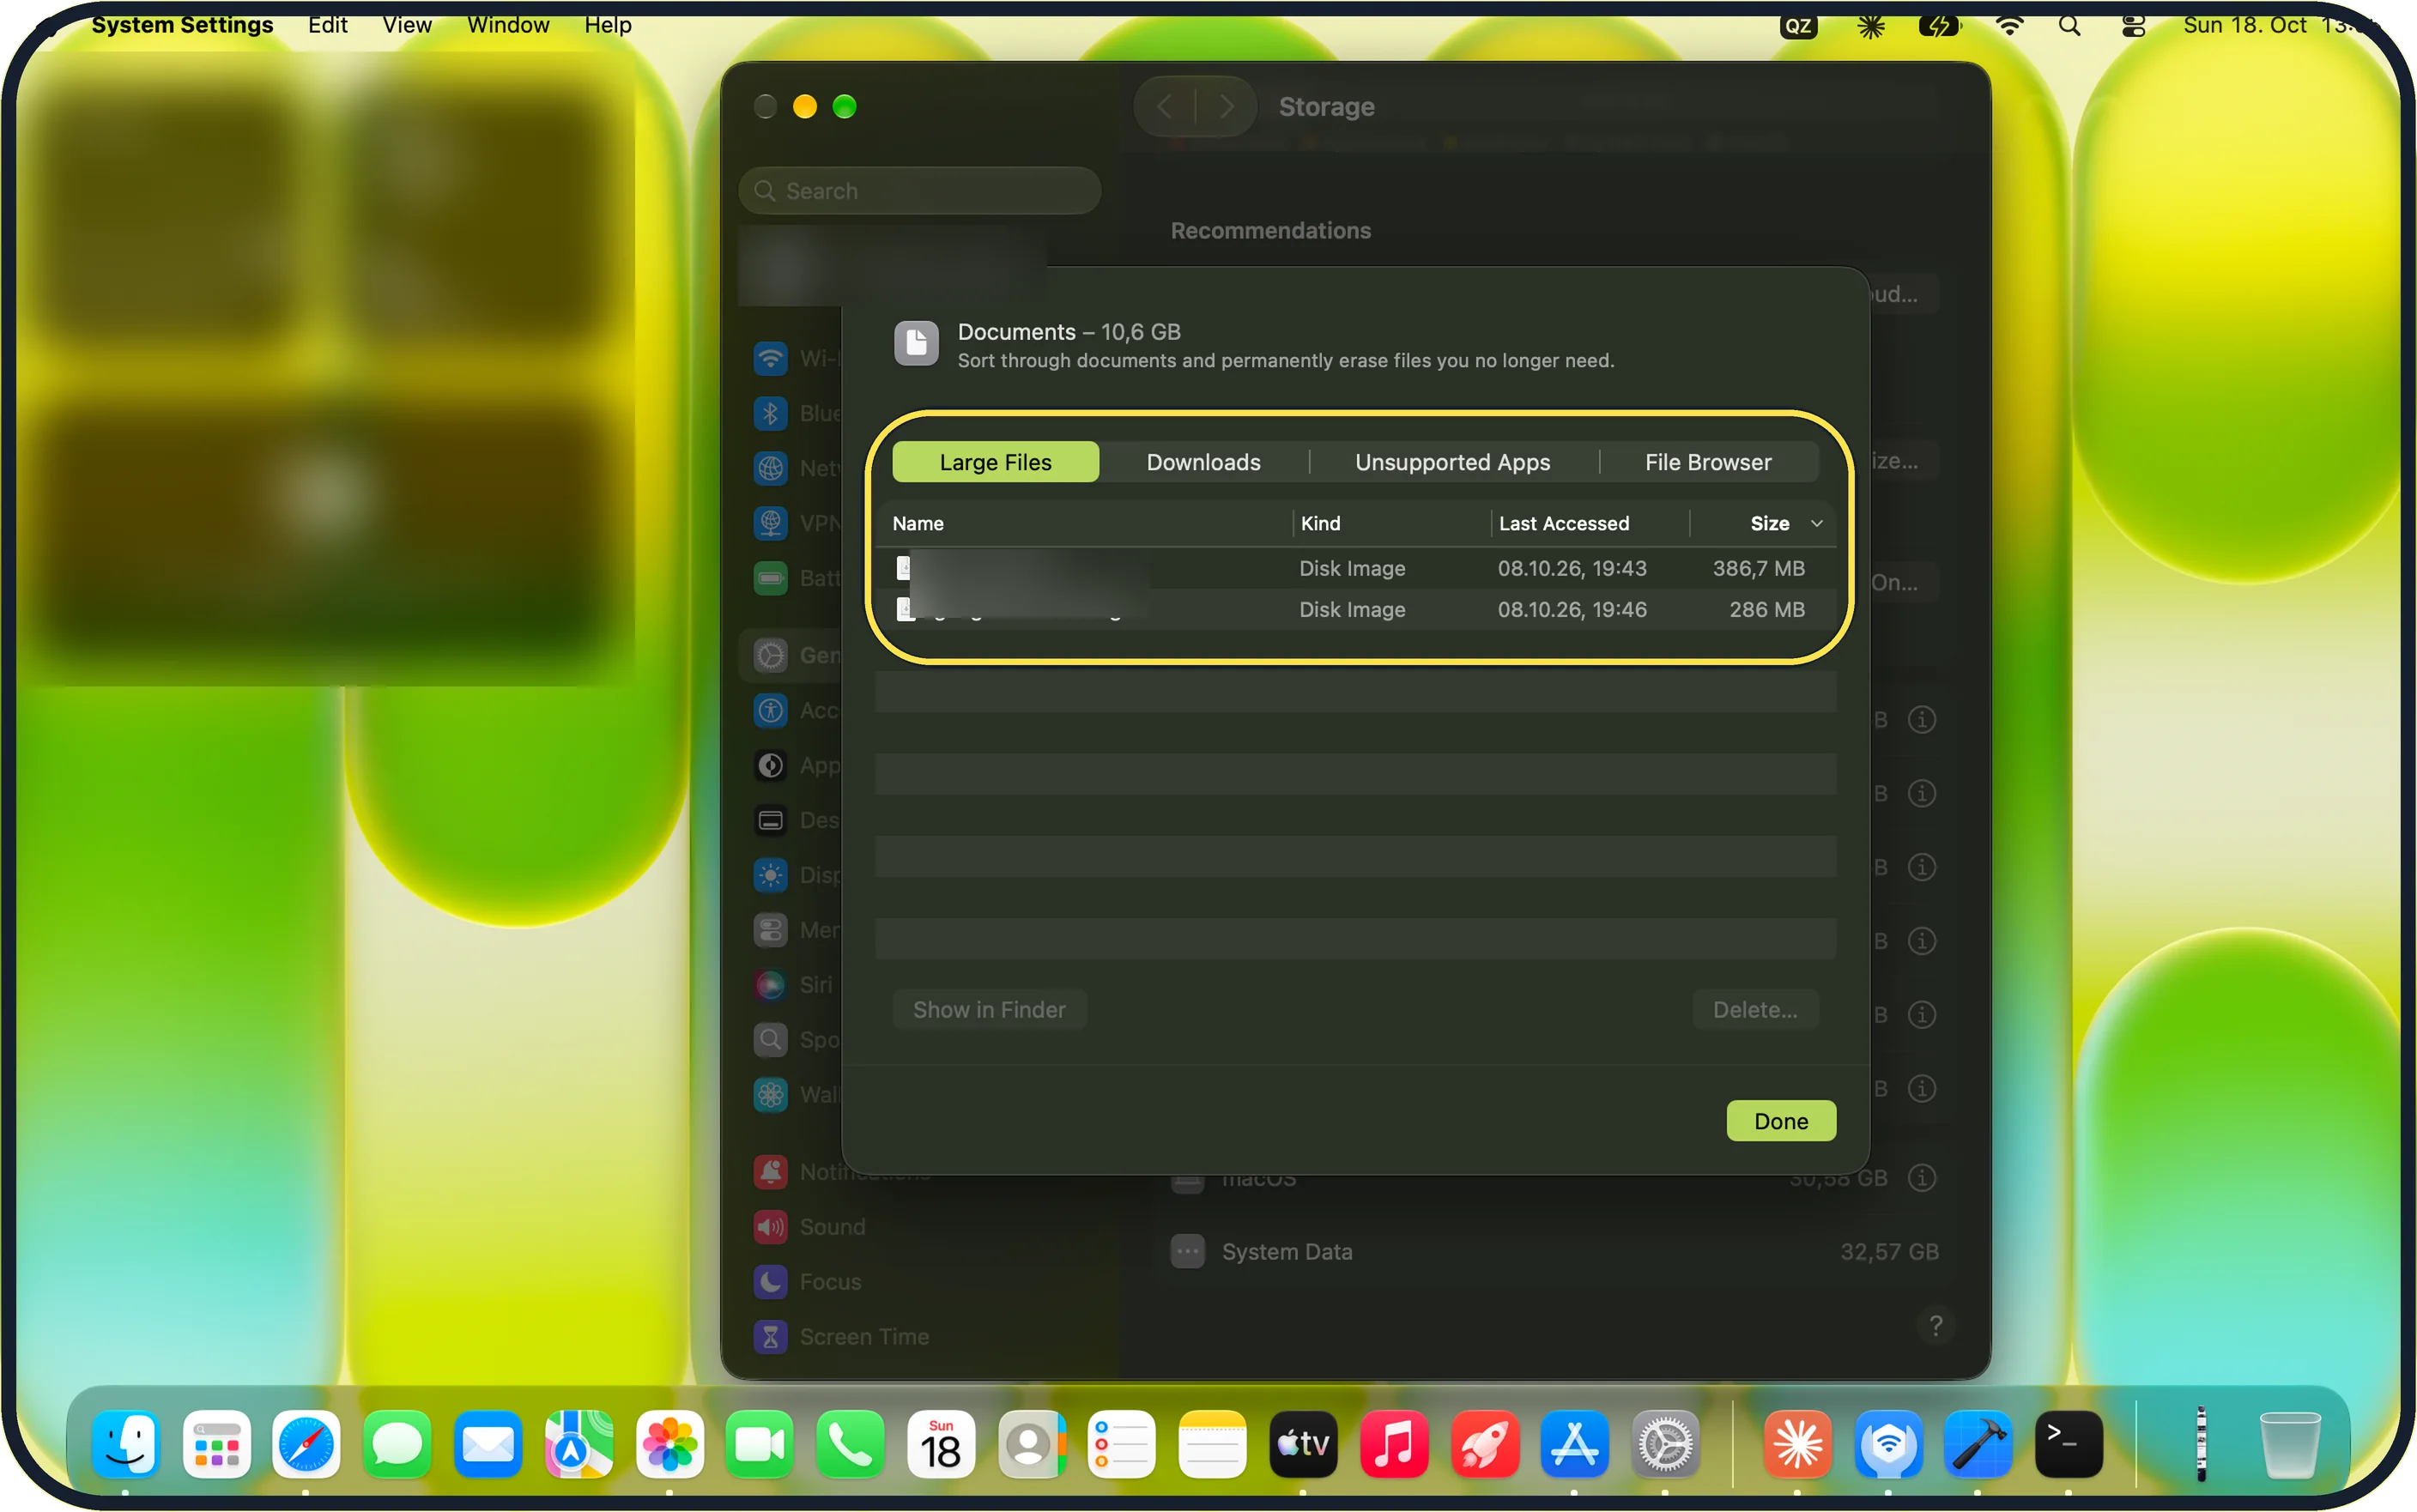
Zoomed in on the setting. Tap to see the whole screenTap the picture to see it full size Free space elsewhere
Click (i) next to Documents. Large Files lists the biggest files; ours were two disk images (.dmg).
If you do not see this option
- No System Data row? Scroll the list to the bottom and wait until Storage finishes calculating.
- Called Other? Apple says this category may be called Other on some Macs. Source: Free up storage space on Mac
- There is no Storage under General. Apple says that on macOS versions before Ventura you choose Apple menu, About This Mac, then Storage. Source: Free up storage space on Mac
If this does not work
- System Data keeps growing? Apple points to the Recommendations at the top of Storage. Apple also suggests emptying the Trash, deleting files you no longer need from Downloads, and moving large files such as a Photos library to an external drive. Source: Free up storage space on Mac
- Old iPhone or iPad backups? Apple lists deleting backups you no longer need as a way to free space. Source: Free up storage space on Mac
- Still large? Apple says starting up in safe mode clears some system caches. Restart normally afterwards. Source: Free up storage space on Mac
About this guide
System Data is the storage that macOS does not put in another category.
The screenshots are from our MacBook Neo with macOS 27.0.1, taken on 18 October 2026. Ours had 91,15 GB of 494,33 GB used.
Good to know
Apps you no longer use: how to uninstall apps on a Mac.
In short: System Settings, General, Storage, last row. Free space through Recommendations and Documents.
Links checked in October 2026. Menus and features can change after software updates. These steps match the version named at the top.
Did this guide work for you?
Sorry about that. What happened?