How to delete temporary files on Windows 11
By Saadat Rafiq · 2 min read · 5 steps · Published 6 October 2026
Open Settings, System, Storage and click Temporary files. Tick what you want gone and click Remove files. For the Temp folder itself, right-click Start, choose Run, type %temp% and press Enter, then delete what is inside; files that are in use are skipped.
- Device
- Windows
- Shown on
- Windows 11 Enterprise 25H2 (build 26200.9457), Microsoft Cloud PC
- App
- Settings
- Path
- Settings › System › Storage › Temporary files › Remove files
- Real screenshots
- 4 of 5 steps
- Checked
- October 2026
- Sources
- 1 official, linked below
Step by step
Open Temporary files
Press Windows + I, click System, then Storage, then Temporary files. Windows scans and lists each kind of file with its size.
Tap the picture to see it full size Check what is ticked
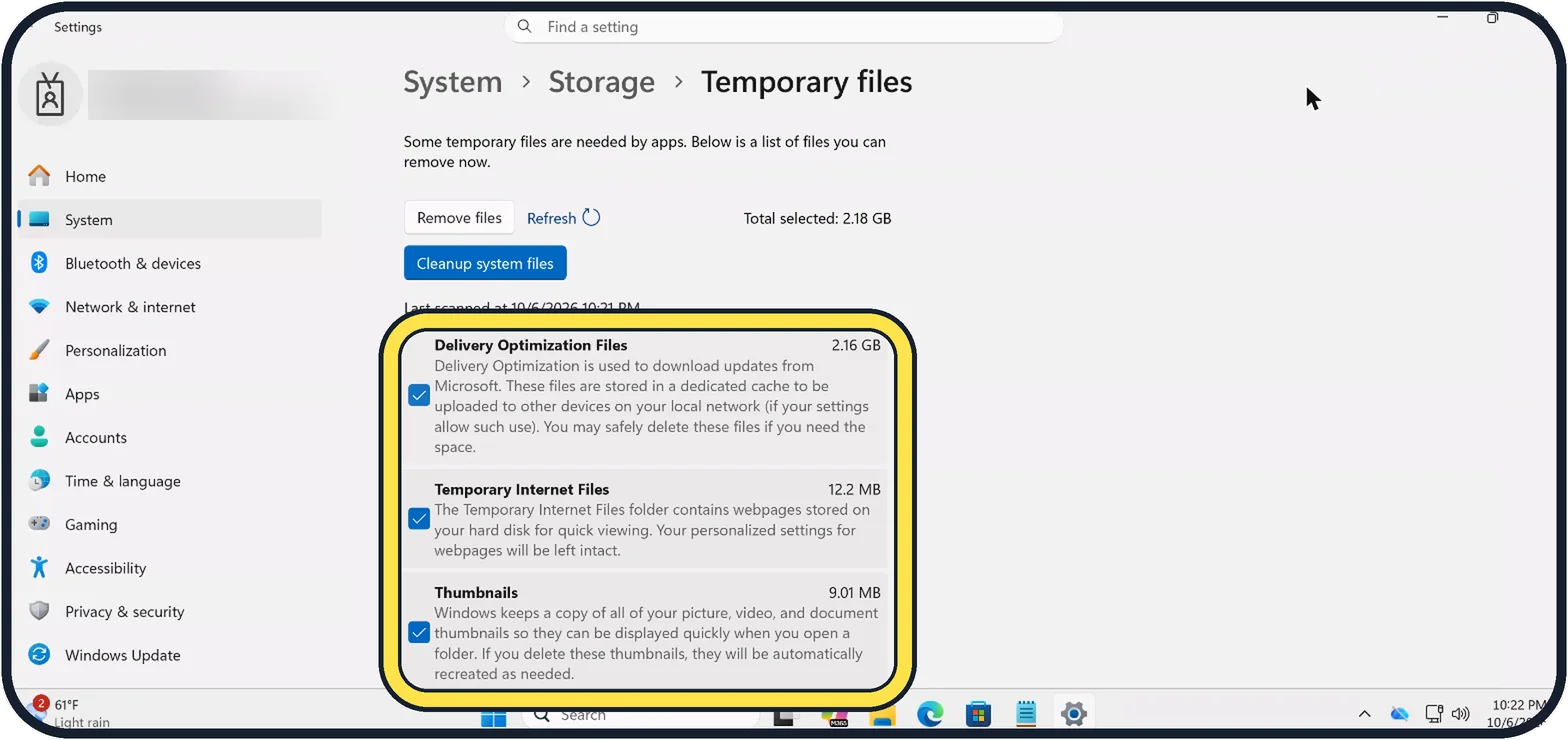
Each entry explains what it is. On our PC Delivery Optimization Files took 2.16 GB, Temporary Internet Files 12.2 MB and Thumbnails 9.01 MB, and the total selected was 2.18 GB.
Tap the picture to see it full size Scroll and click Remove files
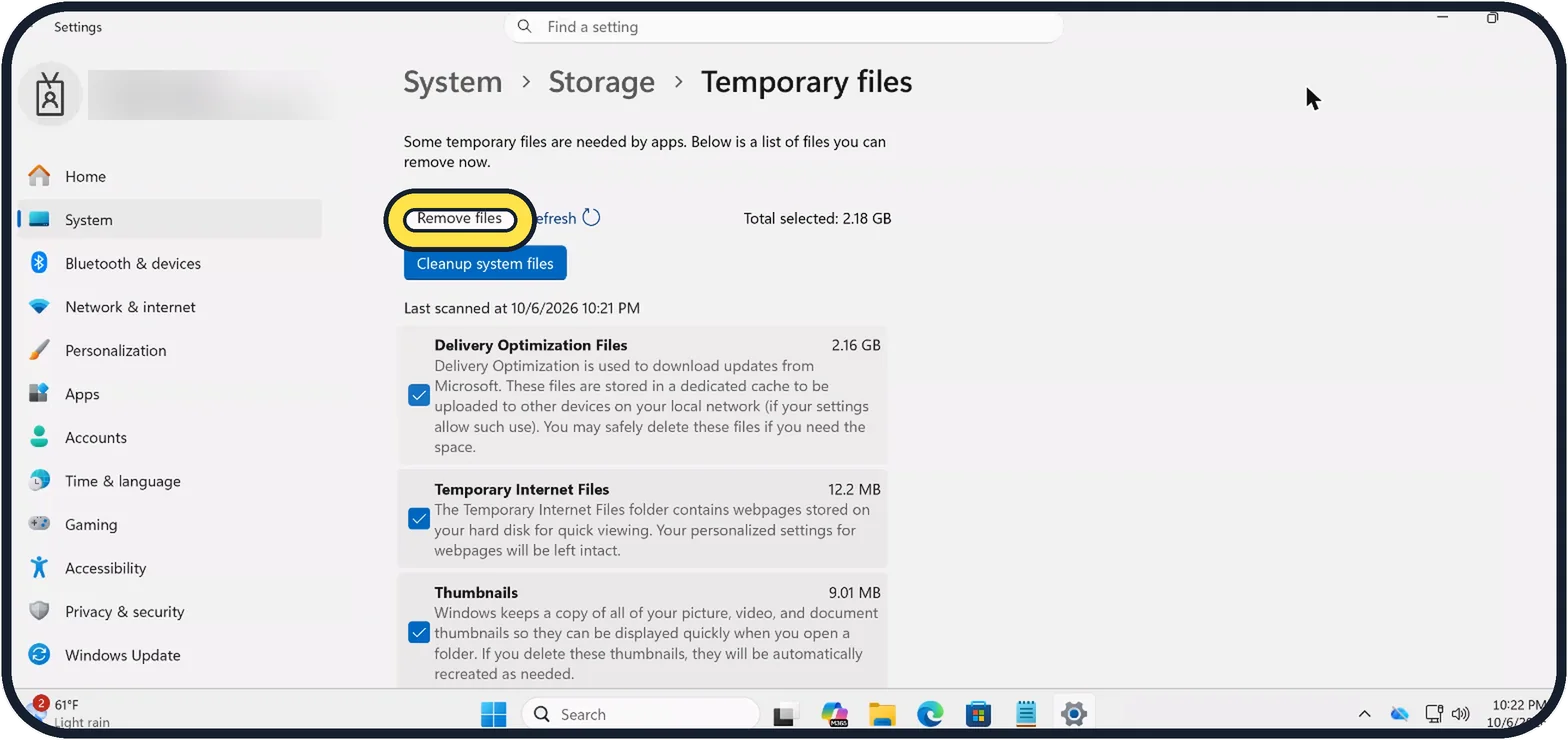
Further down are DirectX Shader Cache and, on ours, 105 MB of Updates. Untick anything you want to keep, then click Remove files at the top. We did not click it on our Cloud PC.
Tap the picture to see it full size Open the Temp folder
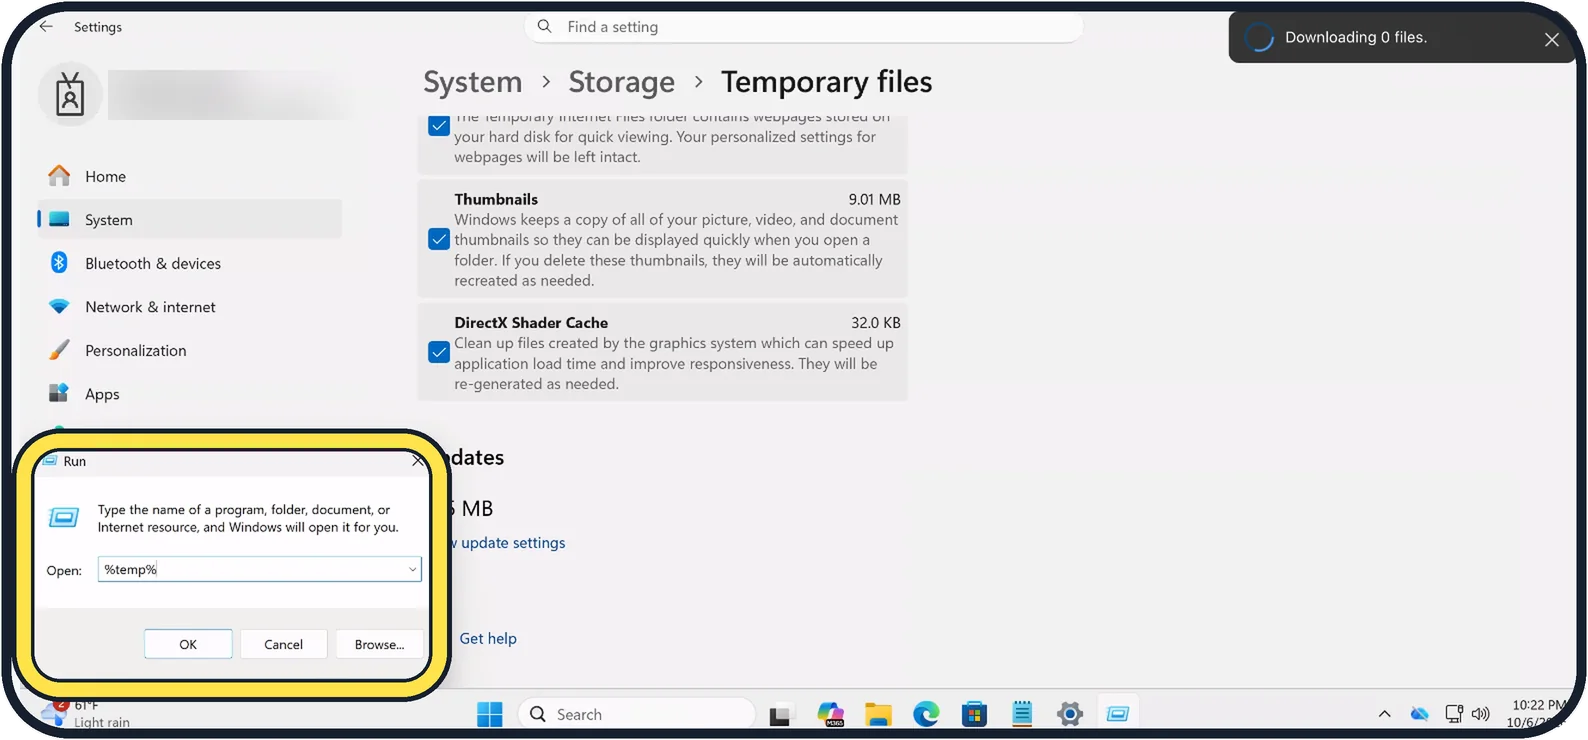
Right-click the Start button, choose Run, type %temp% and click OK.
Tap the picture to see it full size Delete what is inside
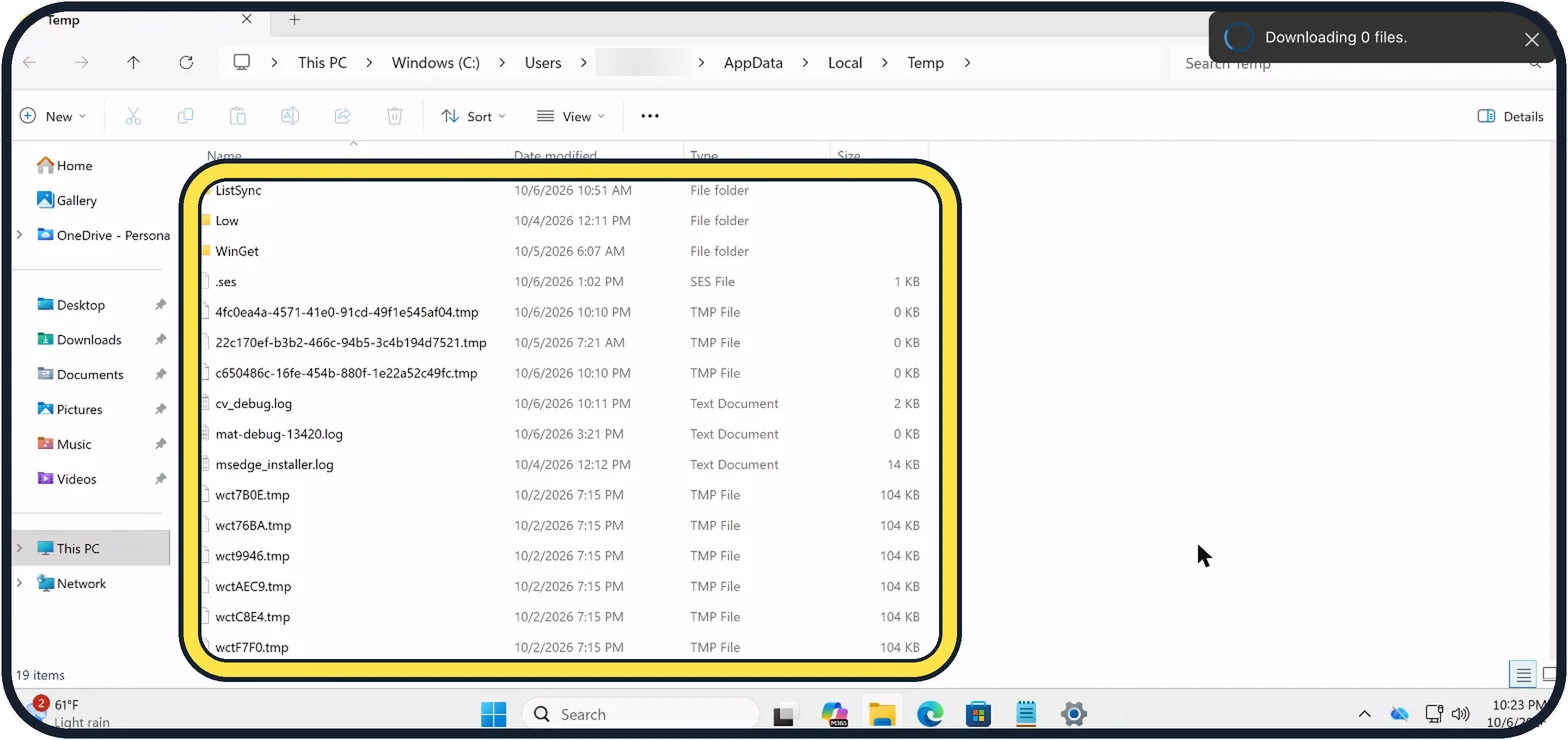
File Explorer opens your user's Temp folder in AppData, Local. Press Ctrl + A and Delete. Close your apps first: Windows skips files that are still in use, and you can click Skip for those. Ours held 19 items; we deleted nothing.
About this guide
Windows and apps leave temporary files behind: update downloads, thumbnails, caches and the contents of the Temp folder. Removing them frees space and does no harm, because Windows makes new ones when it needs them.
The screenshots are our own, taken on Windows 11 Enterprise 25H2 (build 26200.9457) running as a Microsoft Cloud PC, a Windows PC that runs in the cloud. The Settings app is the same on Home and Pro PCs; where the Cloud PC shows something different, the step says so.
Good to know
Downloads is not in the Temporary files list on our PC. Check your Downloads folder yourself before removing anything there.
To let Windows do this by itself, switch on Storage Sense: how to free up disk space on Windows 11.
In short: Settings, System, Storage, Temporary files, Remove files. Then Run, %temp%, select all, Delete, skip files in use.
Links checked in October 2026. Rules and prices change. Check the official source before you act.
Did this guide work for you?
Sorry about that. What happened?