
howtosimply.com/guides/how-to-show-hidden-files-and-file-extensions-on-windows-11/ · Checked October 2026 · Windows 11 Enterprise 25H2 (build 26200.9457), Microsoft Cloud PC
In this guide
Open File Explorer with Windows + E, click View in the top bar, point to Show and click Hidden items. For the endings of file names such as .jpg or .docx, click File name extensions in the same menu if it has no tick.
5 of 5 steps with real screenshots · 1 official source below
- Device
- Windows
- Shown on
- Windows 11 Enterprise 25H2 (build 26200.9457), Microsoft Cloud PC
- App
- Preview
- Real screenshots
- 5 of 5 steps
- Checked
- October 2026
- Sources
- 1 official, linked below
Step by step
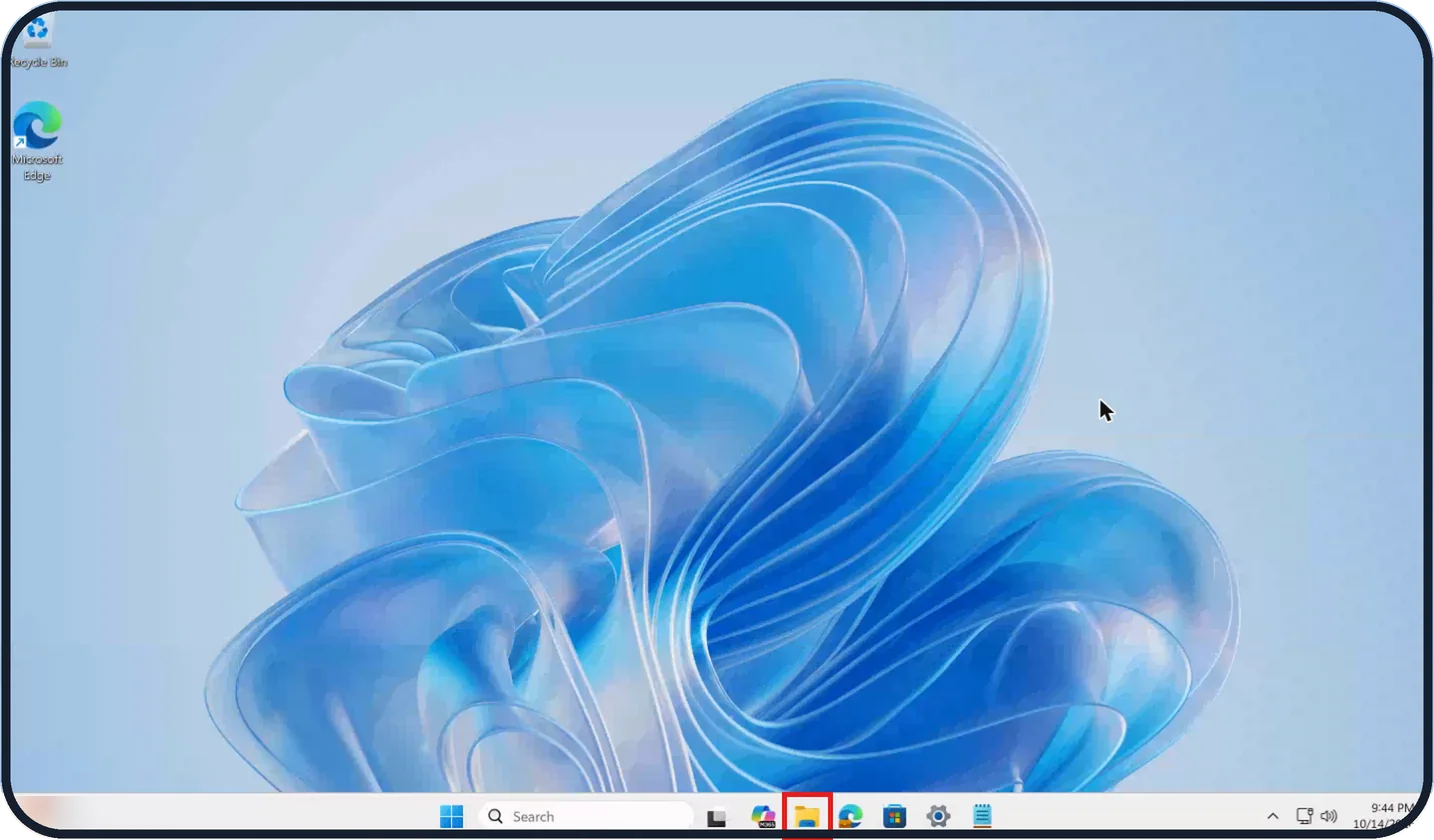
Tap the picture to see it full size Open File Explorer
Click the folder icon on the taskbar, or press Windows + E.
Watch these steps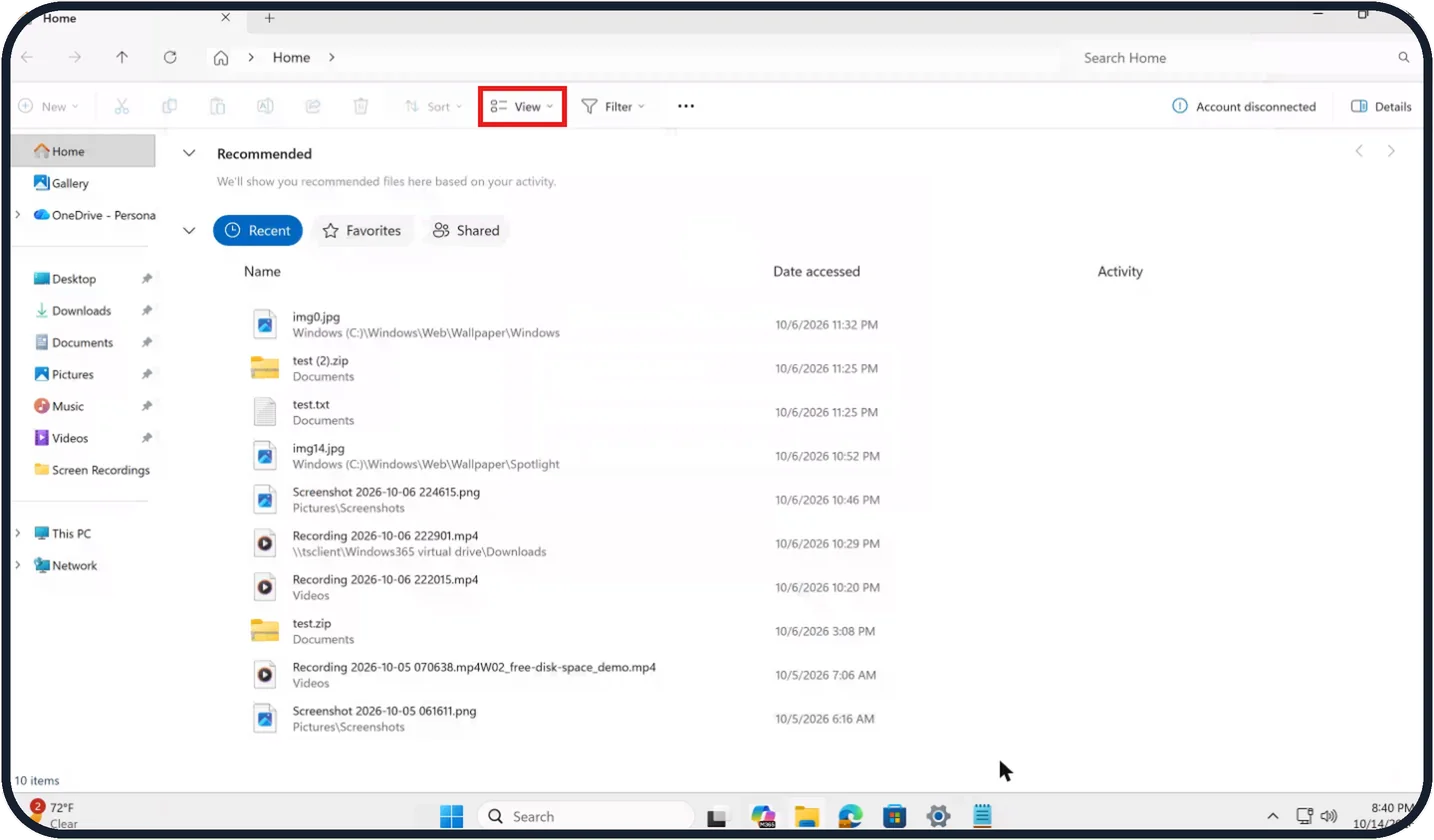
Tap the picture to see it full size Click View
It is in the bar at the top of the window, next to Sort.
On our Cloud PC, File Explorer opened at Home, where View sits between Sort and Filter.
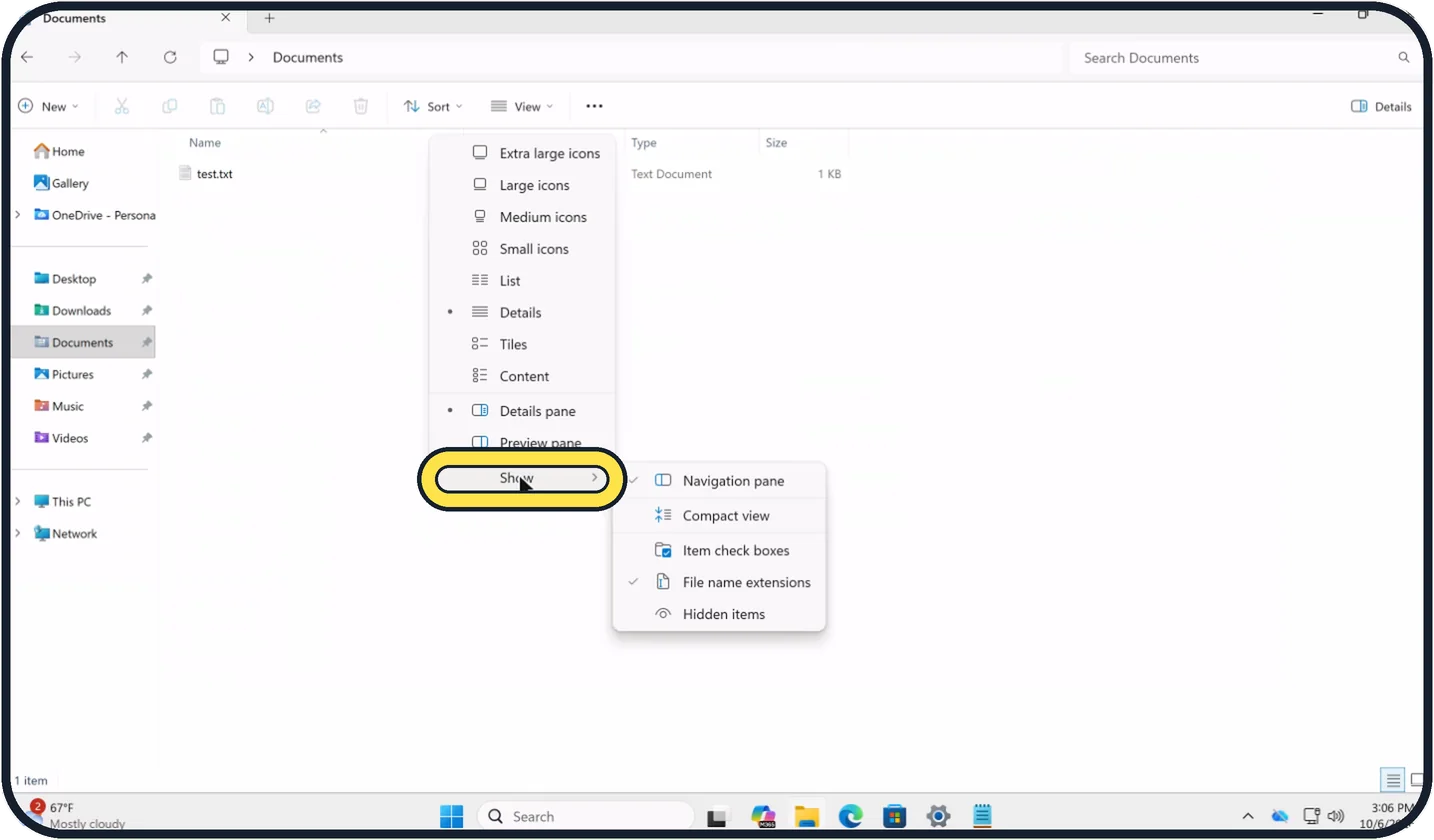
Zoomed in on the setting. Tap to see the whole screenTap the picture to see it full size Point to Show
It is the last entry in the View menu, below Preview pane. A second menu opens beside it.
On our Cloud PC, that menu listed Navigation pane, Compact view, Item check boxes, File name extensions and Hidden items.
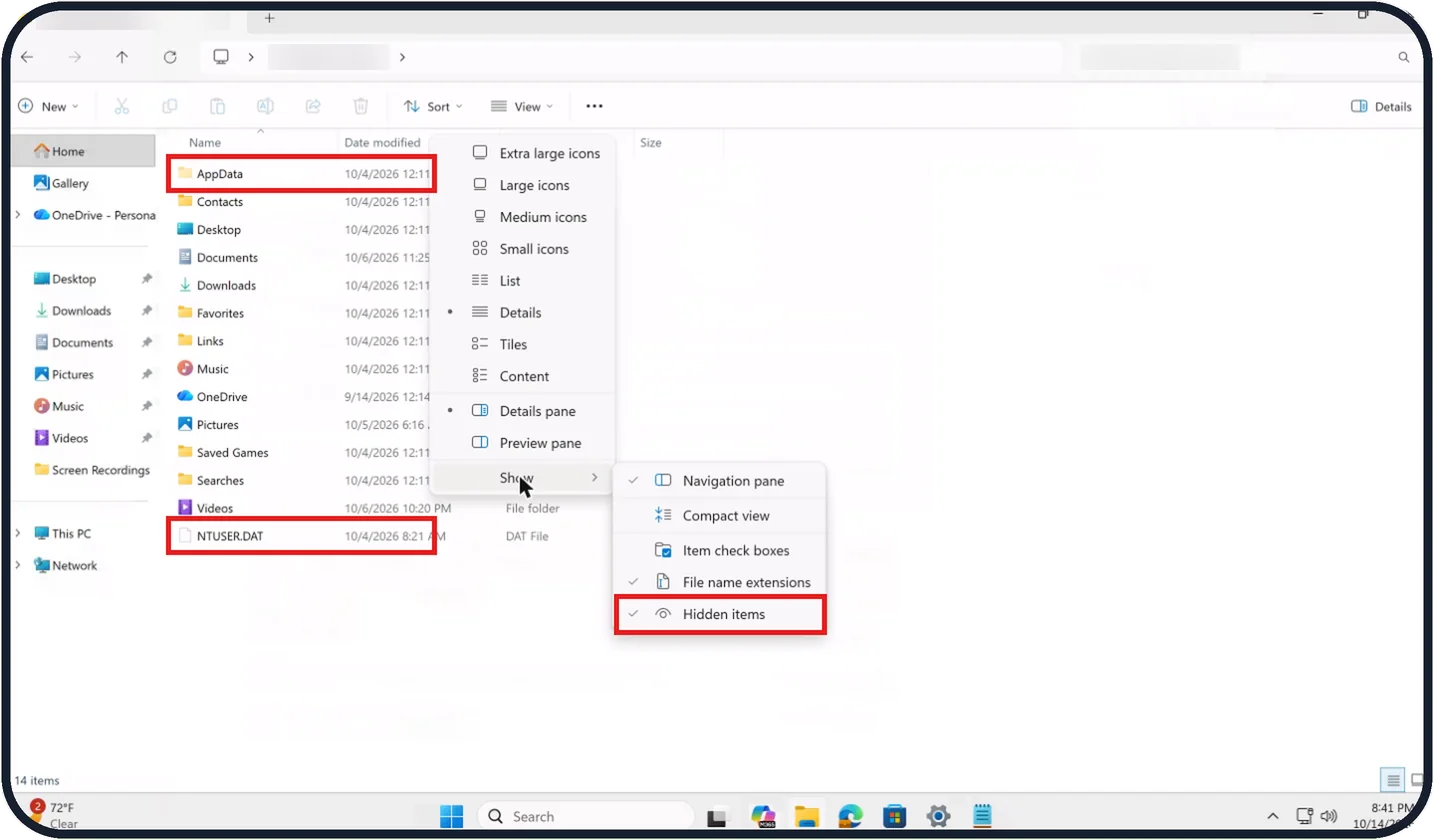
Tap the picture to see it full size Click Hidden items
Hidden files and folders now appear, shown faded.
On our Cloud PC, the user folder then showed AppData and NTUSER.DAT faded, with 14 items in total.
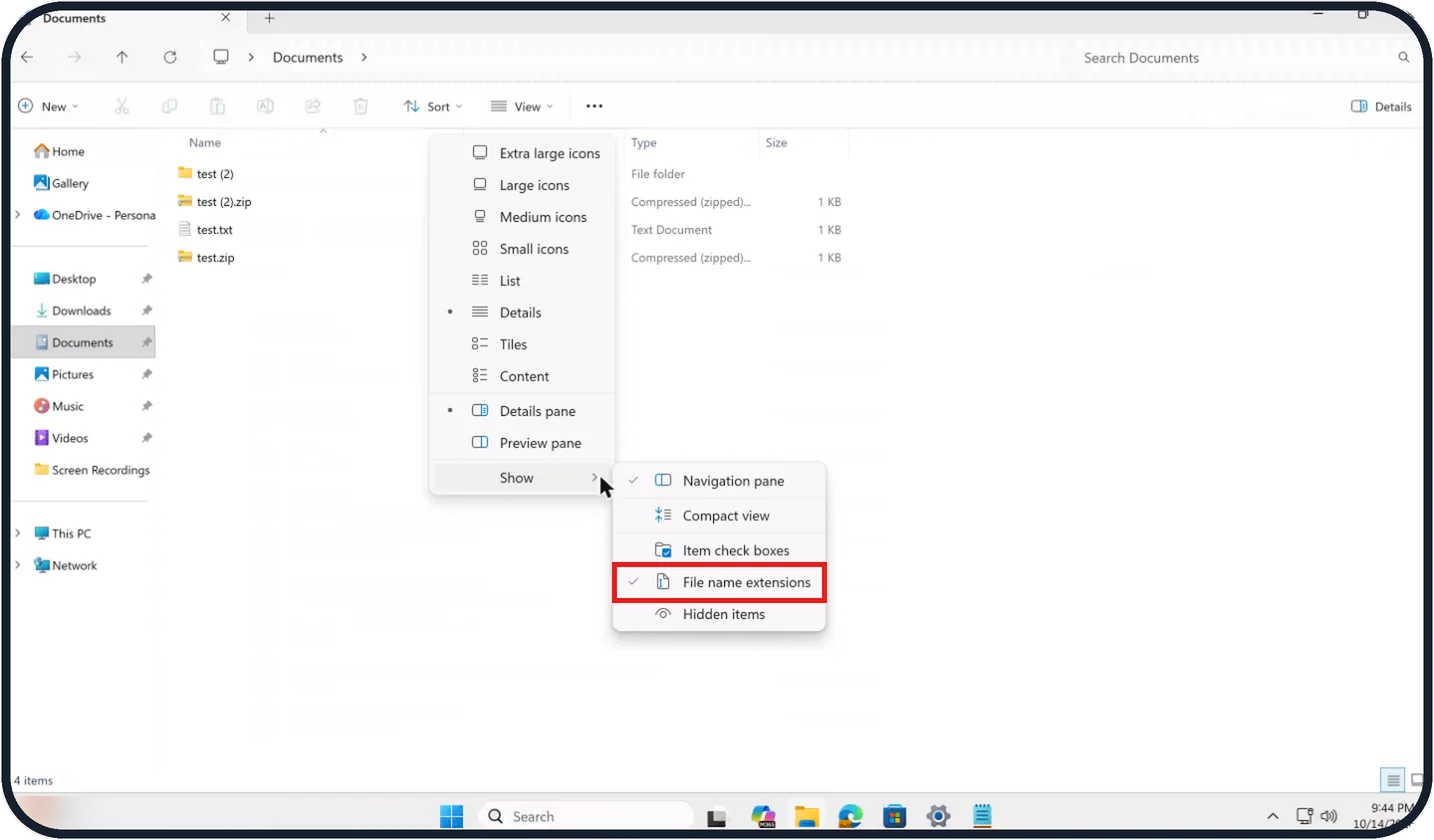
Tap the picture to see it full size Click File name extensions
Open View, Show again. If File name extensions has no tick, click it, and every file shows its ending, for example report.docx or photo.jpg.
On our Cloud PC it was already ticked, so the Documents folder showed endings such as test.txt and test.zip. Clicking it there would remove the tick and hide the endings.
Watch these steps
If you do not see this option
- Sort is greyed out On our Cloud PC, Sort was greyed out on the Home page, but View still worked and opened its menu.
- Show is not in the menu Show is the last entry in the View menu, below Details pane and Preview pane. Point to it rather than looking for the options in the main list.
- Hidden items already has a tick Hidden items are already being shown. Clicking it again removes the tick and hides them.
If this does not work
- No hidden files appear The Home page lists recent files only. Open a folder that holds hidden items, such as your user folder; on our Cloud PC that showed AppData and NTUSER.DAT.
- Some files look pale Faded icons and names are how File Explorer marks hidden items once Hidden items is ticked. They work like any other file.
- File endings disappeared File name extensions was probably ticked already and the click turned it off. Open View, Show and click File name extensions again so it has a tick.
About this guide
Windows hides two things by default: system folders such as AppData, and the ending of each file name that says what kind of file it is. Both can be shown with a few clicks in the View menu of File Explorer, and hidden again the same way.
The screenshots are our own, taken on Windows 11 Enterprise 25H2 running as a Microsoft Cloud PC, a Windows PC that runs in the cloud. File Explorer is the same on Home and Pro PCs; where the Cloud PC shows something different, the step says so.
Good to know
Files are hidden for a reason. Do not delete or move things in folders such as AppData or ProgramData unless a trustworthy guide tells you exactly what to do.
Showing extensions is a safety habit. A file called invoice.pdf.exe is a program, not a PDF, and with extensions shown you can see that before you open it.
With extensions shown, be careful when renaming: change only the part before the dot, or the file may no longer open.
To clear space instead of hunting through hidden folders, see how to free up disk space on Windows 11.
In short: Windows + E, View, Show, Hidden items. File name extensions is in the same menu.
Links checked in October 2026. Menus and features can change after software updates. These steps match the version named at the top.
Did this guide work for you?
Sorry about that. What happened?