In this guide
Go to Settings, More connectivity options, Private DNS and pick Off, Automatic or Private DNS provider hostname. For a hostname, tap the Custom name row that appears, type it (such as dns.google) and tap Save. Ours was set to Automatic, and we set it back afterwards.
- Device
- Android
- Shown on
- Xiaomi Redmi Note 15 Pro 5G (25080RABDG), HyperOS 3.0.308.0, Android 16
- App
- Settings
- Path
- Settings › More connectivity options › Private DNS
- Real screenshots
- 8 of 8 steps
- Checked
- October 2026
- Sources
- 6 official, linked below
Step by step
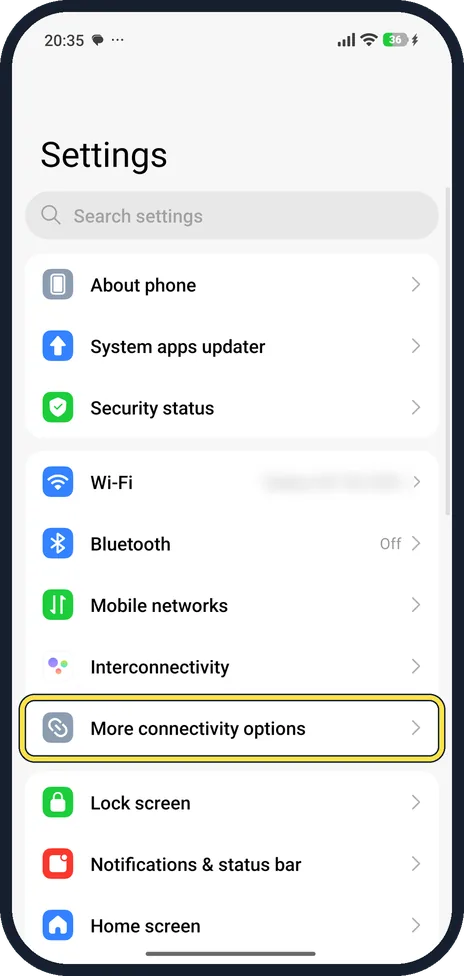
Open More connectivity options
Open Settings and tap More connectivity options, below Interconnectivity.
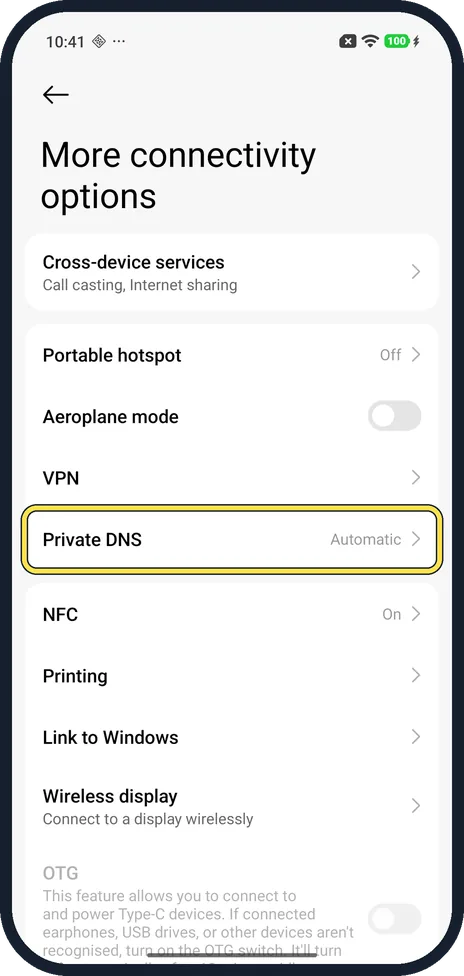
Tap Private DNS
Private DNS is the last row of the second group, below VPN. Ours said Automatic. Tap it.
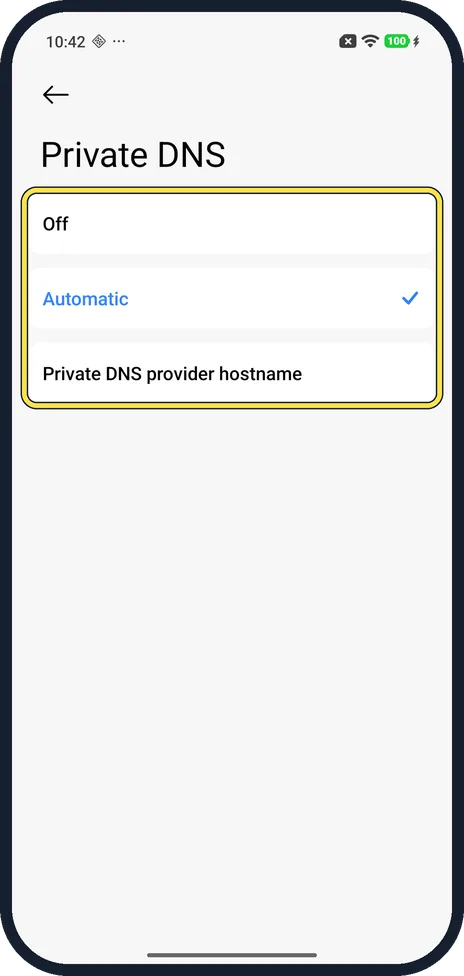
Pick a mode
The Private DNS page has three choices: Off, Automatic and Private DNS provider hostname. Automatic was ticked, in blue, on ours. Tap the one you want. The page has no Save button: when we tapped Automatic to undo our change, the row said Automatic at once.
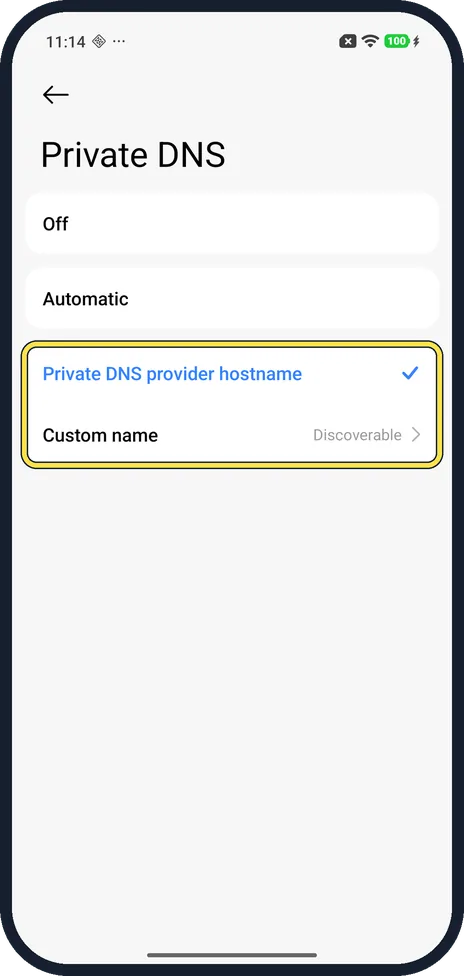
Tap Private DNS provider hostname
Tap Private DNS provider hostname. On ours a new row appeared below it, Custom name, which said Discoverable before we set a name. Tap Custom name.
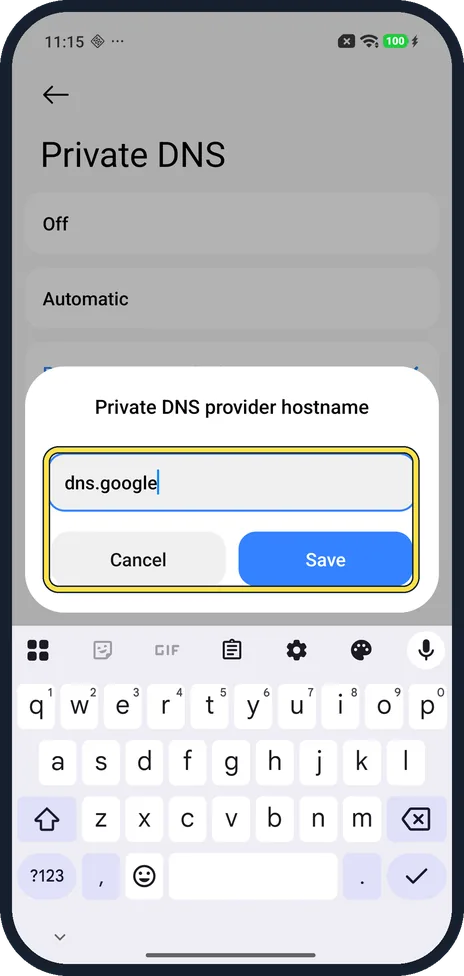
Type the hostname and tap Save
A box opens, Private DNS provider hostname, with Cancel and Save. Type the provider's hostname: Google's Public DNS page gives dns.google for Google's own service. Tap Save.
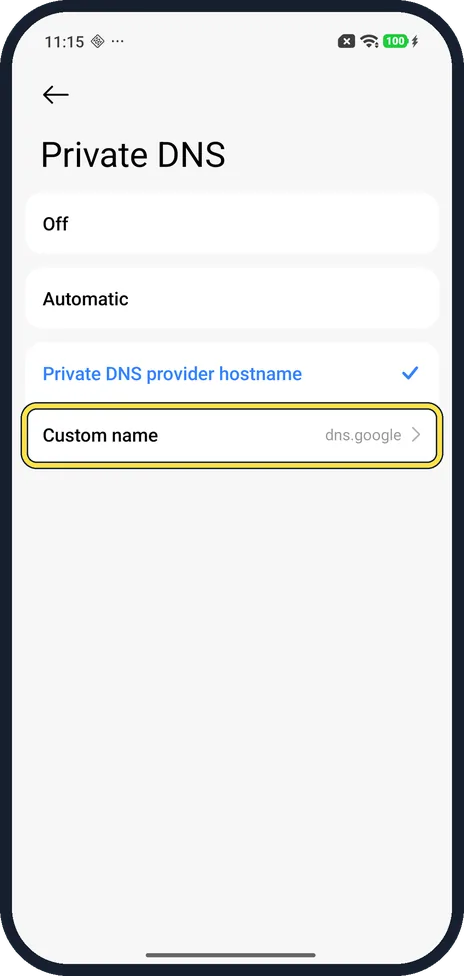
Check Custom name
The Custom name row now shows the hostname, dns.google on ours, with Private DNS provider hostname ticked above it.
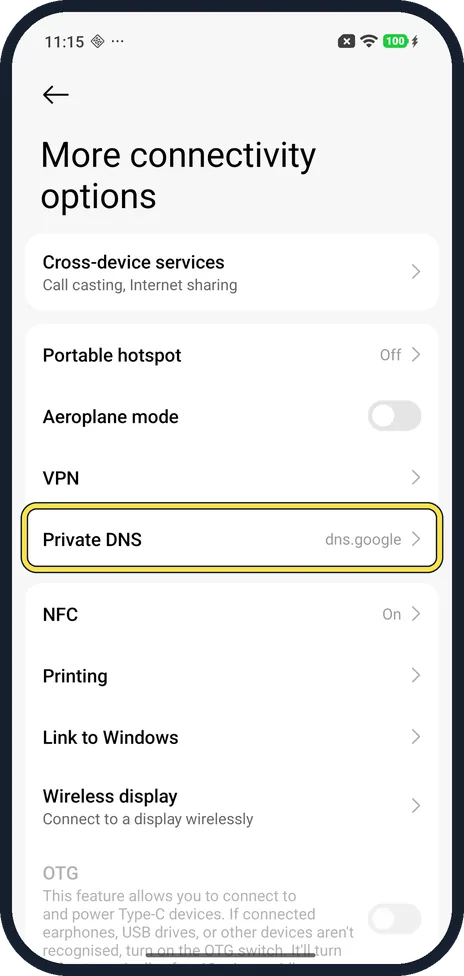
Check More connectivity options
Go back. The Private DNS row says dns.google instead of Automatic. With it set, our phone still resolved websites.
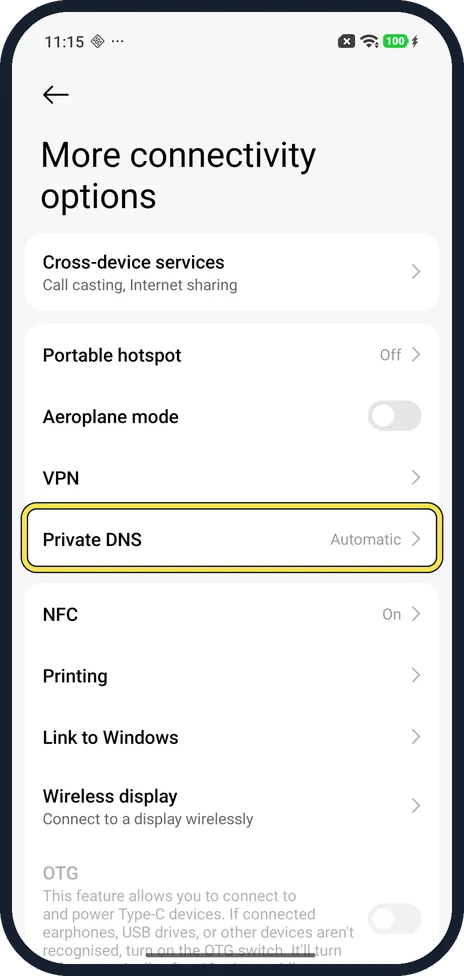
Go back to Automatic
To undo it, tap Private DNS and tap Automatic. The row said Automatic again on ours.
If you do not see this option
- What does each choice do? Google's Android Developers blog (2018) says Automatic upgrades to encrypted DNS over TLS when the network's DNS server supports it, a hostname sends all DNS queries over a secure channel to that server, and users who don't want it can turn it off. Source: DNS over TLS support in Android P Developer Preview
- Looking for Connection and sharing? Xiaomi's HyperOS 3 guide has a chapter called Connection and sharing, but its steps there go through Settings, More connectivity options. Xiaomi's Private DNS steps for the Xiaomi 14T and the REDMI 13C 5G use More connectivity options too, as on our Redmi Note 15 Pro 5G. Source: Generic User Guide for HyperOS 3.0 · Source: How to set Private DNS on the Xiaomi 14T? · Source: How to set Private DNS on the REDMI 13C 5G?
- No box for the hostname? Xiaomi's steps say only that you need to enter the hostname. On ours the box didn't open by itself: it opens from the Custom name row under Private DNS provider hostname. Source: How to set Private DNS on the Xiaomi 14T?
If this does not work
- No internet after typing a hostname? Google's Android Developers blog says that with a hostname set, Android marks the network as No internet access if it can't reach that server. Check the spelling in Custom name, or tap Automatic. Source: DNS over TLS support in Android P Developer Preview
- Not sure which to pick? Google recommends keeping Private DNS on. Automatic was already ticked on ours. Source: Manage advanced network settings on your Android phone
- Still can't connect? See Xiaomi Wi-Fi keeps disconnecting or Xiaomi mobile data not working. As a last step, reset network settings.
About this guide
Xiaomi says Private DNS lets you use a custom DNS provider for your internet connection instead of the default one, which can stop your internet provider tracking your browsing.
The screenshots are from our Redmi Note 15 Pro 5G with Xiaomi HyperOS 3.0.308.0 and Android 16, in Light mode. Private DNS was on Automatic. We set it to dns.google, checked that the phone still resolved websites, and set it back to Automatic.
Good to know
Google says Private DNS helps secure only DNS questions and answers and can't protect anything else.
Portable hotspot, Aeroplane mode and VPN are on the same page: how to set up a hotspot.
In short: Settings, More connectivity options, Private DNS. Pick Off, Automatic or Private DNS provider hostname (Custom name, type it, Save).
- Xiaomi Support: How to set Private DNS on the Xiaomi 14T?
- Xiaomi Support: How to set Private DNS on the REDMI 13C 5G?
- Xiaomi: Generic User Guide for HyperOS 3.0
- Android Developers Blog: DNS over TLS support in Android P Developer Preview
- Google Android Help: Manage advanced network settings on your Android phone
- Google Public DNS: Get started (Android)
Links checked in October 2026. Menus and features can change after software updates. These steps match the version named at the top.
Did this guide work for you?
Sorry about that. What happened?