In this guide
Open Settings, Network and Internet, Private DNS. Pick Off, Automatic or Private DNS provider hostname, type the hostname (such as dns.google) and tap Save. The Private DNS row then shows the hostname. Ours was set to Automatic, and we set it back afterwards.
- Device
- Android
- Shown on
- Google Pixel 10a, Android 17 (build CP3A.261005.005)
- App
- Settings
- Path
- Settings › Network and Internet › Private DNS
- Real screenshots
- 6 of 6 steps
- Checked
- October 2026
- Sources
- 4 official, linked below
Step by step
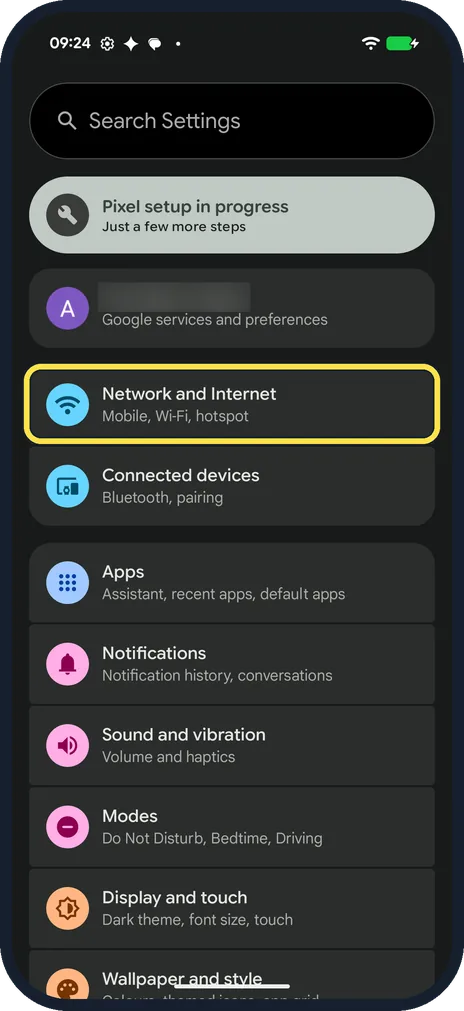
Open Network and Internet
Open Settings and tap Network and Internet: Mobile, Wi-Fi, hotspot.
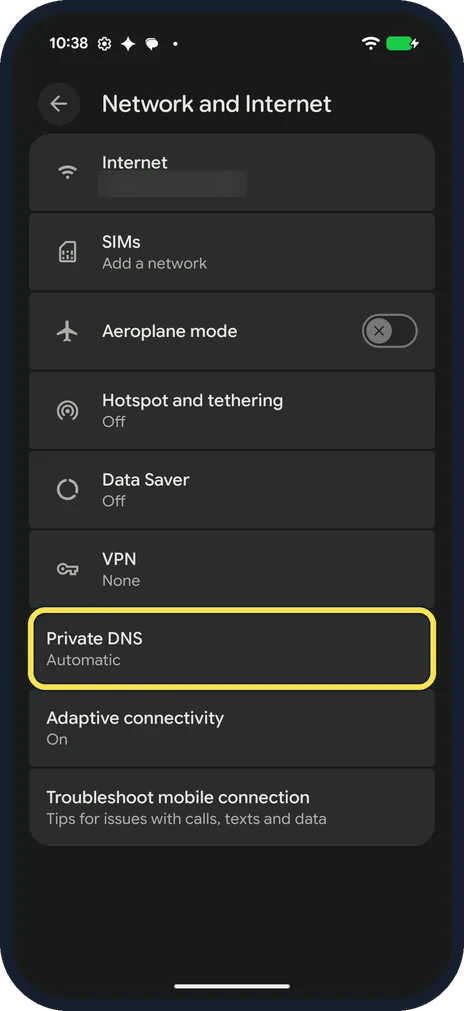
Tap Private DNS
Private DNS is below VPN, above Adaptive connectivity. Ours said Automatic under it. Tap it.
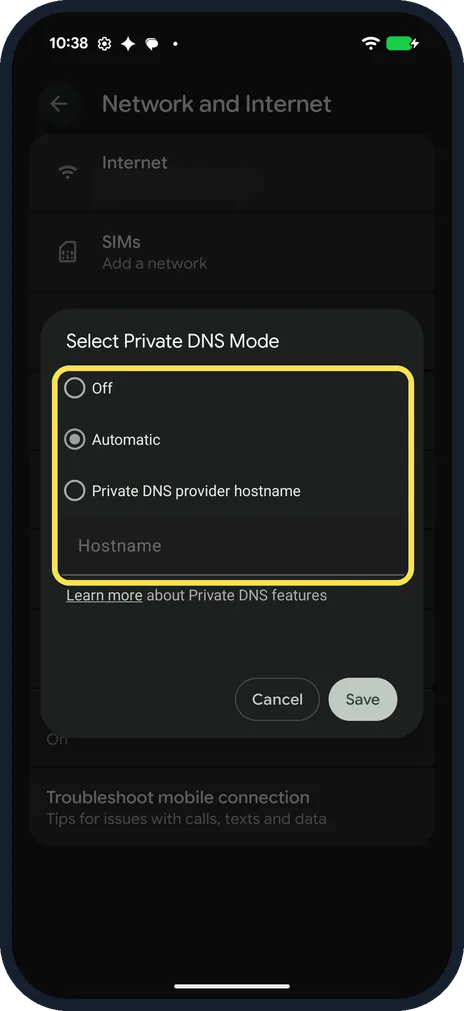
Pick a mode
A box opens, Select Private DNS Mode, with three choices: Off, Automatic and Private DNS provider hostname. Automatic was selected on ours, and the Hostname field below was greyed out. To stay on Off or Automatic, pick it and tap Save; Cancel keeps the old setting.
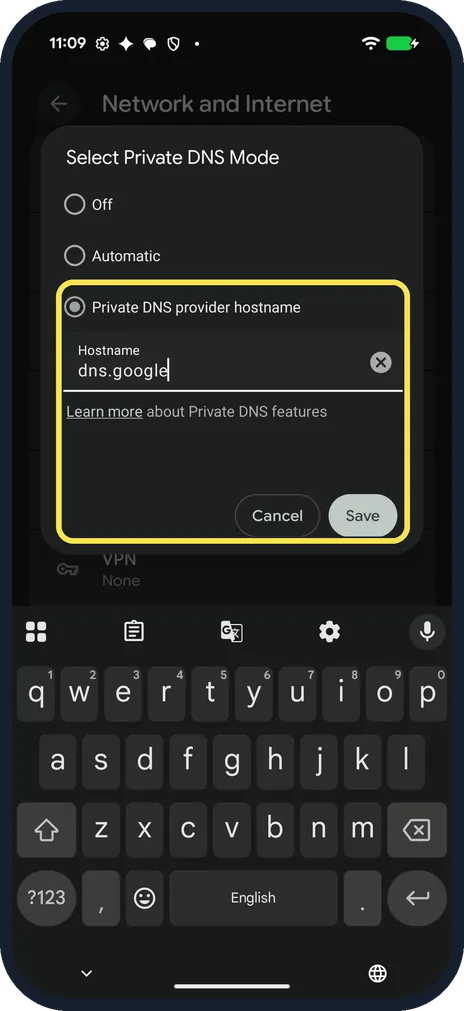
Type a hostname and tap Save
Pick Private DNS provider hostname. The Hostname field becomes usable: type the provider's hostname, here dns.google, which Google's Public DNS page gives for Google's own service. It must be a hostname, not an address. Tap Save.
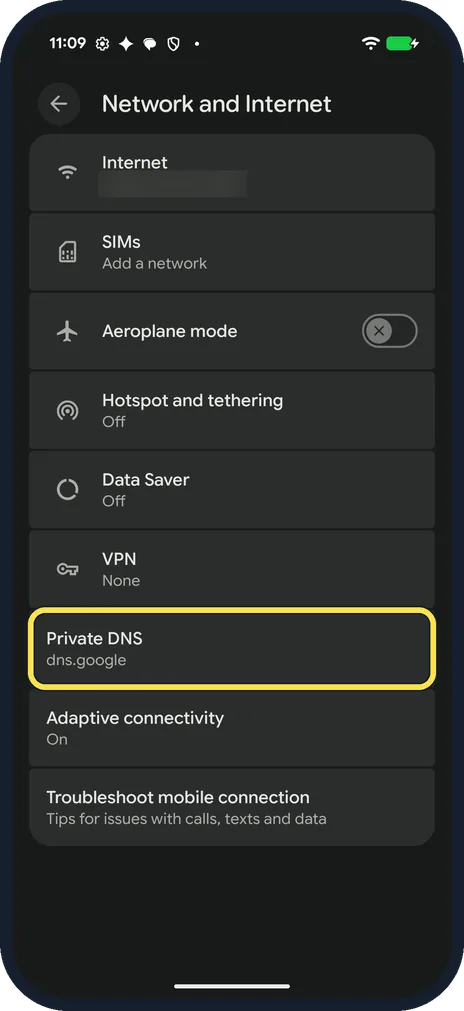
Check the Private DNS row
Back on Network and Internet, the Private DNS row now shows the hostname: dns.google on ours. With it set, our phone stayed on Wi-Fi and still resolved websites.
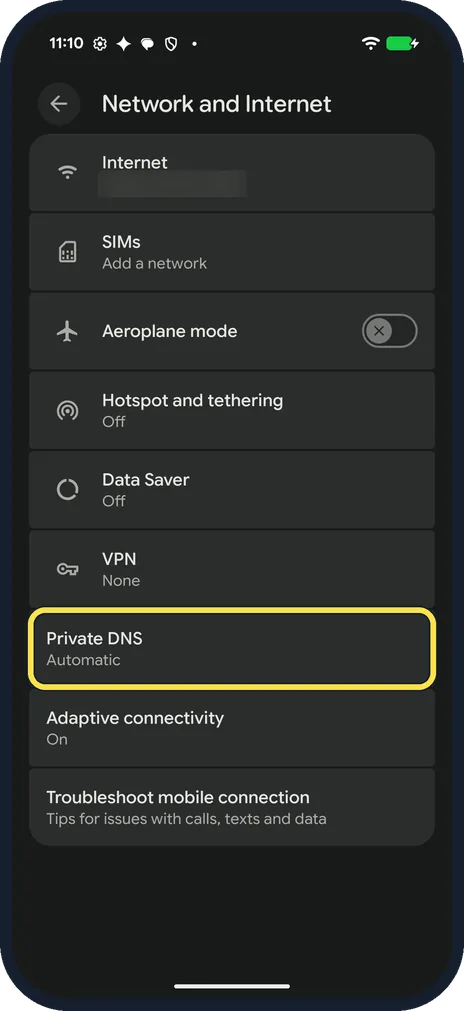
Go back to Automatic
To undo it, tap Private DNS again, pick Automatic and tap Save. The row said Automatic again on ours.
If you do not see this option
- What does each choice do? Google's Android Developers blog (2018) says Automatic upgrades to encrypted DNS over TLS when the network's DNS server supports it, a hostname sends all DNS queries over a secure channel to that server, and users who don't want it can turn it off. Source: DNS over TLS support in Android P Developer Preview
- Called Network & internet? Google's help writes Network & internet. On our Pixel 10a with Android 17 the page was titled Network and Internet. Source: Control aeroplane mode, private DNS and other network settings
- Can't find Private DNS? Google says to search Settings for Private DNS, and if you still can't find it, to ask your device manufacturer for help. Source: Manage advanced network settings on your Android phone
- Older Android? Google's Public DNS page says Private DNS needs Android 9 or higher; older versions can't set it for all networks. Source: Get started (Android)
If this does not work
- No internet after typing a hostname? Google's Android Developers blog says that with a hostname set, the phone marks the network as No internet access if it can't reach that server. Check the spelling, or go back to Automatic. Source: DNS over TLS support in Android P Developer Preview
- Not sure which to pick? Google says your phone uses Private DNS by default on every network that can use it, and recommends keeping it on. Automatic was already selected on ours. Source: Control aeroplane mode, private DNS and other network settings · Source: Manage advanced network settings on your Android phone
- Still can't connect? See Pixel Wi-Fi keeps disconnecting or Pixel mobile data not working. As a last step, reset network settings.
About this guide
Private DNS sends your phone's DNS lookups over a secure channel. Google says it helps secure only DNS questions and answers and can't protect anything else.
The screenshots are from our Google Pixel 10a with Android 17 (build CP3A.261005.005), in Dark mode. Private DNS was on Automatic. We set it to dns.google, checked that the phone still resolved websites, and set it back to Automatic.
Good to know
Under the Hostname field on ours is a Learn more link about Private DNS features. The cross at the end of the field clears what you typed.
Data Saver is on the same page and said Off on ours: how to use Data Saver.
In short: Settings, Network and Internet, Private DNS. Pick Off, Automatic or Private DNS provider hostname (type the hostname), then Save.
- Pixel Phone Help: Control aeroplane mode, private DNS and other network settings
- Google Android Help: Manage advanced network settings on your Android phone
- Android Developers Blog: DNS over TLS support in Android P Developer Preview
- Google Public DNS: Get started (Android)
Links checked in October 2026. Menus and features can change after software updates. These steps match the version named at the top.
Did this guide work for you?
Sorry about that. What happened?