
howtosimply.com/guides/how-to-use-multiple-desktops-on-windows-11/ · Checked October 2026 · Windows 11 Enterprise 25H2 (build 26200.9457), Microsoft Cloud PC
In this guide
Open Task view with the button on the taskbar or Windows + Tab, and click New desktop at the bottom. Windows + Ctrl + D also creates one. Switch between desktops with Windows + Ctrl + Left Arrow or Right Arrow, or click one in Task view.
3 of 6 steps with real screenshots · 1 official source below
- Device
- Windows
- Shown on
- Windows 11 Enterprise 25H2 (build 26200.9457), Microsoft Cloud PC
- Real screenshots
- 3 of 6 steps
- Checked
- October 2026
- Sources
- 1 official, linked below
Step by step
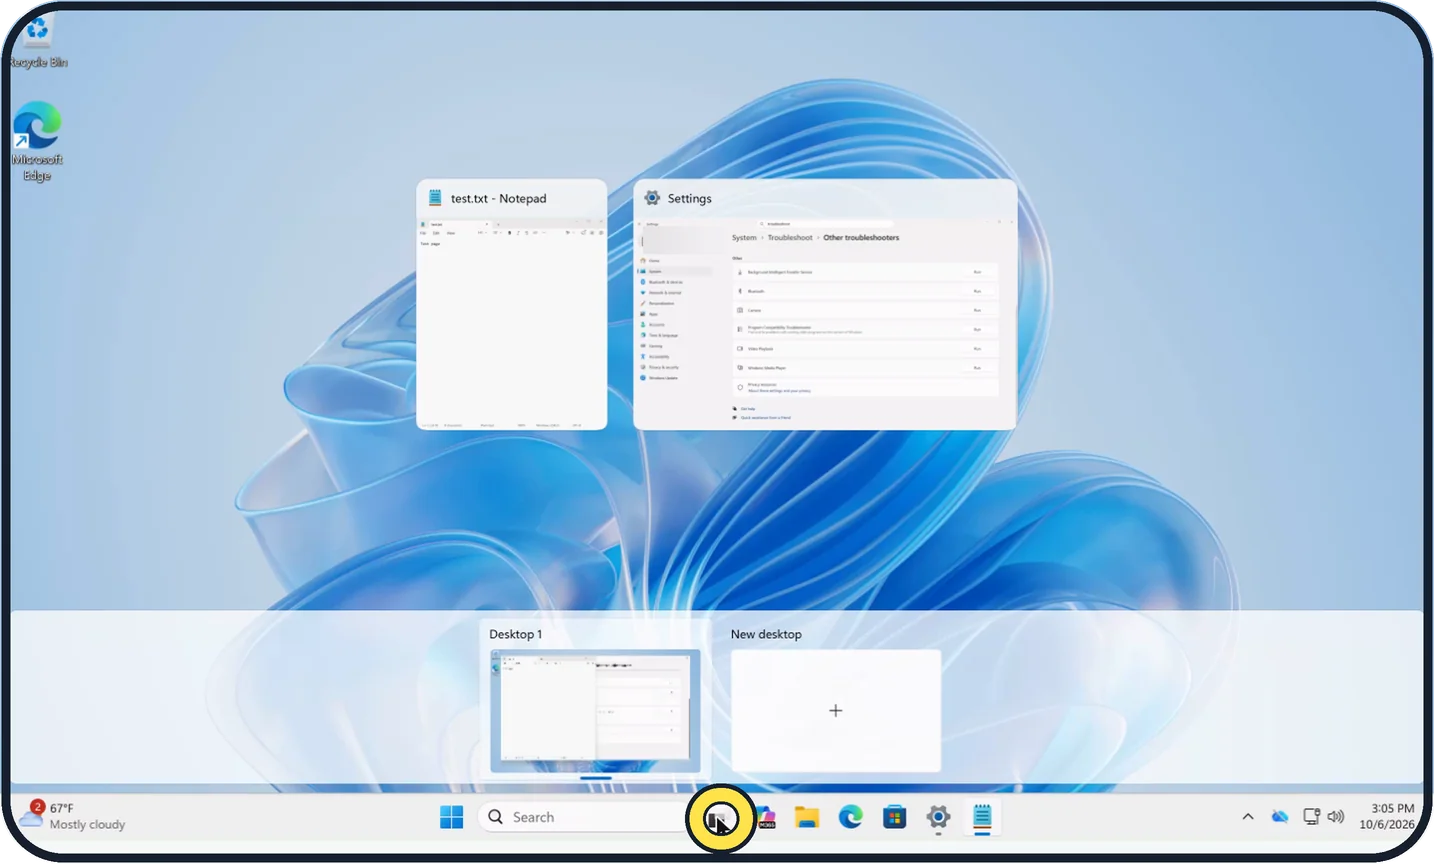
Zoomed in on the setting. Tap to see the whole screenTap the picture to see it full size Open Task view
Click the Task view button on the taskbar, next to the search box, or press Windows + Tab. Your open windows appear above, and your desktops in a bar at the bottom.
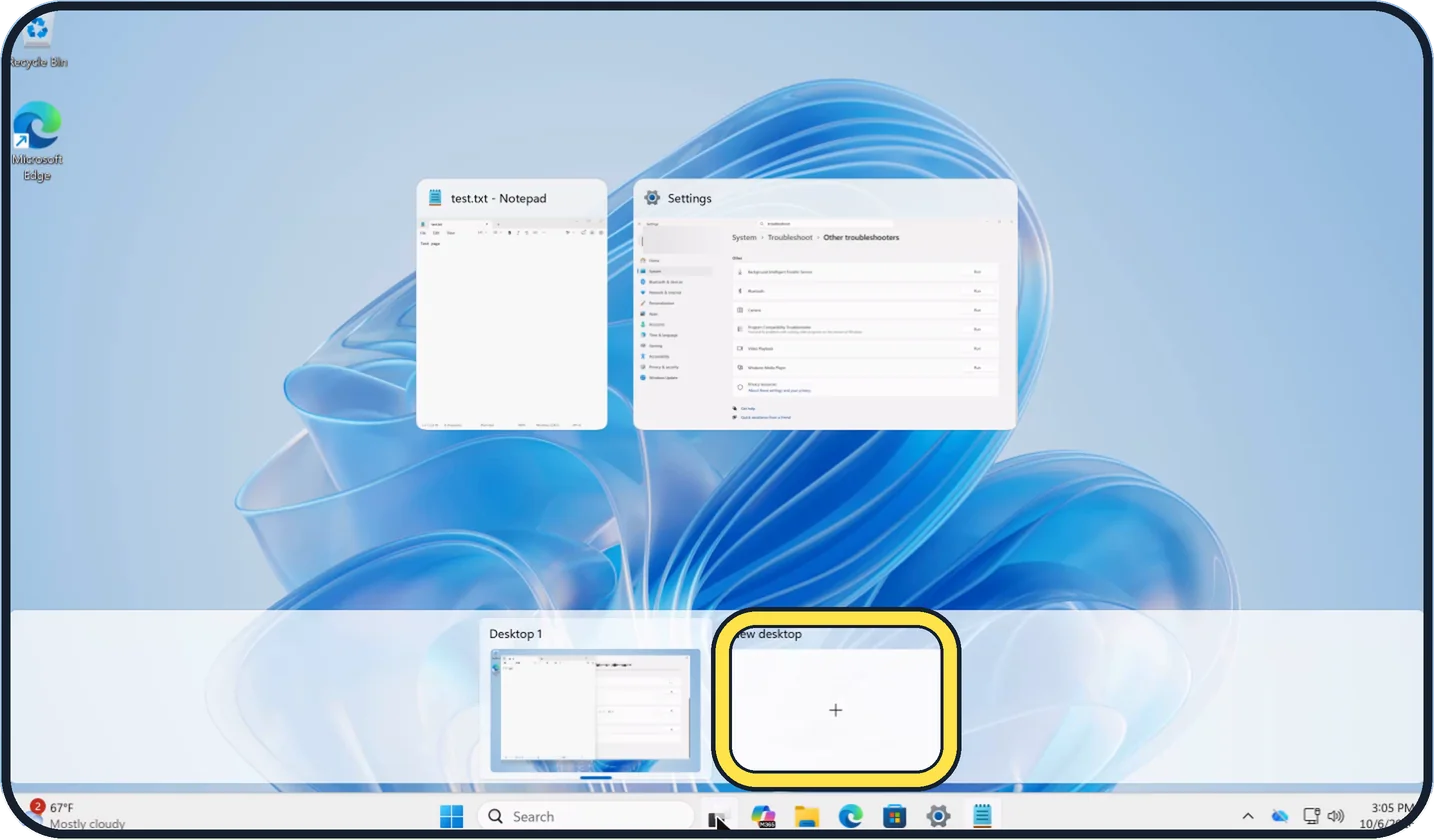
Zoomed in on the setting. Tap to see the whole screenTap the picture to see it full size Create a new desktop
Click New desktop, the empty tile with a plus, in the bar at the bottom. Or press Windows + Ctrl + D at any time. You land on an empty desktop.
Switch between desktops
Press Windows + Ctrl + Right Arrow or Left Arrow, or click the desktop you want in Task view.
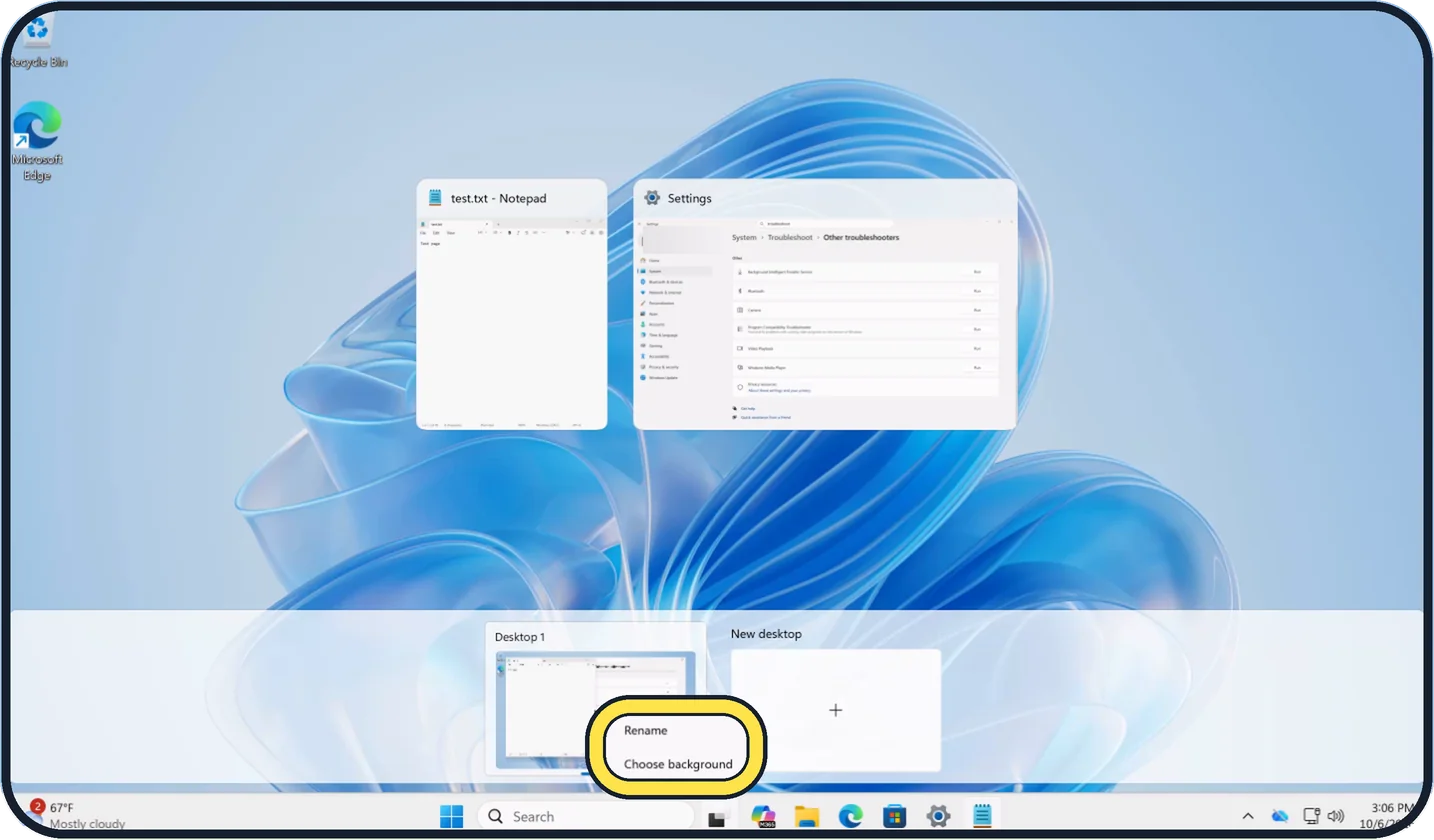
Zoomed in on the setting. Tap to see the whole screenTap the picture to see it full size Name a desktop and give it its own background
In Task view, right-click a desktop and choose Rename or Choose background.
Move a window to another desktop
In Task view, drag the window onto the desktop you want.
Close a desktop
In Task view, point at the desktop and click the x. Its windows move to the neighbouring desktop. Nothing is closed.
About this guide
Multiple desktops let you keep separate sets of windows, for example one for work and one for private things. All your programs keep running. Only what you see changes.
The key pictures are diagrams; the other pictures are screenshots.
Good to know
The desktops stay after a restart, but the programs have to be opened again.
On one desktop, Snap layouts arrange windows side by side: how to split the screen on Windows 11.
In short: Windows + Ctrl + D for a new desktop, Windows + Ctrl + arrows to switch, Windows + Tab to manage.
Links checked in October 2026. Menus and features can change after software updates. These steps match the version named at the top.
Did this guide work for you?
Sorry about that. What happened?