How to resize a photo on a Samsung Galaxy
By Saadat Rafiq · 2 min read · 3 steps · Published 6 October 2026
Open the photo in Gallery, tap the pencil (Edit), then the three dots at the top right and Resize. Pick 20, 40, 60 or 80 percent, tap Done, then save it. Samsung warns that Save overwrites the original, so use Save copy in the same menu to keep both.
- Device
- Android
- Shown on
- Samsung Galaxy A57 5G (SM-A576B), One UI 8.5, Android 16
- Real screenshots
- 3 of 3 steps
- Checked
- October 2026
- Sources
- 1 official, linked below
Step by step
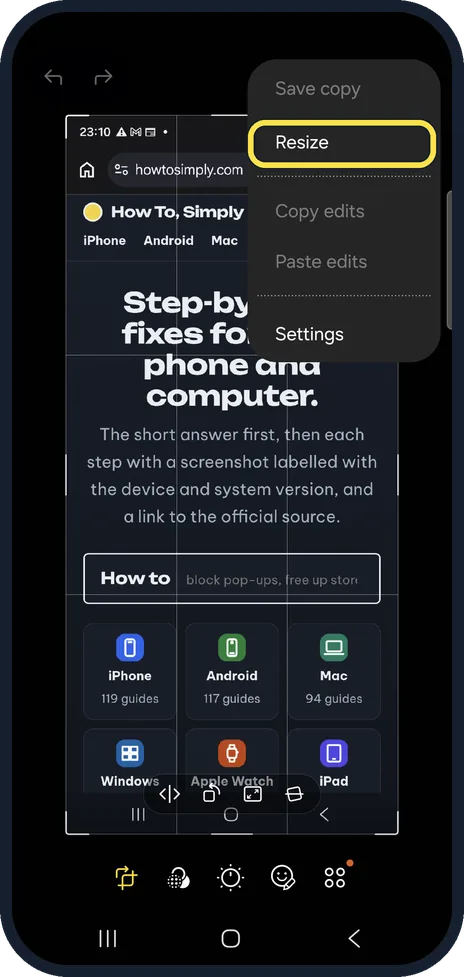
Open the editor menu
Open the photo in Gallery and tap the pencil. In the editor, tap the three dots at the top right. On One UI 8.5 Resize is in this editor menu, not the viewer's.
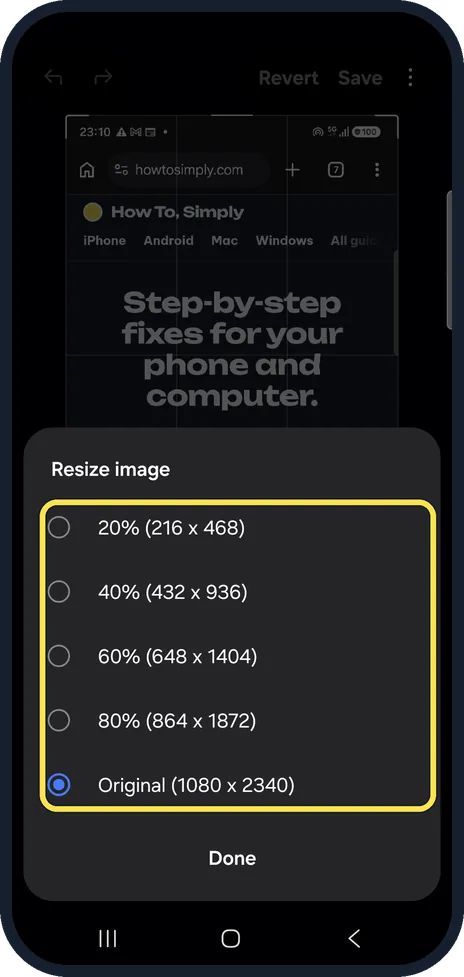
Pick a size
Choose a percentage. Each one shows the new size in pixels; for our 1080x2340 picture, 20% is 216x468. A photo can only be made smaller, not bigger.
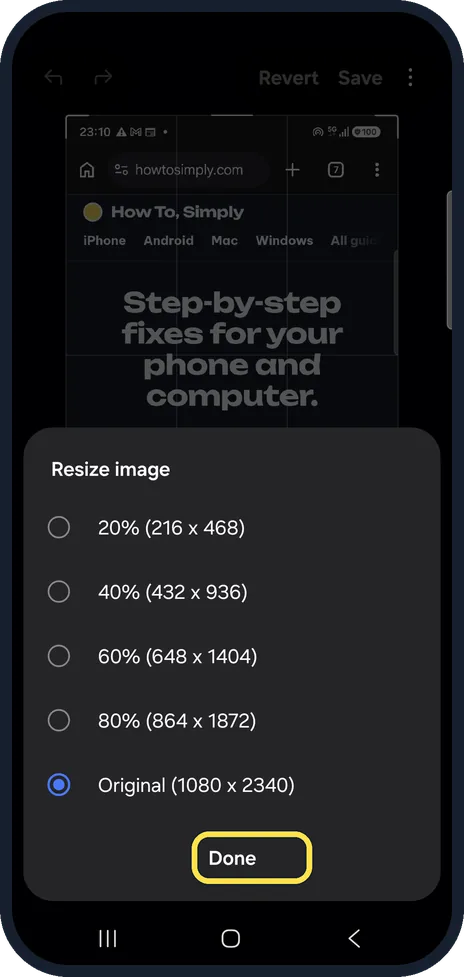
Tap Done and save
Tap Done, then save. To keep the original, tap the three dots and Save copy instead of Save. We tapped Original and left without saving.
About this guide
Resizing makes a photo smaller in pixels and in file size, which helps when a website or email has a size limit. We tried this on our own test files and saved nothing.
The screenshots are from a Samsung Galaxy A57 5G with One UI 8.5 and Android 16, in Dark mode, using test pictures and a test video we made for this guide. Other Galaxy phones on One UI 8 use the same Gallery; on older versions a few names differ.
Good to know
Save copy keeps the original and adds the smaller version as a new picture.
Cropping cuts part of the picture away; resizing keeps all of it but with fewer pixels.
In short: Gallery, the photo, pencil, three dots, Resize, choose a size, Done, Save copy.
Links checked in October 2026. Rules and prices change. Check the official source before you act.
Did this guide work for you?
Sorry about that. What happened?