
howtosimply.com/guides/how-to-record-your-screen-on-windows-11/ · Checked October 2026 · Windows 11 Enterprise 25H2 (build 26200.9457), Microsoft Cloud PC
In this guide
Open Snipping Tool, switch to the video camera button and click New, or press Windows + Shift + R. Drag a box around what you want to record and click Start, then Stop. The recording opens in Snipping Tool and is saved automatically in the Screen Recordings folder.
7 of 7 steps with real screenshots · 1 official source below
- Device
- Windows
- Shown on
- Windows 11 Enterprise 25H2 (build 26200.9457), Microsoft Cloud PC
- Real screenshots
- 7 of 7 steps
- Checked
- October 2026
- Sources
- 1 official, linked below
Step by step
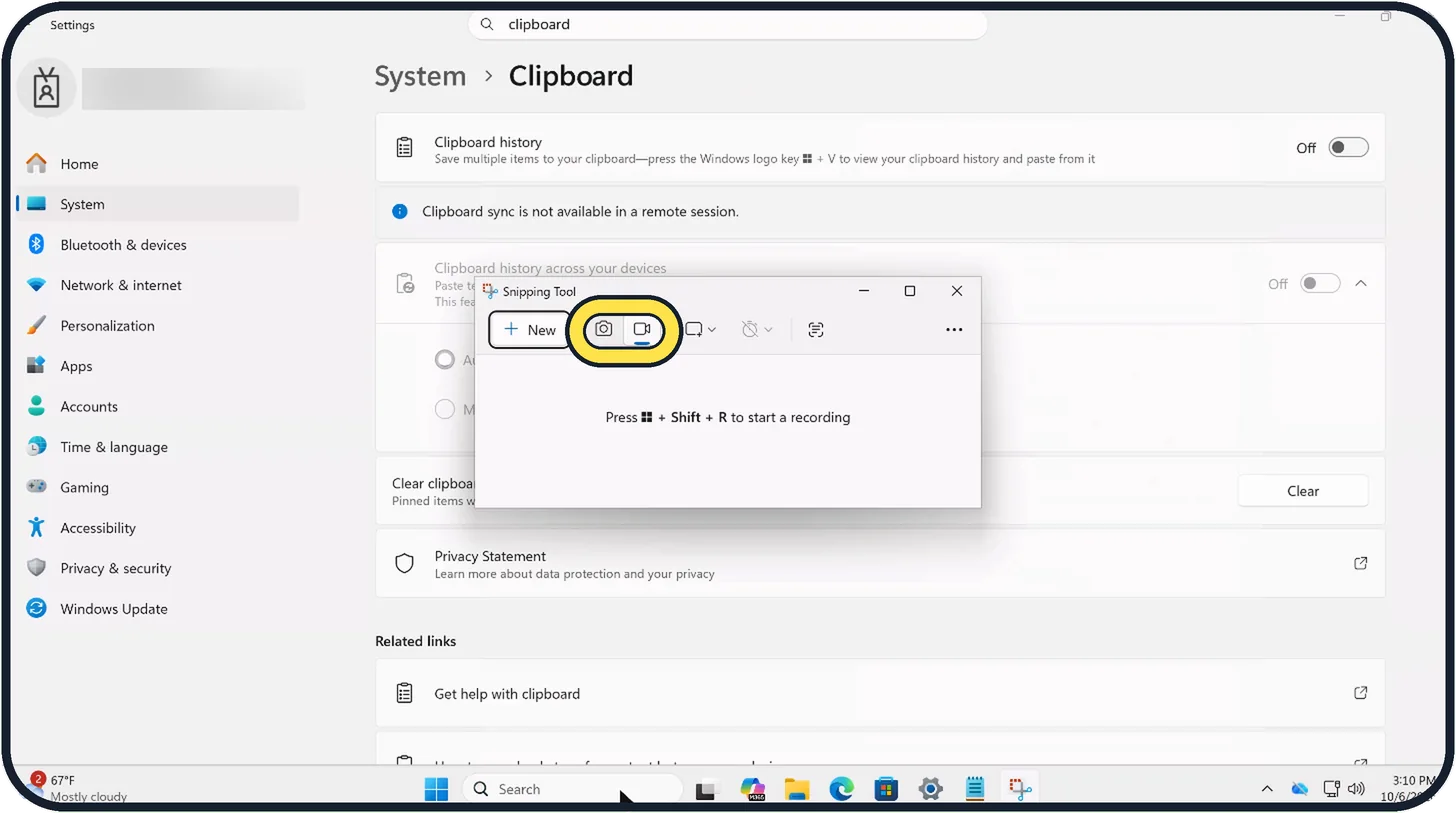
Zoomed in on the setting. Tap to see the whole screenTap the picture to see it full size Open Snipping Tool in record mode
Open Start and type Snipping Tool. In its toolbar, click the video camera button next to the camera. The window then says Press Windows + Shift + R to start a recording.
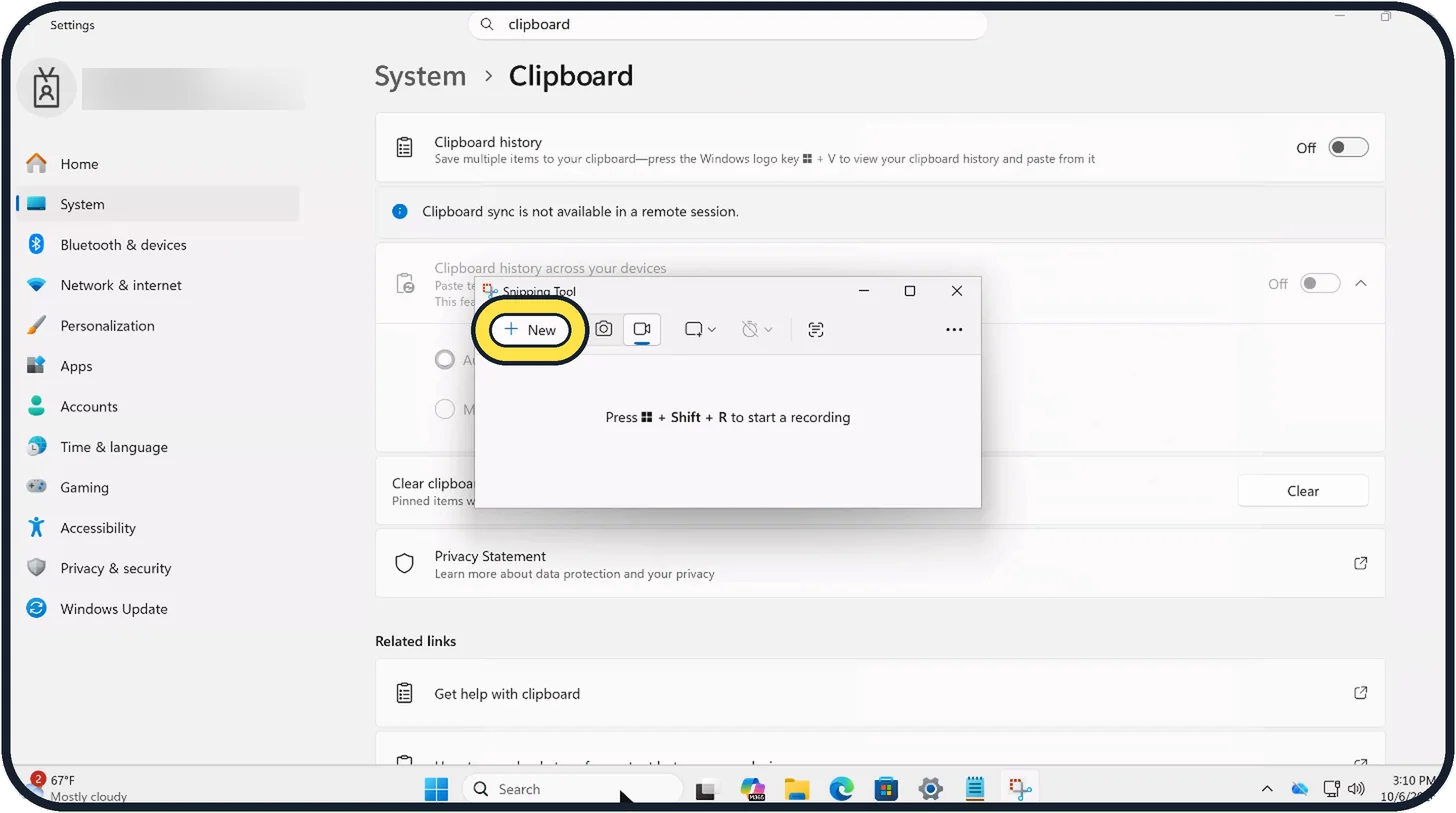
Zoomed in on the setting. Tap to see the whole screenTap the picture to see it full size Click New
Click New, or press Windows + Shift + R from anywhere. The screen darkens.
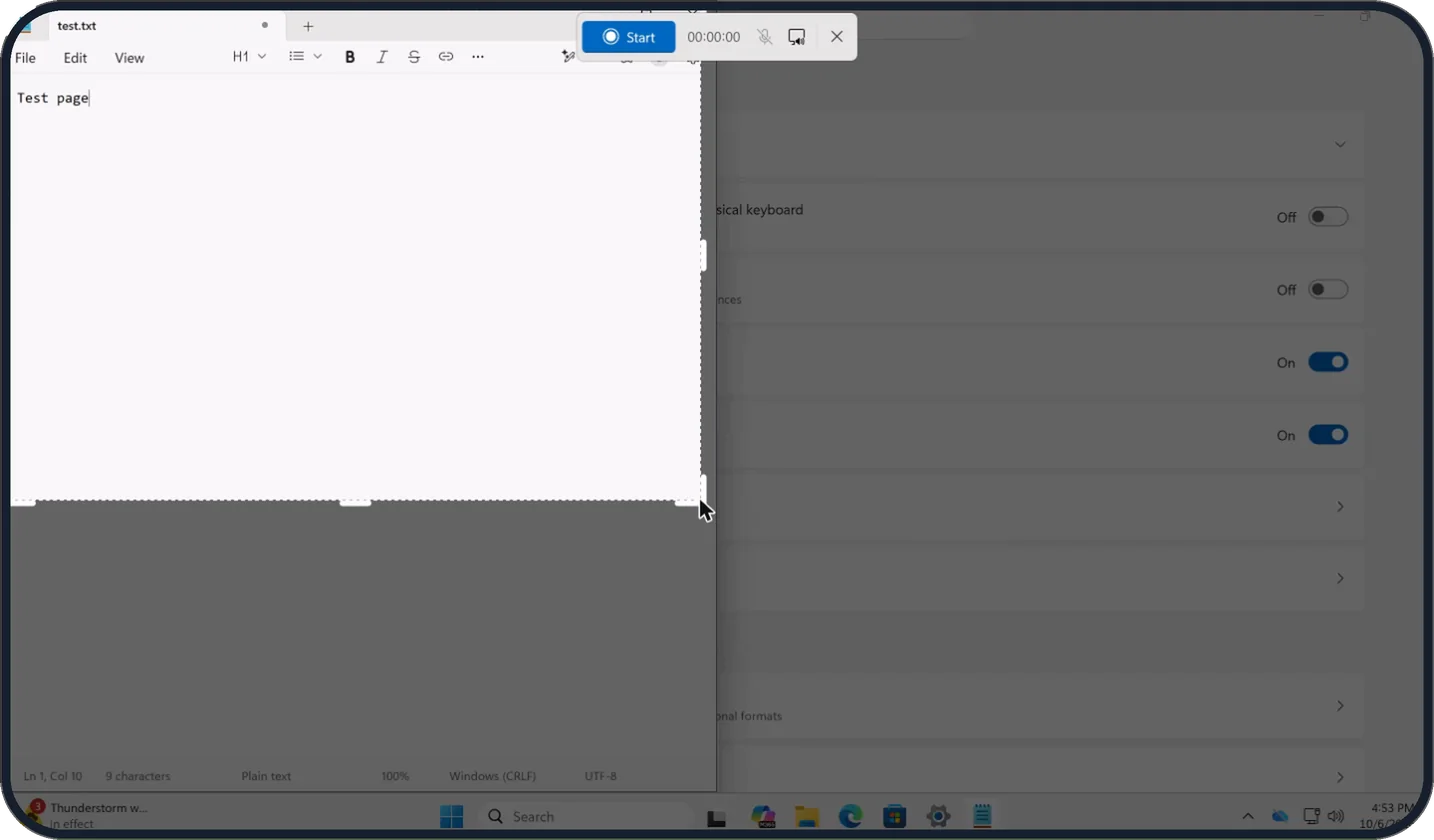
Tap the picture to see it full size Select the area
Drag a box around the part you want. Here we selected the Notepad window; the dashed line shows the area. Drag from corner to corner of the screen to record everything.
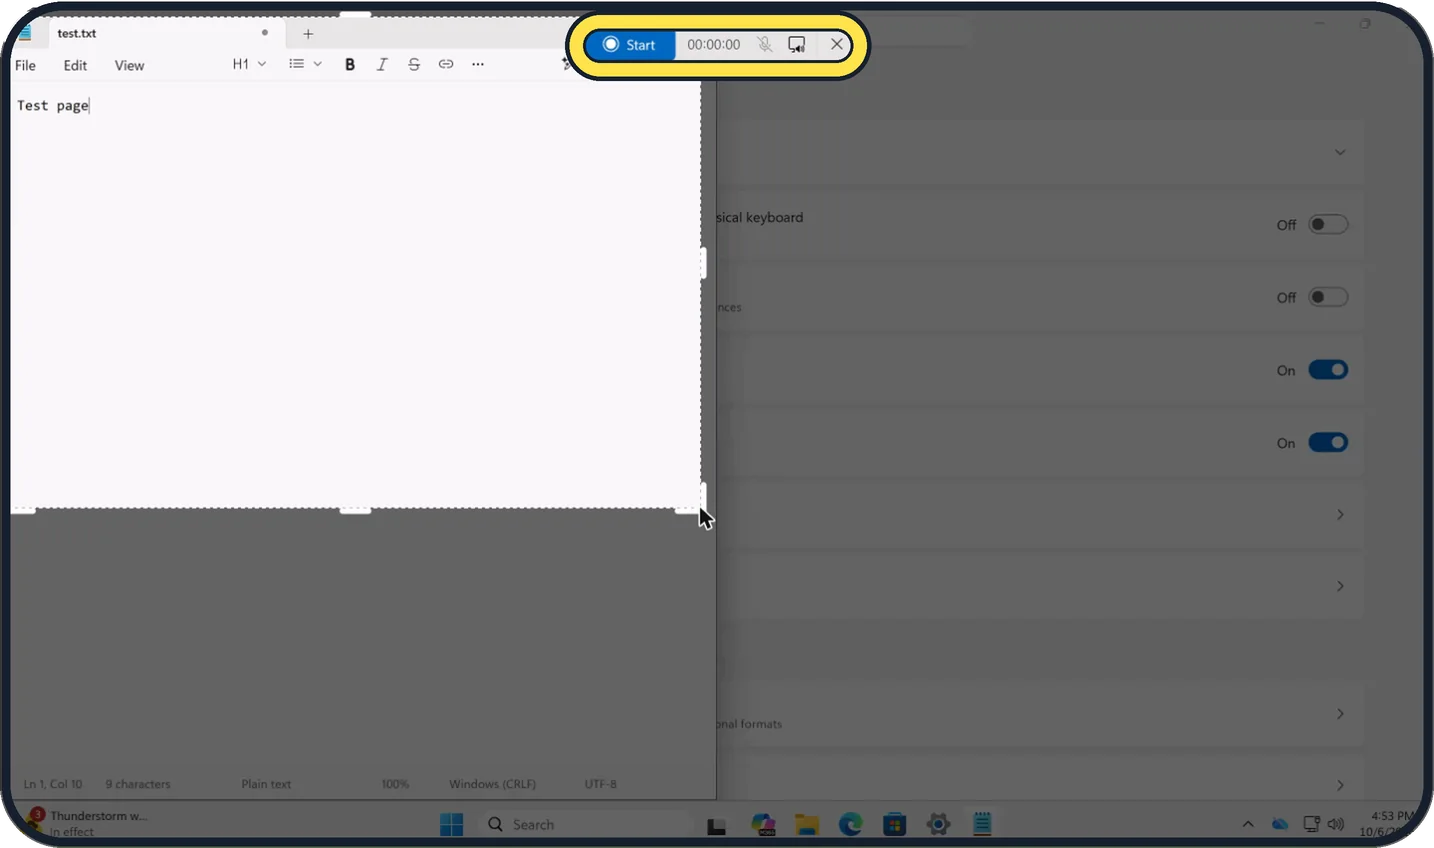
Zoomed in on the setting. Tap to see the whole screenTap the picture to see it full size Click Start
The bar at the top has Start, a timer, a microphone button and a button for system sound. Turn on the microphone first if you want to talk over the video.
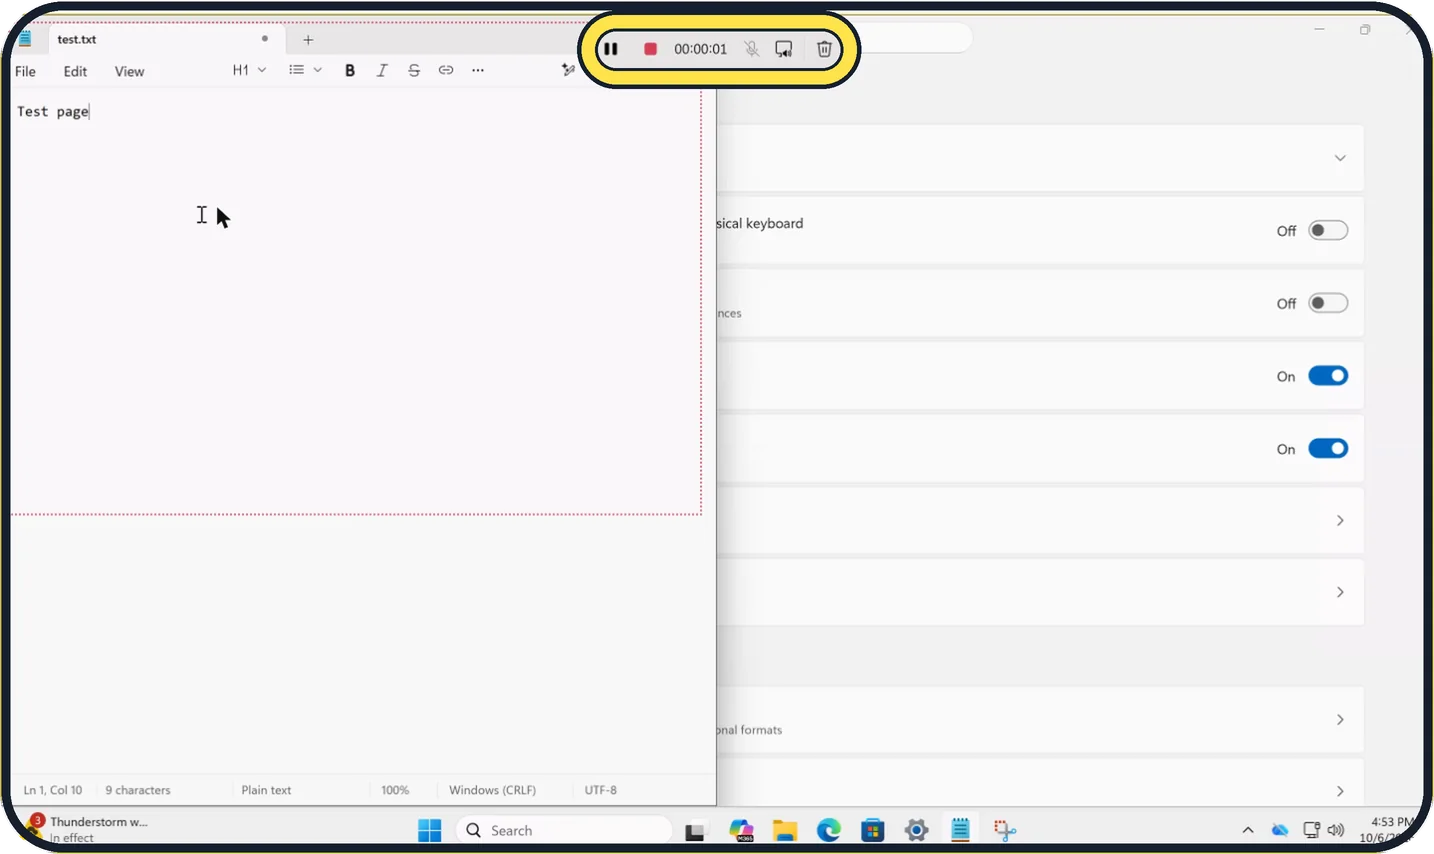
Zoomed in on the setting. Tap to see the whole screenTap the picture to see it full size Pause or stop
While recording, a red border marks the area and the bar shows pause, the red stop button, the time and a bin to throw the clip away. Click the red button when you are done.
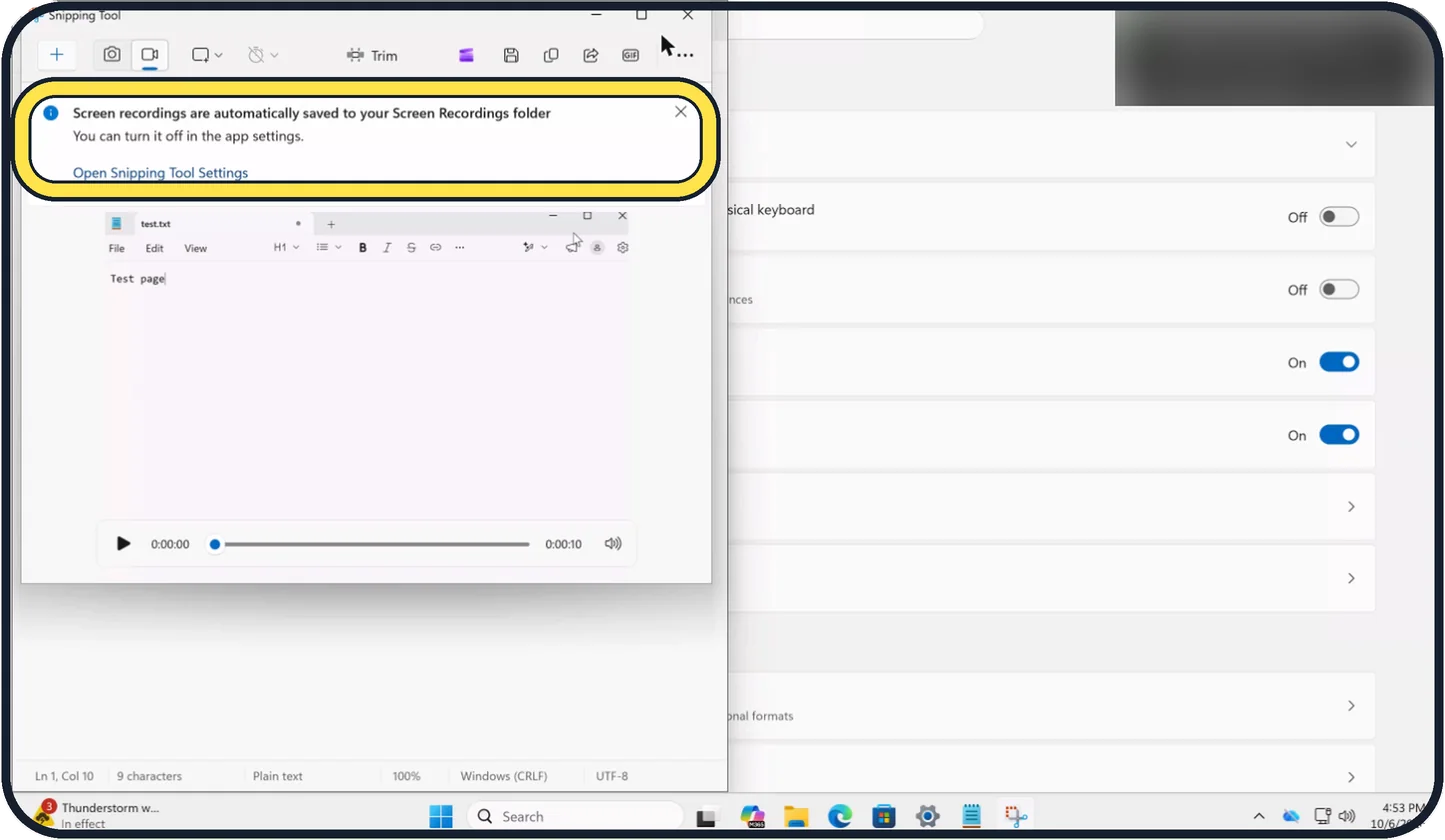
Zoomed in on the setting. Tap to see the whole screenTap the picture to see it full size Find the recording
The video opens in Snipping Tool to play back. Ours said: Screen recordings are automatically saved to your Screen Recordings folder. That folder is in Videos.
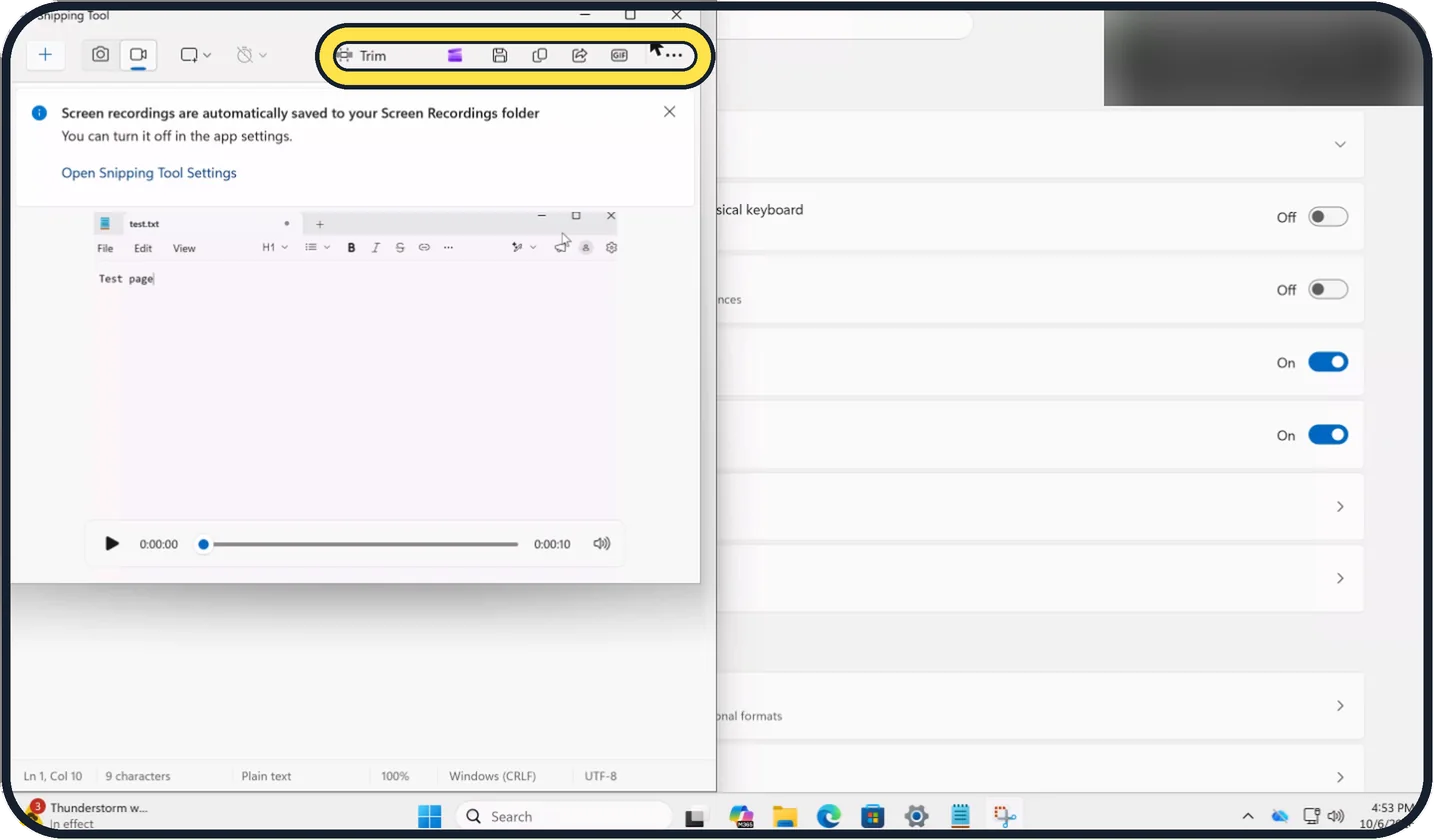
Zoomed in on the setting. Tap to see the whole screenTap the picture to see it full size Trim or save a copy
Trim cuts the start or end. The disk button saves a copy somewhere else, and the share button sends it.
If you do not see this option
- There is no video camera (Record) button. Microsoft calls it the Record button. If Snipping Tool shows only the camera, update it in the Microsoft Store: older versions only take pictures. Source: Use Snipping Tool to capture screenshots
If this does not work
- The recording is not in the Screen Recordings folder. Microsoft says snips are saved automatically and that you change the automatic save behaviour or the folder under See More, Settings. Check that setting, or use the disk button in step 7 to save a copy where you want it. Source: Use Snipping Tool to capture screenshots
- The video has no sound. Turn on the microphone or the system sound button in the bar before you click Start (step 4). Microsoft says you can also add audio afterwards: choose Edit in Clipchamp and open the Audio tab. Source: Use Snipping Tool to capture screenshots
About this guide
Windows 11 has a screen recorder built into Snipping Tool, so you do not need to install anything to show someone a problem or record a short how-to.
Good to know
If Windows + Shift + R does nothing, update Snipping Tool in the Microsoft Store. Older versions only take pictures.
For a still picture instead: how to take a screenshot on Windows 11.
Close anything private before you record, including notifications. Do not disturb stops them popping up.
In short: Windows + Shift + R, select the area, Start, Stop.
Links checked in October 2026. Menus and features can change after software updates. These steps match the version named at the top.
Did this guide work for you?
Sorry about that. What happened?