
howtosimply.com/guides/how-to-hide-notification-previews-on-a-mac/ · Checked October 2026 · MacBook Pro · macOS Tahoe 26
In this guide
Open System Settings, click Notifications, and set Show previews to Never, or to When Unlocked. The menu decides when previews are shown: Always, When Unlocked or Never.
4 of 4 steps with real screenshots · 1 official source below
- Device
- Mac
- Shown on
- macOS Tahoe 26 (MacBook Pro)
- App
- System Settings
- Path
- System Settings › Notifications › Show previews: Never
- Real screenshots
- 4 of 4 steps
- Checked
- October 2026
- Sources
- 1 official, linked below
Step by step
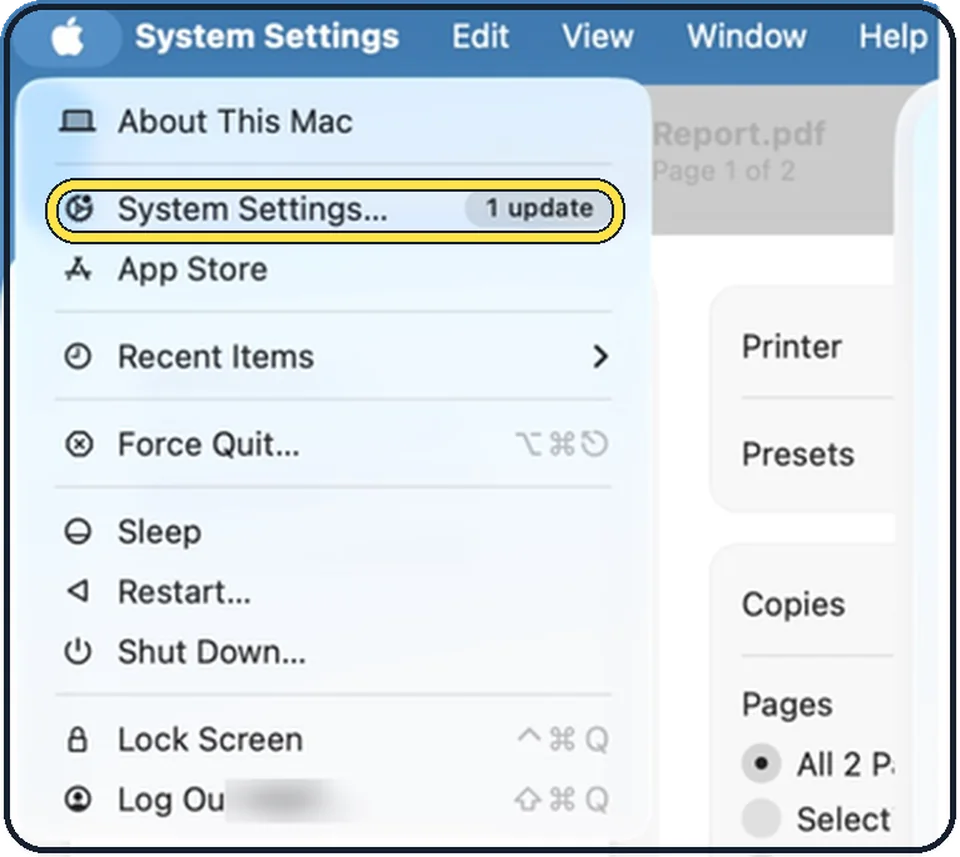
Tap the picture to see it full size Open System Settings
Click the Apple menu in the top left corner of the screen and choose System Settings.
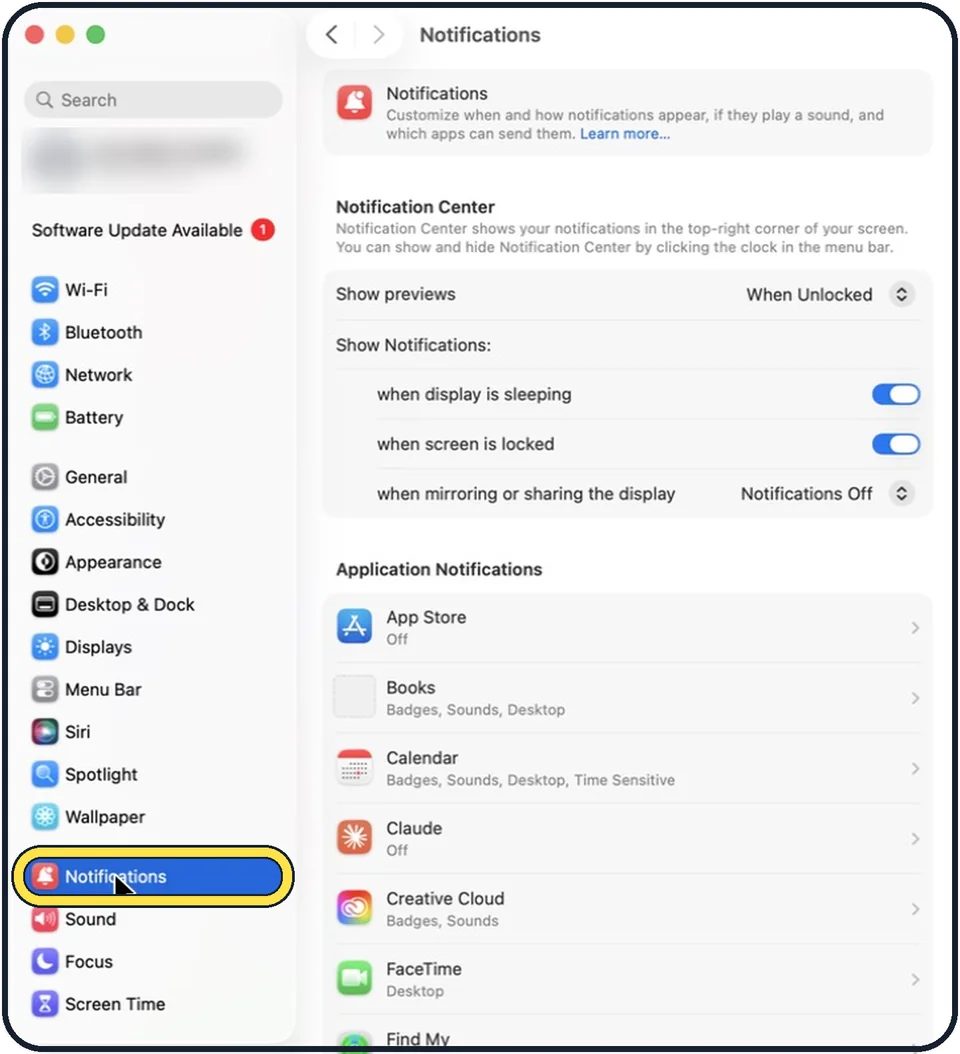
Zoomed in on the setting. Tap to see the whole screenTap the picture to see it full size Click Notifications in the sidebar
Notifications is in the group with Sound and Focus.
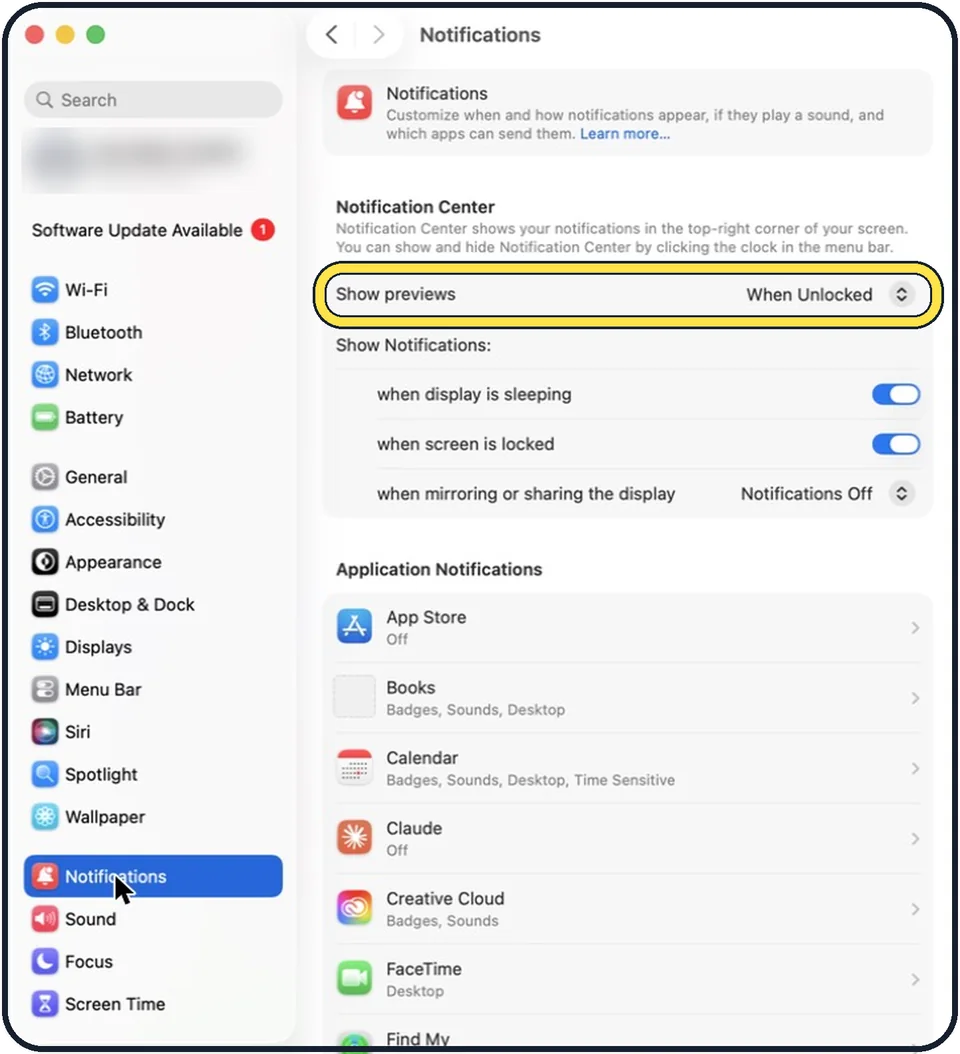
Tap the picture to see it full size Set Show previews
It is the first row under Notification Center. In the picture it is set to When Unlocked.
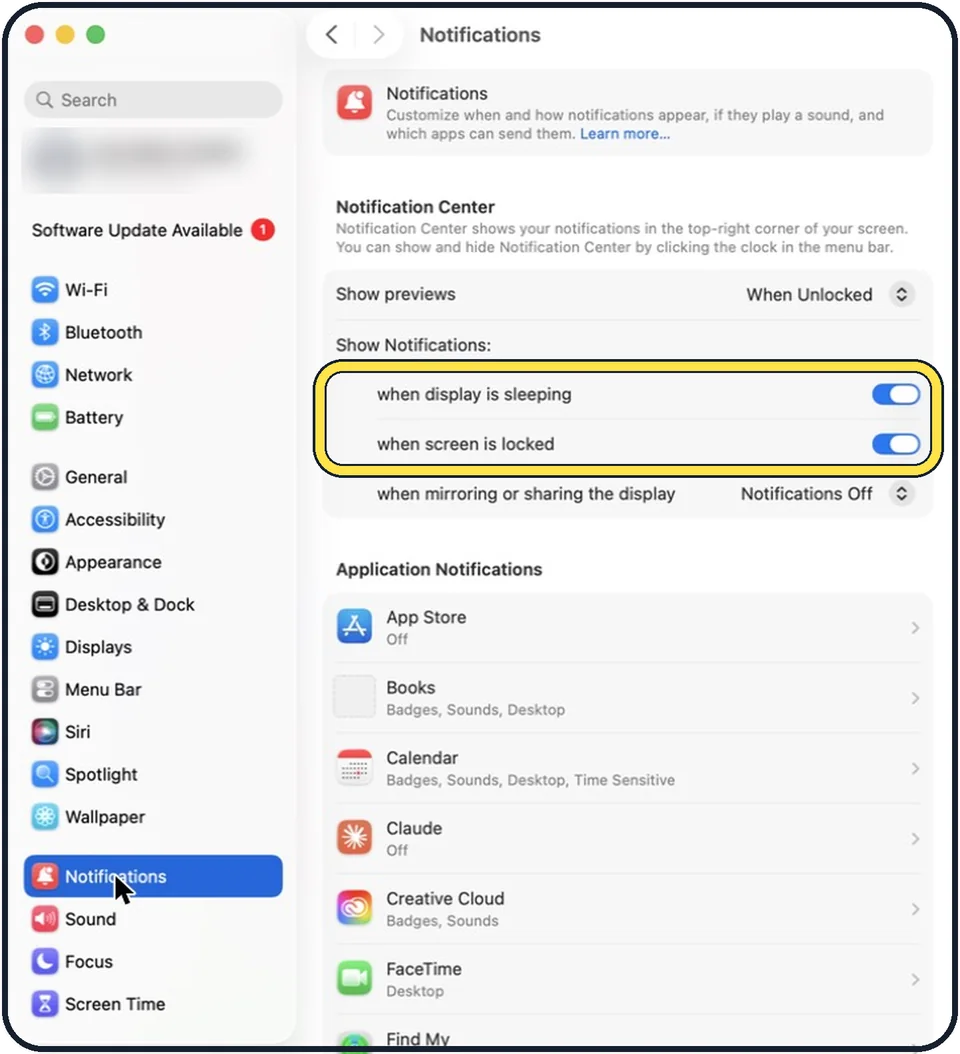
Tap the picture to see it full size Decide about the locked and sleeping screen
Two switches below it allow or stop notifications when the display is sleeping and when the screen is locked. Both are on in the picture.
If you do not see this option
- There is a Summarize notifications switch Apple says this switch appears only when Apple Intelligence is turned on. Source: Change Notifications settings on Mac
- Show previews already reads When Unlocked That is how it was set on our Mac. Choose Never to hide previews all the time.
If this does not work
- Notifications still show on the locked screen Apple says to switch off when screen is locked under Notification Center. Source: Change Notifications settings on Mac
- Notifications appear while you present Apple says to choose Notifications Off for when mirroring or sharing the display. It was already set that way on our Mac. Source: Change Notifications settings on Mac
About this guide
Notification previews can be read by anyone who looks at your screen. The Show previews menu decides when they are shown at all.
The screenshots show System Settings on macOS Tahoe 26.
Good to know
During a presentation: the last row of the group, when mirroring or sharing the display, is set to Notifications Off in the picture. Apple explains that others then cannot see your notifications while you present.
To switch notifications off for single apps: how to turn off notifications on a Mac.
In short: System Settings, Notifications, Show previews: Never.
Links checked in October 2026. Menus and features can change after software updates. These steps match the version named at the top.
Did this guide work for you?
Sorry about that. What happened?