
howtosimply.com/guides/how-to-add-a-user-account-on-a-mac/ · Checked October 2026 · MacBook Pro · macOS Tahoe 26
In this guide
Open System Settings, click Users & Groups and click Add User. Enter your password, choose Standard, fill in the name and a password for the new person, and click Create User.
3 of 5 steps with real screenshots · 1 official source below
- Device
- Mac
- Shown on
- macOS Tahoe 26 (MacBook Pro)
- App
- System Settings
- Path
- System Settings › Users & Groups › Add User
- Real screenshots
- 3 of 5 steps
- Checked
- October 2026
- Sources
- 1 official, linked below
Step by step
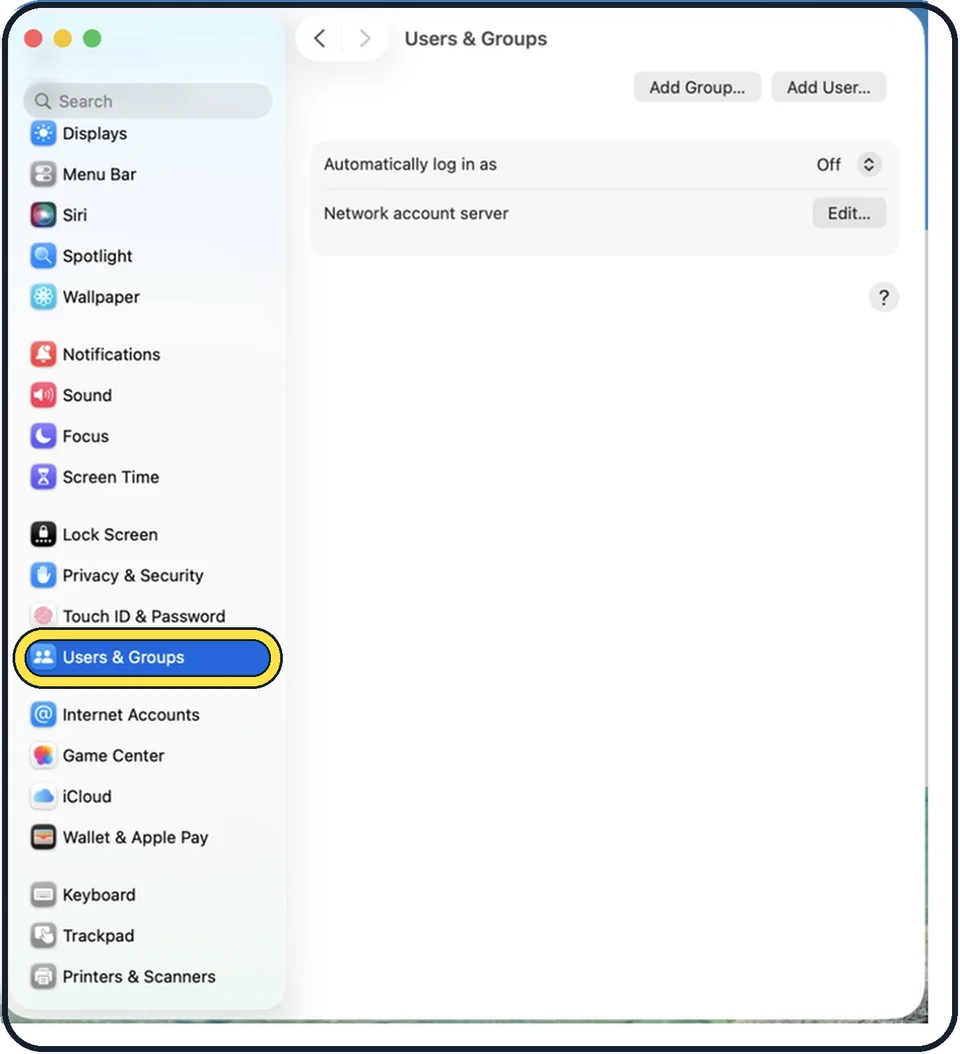
Zoomed in on the setting. Tap to see the whole screenTap the picture to see it full size Open System Settings and click Users & Groups
Click the Apple menu and choose System Settings.
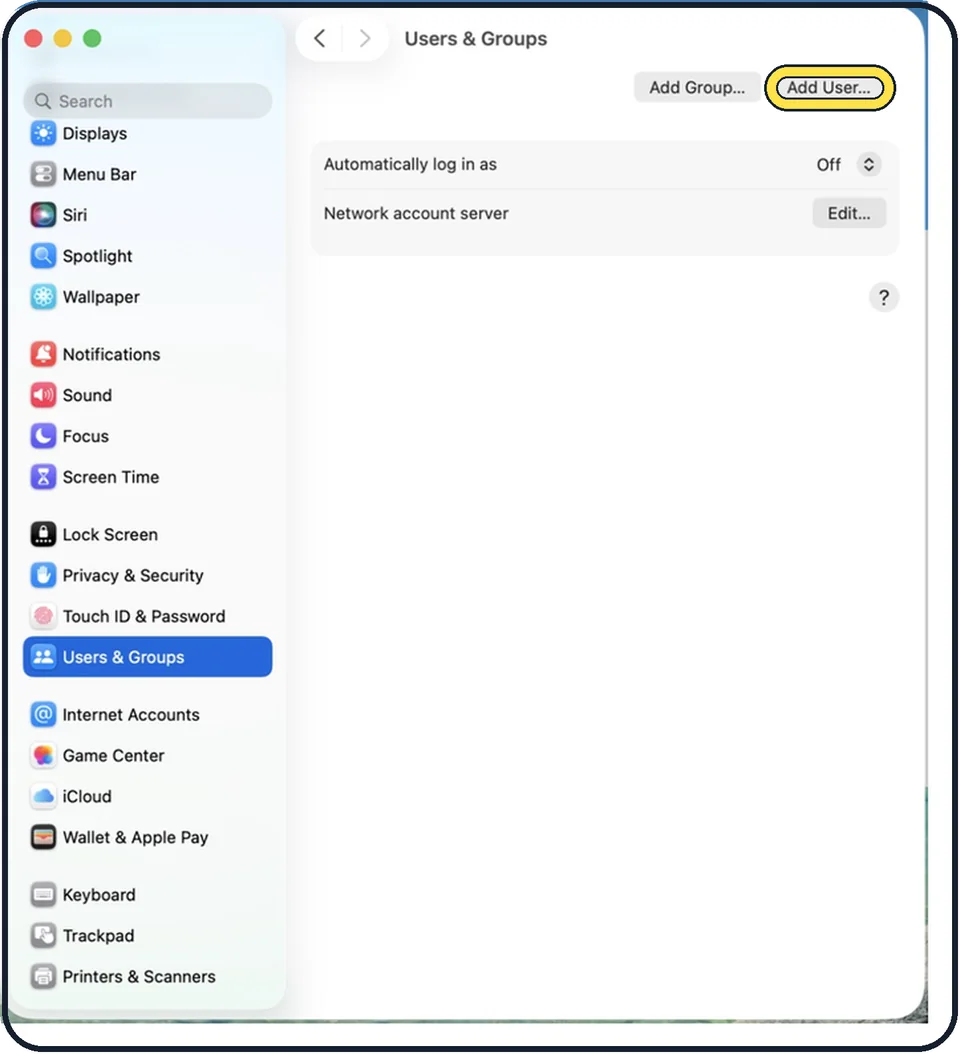
Zoomed in on the setting. Tap to see the whole screenTap the picture to see it full size Click Add User
Enter your own password to allow the change.
Choose the account type
Open the menu next to New User. Standard is right for most people: they can install apps and change their own settings. Administrator can also add and manage other users and change settings for everyone. Give that only to someone you trust with the whole Mac.
Fill in name and password
Type the full name; the account name is filled in for you. Set a password and a hint, and click Create User.
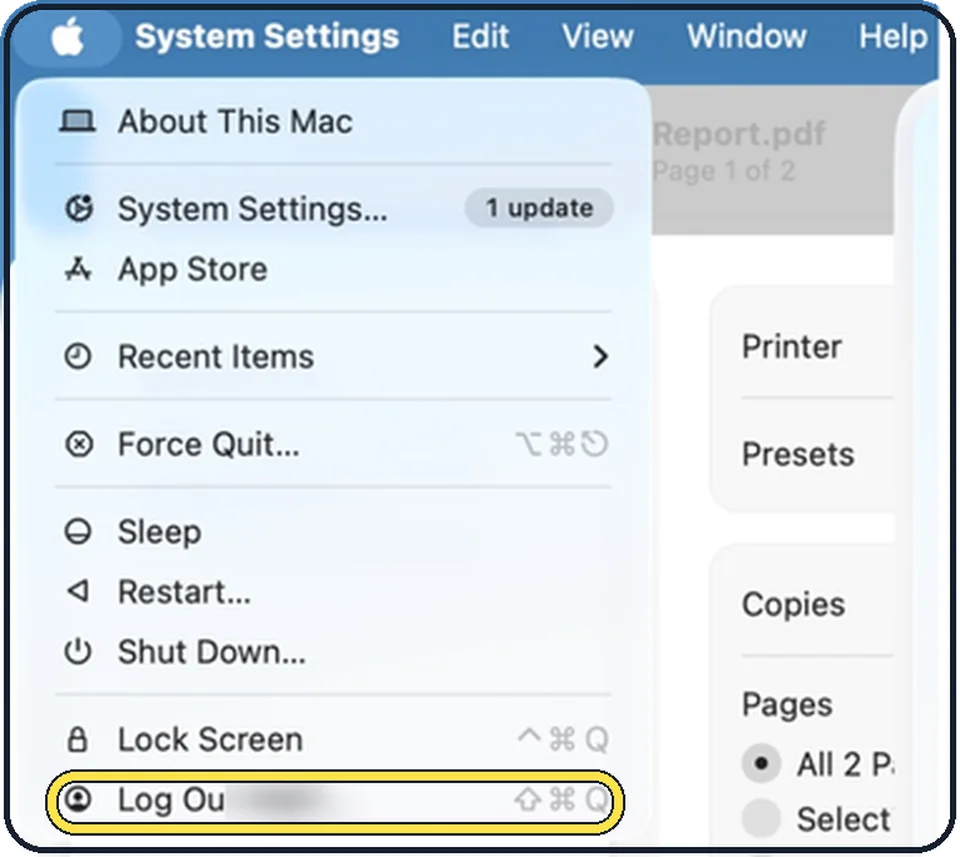
Tap the picture to see it full size Switch between users
Click the Apple menu and choose Log Out, or turn on fast user switching in System Settings, Control Centre or Menu Bar, to change users from the menu bar without closing your apps.
About this guide
A separate account gives another person their own desktop, files, browser history and settings. Your files stay private from them.
Good to know
For a visitor who needs the Mac briefly, use the Guest User instead: click the i next to Guest User and allow guests to log in. Their files are deleted when they log out.
For a child, create a Standard account, then set limits under System Settings, Screen Time.
To remove an account, click the i next to it and choose Delete User. You are asked whether to keep or delete their files.
Only lending the Mac for an hour? How to let someone use your Mac safely with the Guest User.
Make every user type their name at login: how to make a Mac ask for both name and password at login.
In short: System Settings, Users & Groups, Add User.
Links checked in October 2026. Menus and features can change after software updates. These steps match the version named at the top.
Did this guide work for you?
Sorry about that. What happened?