
macOS 27 compared with macOS 26: We rewrote this guide on macOS 27.0.1 (MacBook Neo): it now has 5 steps instead of 4. The macOS 26 page keeps the steps and screenshots as they were.
howtosimply.com/guides/how-to-make-the-menu-bar-text-bigger-on-a-mac/ · Checked October 2026 · MacBook Neo · macOS 27.0.1
In this guide
Open System Settings, click Accessibility, then Display, and under Text select Large next to Menu bar size. Log out and log in again if the change does not show. Select Default to go back.
5 of 5 steps with real screenshots · 1 official source below
- Device
- Mac
- Shown on
- macOS 27.0.1 (MacBook Neo)
- App
- System Settings
- Real screenshots
- 5 of 5 steps
- Checked
- October 2026
- Sources
- 1 official, linked below
Step by step
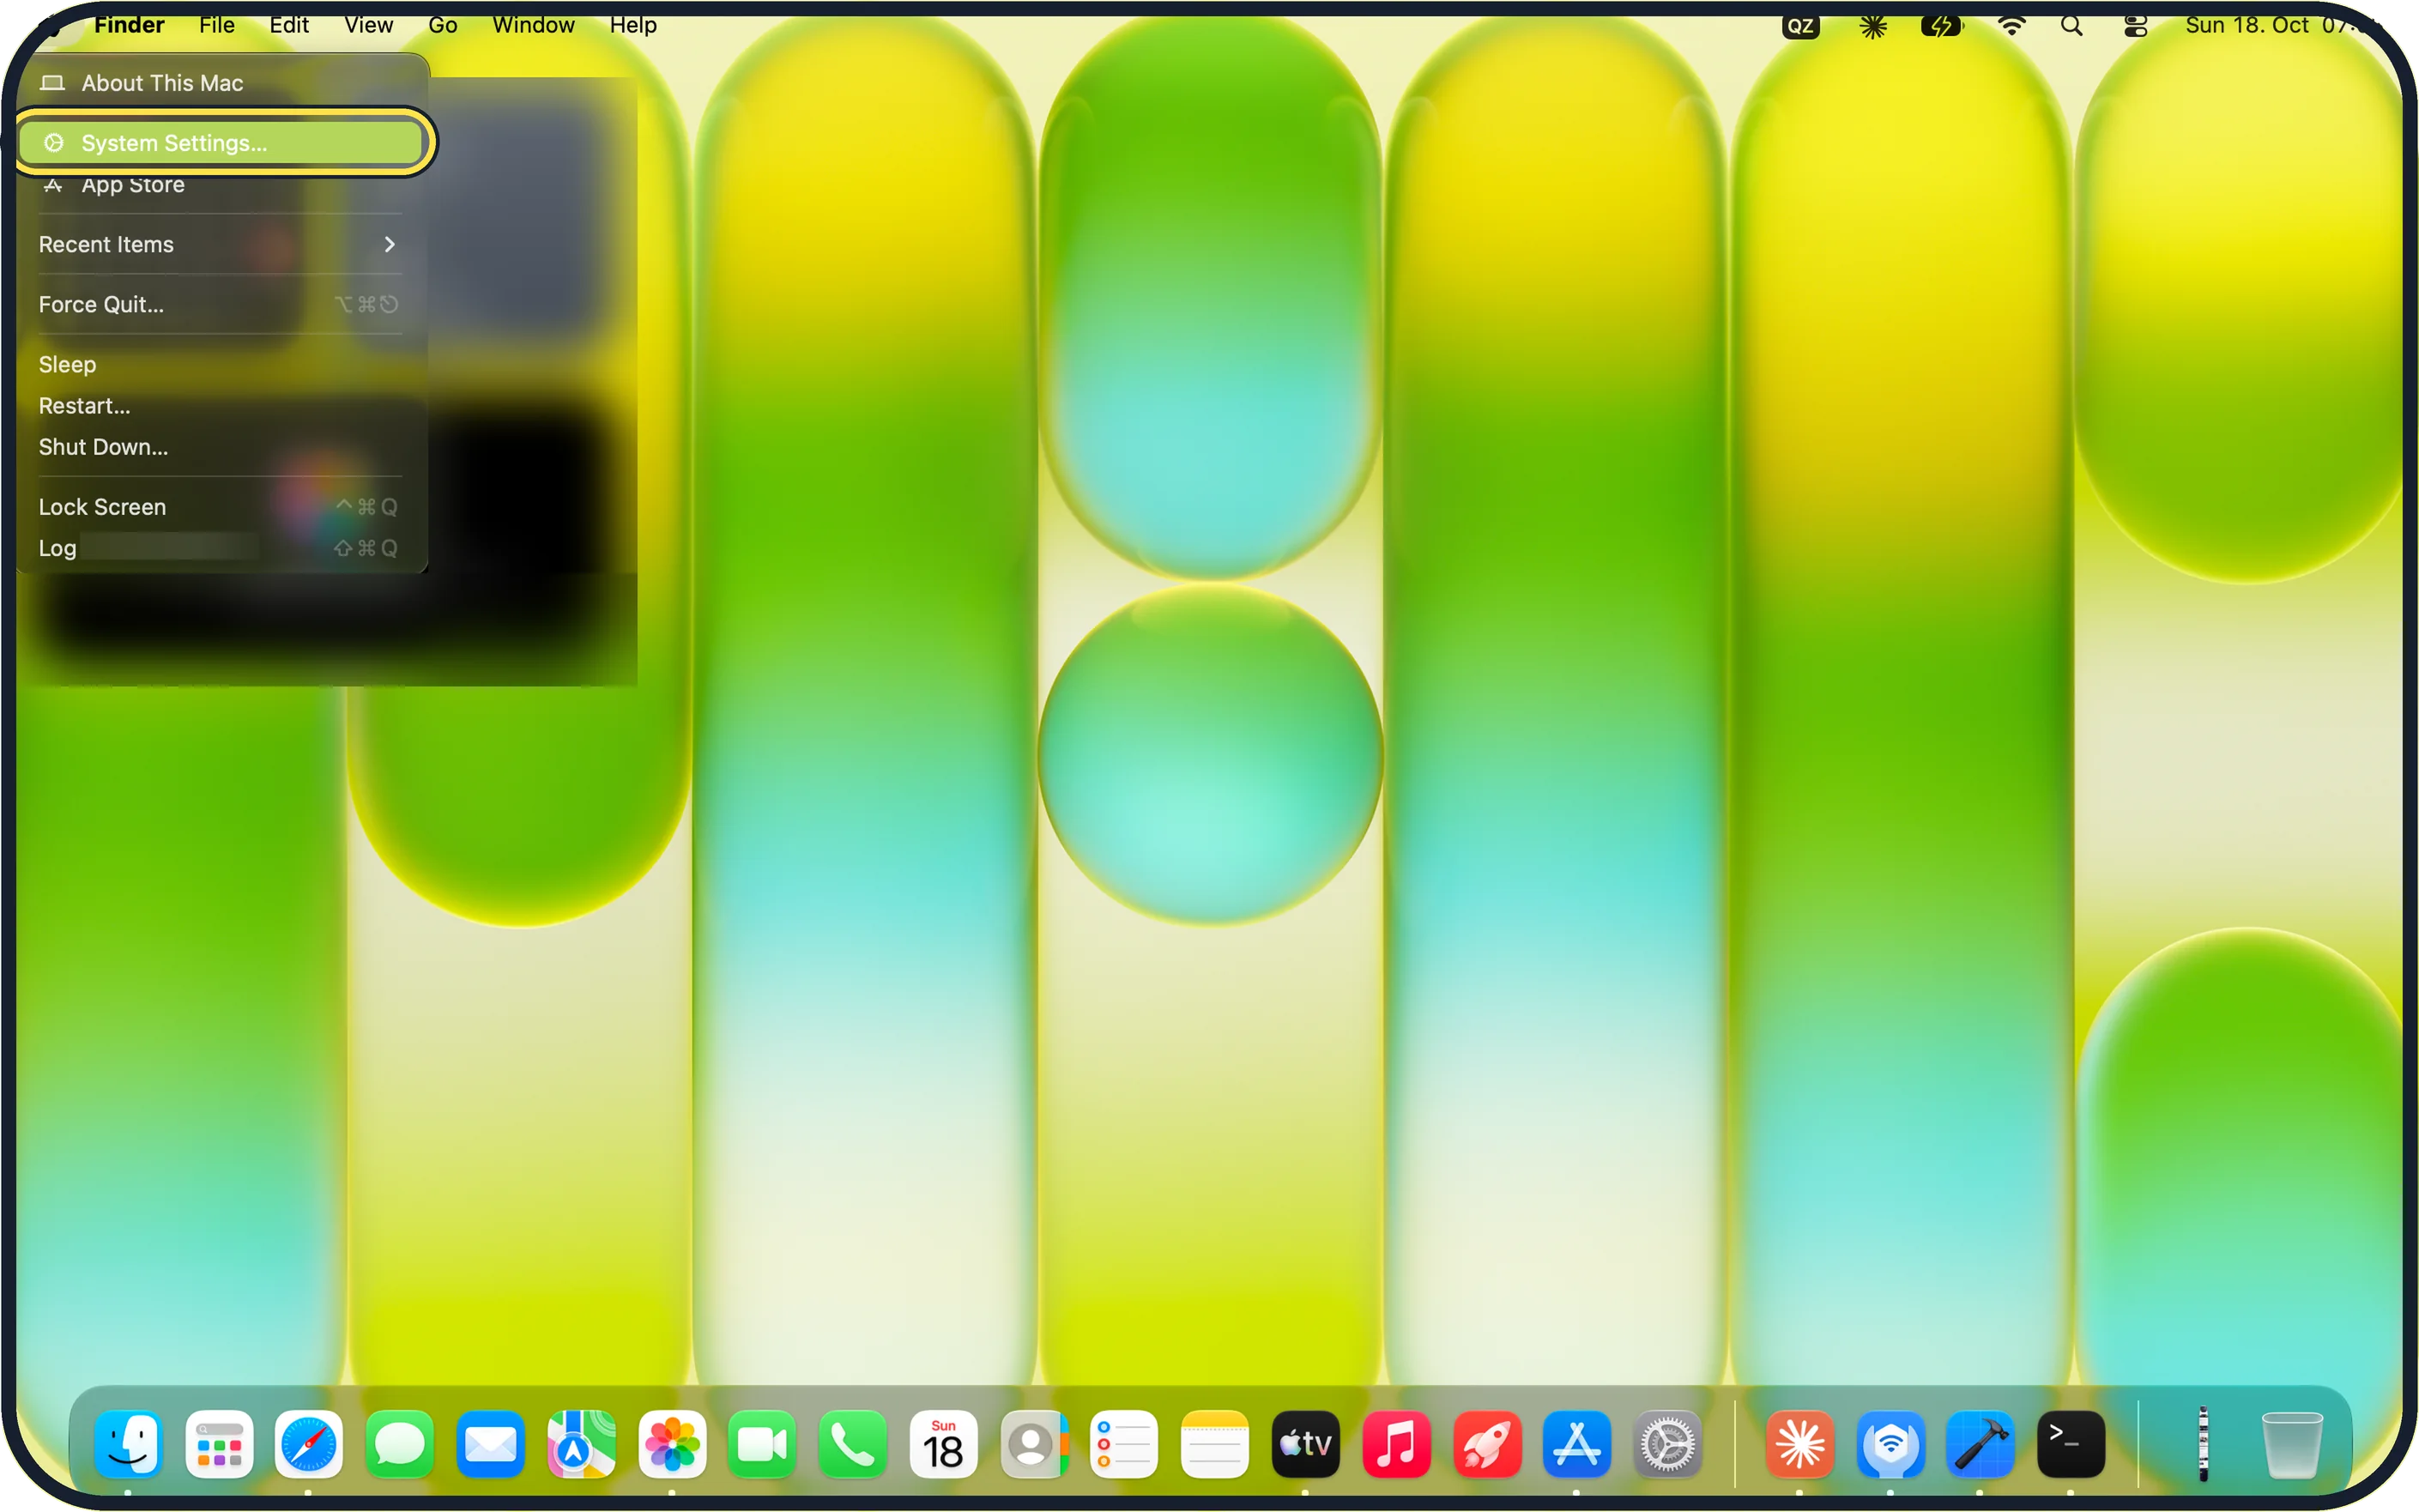
Zoomed in on the setting. Tap to see the whole screenTap the picture to see it full size Open System Settings
Click the Apple menu in the top-left corner of the screen and choose System Settings.
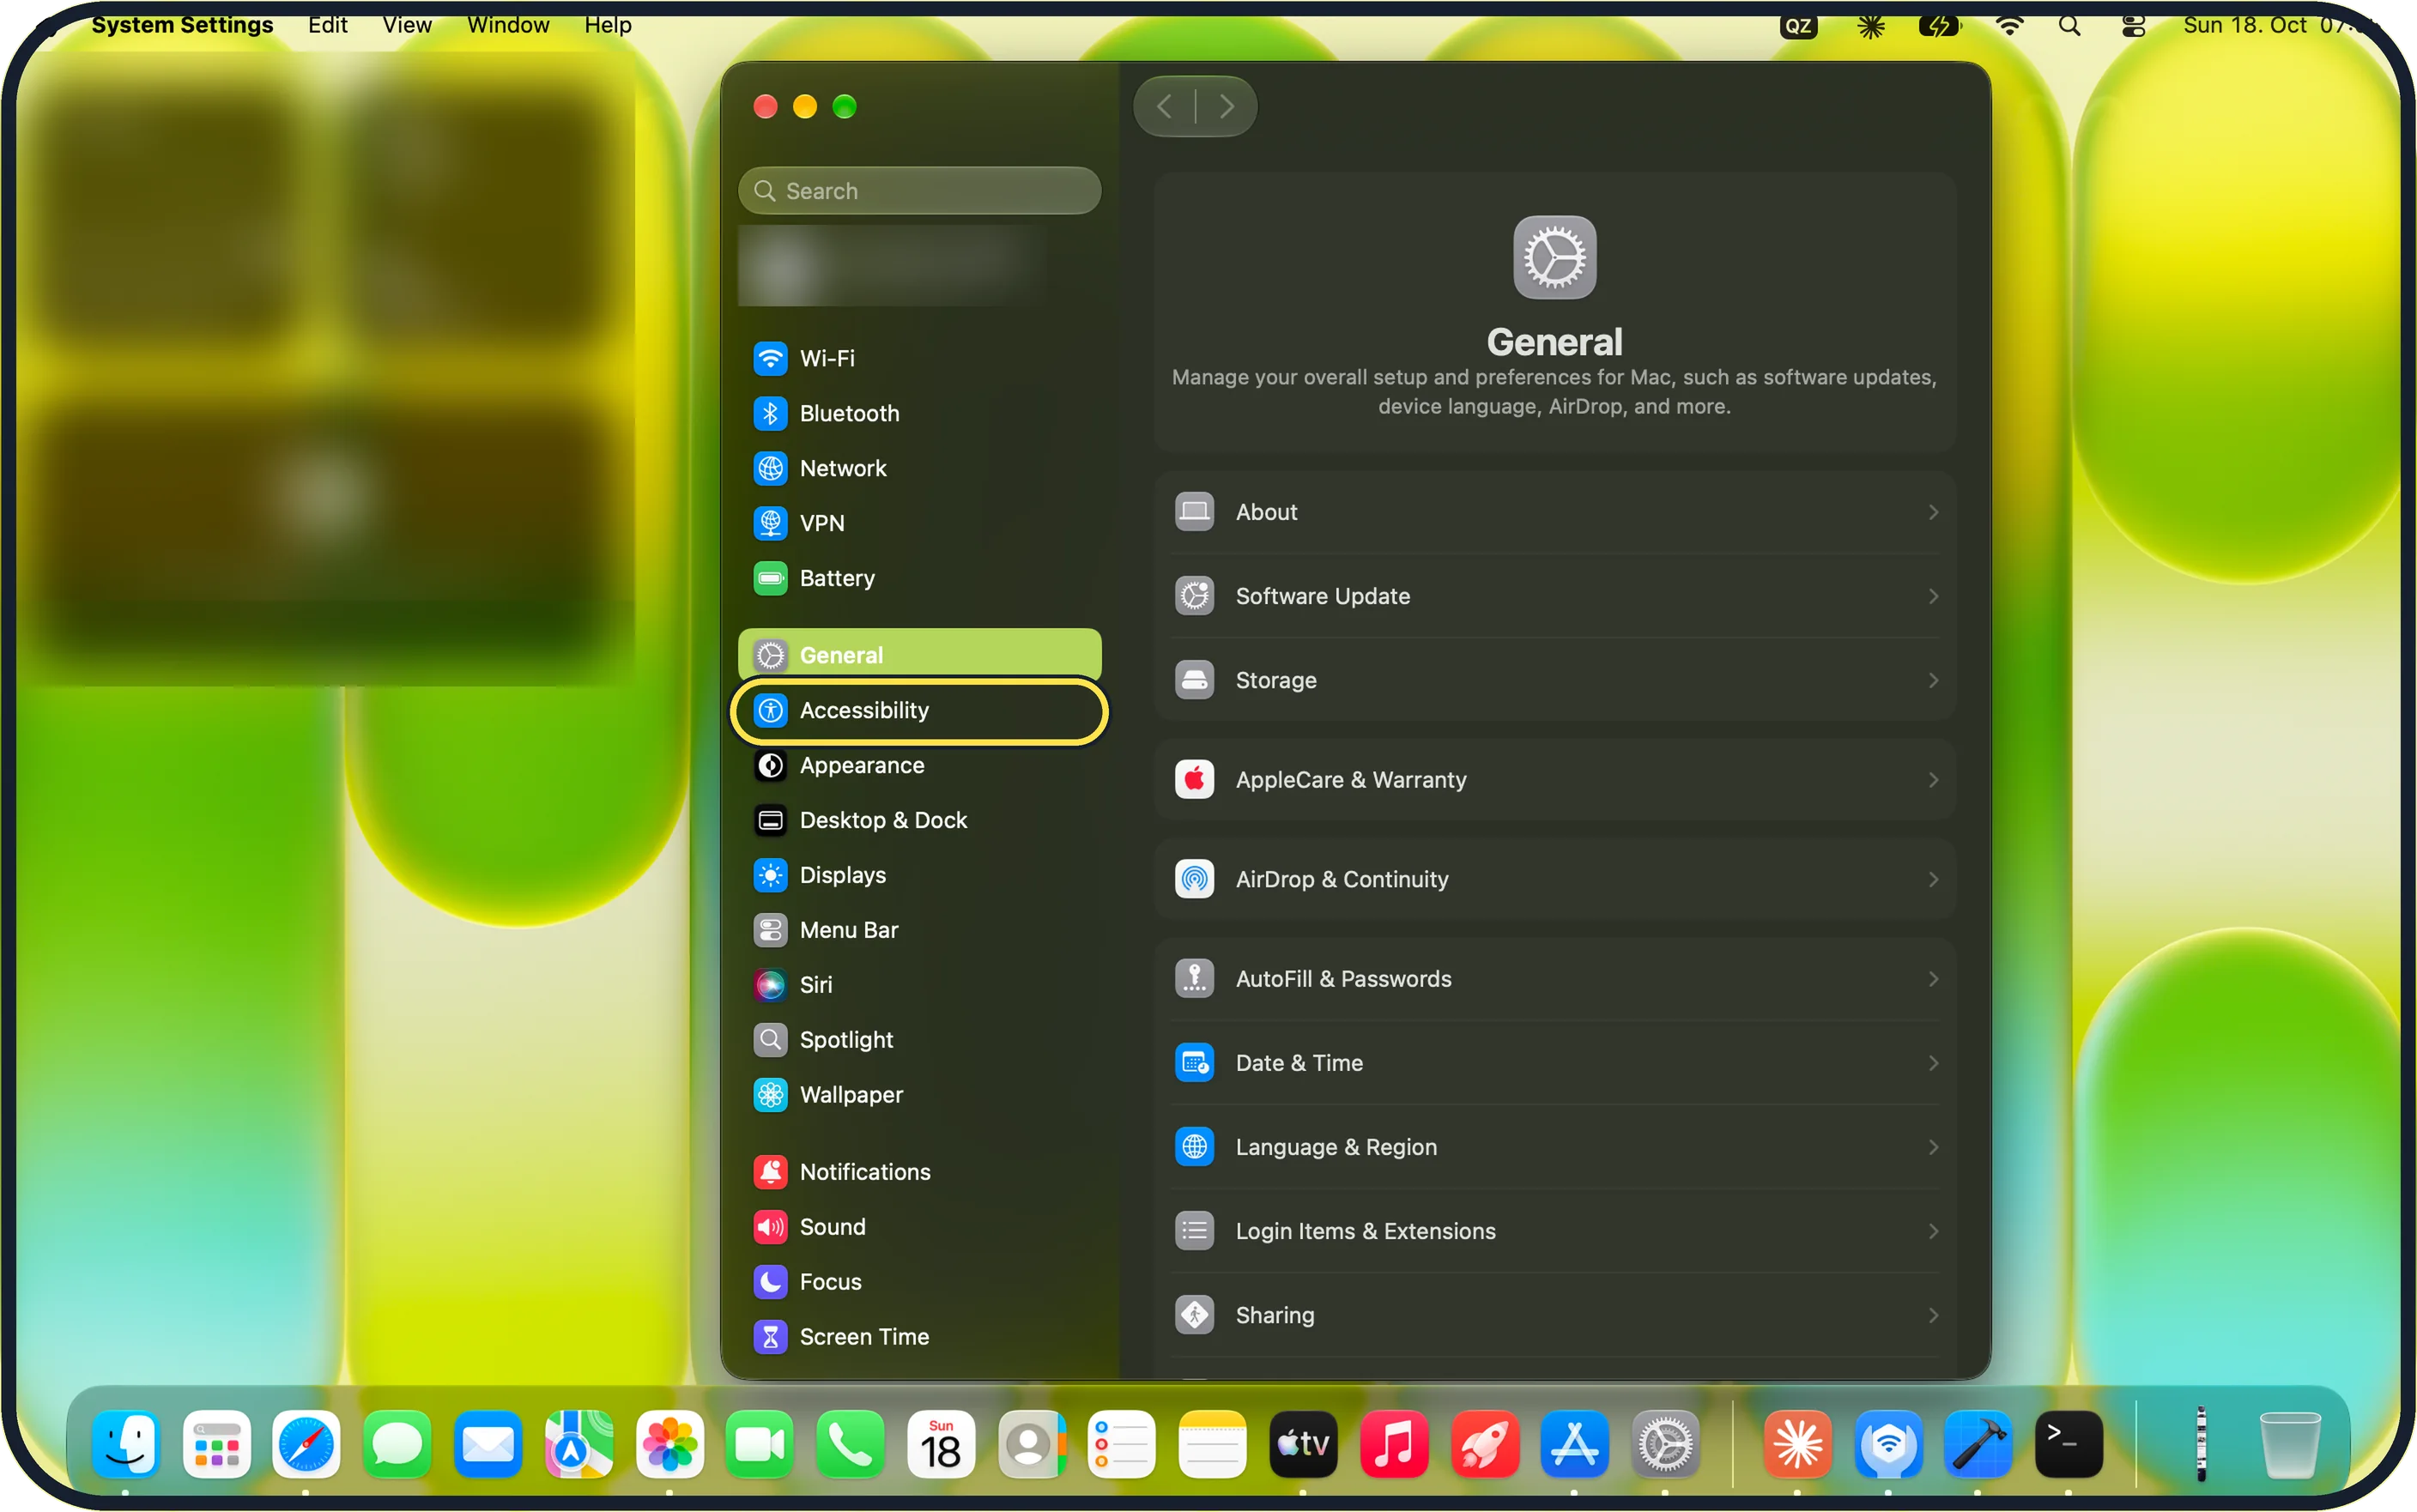
Zoomed in on the setting. Tap to see the whole screenTap the picture to see it full size Click Accessibility in the sidebar
On our MacBook Neo, Accessibility is near the top of the sidebar, just below General.
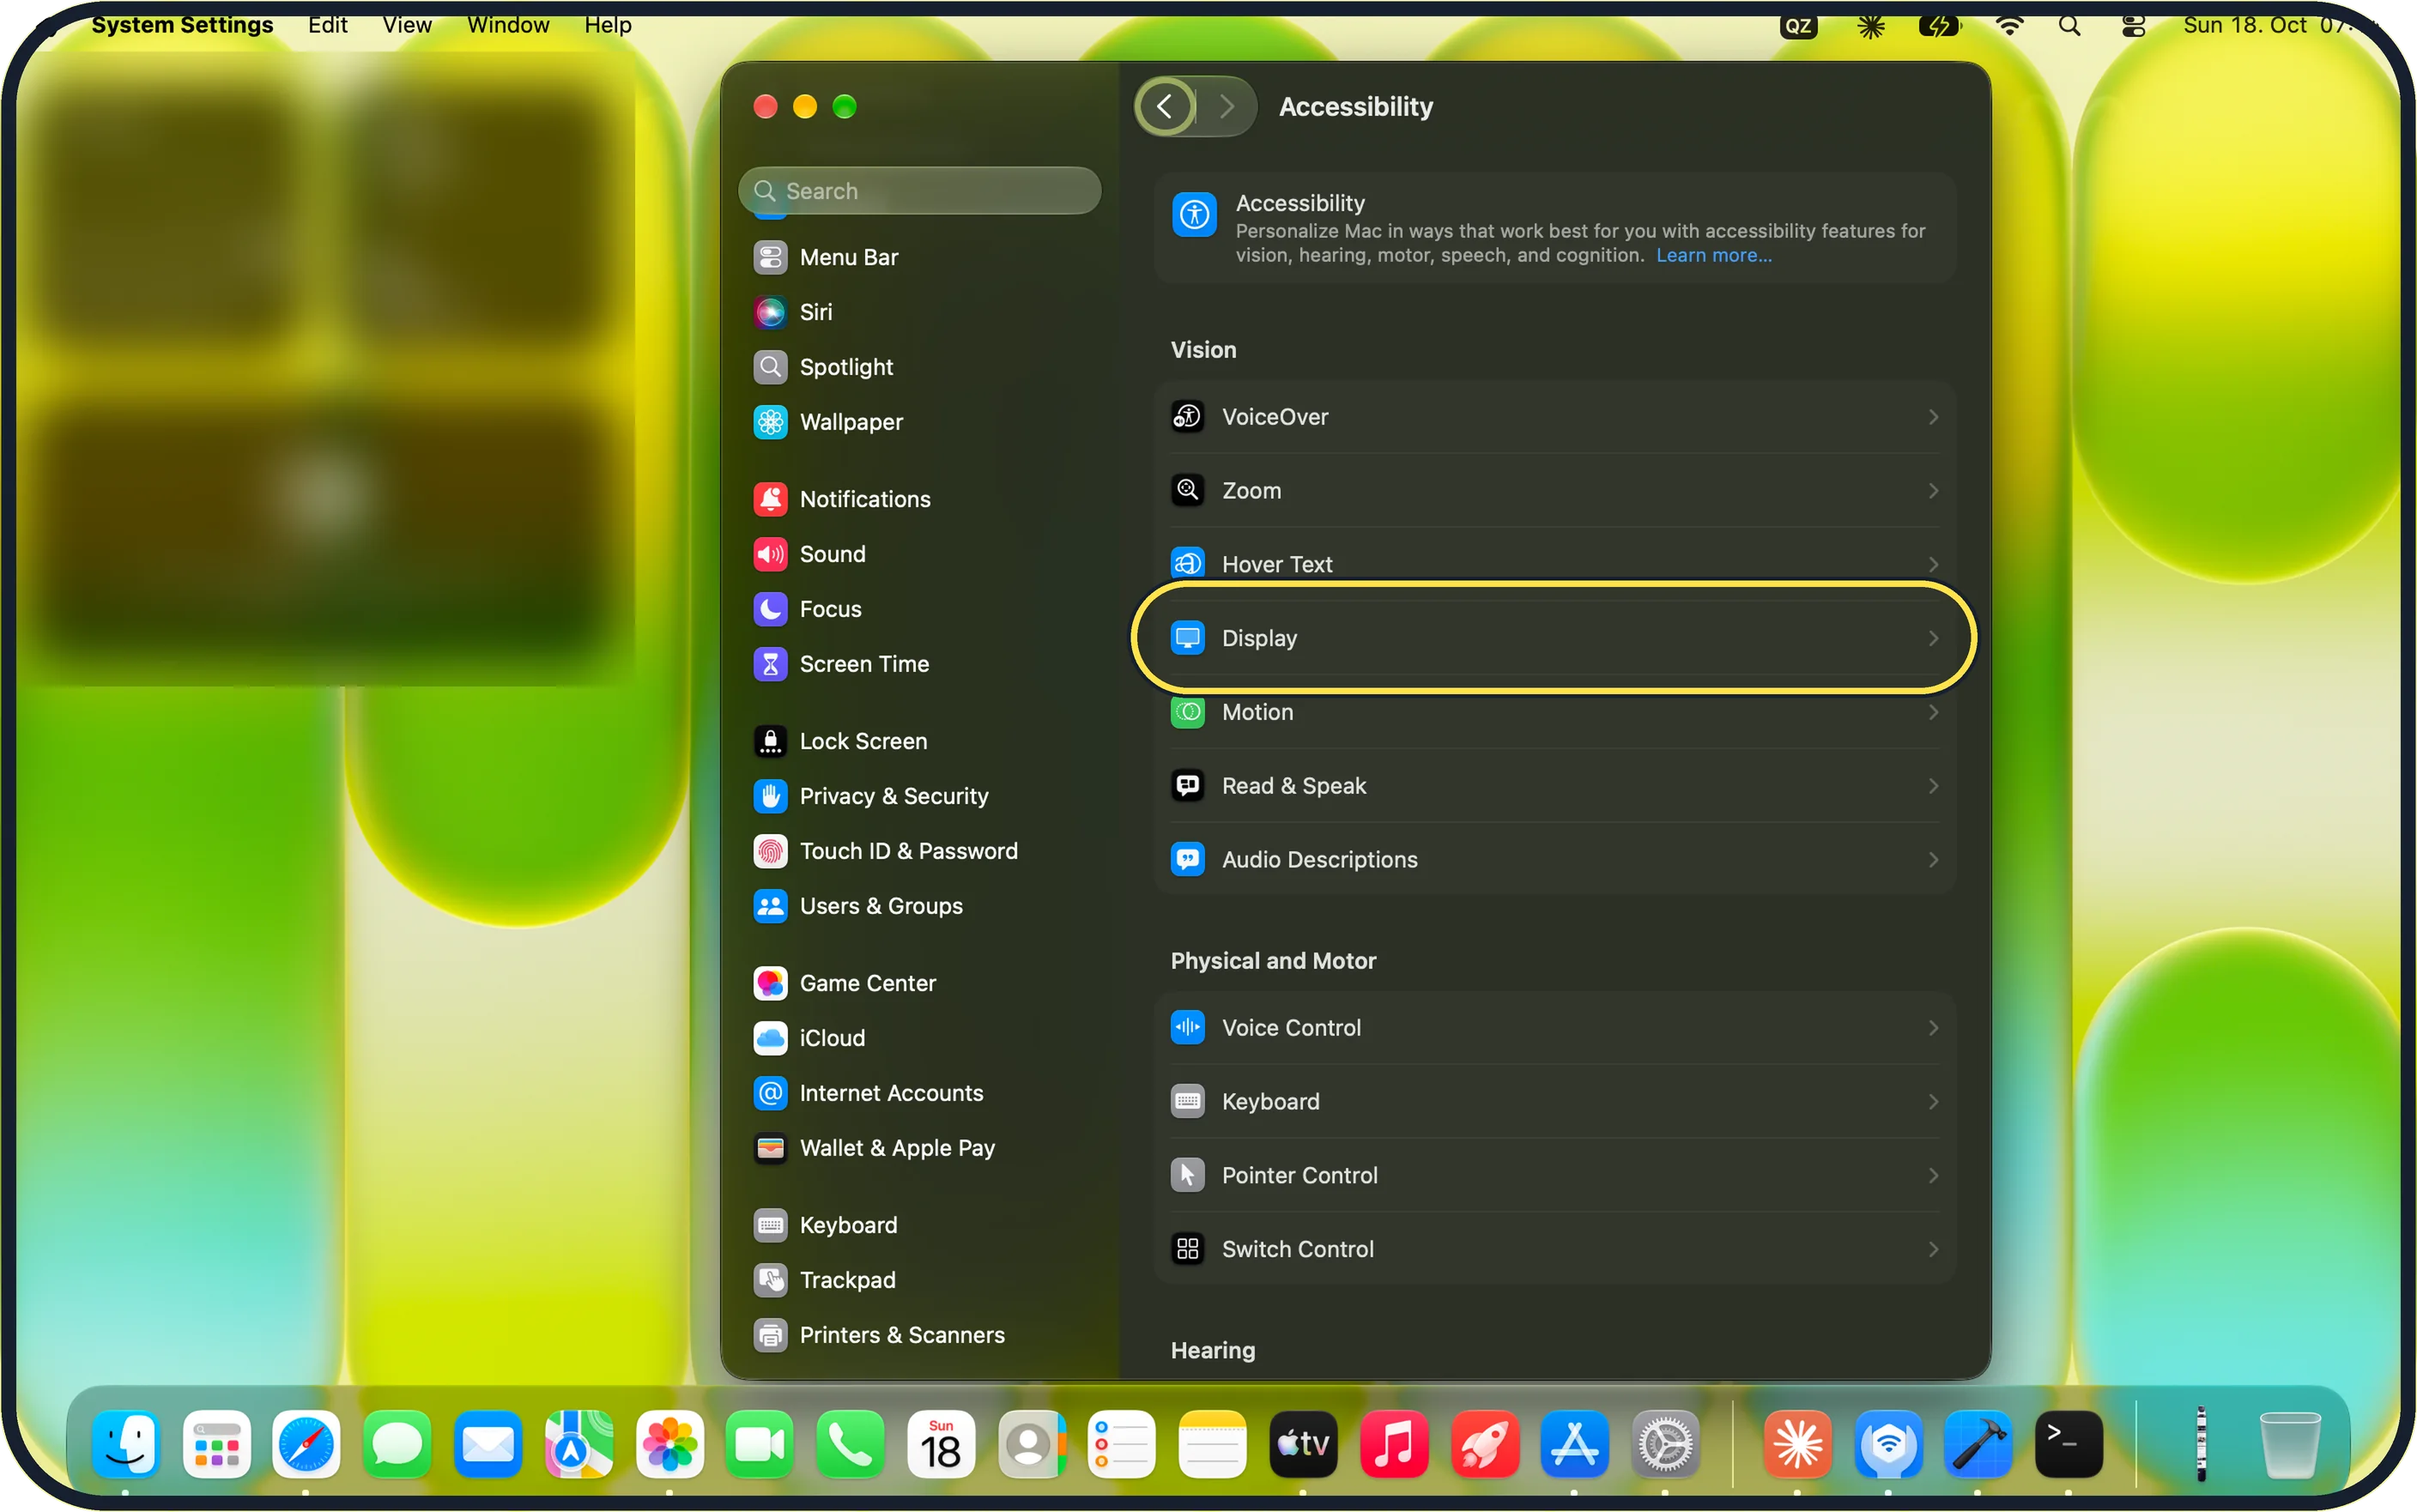
Zoomed in on the setting. Tap to see the whole screenTap the picture to see it full size Click Display
On our MacBook Neo, Display is in the Vision group, between Hover Text and Motion.
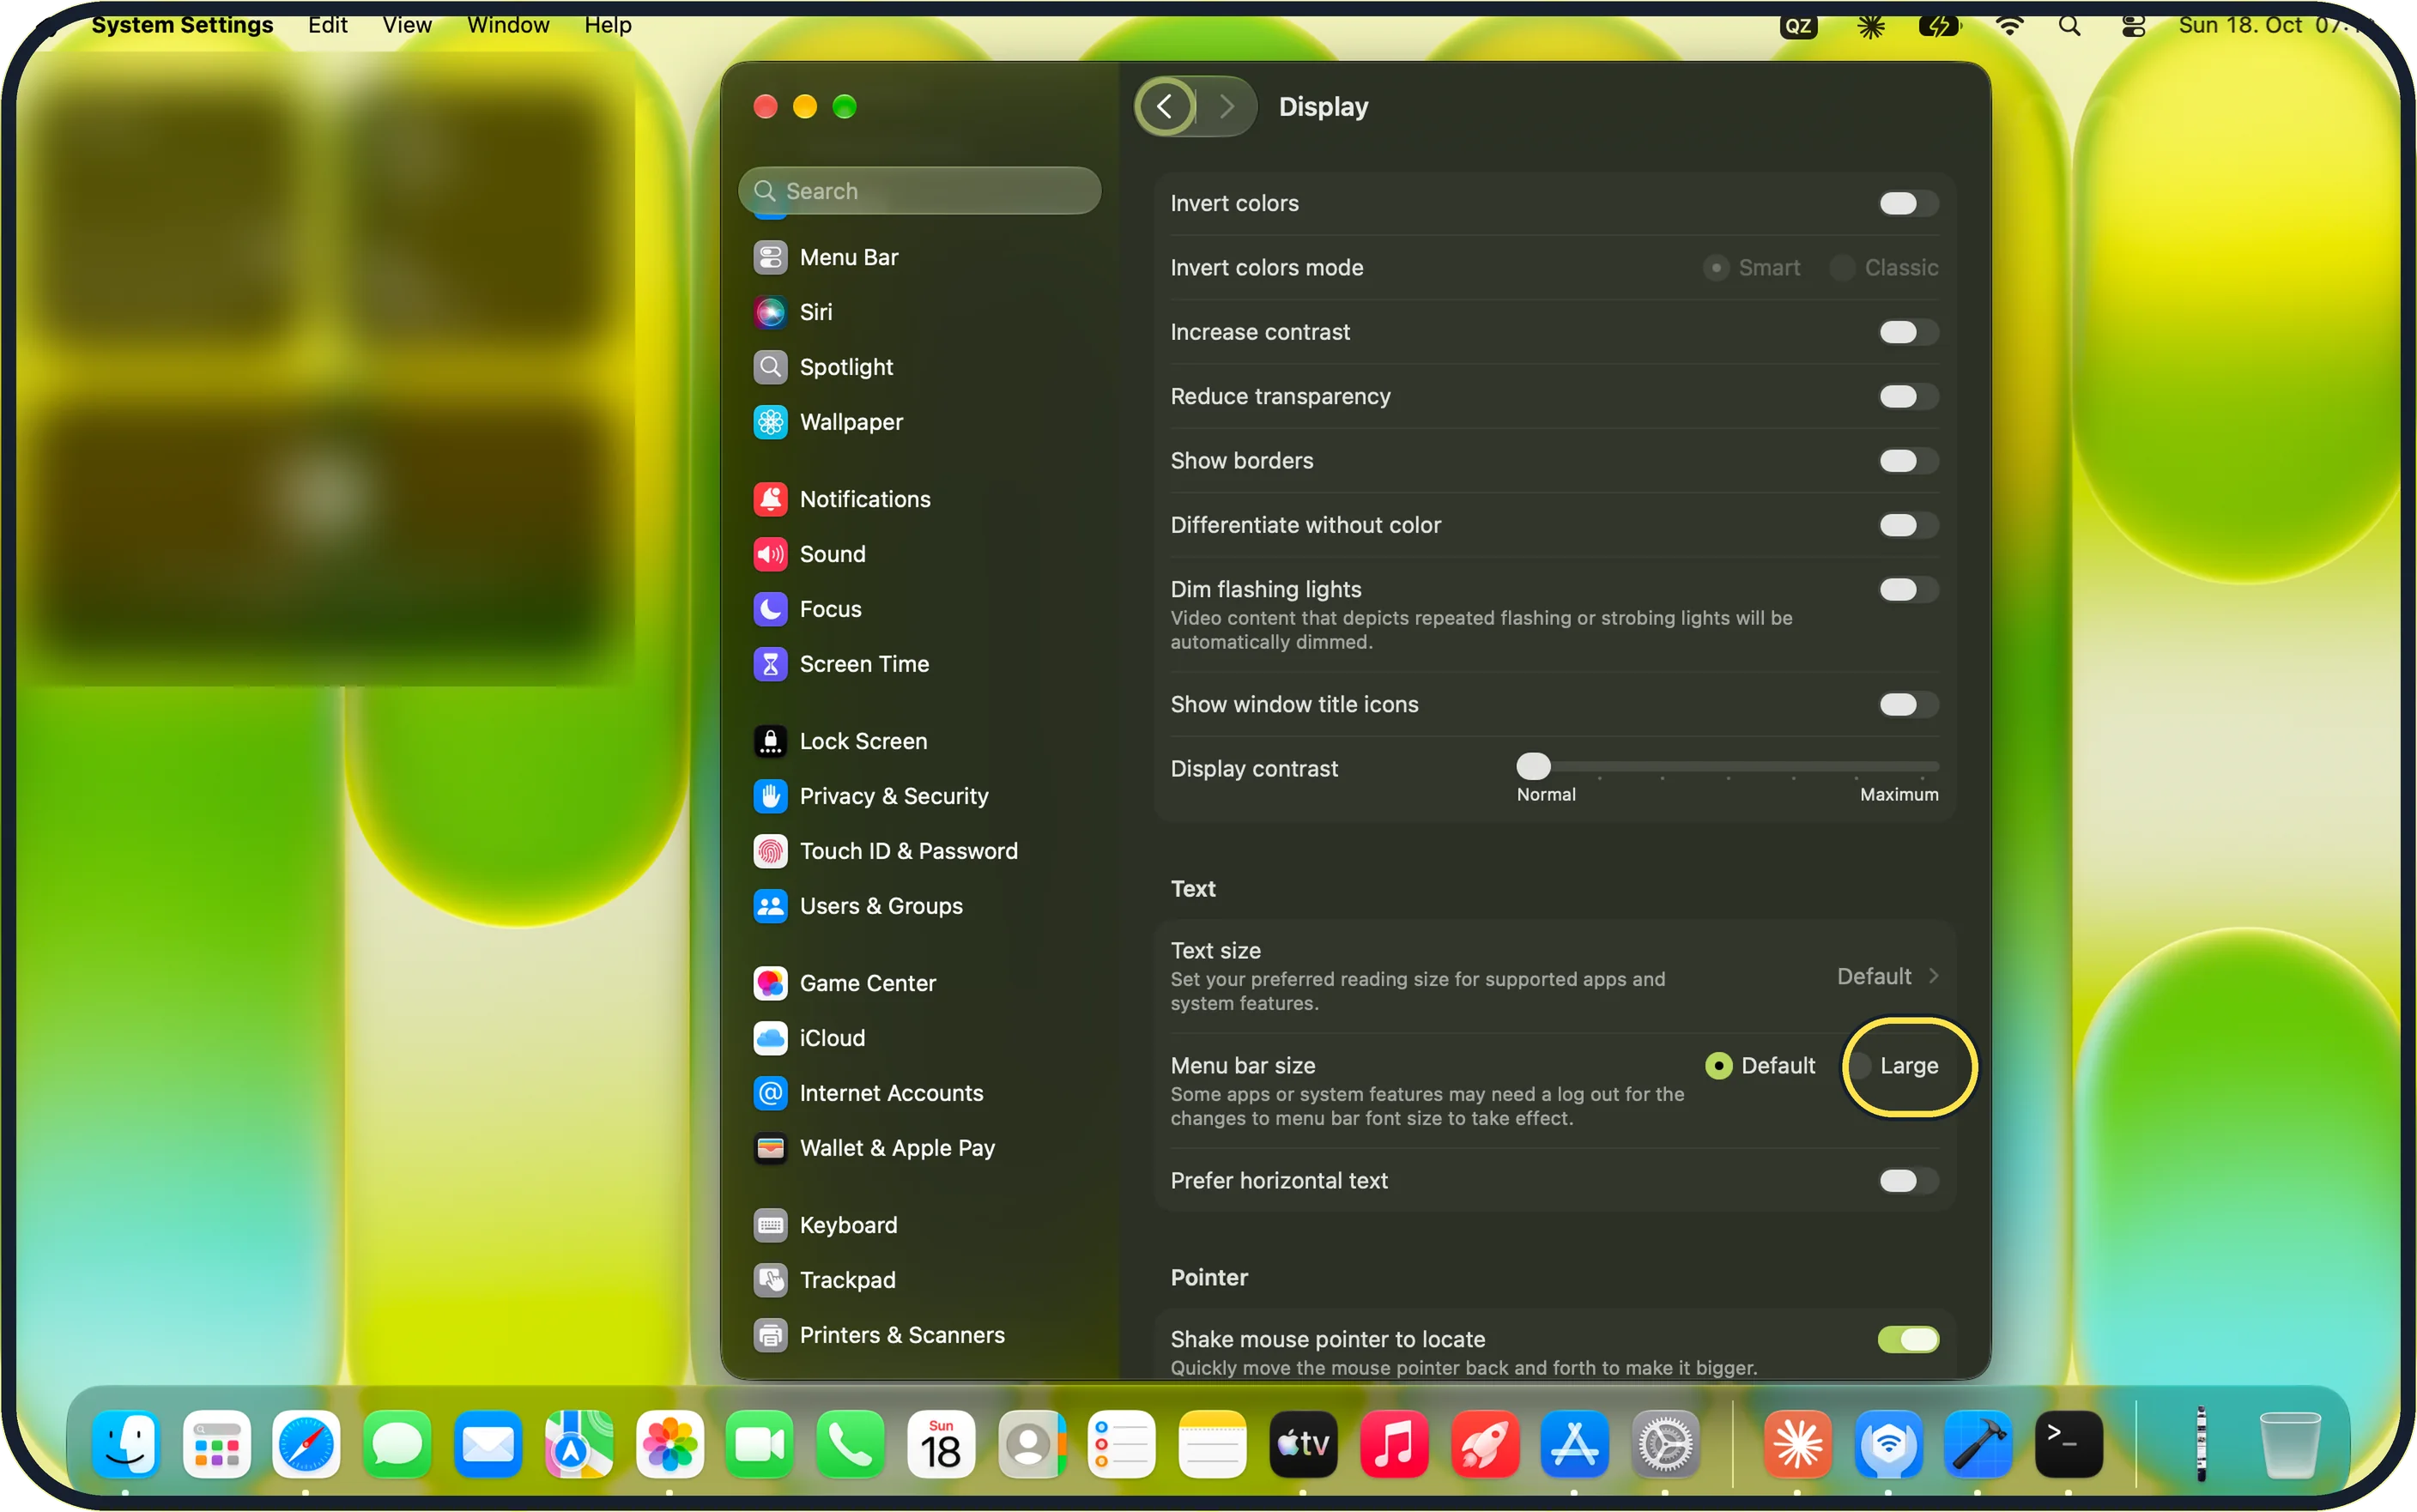
Zoomed in on the setting. Tap to see the whole screenTap the picture to see it full size Select Large next to Menu bar size
Menu bar size is in the Text group. On our MacBook Neo it is two buttons, Default and Large, not a pop-up menu, and Default was selected.
The note under it reads: "Some apps or system features may need a log out for the changes to menu bar font size to take effect."
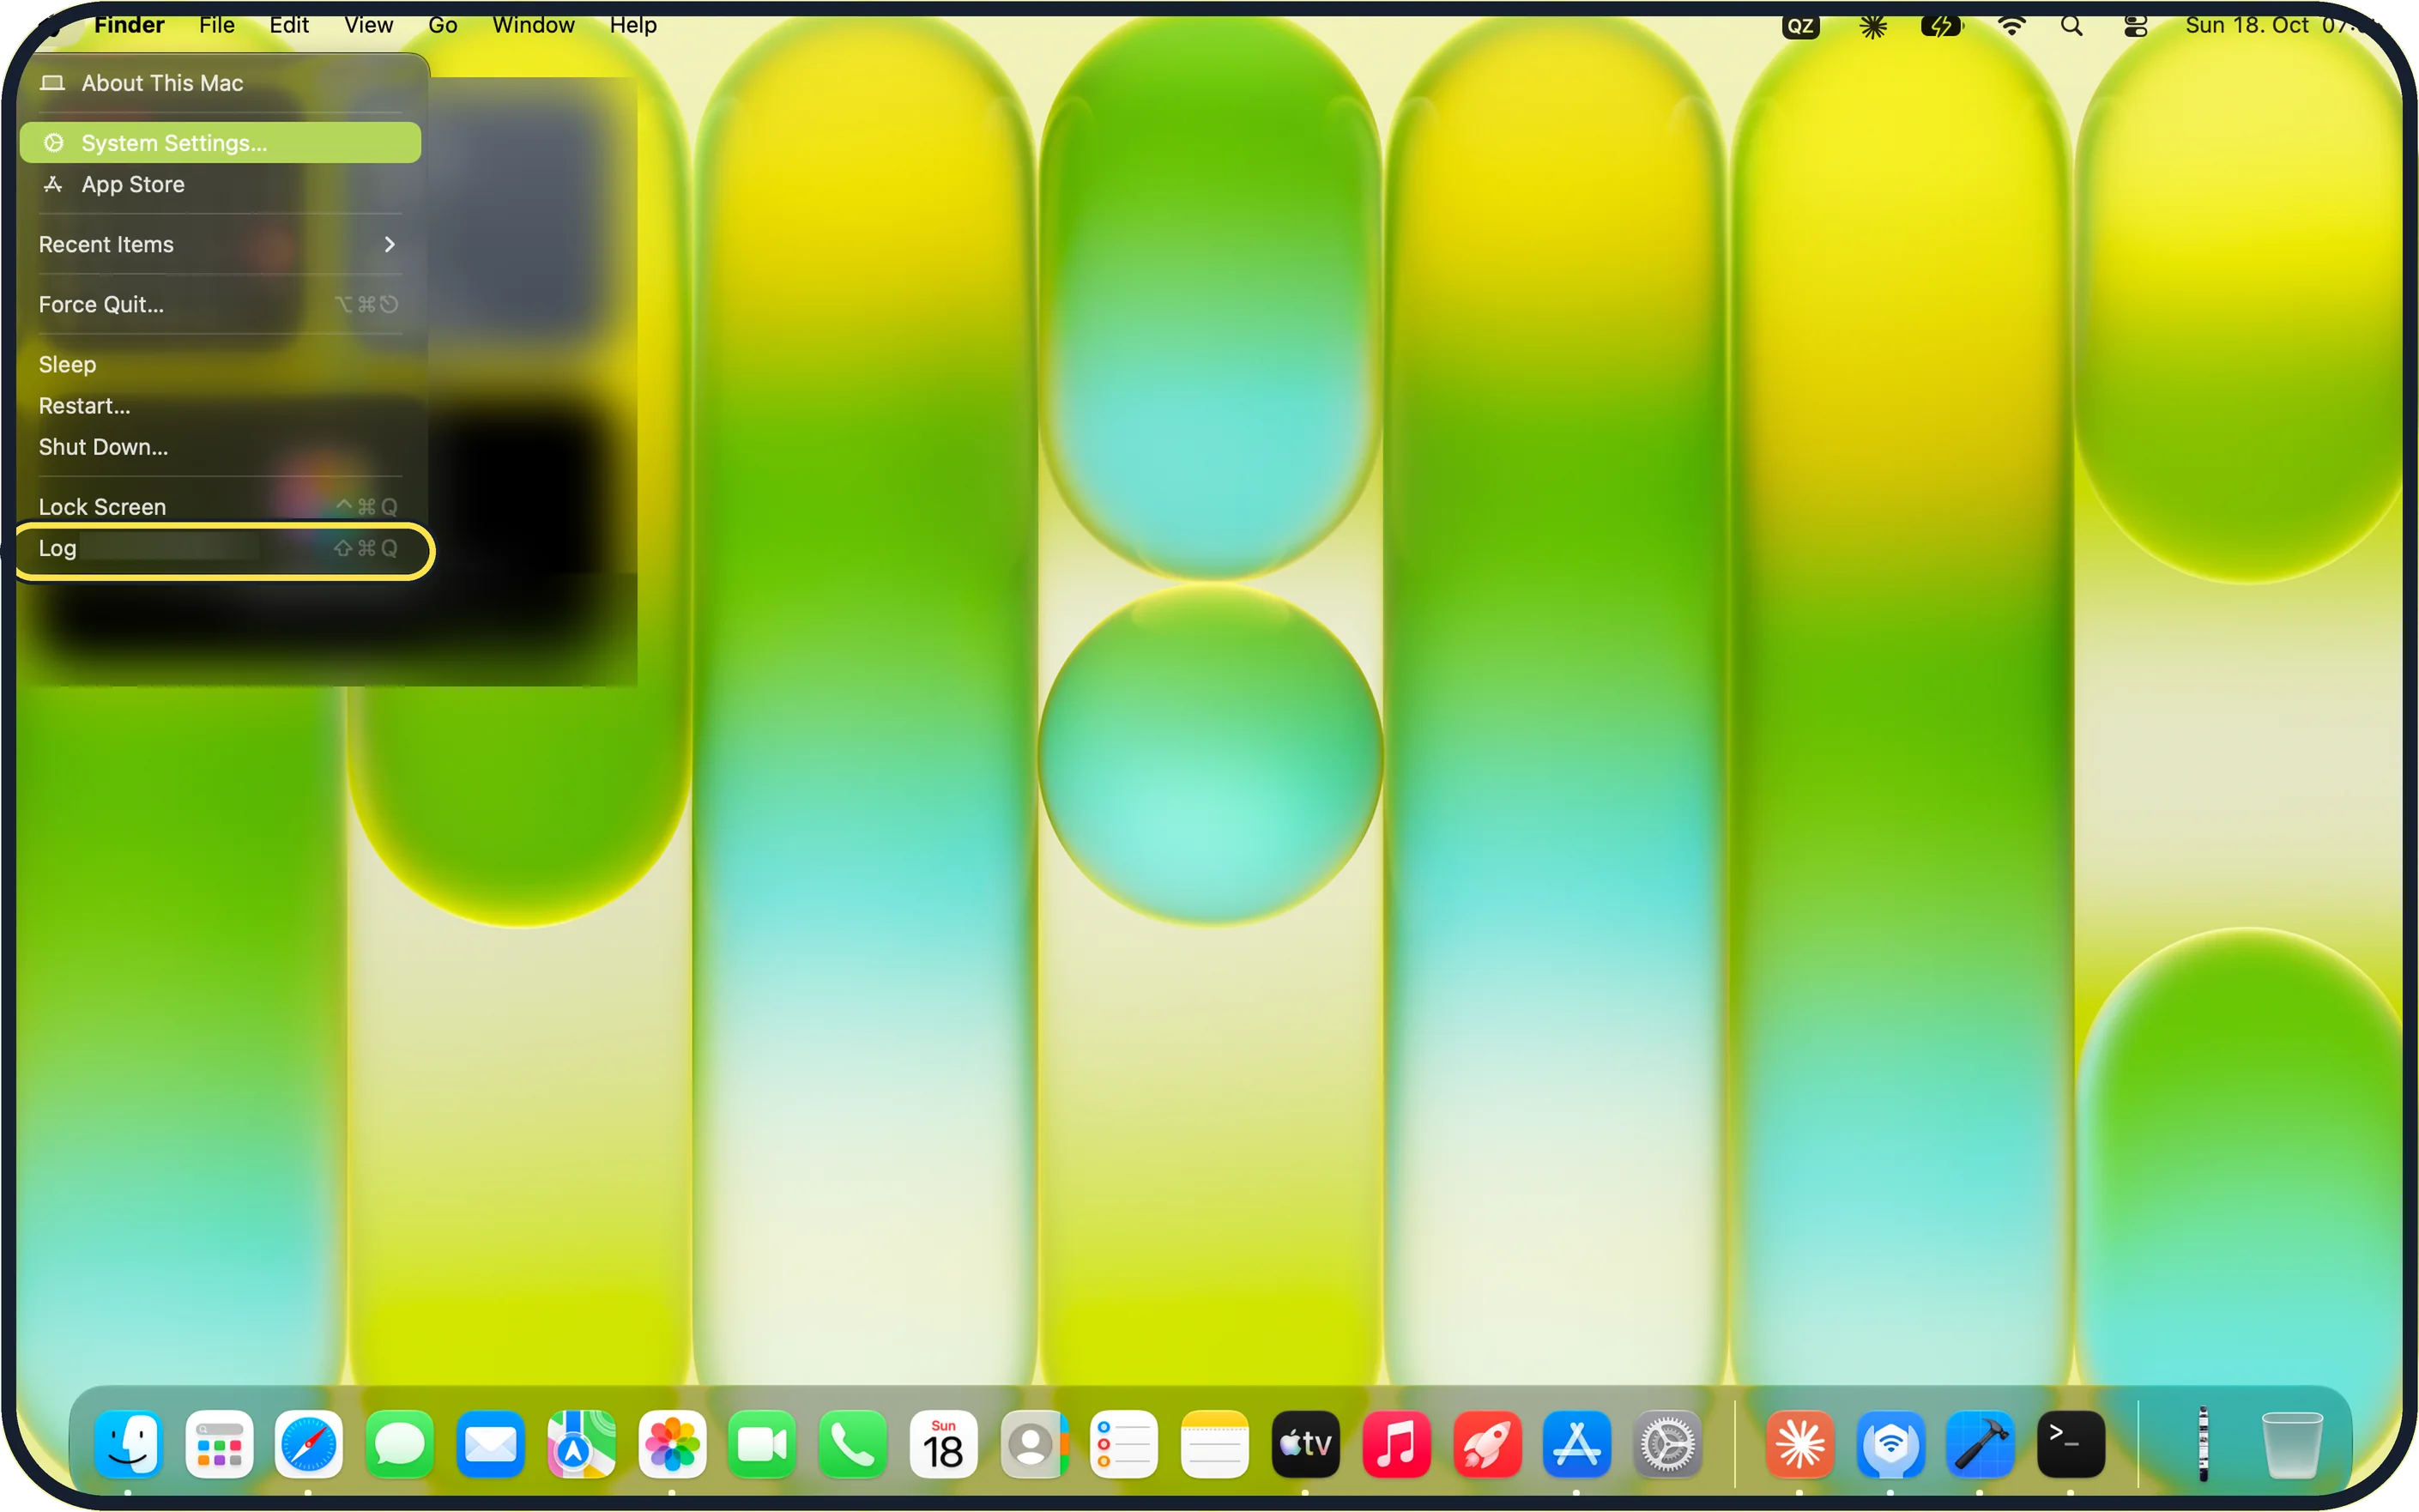
Zoomed in on the setting. Tap to see the whole screenTap the picture to see it full size Log out and log in again
Click the Apple menu and choose Log Out. On our MacBook Neo, the menu item shows Log Out followed by the user's name.
After you log in again, the menu bar uses the larger text.
If you do not see this option
- Accessibility is not in the sidebar The sidebar scrolls. Scroll it down, or type Accessibility in the Search field at the top of the sidebar.
- Display is not on the Accessibility page Look in the Vision group at the top of the Accessibility page. On our MacBook Neo it is the fourth row, after VoiceOver, Zoom and Hover Text.
- You expect a menu for Menu bar size On macOS 27 Menu bar size is two buttons, Default and Large, in the Text group of the Display page. There is no menu to open.
If this does not work
- The menu bar text has not changed The note under Menu bar size says some apps or system features may need a log out. Choose Log Out from the Apple menu, then log in again. Source: Change Display settings for accessibility on Mac
- You want the normal size back Go to Accessibility > Display again, select Default next to Menu bar size, then log out and log in again.
About this guide
The menu bar at the top of the screen has its own text size, separate from the rest of macOS, with two choices: Default and Large.
Screenshots: MacBook Neo, macOS 27.0.1, dark mode.
Good to know
Text size, the row above, sets your preferred reading size for apps and system features that support it.
On our MacBook Neo, the Text size row showed Default, and Prefer horizontal text sits just below Menu bar size.
In short: System Settings > Accessibility > Display > Menu bar size: Large, then log out and log in.
Links checked in October 2026. Menus and features can change after software updates. These steps match the version named at the top.
Did this guide work for you?
Sorry about that. What happened?