
macOS 27 compared with macOS 26: We rewrote this guide on macOS 27.0.1 (MacBook Neo): it now has 3 steps instead of 4. The macOS 26 page keeps the steps and screenshots as they were.
howtosimply.com/guides/how-to-zip-and-unzip-files-on-a-mac/ · Checked October 2026 · MacBook Neo · macOS 27.0.1
In this guide
To zip, select the files in Finder, Control-click one of them and choose Compress. Several items become Archive.zip in the same folder. To unzip, double-click the .zip file: the contents appear next to it.
3 of 3 steps with real screenshots · 2 official sources below
- Device
- Mac
- Shown on
- macOS 27.0.1 (MacBook Neo)
- App
- Finder
- Real screenshots
- 3 of 3 steps
- Checked
- October 2026
- Sources
- 2 official, linked below
Step by step
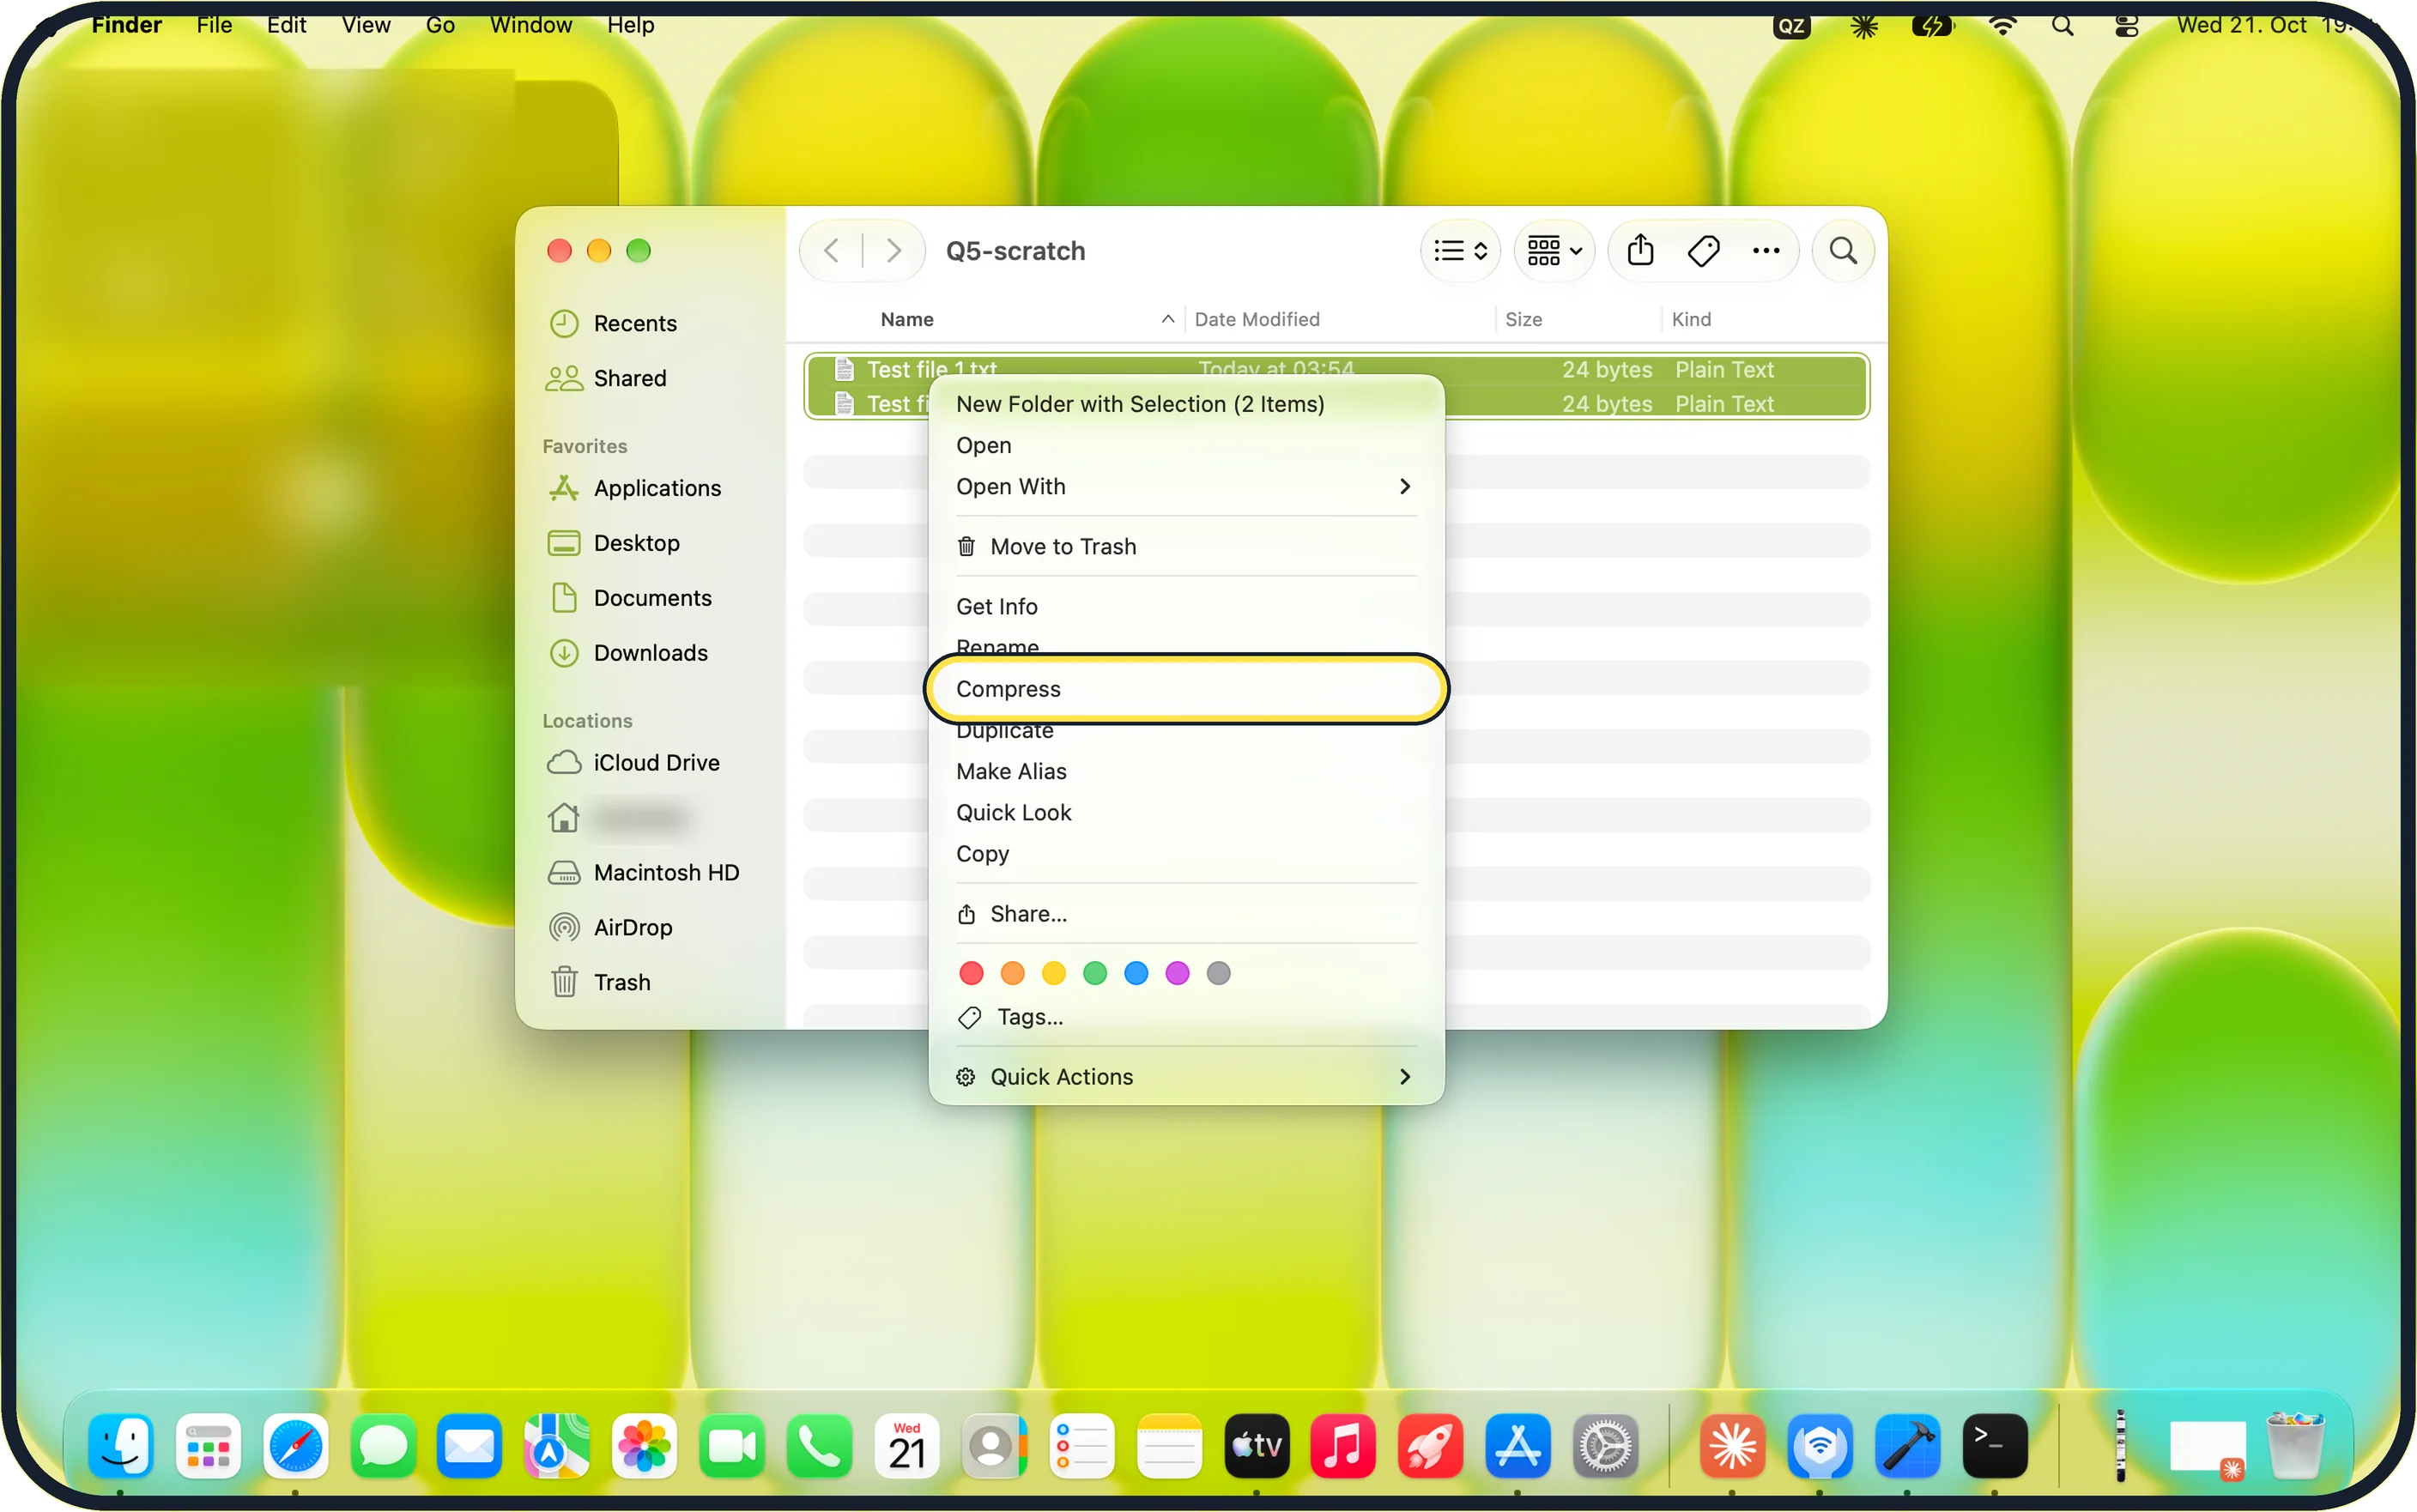
Zoomed in on the setting. Tap to see the whole screenTap the picture to see it full size Select the files and choose Compress
Click one item, or hold Command and click several. Then Control-click (or right-click) one of them and choose Compress.
On our MacBook Neo, with two text files selected, the menu said just Compress. The top line, New Folder with Selection (2 Items), showed that both were selected.
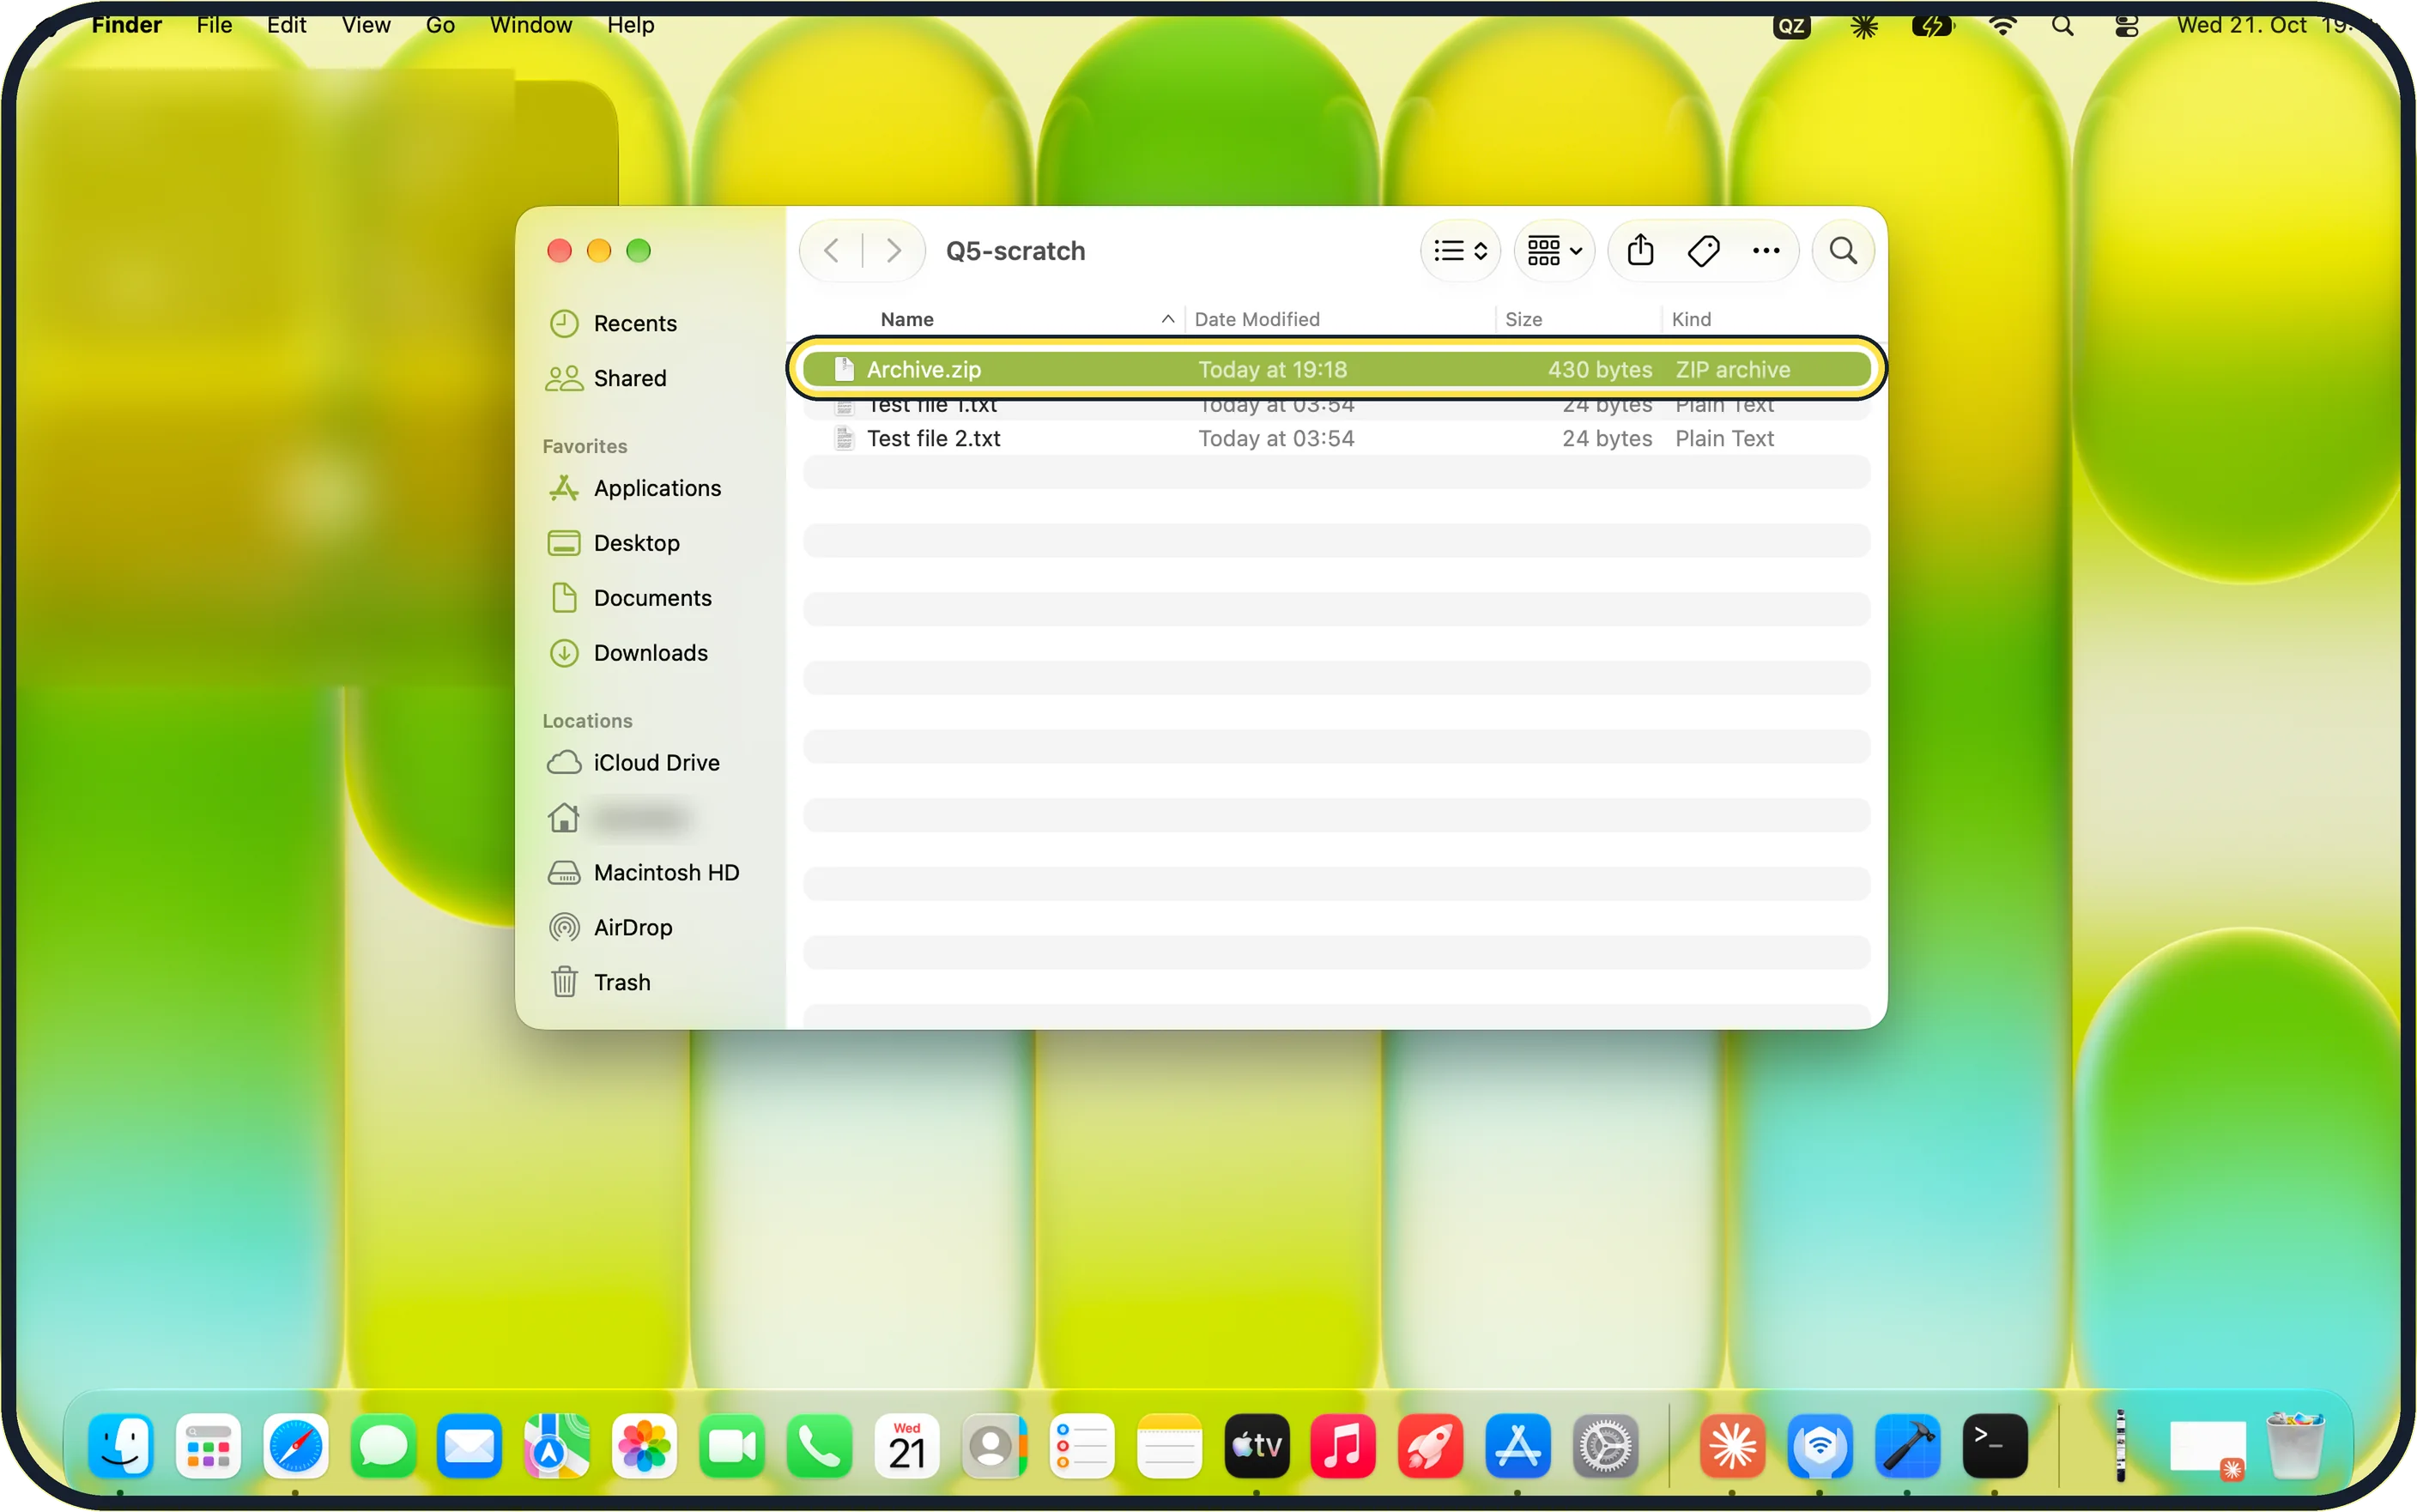
Zoomed in on the setting. Tap to see the whole screenTap the picture to see it full size Find the zip file
Several items become a file called Archive.zip; one item becomes a zip with its own name. It appears in the same folder, and the originals stay where they are.
Ours was Archive.zip, 430 bytes, Kind ZIP archive, listed above Test file 1.txt and Test file 2.txt.
To rename it, click it once, press Return, type the new name and press Return again.
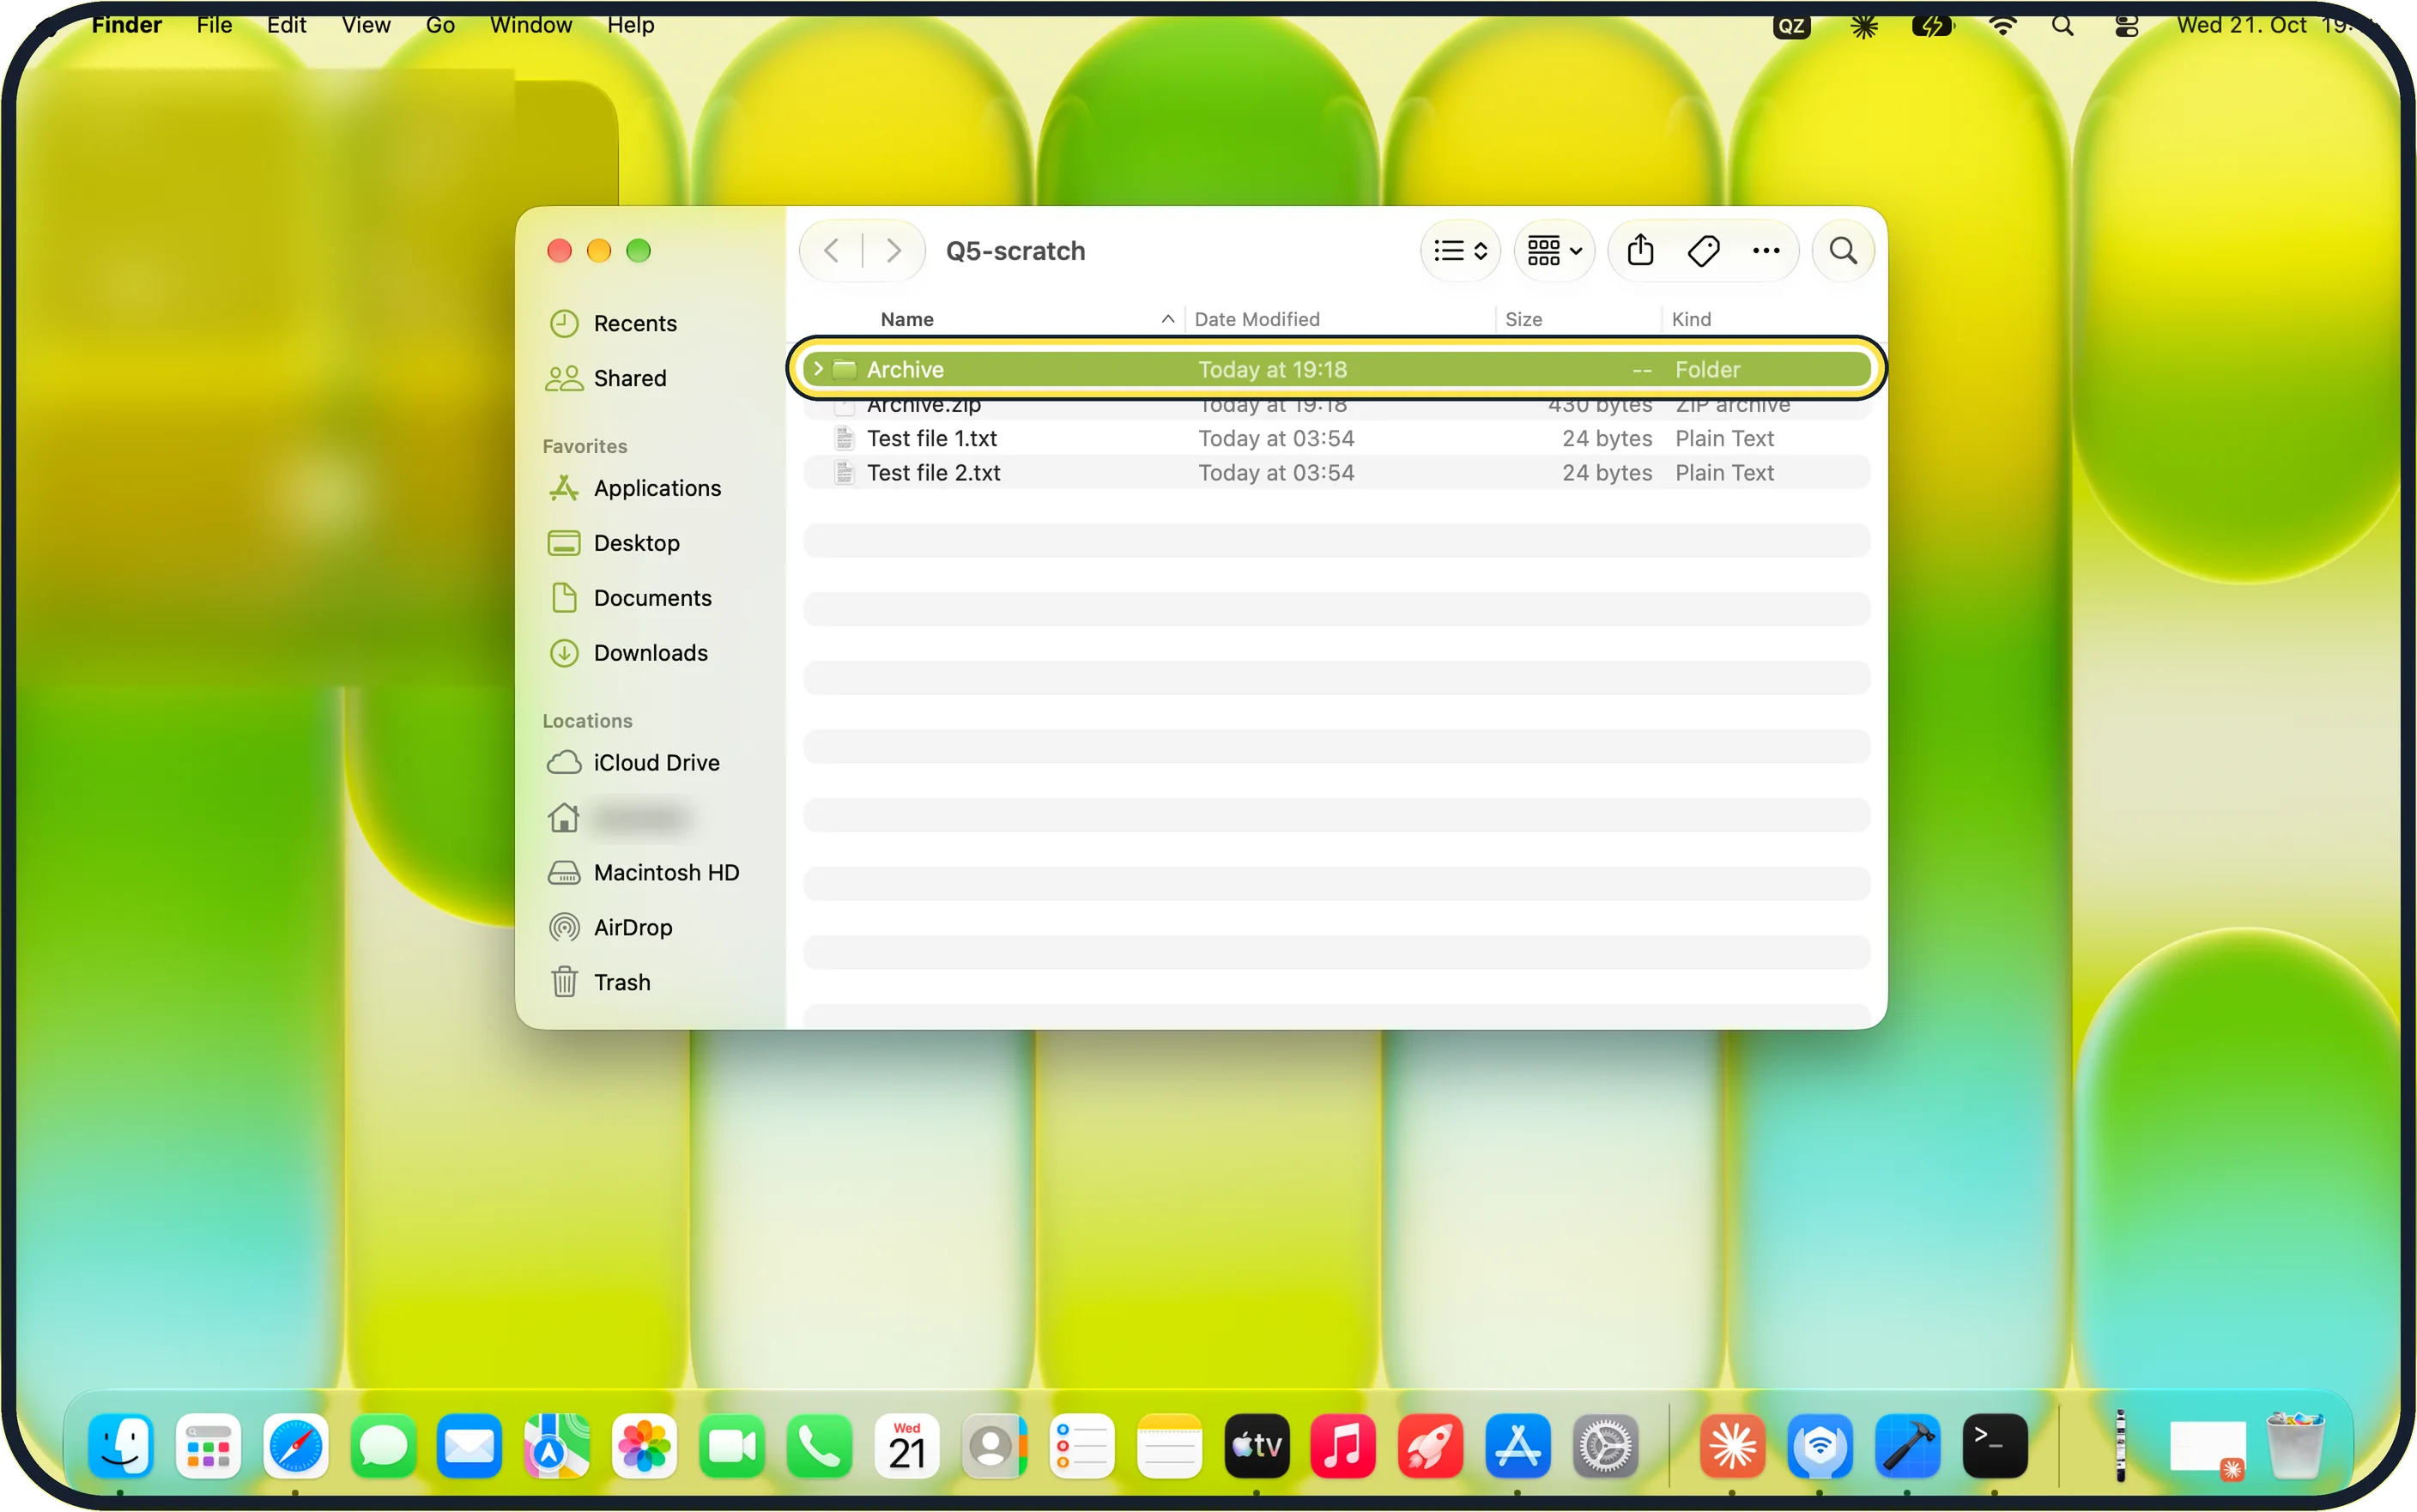
Zoomed in on the setting. Tap to see the whole screenTap the picture to see it full size Unzip by double-clicking
Double-click the .zip file. The contents are unpacked into the same folder. The zip itself stays, and you can delete it afterwards.
On our MacBook Neo, Archive.zip unpacked to a folder named Archive, next to the zip.
What we saw on our device
- Select the files and choose Compress: On our MacBook Neo, with two text files selected, the menu said just Compress.
- Find the zip file: Ours was Archive.zip, 430 bytes, Kind ZIP archive, listed above Test file 1.txt and Test file 2.txt.
- Unzip by double-clicking: On our MacBook Neo, Archive.zip unpacked to a folder named Archive, next to the zip.
If you do not see this option
- The menu says Compress, not Compress 2 Items That is how macOS 27 labels it on our MacBook Neo. Check the line New Folder with Selection at the top of the same menu: it counts the selected items.
- Several files unpack into a folder called Archive That is expected when the zip was made from several items: Apple says the file is then called Archive.zip, and ours unpacked to a folder with the same name. Source: Zip and unzip files and folders on Mac
- Compress is missing or the zip is not made Apple says the permissions on the item may be wrong. Select it, choose File > Get Info, open Sharing & Permissions and set your user name to Read & Write or Read only. If you cannot change them, ask an administrator of the Mac or the owner of the item. Source: If you can't compress a file or folder on Mac
If this does not work
- The zip file will not open Apple says to check that the Mac has enough free space for the unzipped items. Source: Zip and unzip files and folders on Mac
- A zip someone sent you will not open Apple says the file may be damaged. Ask the sender to zip it again and send it once more. Source: Zip and unzip files and folders on Mac
About this guide
A zip file packs several files into one and usually makes them smaller, which helps with email attachments, uploads and backups. macOS handles zip files itself.
Screenshots: MacBook Neo, macOS 27.0.1, light mode.
Good to know
Photos and videos hardly shrink when zipped, because they are already compressed.
For .rar and .7z files, which macOS does not open, a free app such as The Unarchiver from the App Store works.
To protect a zip with a password, macOS needs the Terminal command zip -e. For sensitive documents, many people find it easier to share through a service with password-protected links.
Peek inside files without opening them: How to use Quick Look on a Mac.
Tidy many files first: how to rename several files at once on a Mac.
In short: Select > Control-click > Compress > Archive.zip > double-click to unzip
- Apple Support: Zip and unzip files and folders on Mac
- Apple Support: If you can't compress a file or folder on Mac
Links checked in October 2026. Menus and features can change after software updates. These steps match the version named at the top.
Did this guide work for you?
Sorry about that. What happened?