
macOS 27 compared with macOS 26: We rewrote steps 1, 2, 3 and 4 to match the macOS 27 screens. The macOS 26 page keeps the steps and screenshots as they were.
howtosimply.com/guides/how-to-rename-your-mac/ · Checked October 2026 · MacBook Neo · macOS 27.0.1
In this guide
Open System Settings, click General, then About. Click Name, enter your password and click Modify Settings, then type the new name and press Return.
4 of 4 steps with real screenshots · 1 official source below
- Device
- Mac
- Shown on
- macOS 27.0.1 (MacBook Neo)
- App
- System Settings
- Path
- System Settings › General › About › Name
- Real screenshots
- 4 of 4 steps
- Checked
- October 2026
- Sources
- 1 official, linked below
Step by step
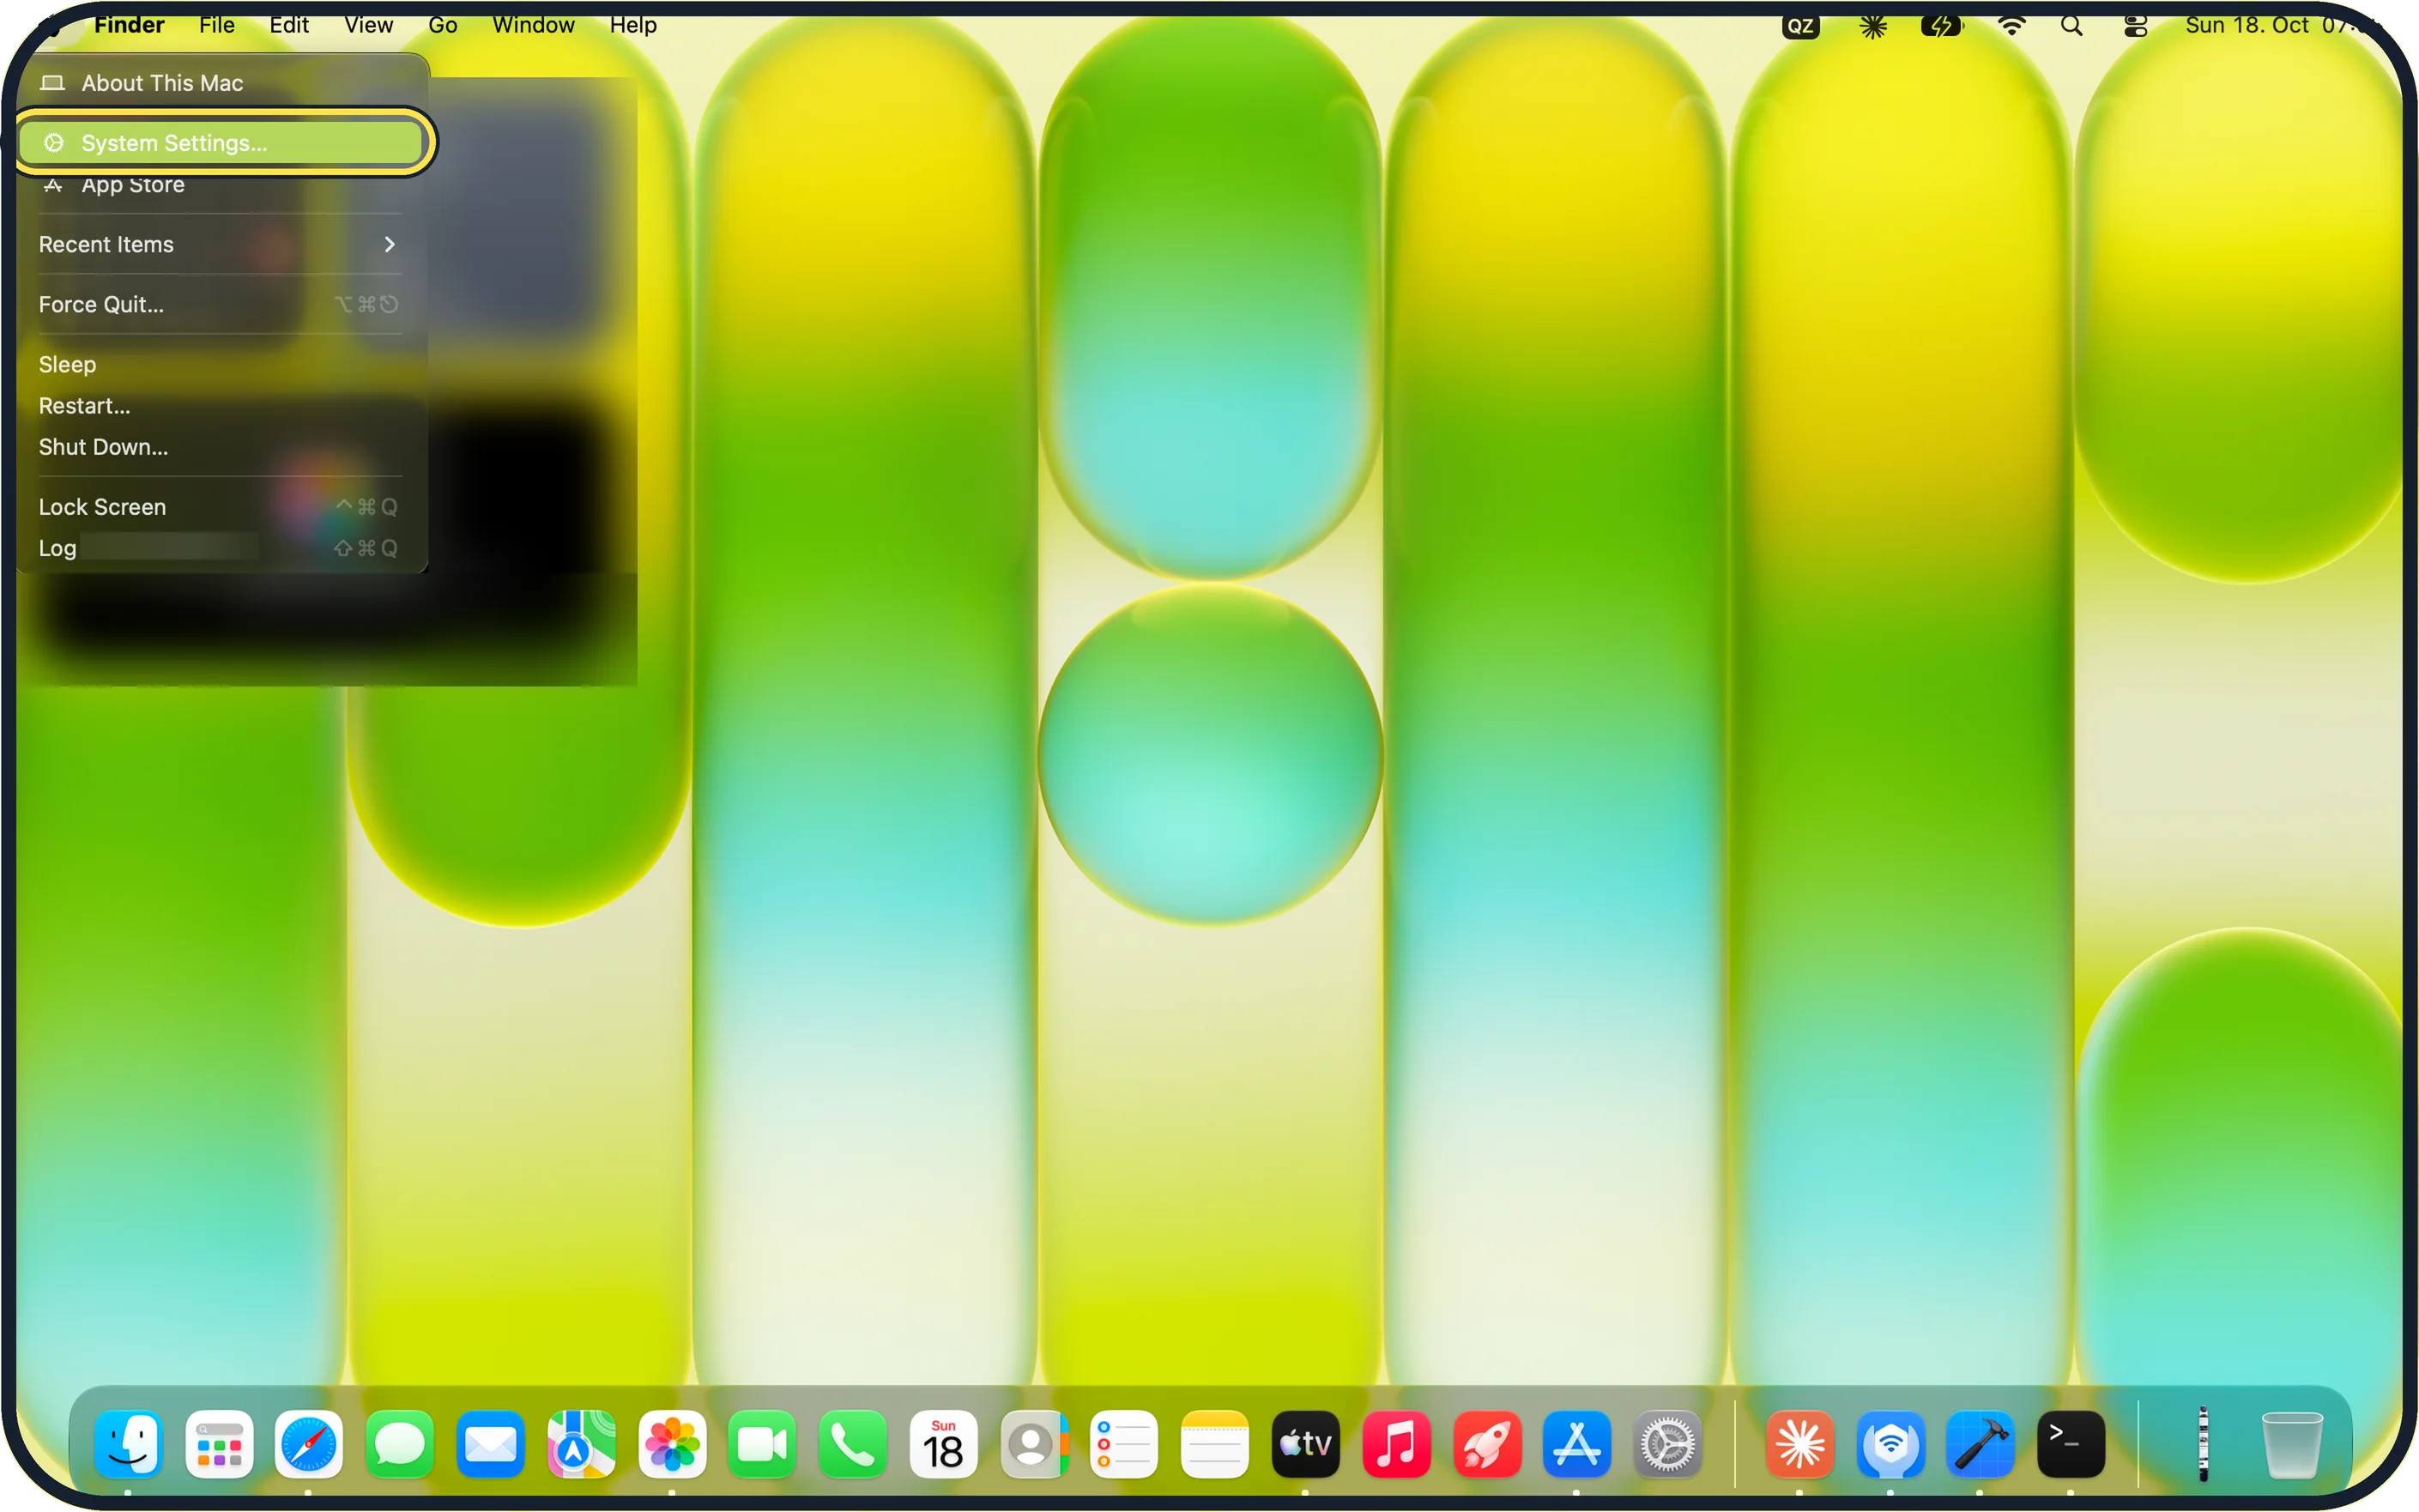
Zoomed in on the setting. Tap to see the whole screenTap the picture to see it full size Open System Settings
Click the Apple menu in the top left corner and choose System Settings.
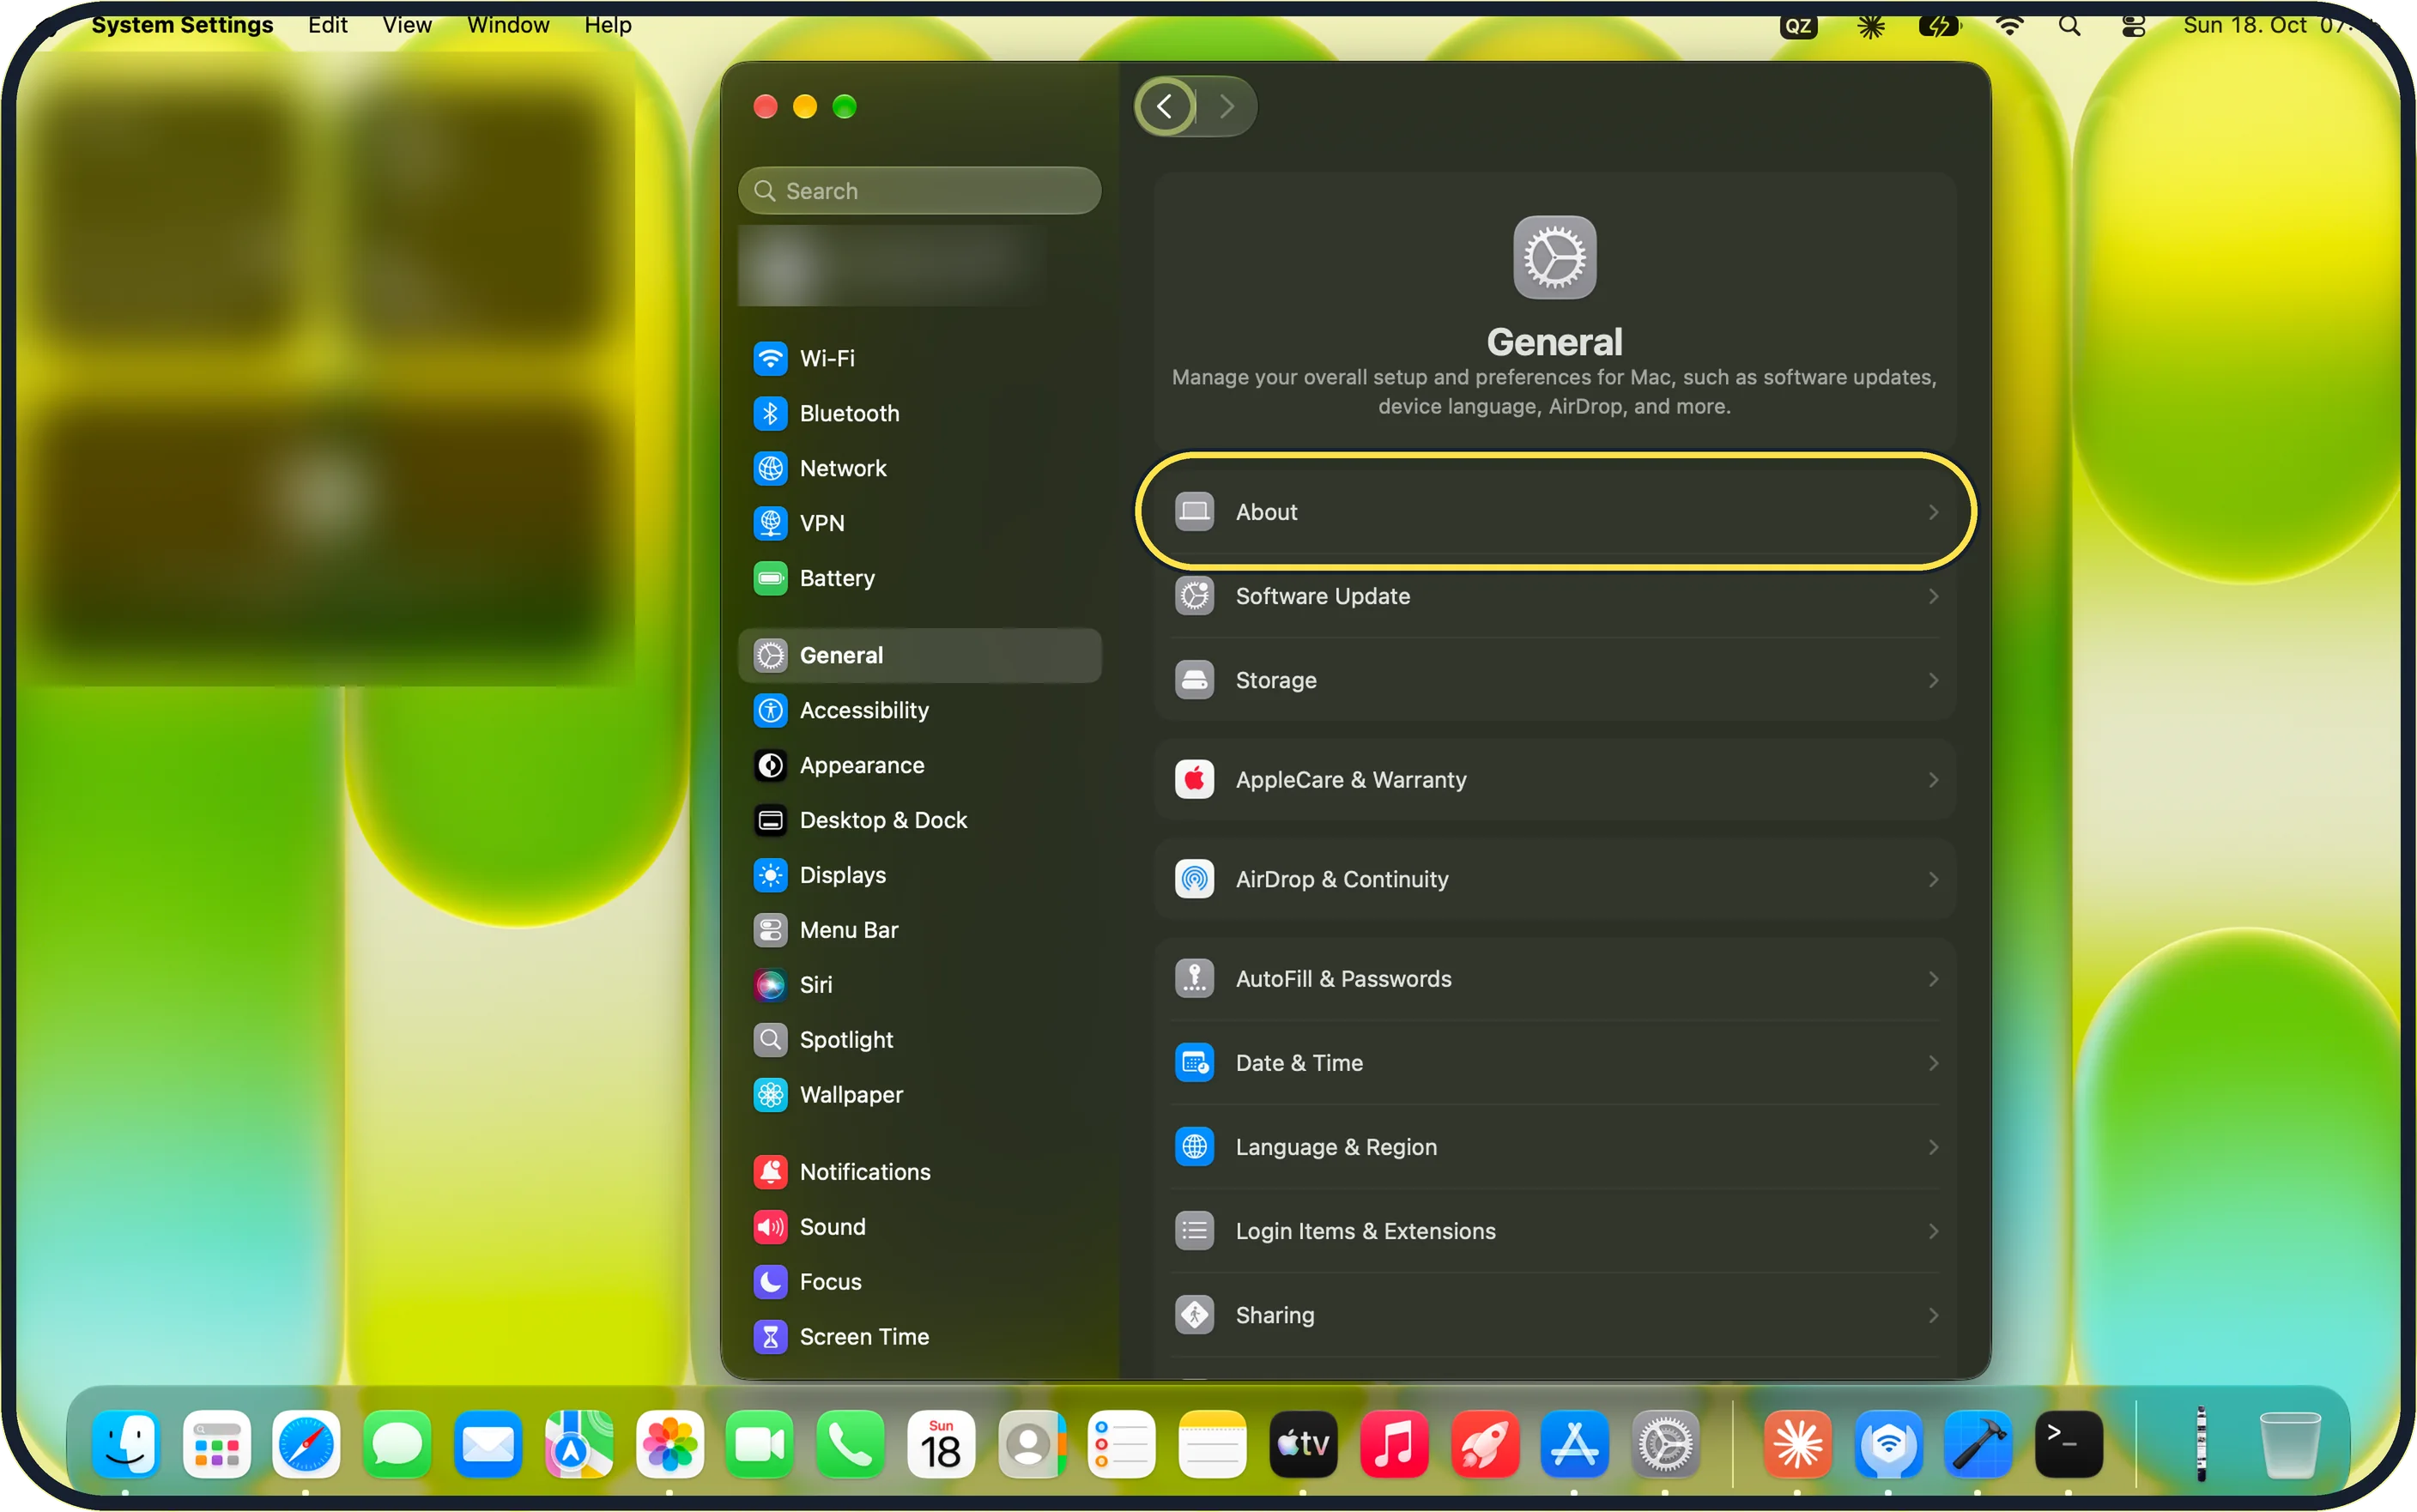
Zoomed in on the setting. Tap to see the whole screenTap the picture to see it full size Click General, then About
Click General in the sidebar. About is the first row on the General page.
On our MacBook Neo, About sits above Software Update and Storage.
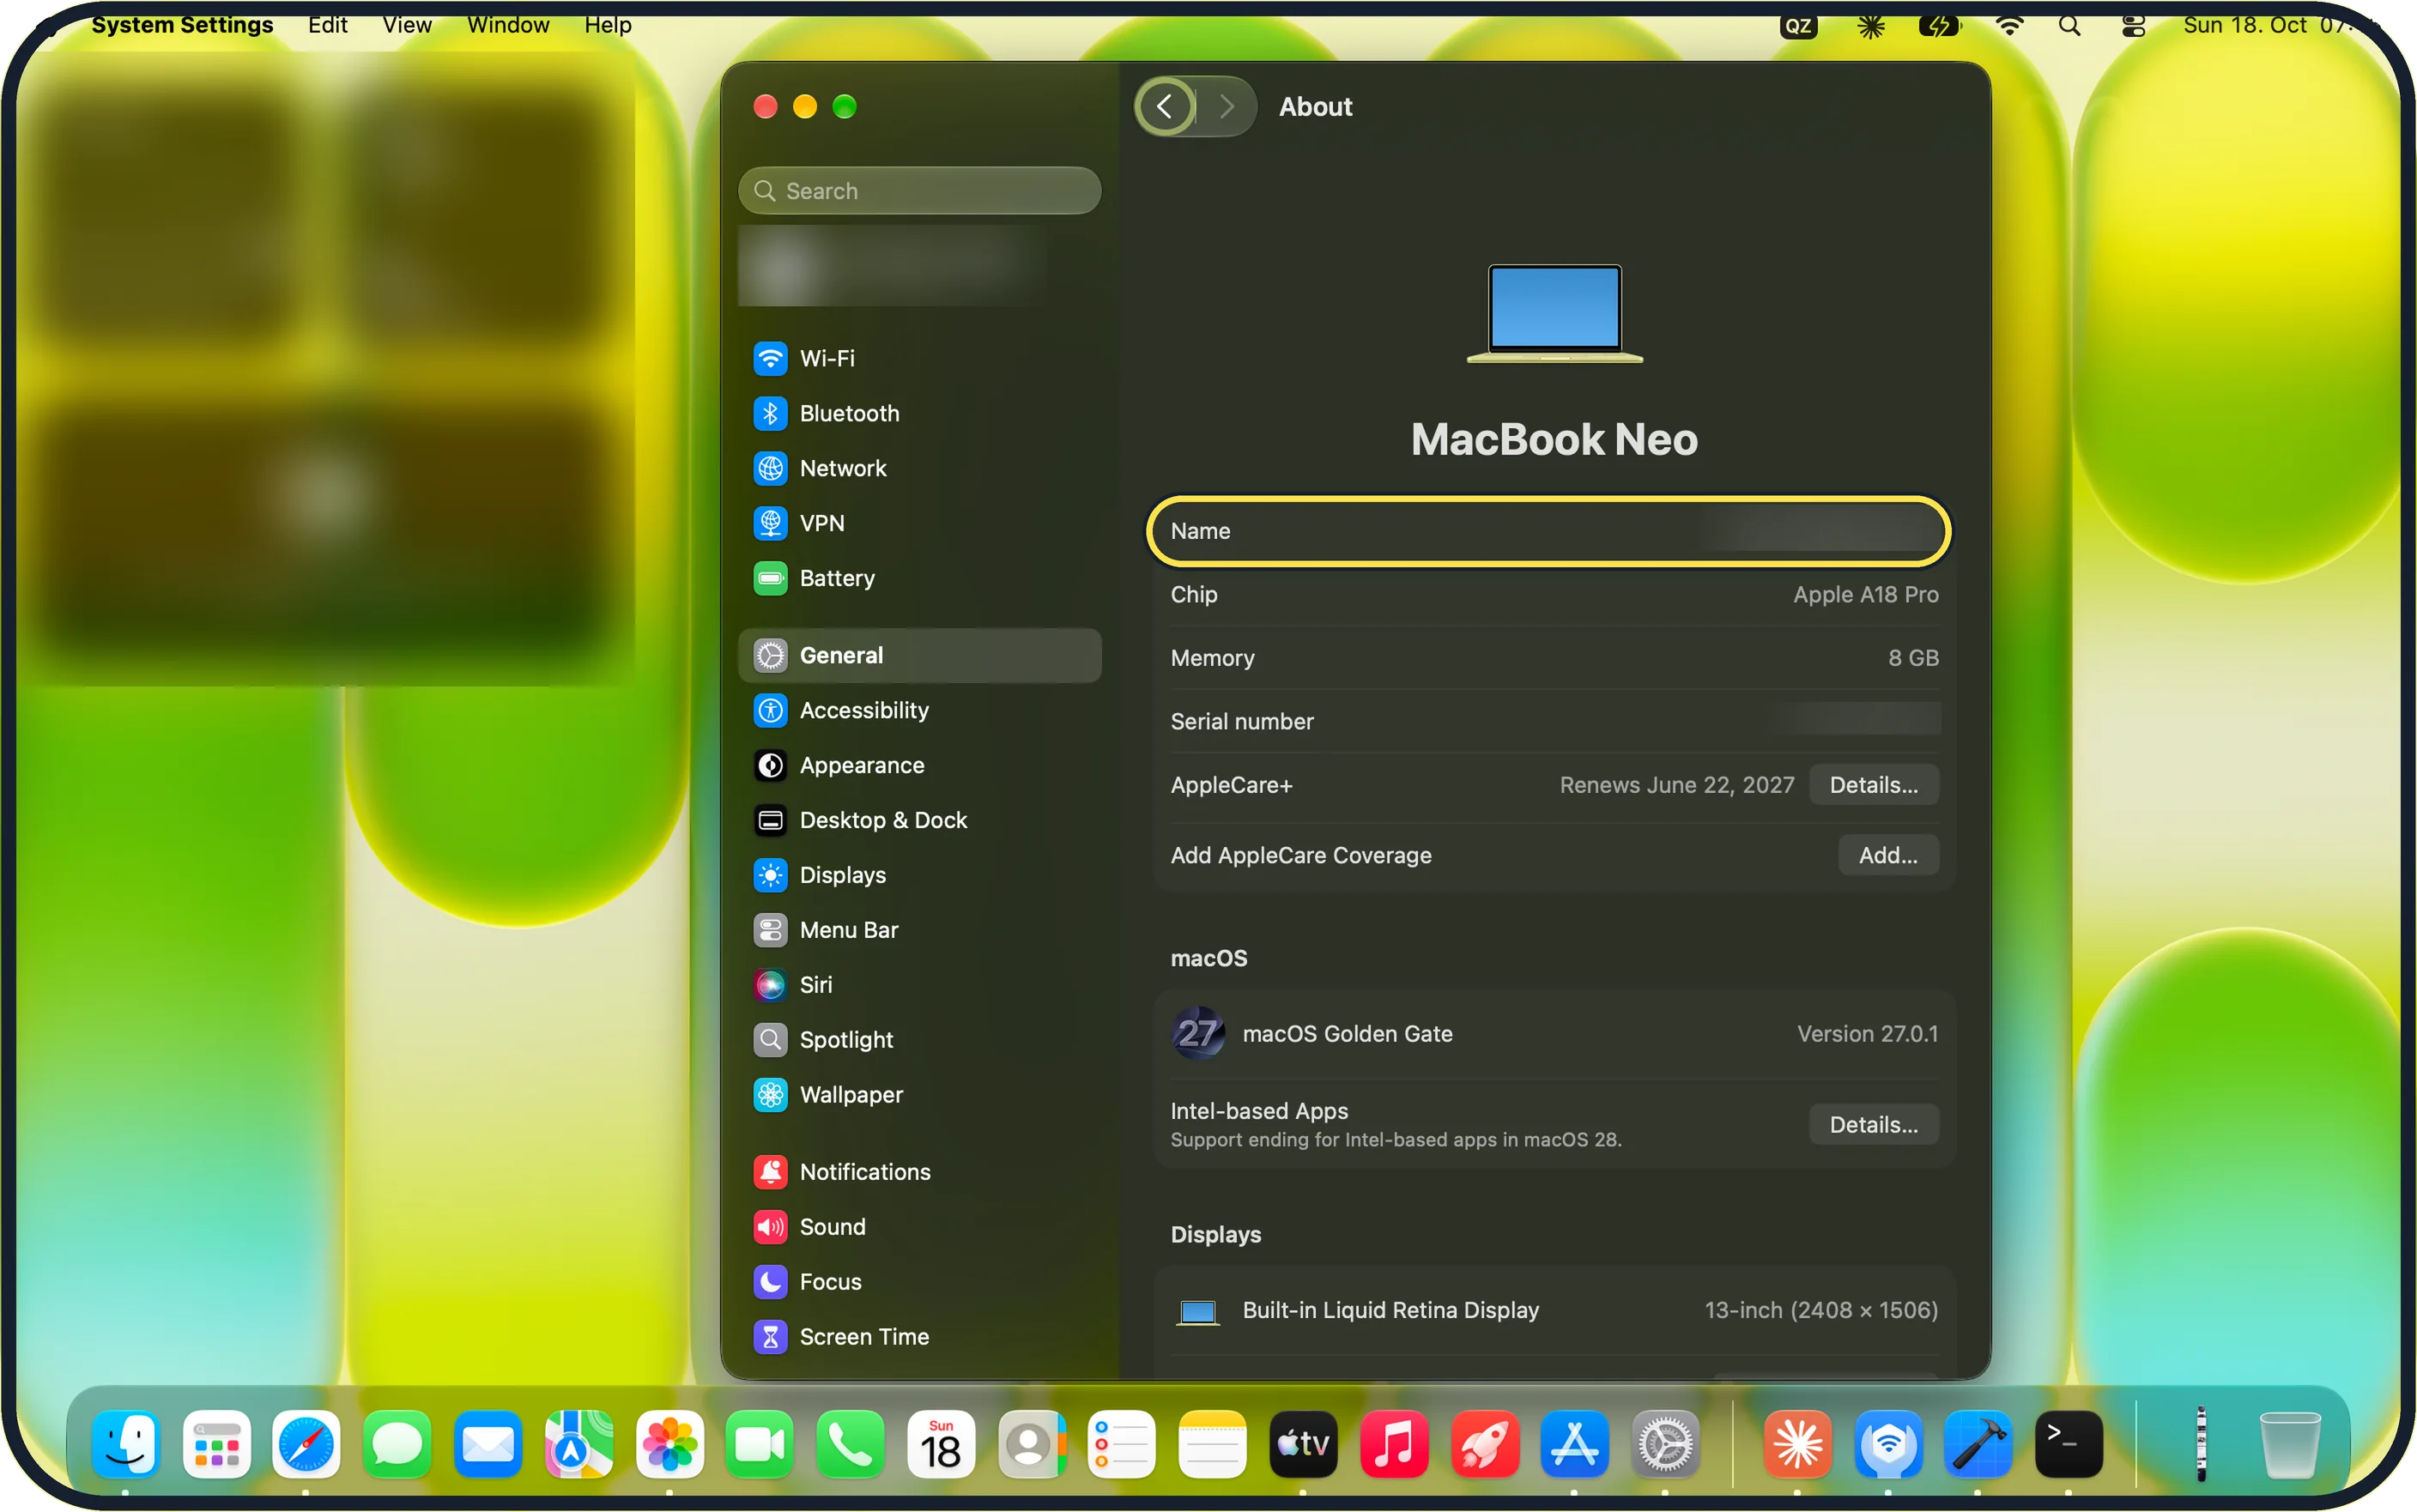
Zoomed in on the setting. Tap to see the whole screenTap the picture to see it full size Click Name
Name is the first row under the Mac's picture.
On our MacBook Neo, the About page shows MacBook Neo at the top, then Name, Chip Apple A18 Pro and Memory 8 GB.
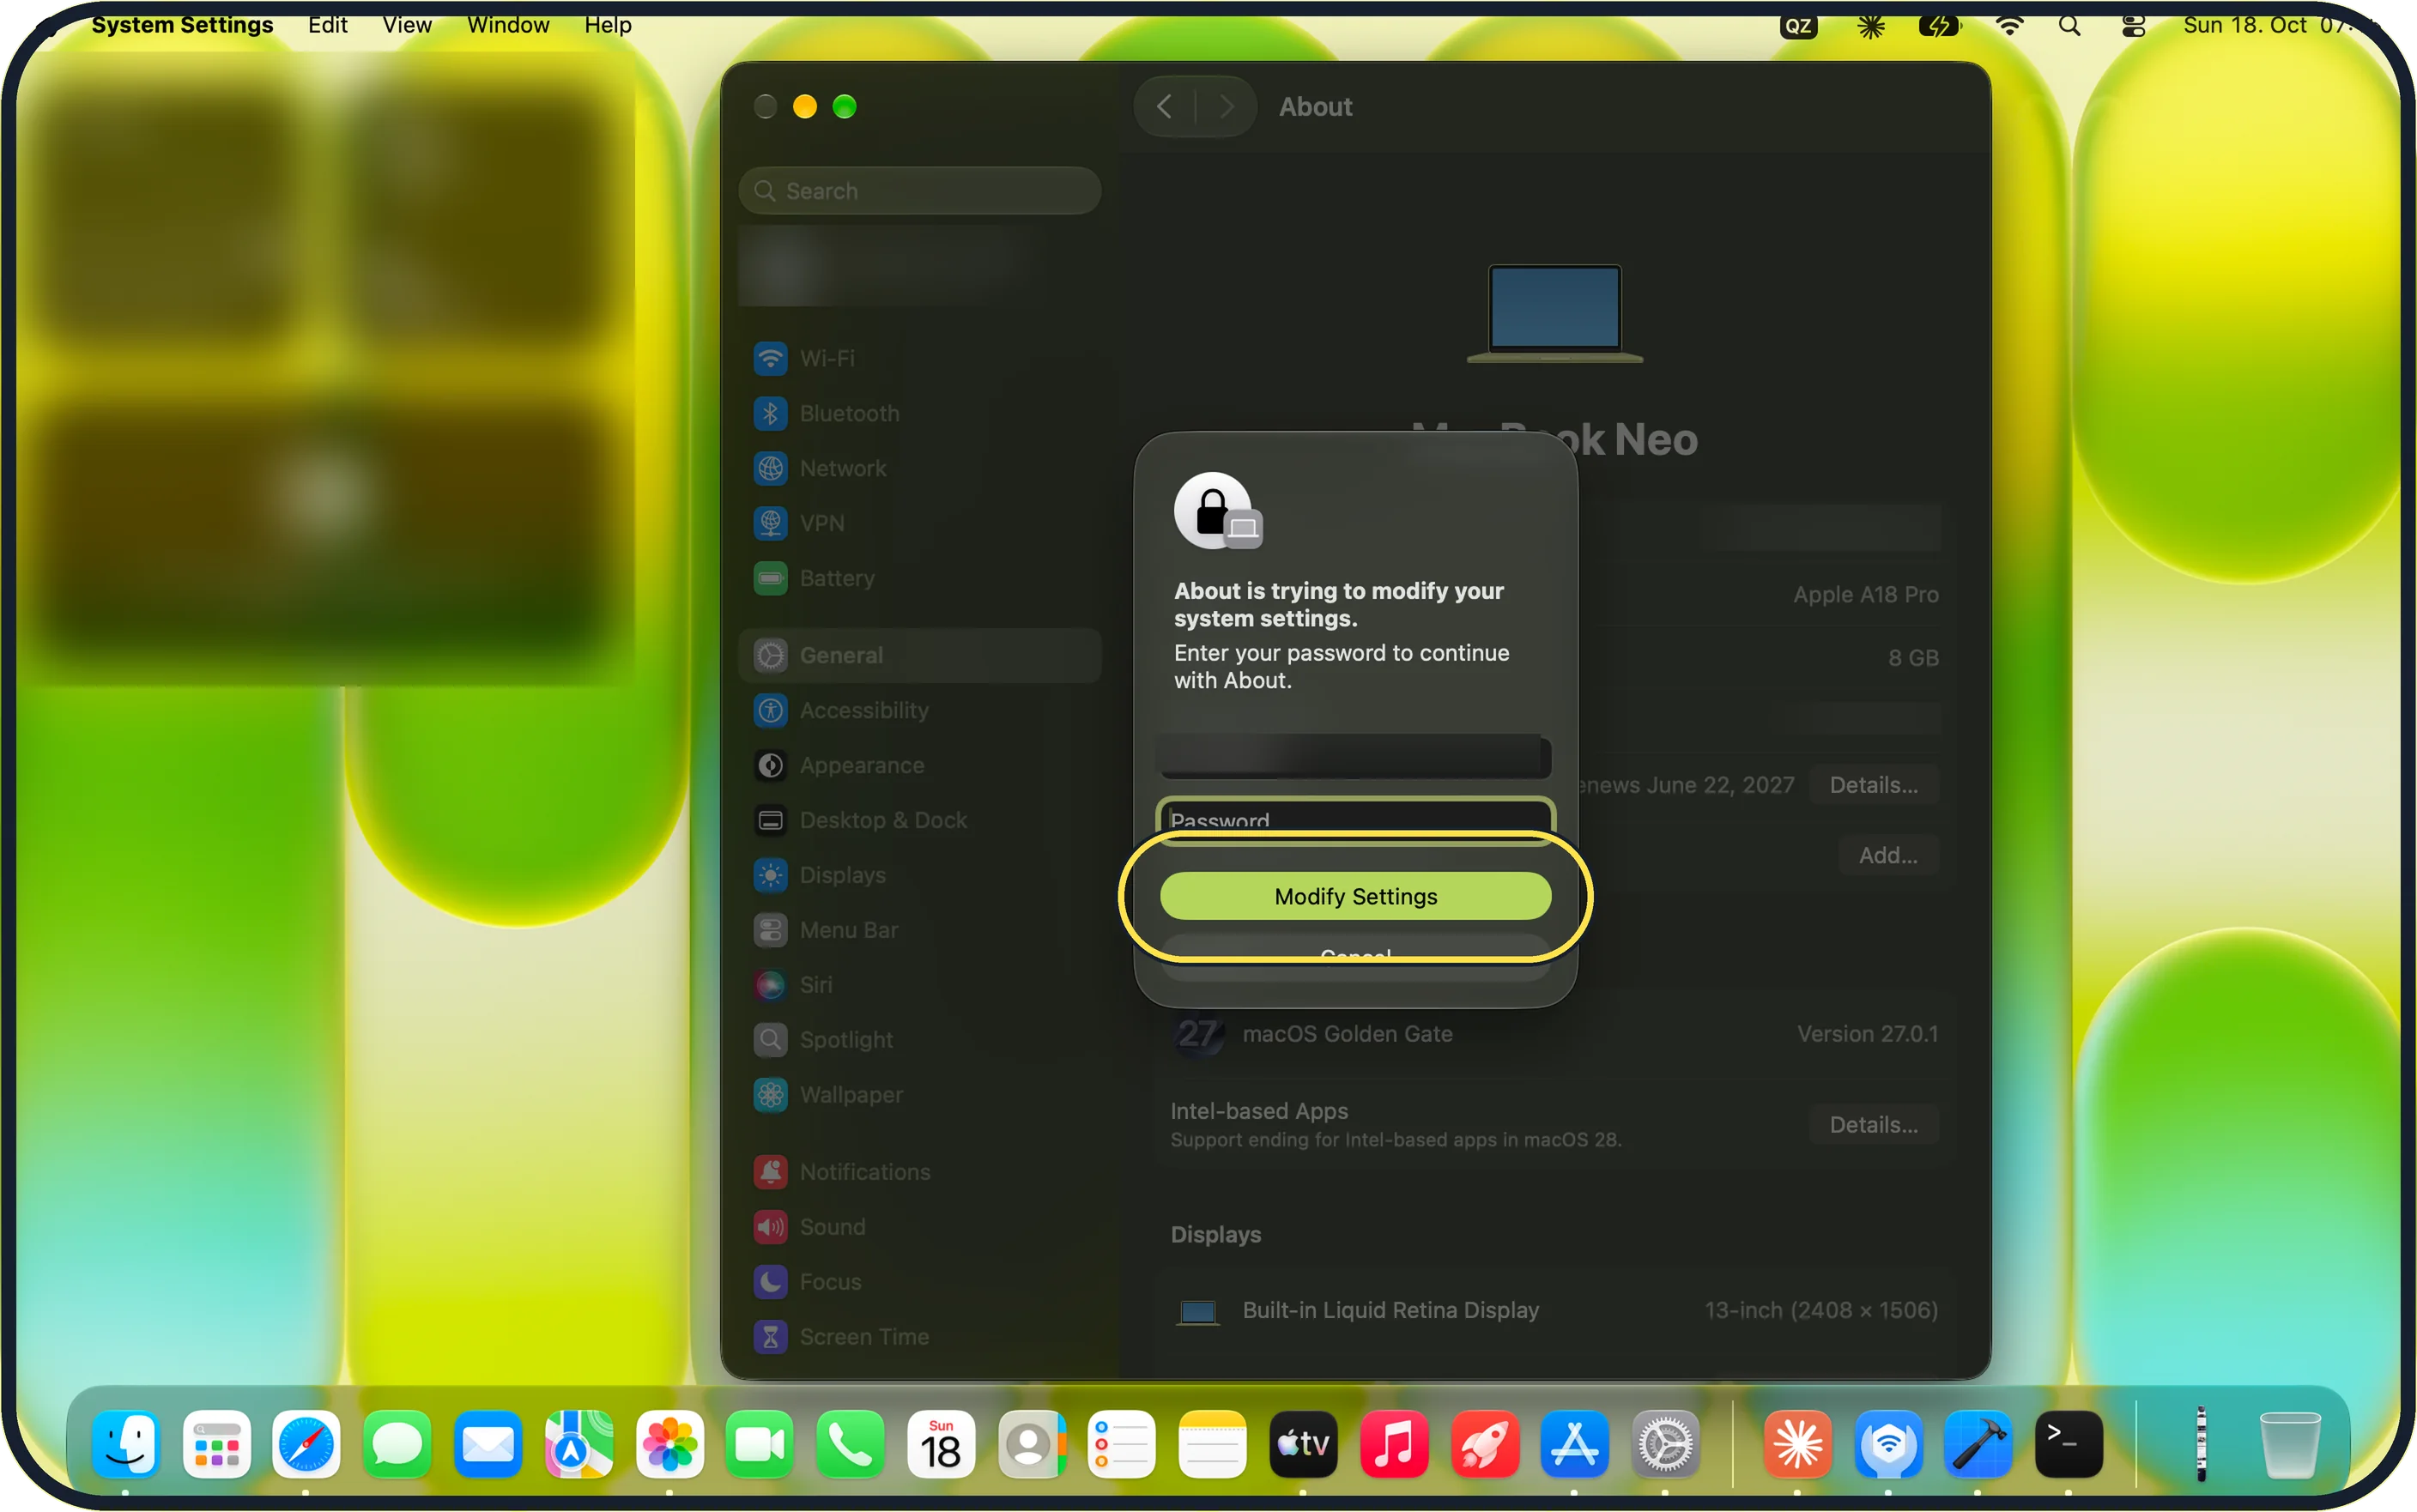
Zoomed in on the setting. Tap to see the whole screenTap the picture to see it full size Enter your password, click Modify Settings and type the new name
On our MacBook Neo, clicking Name did not make it editable straight away. macOS first showed "About is trying to modify your system settings." and asked for the password.
Type your password and click Modify Settings.
Apple says to select the current name, type the new one and press Return or click somewhere else to keep it.
If you do not see this option
- About is not where you expect On our MacBook Neo, About is the first row on the General page, not in the sidebar. You can also type About in the Search field at the top of the sidebar.
- The name cannot be edited On our MacBook Neo, the Name row stays locked until you enter your password in the prompt and click Modify Settings.
If this does not work
- The name did not change If you click Cancel in the password prompt, the name stays as it was. Click Name again and enter your password this time.
- The password is not accepted The prompt asks for the password of an administrator account on this Mac. Use your Mac login password, not your Apple Account password. Source: Change your computer's name or local hostname on Mac
- The local hostname still shows the old name Apple says you can change it separately: open System Settings, General, Sharing, and click Edit in the Local hostname section. Source: Change your computer's name or local hostname on Mac
About this guide
A Mac is usually named after its first user, and that name is what other devices see on the network and in AirDrop, so change it if you bought the Mac second-hand or do not want your name shown.
Screenshots: MacBook Neo, macOS 27.0.1, dark mode.
Good to know
Apple calls this the computer name. It identifies the Mac on your local network.
There is a second name, the local hostname. It is the computer name with .local added, and with hyphens in place of spaces: My Computer becomes My-Computer.local. Other devices use it to find shared services on the Mac.
To change the local hostname yourself, open System Settings, General, Sharing, and click Edit in the Local hostname section at the bottom.
Renaming the Mac does not change your user account name or your home folder.
A new name is a good moment to check the login password too: How to change your password on a Mac.
Selling or giving the Mac away instead? How to factory reset a Mac.
In short: System Settings, General, About, Name, password, Modify Settings, type a new name.
Links checked in October 2026. Menus and features can change after software updates. These steps match the version named at the top.
Did this guide work for you?
Sorry about that. What happened?