
What changed: new screenshots from our own iPhone 17e on iOS 27.0.1, dark mode, and the wording checked against those screens.
howtosimply.com/guides/how-to-customise-control-centre-on-an-iphone/ · Checked October 2026 · iPhone 17e · iOS 27.0.1
In this guide
Swipe down from the top right corner, touch and hold an empty area, then drag controls to move them, drag their curved corner handle to resize them, tap the minus to remove them, or tap Add a Control to add new ones. This needs iOS 18 or later.
7 of 7 steps with real screenshots · 2 official sources below
- Device
- iPhone
- Shown on
- iOS 27.0.1 (iPhone 17e)
- Starts in
- Control Centre
- Real screenshots
- 7 of 7 steps
- Checked
- October 2026
- Sources
- 2 official, linked below
Step by step
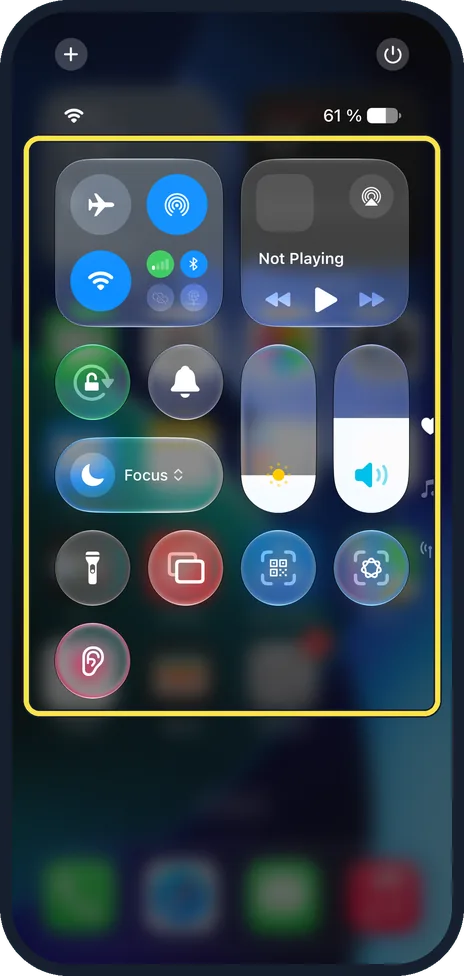
Open Control Centre
Swipe down from the top right corner. On an iPhone with a Home button, swipe up from the bottom edge.
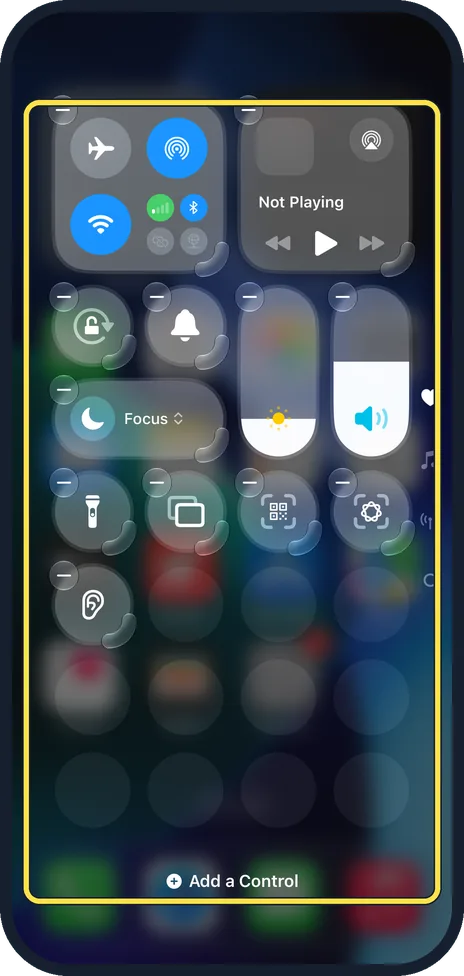
Enter edit mode
Touch and hold an empty area, or tap the plus in the top left corner.
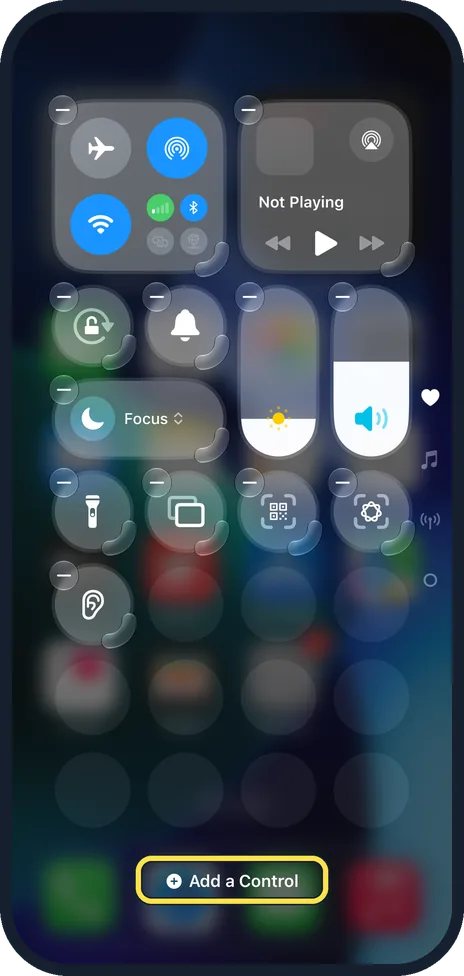
Each control gets a minus at its top left and a curved handle at its bottom right, and Add a Control appears at the bottom.
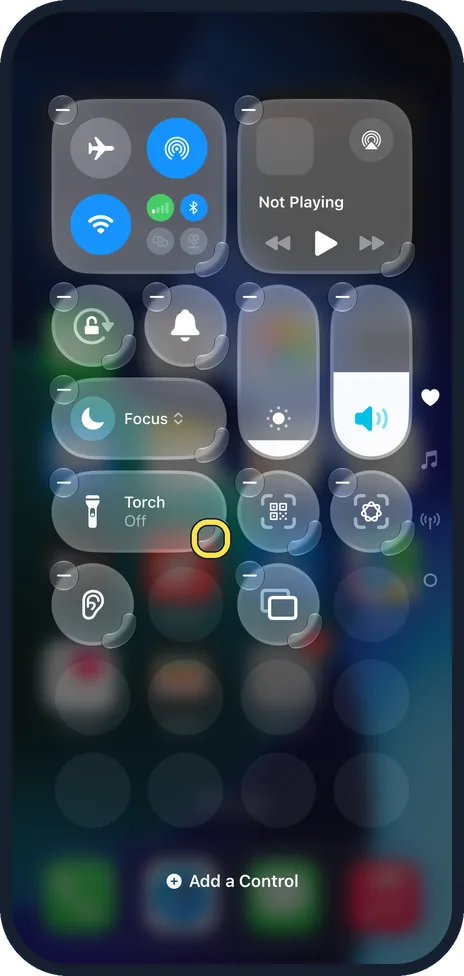
Move and resize
Drag a control to a new place. Drag the curved handle at its bottom right to make it larger or smaller.
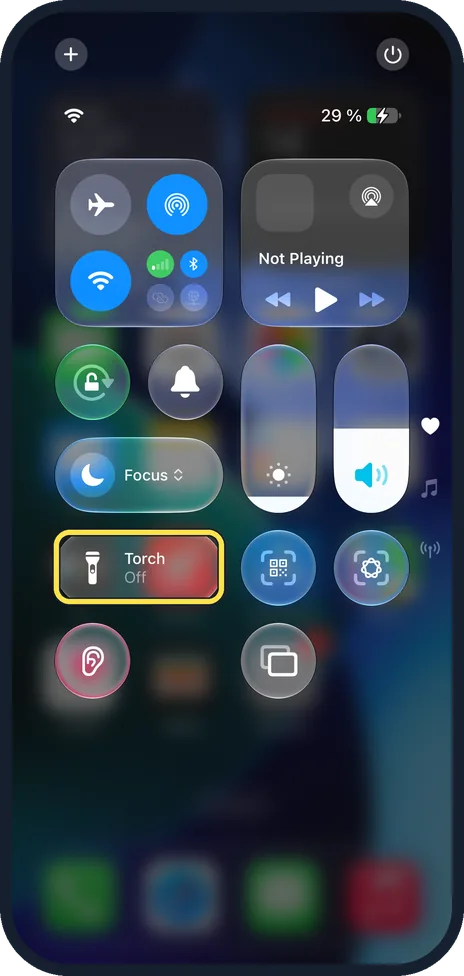
On our iPhone, Torch stretched to two spaces wide and then showed Torch and Off.
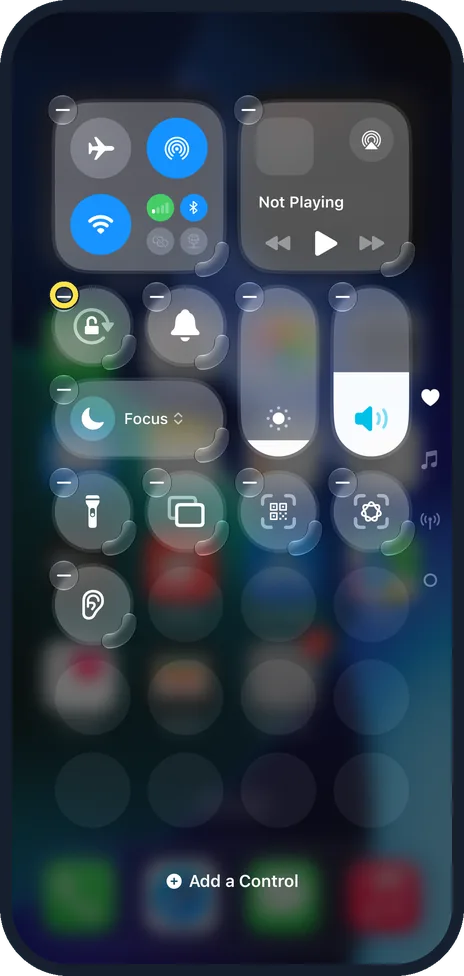
Remove a control
Tap the minus on its top left corner.
Add a control
Tap Add a Control at the bottom.
Choose a control
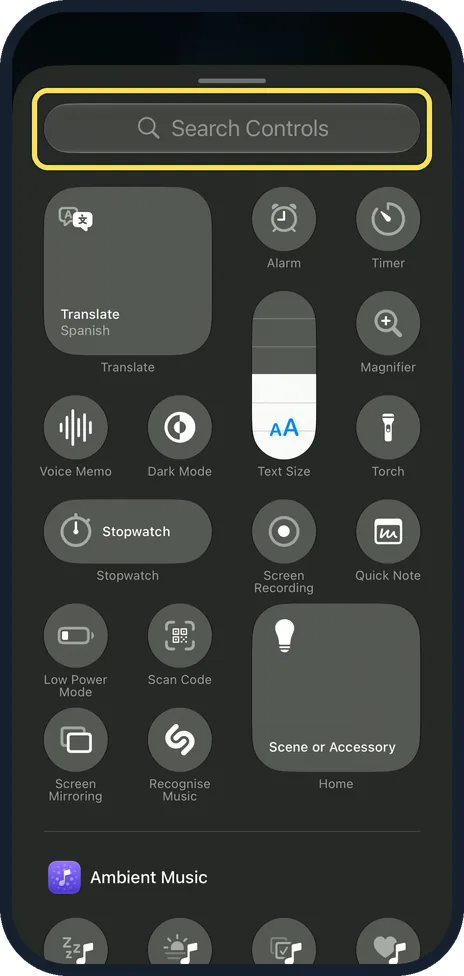
Type in Search Controls at the top, or scroll and tap a control to add it. Further down, controls are grouped by app.
On our iPhone the sections after the main controls began with Ambient Music, Apple Intelligence & Siri, Capture and Clock.
Finish
Tap an empty area or swipe up. Your new layout shows straight away, such as the wider Torch here.
What changed: new screenshots from our own iPhone 17e on iOS 27.0.1, dark mode, and the wording checked against those screens.
What we saw on our device
- Move and resize: On our iPhone, Torch stretched to two spaces wide and then showed Torch and Off.
- Choose a control: On our iPhone the sections after the main controls began with Ambient Music, Apple Intelligence & Siri, Capture and Clock.
If you do not see this option
- No curved handles or Add a Control Your iPhone is on iOS 17 or earlier. Choose controls under Settings, Control Centre instead.
- No plus in the top left corner Touch and hold an empty area of Control Centre instead to enter edit mode.
- You cannot find a control Type its name in Search Controls at the top of the gallery. On our iPhone, Ambient Music offered Sleep, Chill, Productivity and Wellbeing.
If this does not work
- Control Centre does not open On an iPhone with a Home button, swipe up from the bottom edge instead of down from the top right corner.
- A control will not resize Drag the curved handle at its bottom right corner, not the middle of the control, which moves it instead.
- You removed a control by mistake Tap Add a Control and add it again. On our iPhone, Torch, Scan Code and Screen Mirroring were near the top of the gallery.
About this guide
Control Centre holds the switches you use most: torch, brightness, Wi-Fi, music and more. You can arrange it so the controls you need are on the first page and the rest are gone. The screenshots are our own, from iPhones running iOS 27.0.1.
Good to know
Control Centre has several pages. Swipe up and down to move between them. In edit mode, tap the circle at the bottom of the page icons on the right to add a new page.
The two round buttons at the bottom of the Lock Screen, torch and camera by default, can be changed too: touch and hold the Lock Screen, tap Customise, Lock Screen, and tap the minus on each.
On iOS 17 and earlier, controls are chosen under Settings, Control Centre.
In short: Open Control Centre, hold an empty area, then move, resize, remove or Add a Control.
- Apple Support: Use and customize Control Center on iPhone
- Apple Support: Use and customise Control Centre on iPhone
Links checked in October 2026. Menus and features can change after software updates. These steps match the version named at the top.
Did this guide work for you?
Sorry about that. What happened?