
howtosimply.com/guides/how-to-change-the-subtitle-style-on-a-mac/ · Checked October 2026 · MacBook Pro · macOS Tahoe 26
In this guide
Open System Settings, click Accessibility, then Captions, and click a style in the list: Transparent Background, Classic, Large Text or Outline Text. The preview at the top shows how subtitles will look. Switch on Prefer closed captions and SDH to get captions for the deaf and hard of hearing when they are available.
5 of 5 steps with real screenshots · 2 official sources below
- Device
- Mac
- Shown on
- macOS Tahoe 26 (MacBook Pro)
- App
- System Settings
- Path
- System Settings › Accessibility › Captions
- Real screenshots
- 5 of 5 steps
- Checked
- October 2026
- Sources
- 2 official, linked below
Step by step
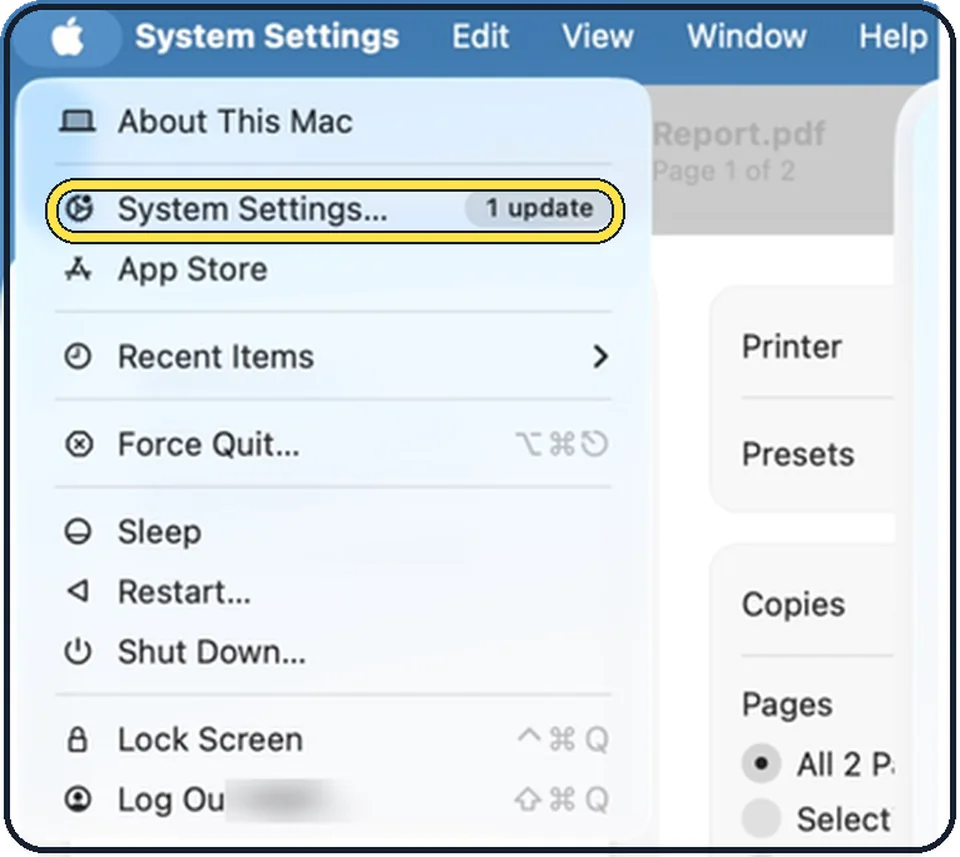
Tap the picture to see it full size Open System Settings
Click the Apple menu in the top left corner of the screen and choose System Settings.
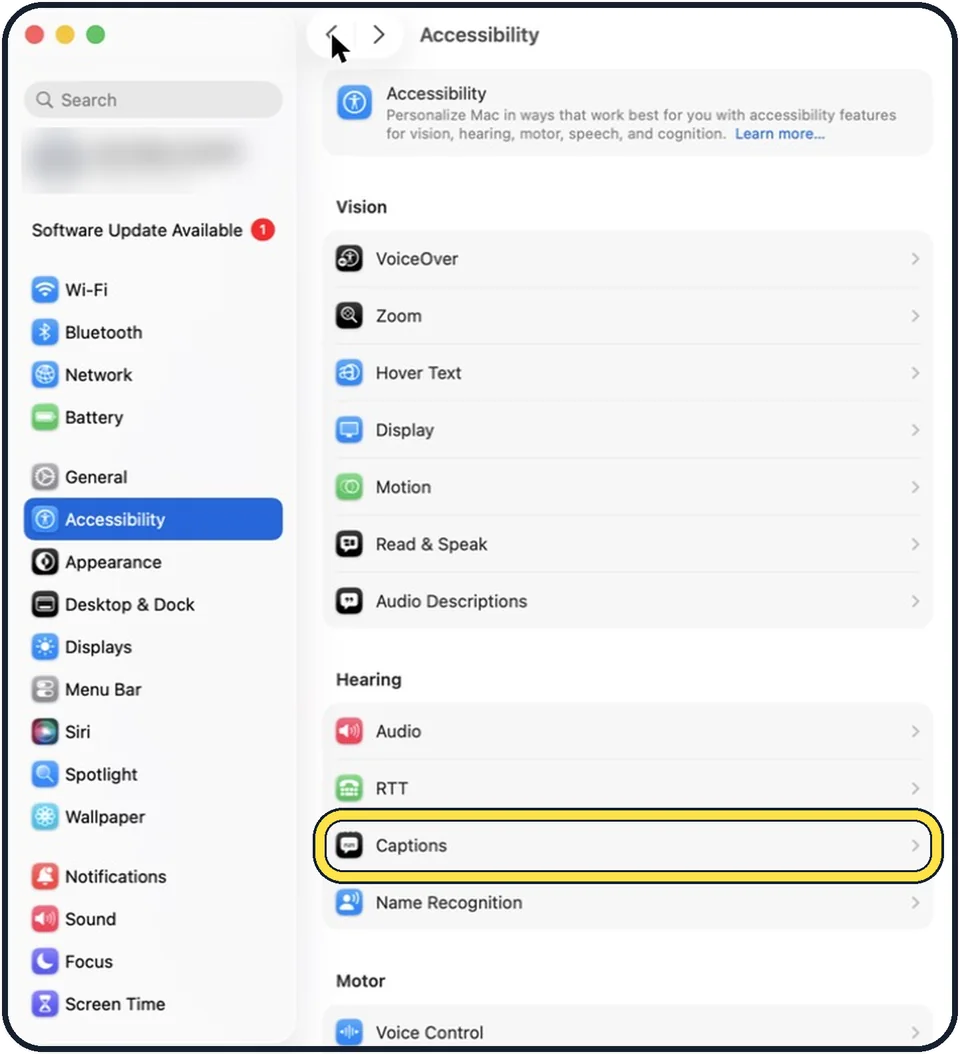
Tap the picture to see it full size Click Accessibility, then Captions
Accessibility is in the sidebar. Captions is in the Hearing group on the right.
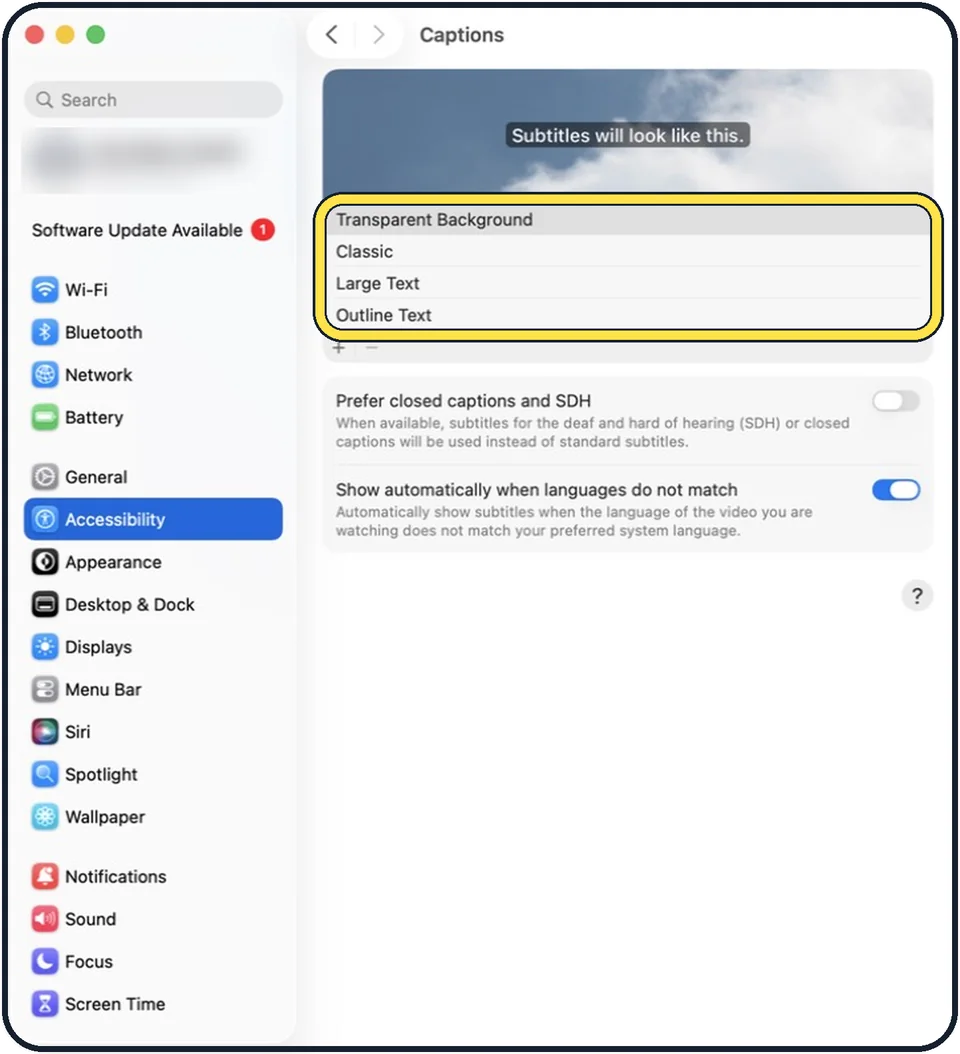
Tap the picture to see it full size Click a style
Four built-in styles are listed. The picture above the list previews the selected one with the line: Subtitles will look like this.
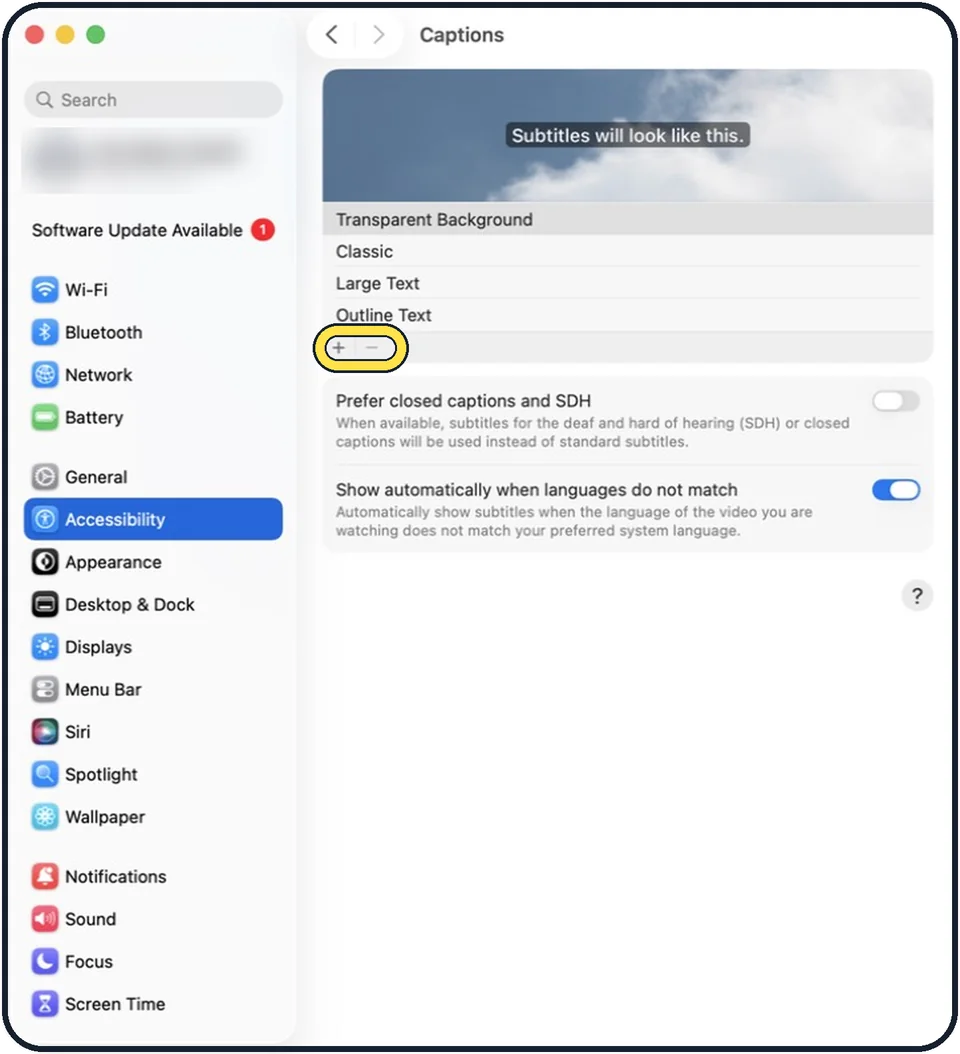
Zoomed in on the setting. Tap to see the whole screenTap the picture to see it full size Create your own style if you like
Click the plus button below the list to create a style. The minus button deletes a style that you added.
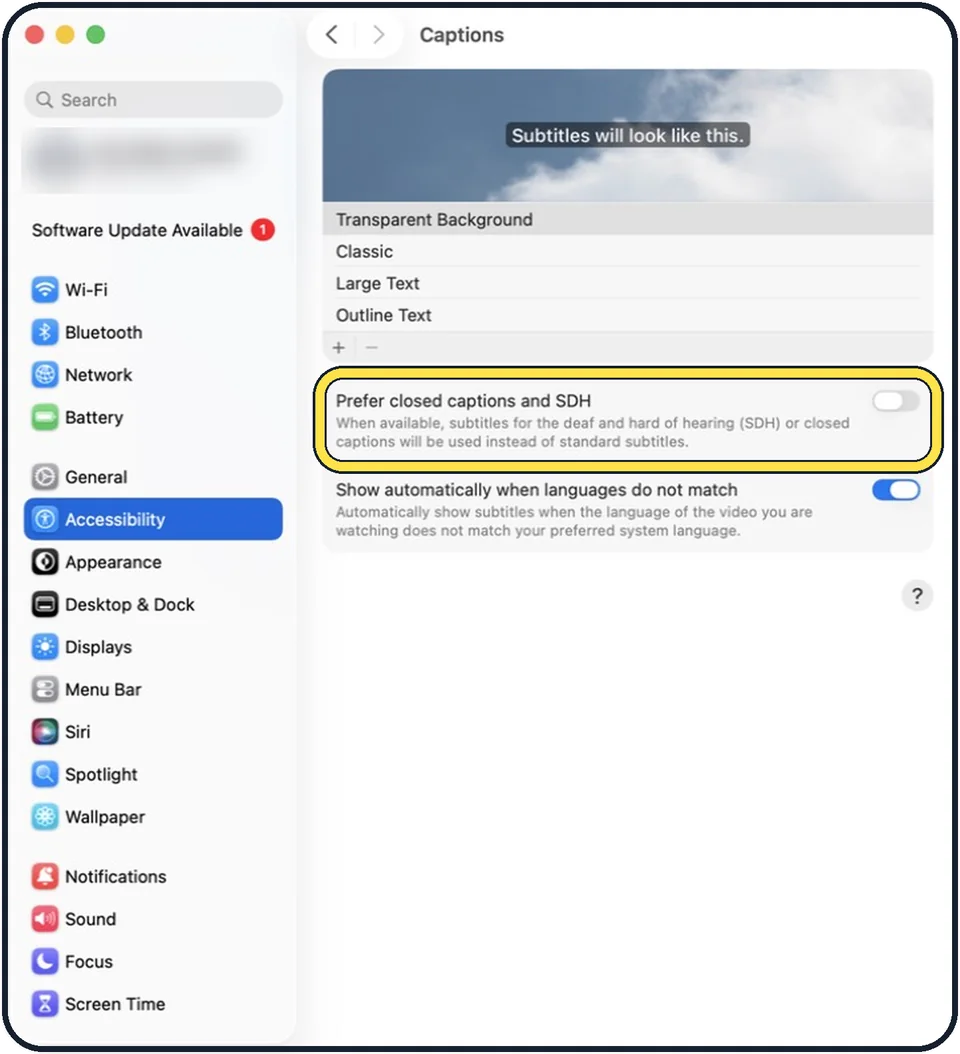
Tap the picture to see it full size Prefer closed captions
With Prefer closed captions and SDH on, the Mac uses closed captions or subtitles for the deaf and hard of hearing in place of standard subtitles, if they are available.
If you do not see this option
- The row is called Subtitles and Captioning Apple’s current guide names it Subtitles and Captioning, under Hearing. Our Tahoe 26 picture shows it as Captions. Source: Use subtitles and closed captions on Mac
- The minus button is grey Apple says the minus button deletes only styles you added. In our picture only the four built-in styles are listed and it is grey. Source: Change Captions settings for accessibility on Mac
If this does not work
- A video keeps its own subtitle look Apple says to deselect Allow video to override in your style, so your style is used. Source: Use subtitles and closed captions on Mac
- Prefer closed captions changes nothing Apple says closed captions and SDH are used only when the video has them. Source: Change Captions settings for accessibility on Mac
About this guide
Subtitles in videos on a Mac follow one system-wide style. If they are too small or hard to read against the picture, choose another style or create your own.
The screenshots show System Settings on macOS Tahoe 26.
Good to know
Show automatically when languages do not match, on in the picture, shows subtitles when the language of the video is not your preferred system language.
In short: System Settings, Accessibility, Captions, click a style.
- Mac User Guide: Change Captions settings for accessibility on Mac
- Apple Support: Use subtitles and closed captions on Mac
Links checked in October 2026. Menus and features can change after software updates. These steps match the version named at the top.
Did this guide work for you?
Sorry about that. What happened?