
macOS 27 compared with macOS 26: We rewrote this guide on macOS 27.0.1 (MacBook Neo): it now has 3 steps instead of 5. The macOS 26 page keeps the steps and screenshots as they were.
howtosimply.com/guides/how-to-change-the-screen-resolution-on-a-mac/ · Checked October 2026 · MacBook Neo · macOS 27.0.1
In this guide
Open System Settings and click Displays, then click one of the four pictures between Larger Text and More Space. Larger Text makes everything bigger; More Space fits more on the screen.
3 of 3 steps with real screenshots · 1 official source below
- Device
- Mac
- Shown on
- macOS 27.0.1 (MacBook Neo)
- App
- System Settings
- Real screenshots
- 3 of 3 steps
- Checked
- October 2026
- Sources
- 1 official, linked below
Step by step
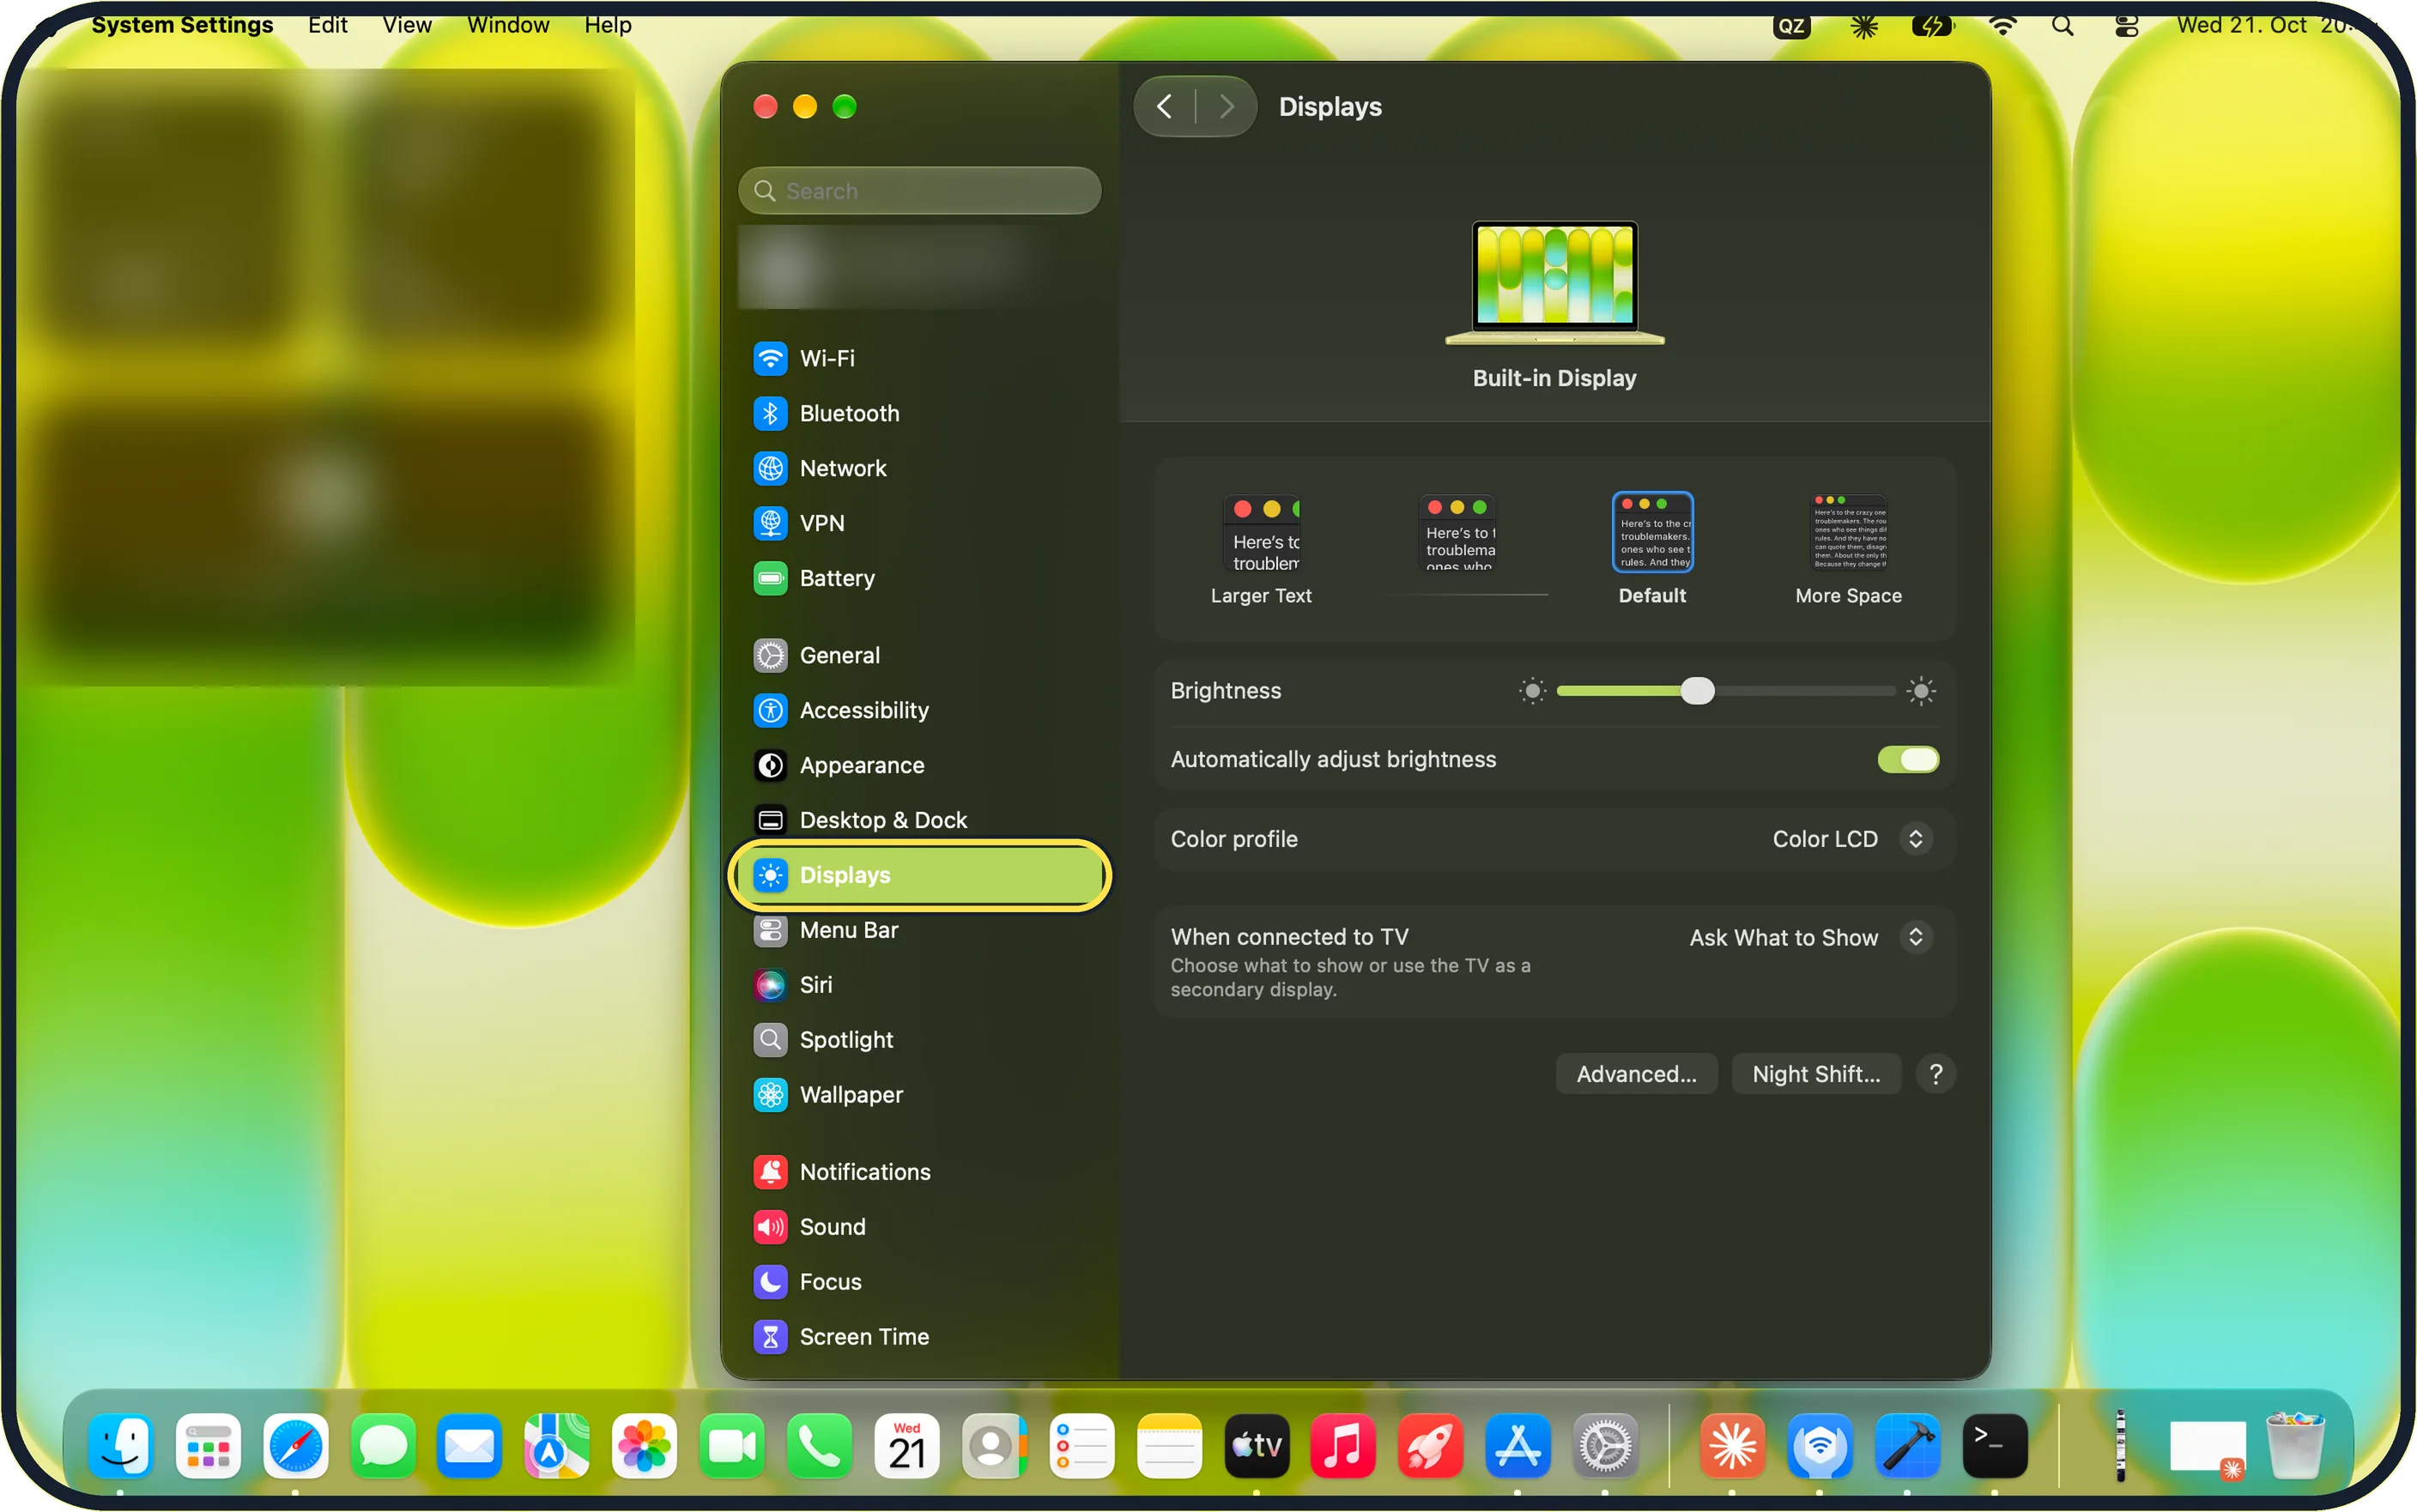
Zoomed in on the setting. Tap to see the whole screenTap the picture to see it full size Open System Settings and click Displays
Click the Apple menu, then System Settings, then Displays in the sidebar.
On our MacBook Neo the screen is shown at the top as Built-in Display.
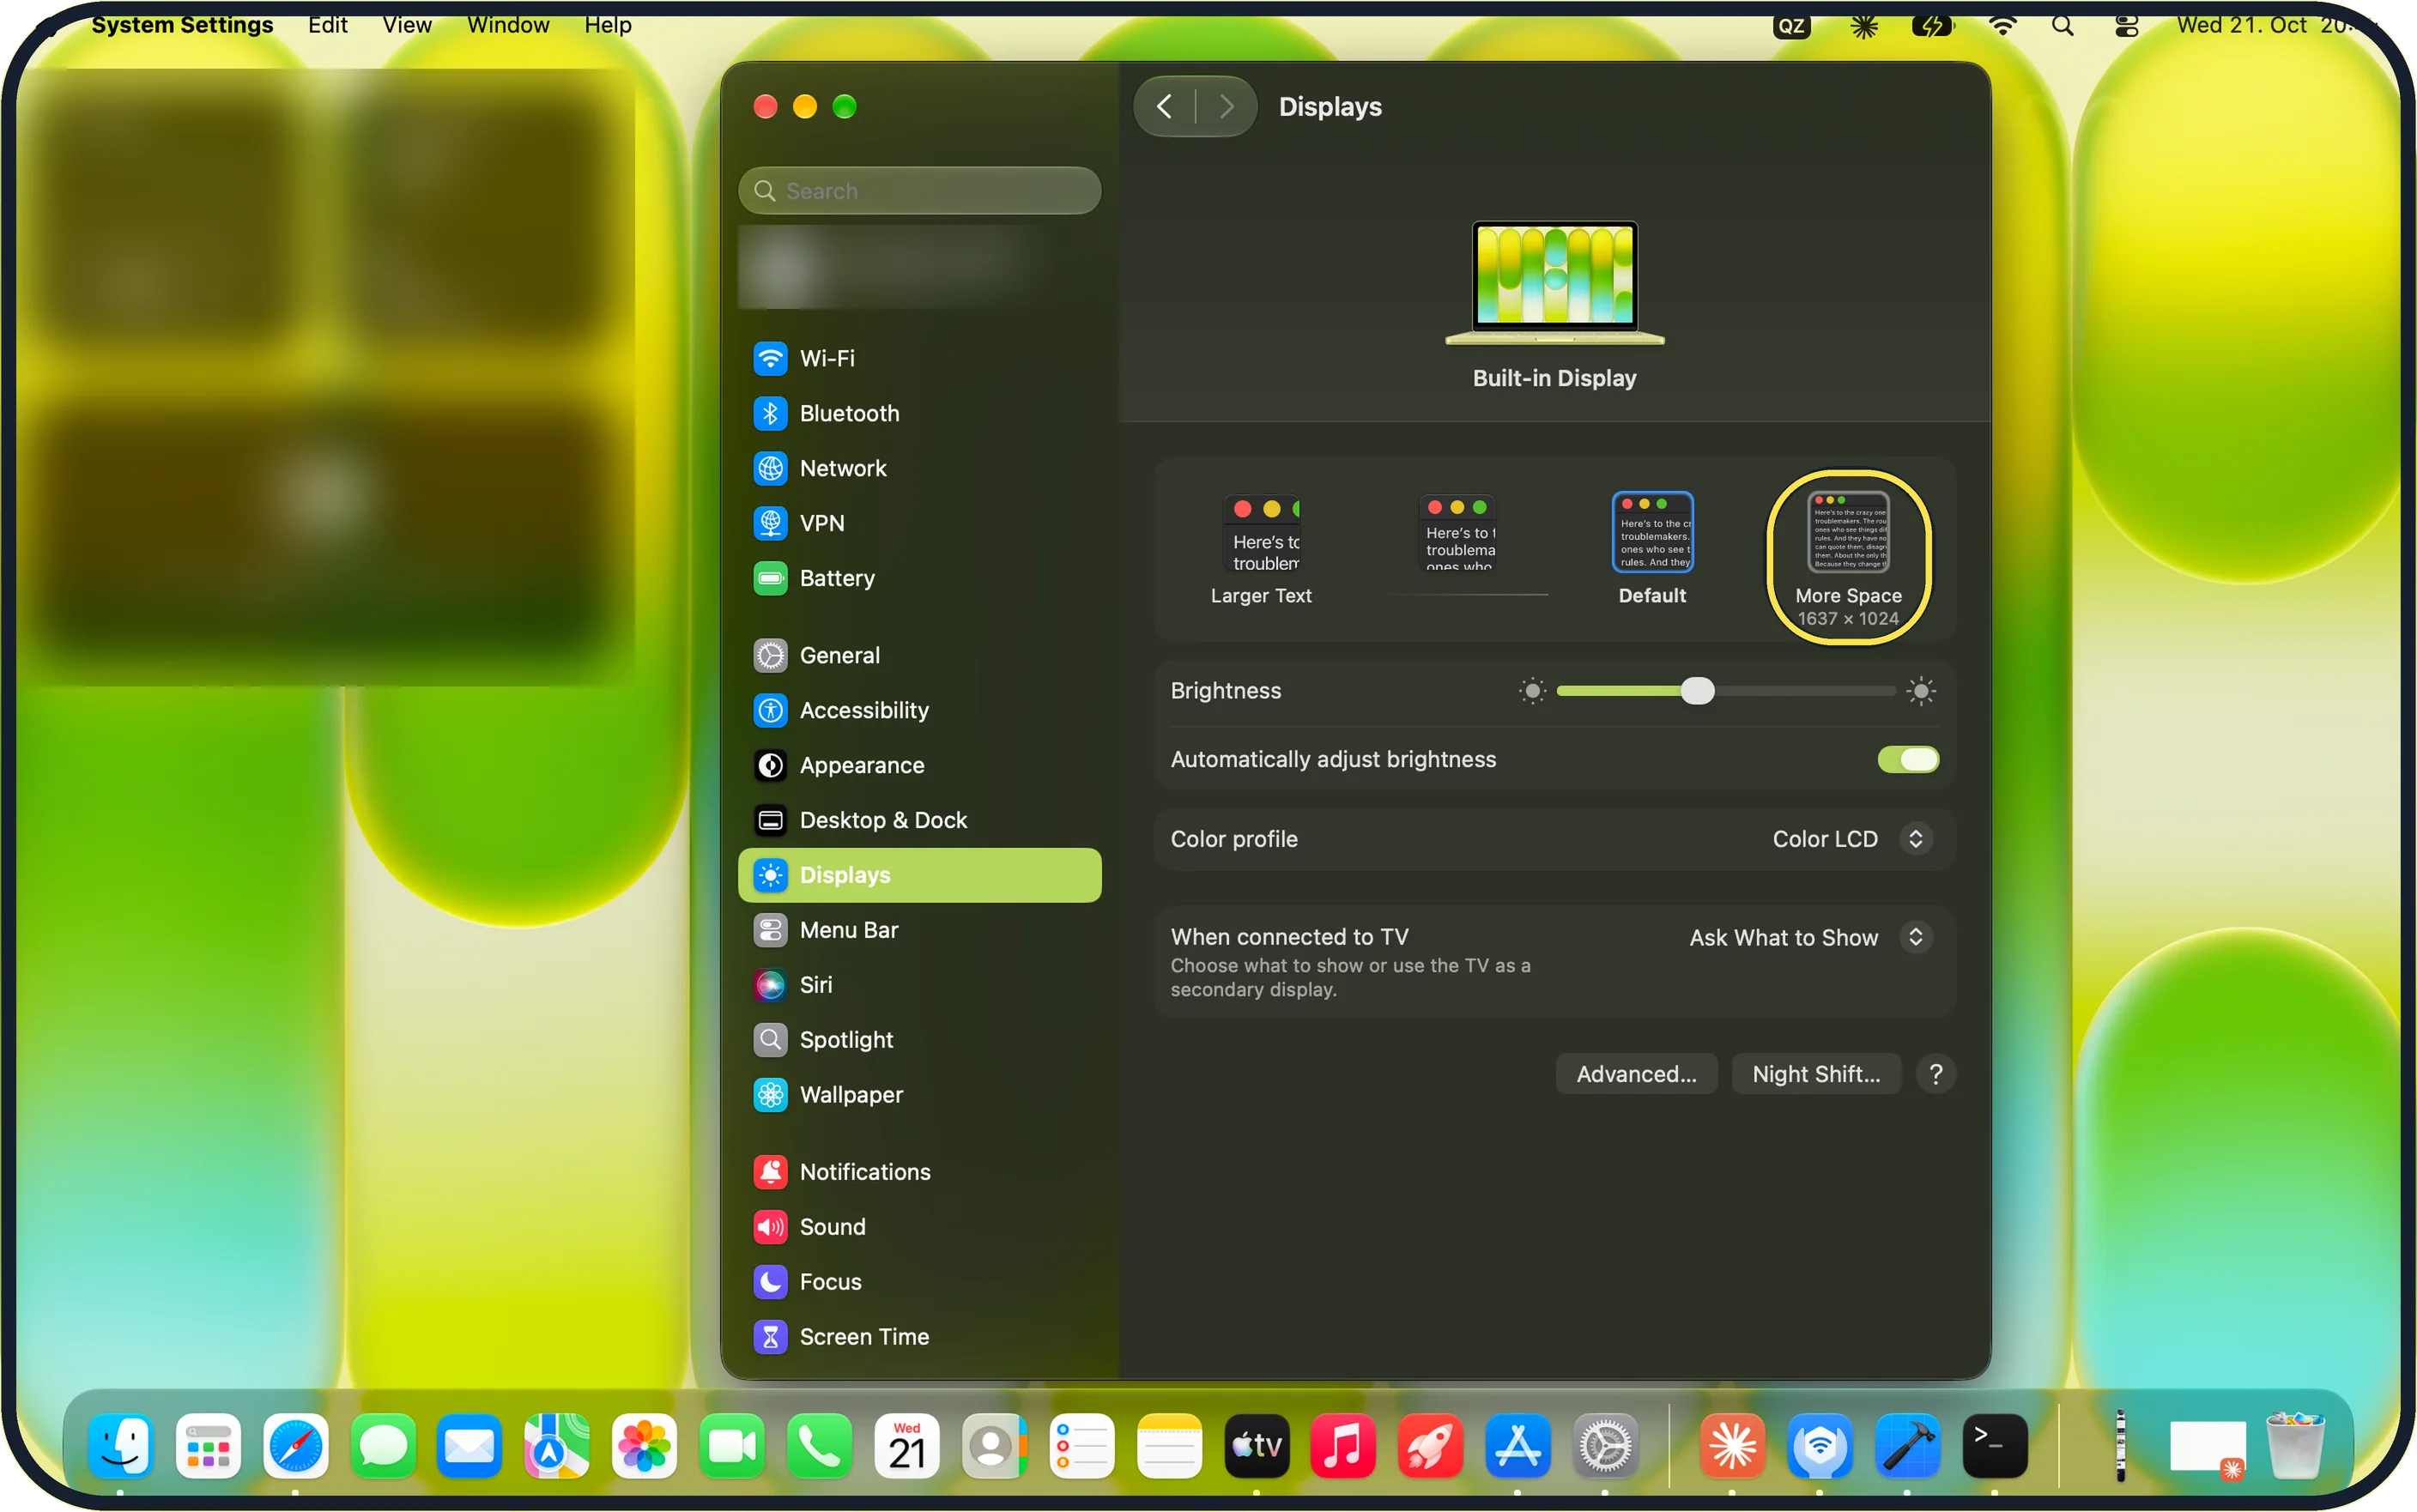
Zoomed in on the setting. Tap to see the whole screenTap the picture to see it full size Click a resolution
Point at a picture to see its size, then click the one you want. Towards Larger Text everything gets bigger; towards More Space more fits on the screen.
On our MacBook Neo there are four pictures: Larger Text, an unlabelled one, Default (selected) and More Space, and pointing at More Space shows 1637 × 1024.
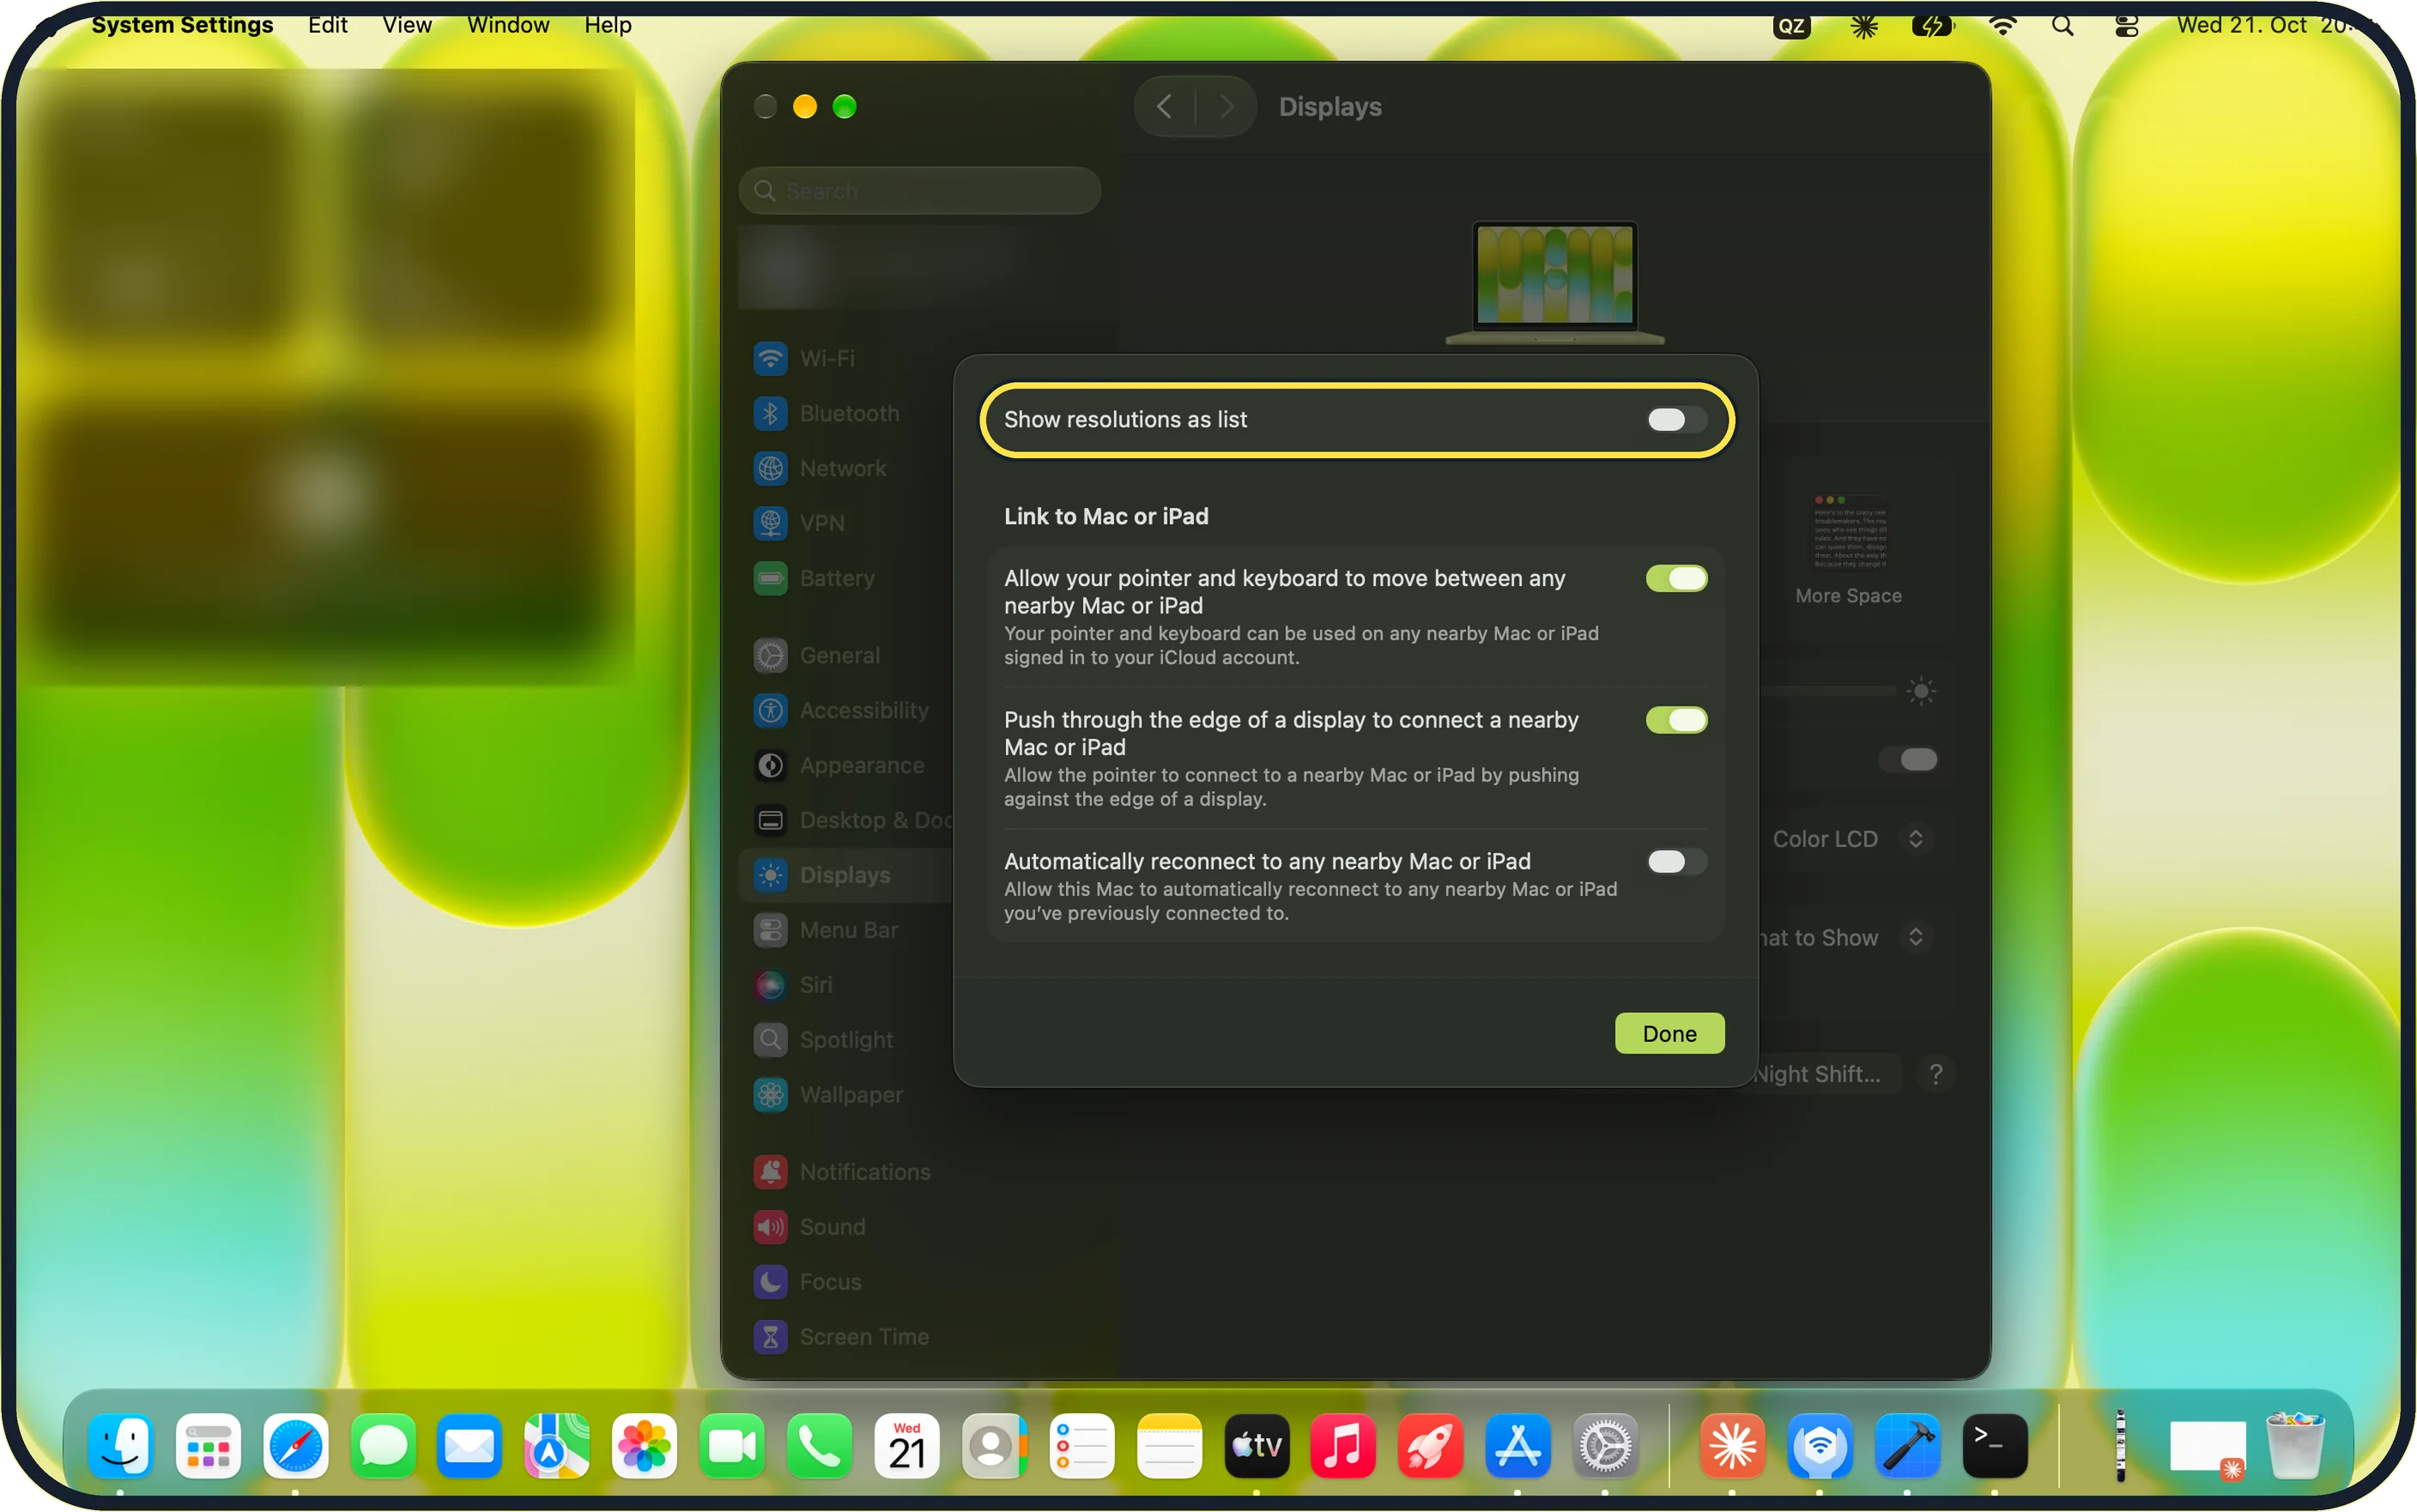
Zoomed in on the setting. Tap to see the whole screenTap the picture to see it full size Show resolutions as a list instead
Click Advanced… at the bottom of the Displays page, switch on Show resolutions as list, then click Done.
On our MacBook Neo, Advanced… sits next to Night Shift…, not below Color profile, and Show resolutions as list was off.
If you do not see this option
- If you cannot find Displays Type Displays in the Search field at the top of the System Settings sidebar.
- If you see a list instead of pictures Click Advanced… on the Displays page and switch off Show resolutions as list.
- If the pictures show no size Hold the pointer over a picture for a moment; the size appears under its name, such as 1637 × 1024 under More Space.
If this does not work
- If text is still too small Click Larger Text or the unlabelled picture next to it instead of Default.
- If you want to undo your change Click Default, which is the standard setting for the built-in screen.
- If the brightness changes on its own That is Automatically adjust brightness on the Displays page; switch it off if you prefer a fixed brightness.
About this guide
If text is too small or you want more room for windows, change the resolution. On a Mac the choices appear as small pictures, not numbers.
Screenshots: MacBook Neo, macOS 27.0.1, dark mode.
Good to know
If the screen goes black after a change, wait 15 seconds and the Mac goes back to the previous resolution.
If only the text is too small, changing the resolution is the quickest fix. Single apps can also be zoomed with Command and the plus key.
To send the picture to a television: how to mirror a Mac screen to a TV with AirPlay.
In short: System Settings > Displays > click Larger Text, Default, More Space or the picture between them.
Links checked in October 2026. Menus and features can change after software updates. These steps match the version named at the top.
Did this guide work for you?
Sorry about that. What happened?