
howtosimply.com/guides/how-to-add-a-printer-on-windows-11/ · Checked October 2026 · Windows 11 Enterprise 25H2 (build 26200.9457), Microsoft Cloud PC
In this guide
Turn the printer on and connect it to your Wi-Fi or plug in its USB cable. Open Settings, Bluetooth & devices, Printers & scanners, click Add device, wait for the printer to appear and click Add device next to it. If it does not appear, click Add a new device manually.
5 of 6 steps with real screenshots · 1 official source below
- Device
- Windows
- Shown on
- Windows 11 Enterprise 25H2 (build 26200.9457), Microsoft Cloud PC
- App
- Settings
- Path
- Settings › Bluetooth & devices › Printers & scanners › Add device
- Real screenshots
- 5 of 6 steps
- Checked
- October 2026
- Sources
- 1 official, linked below
Step by step
Get the printer ready
For Wi-Fi, use the printer's own display to join the same network as the PC. For USB, plug the cable in and switch the printer on.
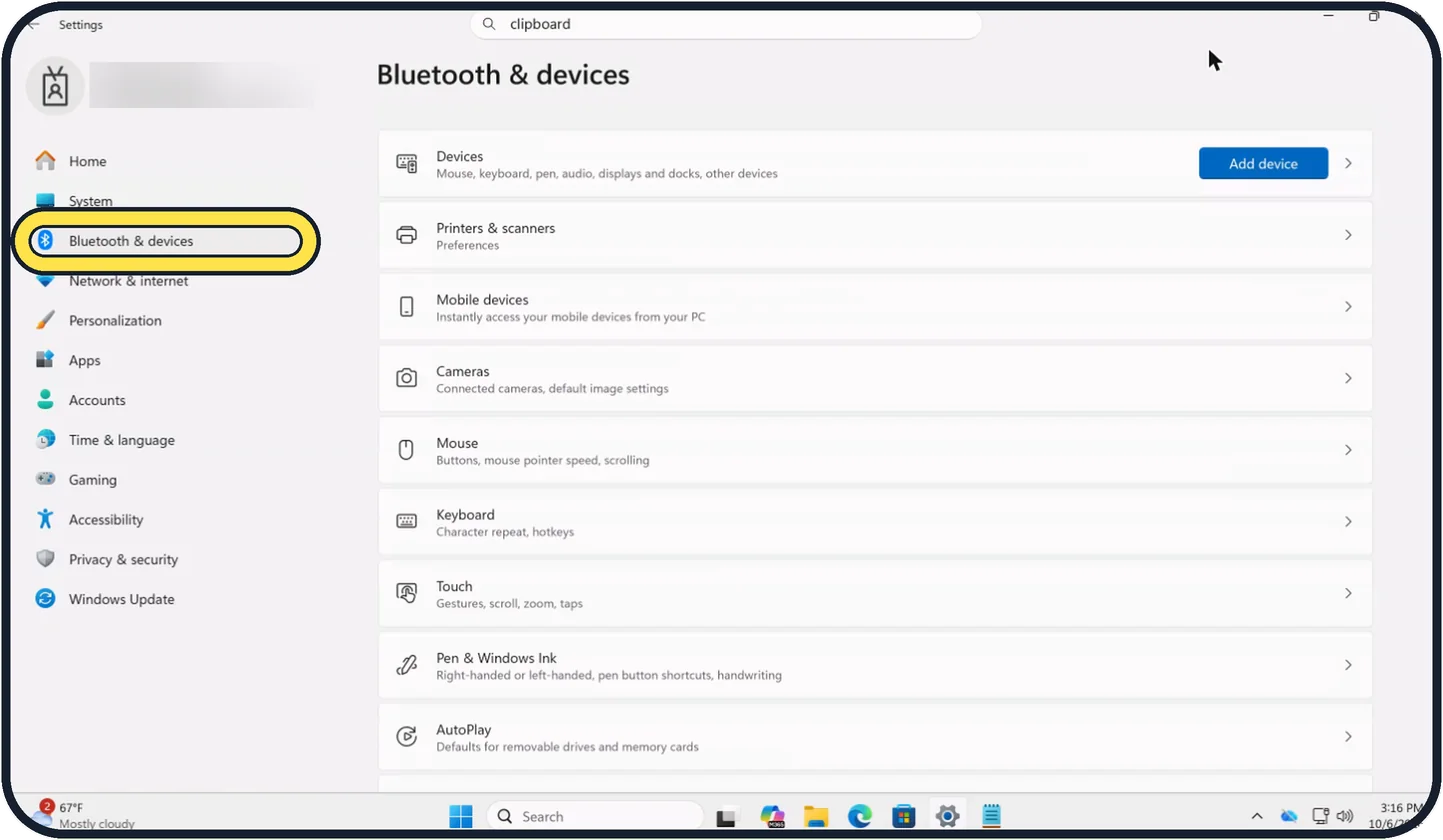
Zoomed in on the setting. Tap to see the whole screenTap the picture to see it full size Open Settings, Bluetooth & devices
Open Start, Settings and click Bluetooth & devices on the left.
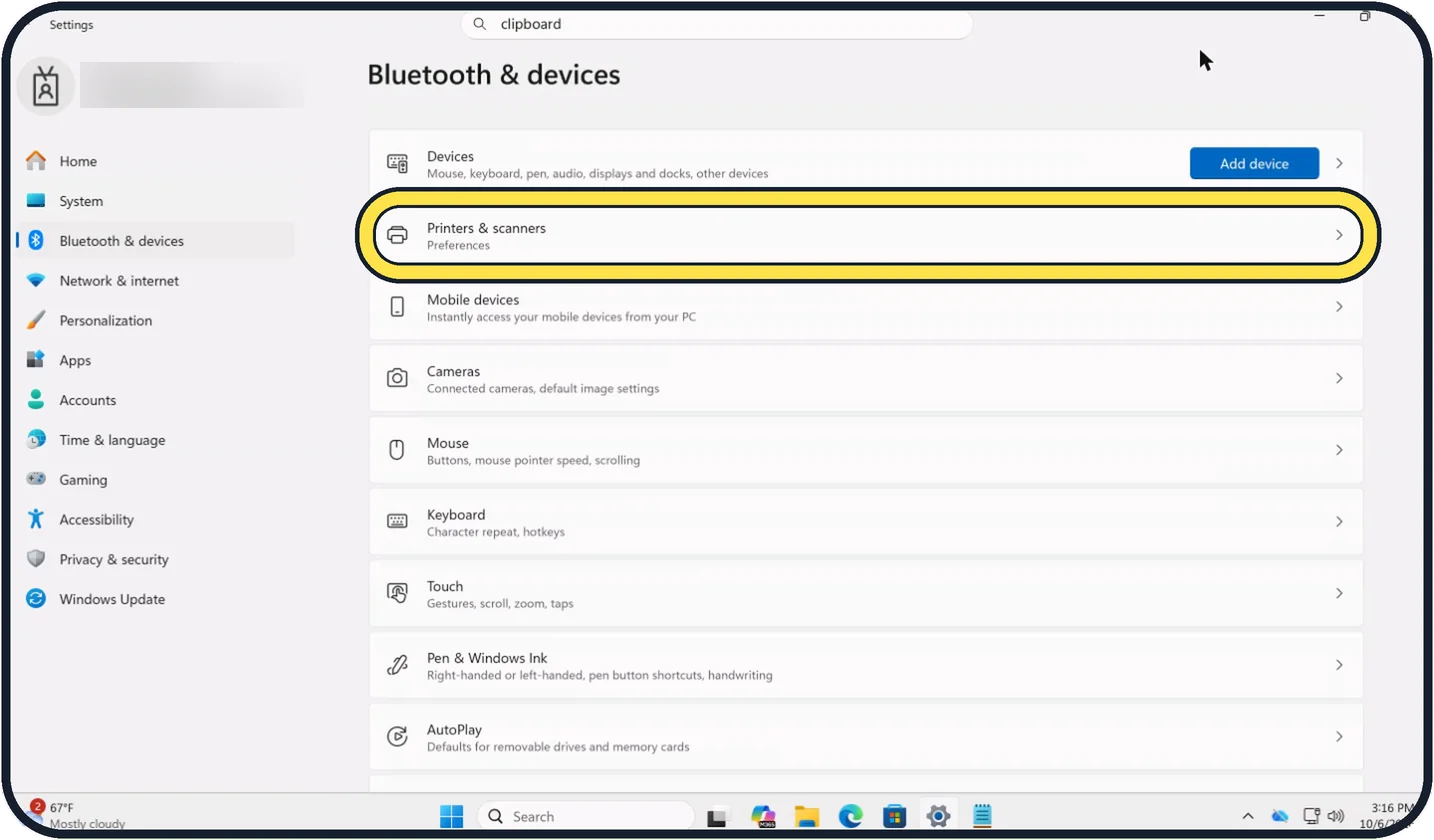
Tap the picture to see it full size Click Printers & scanners
Check the list first. A USB printer is often there already.
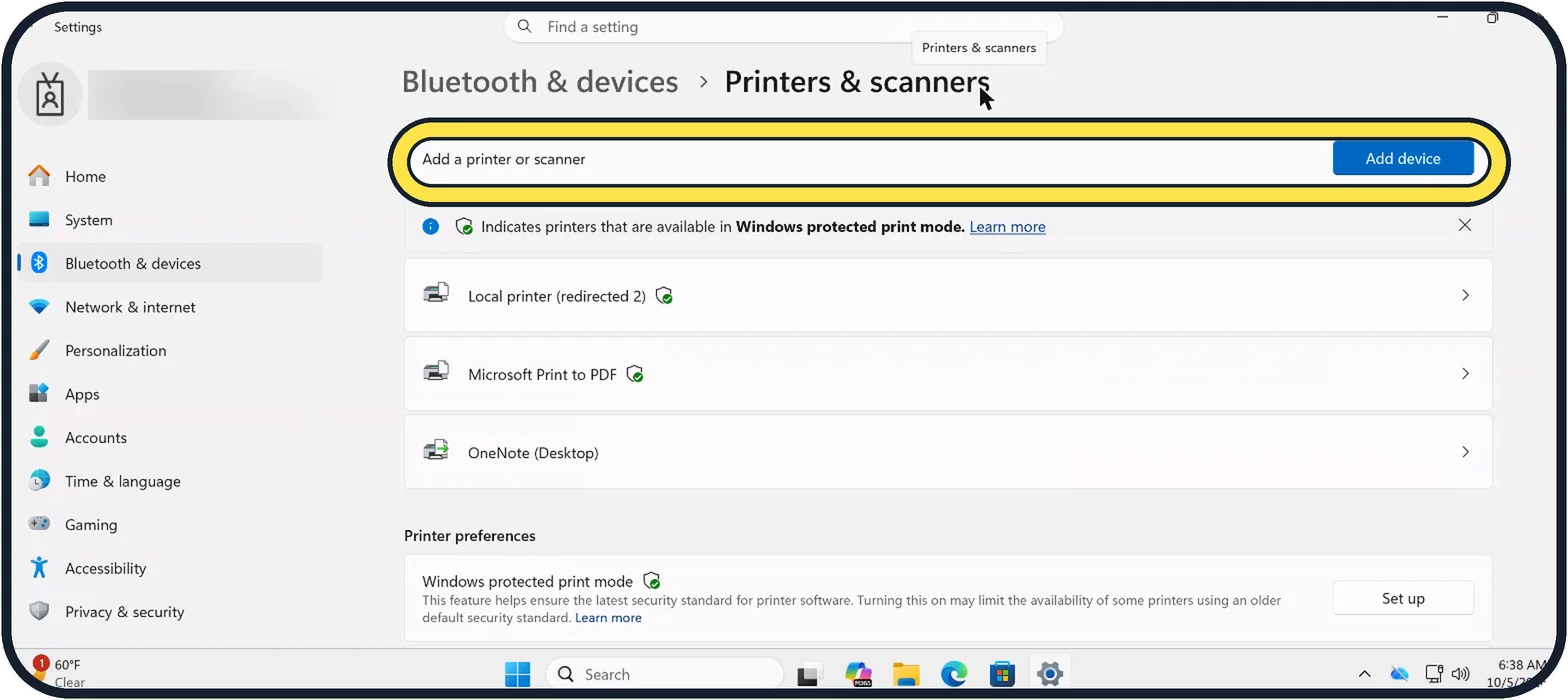
Tap the picture to see it full size Click Add device
It is next to Add a printer or scanner at the top. Windows searches for printers on your network and on the cable.
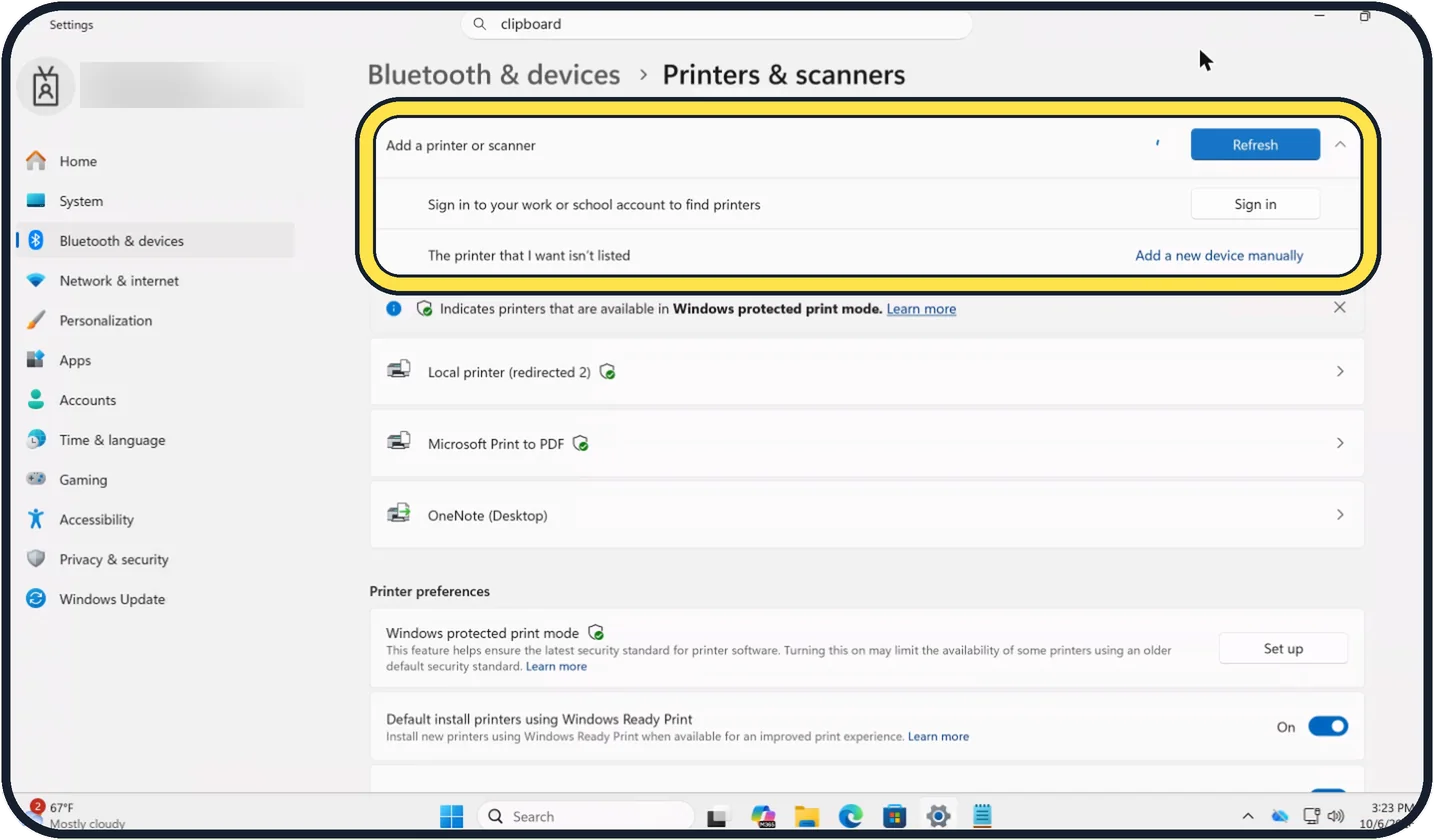
Tap the picture to see it full size Click Add device next to your printer
Printers Windows found are listed under Add a printer or scanner, and the button turns into Refresh. Click Add device next to yours. When it shows as ready, click the printer and choose Print test page. Our Cloud PC found none.
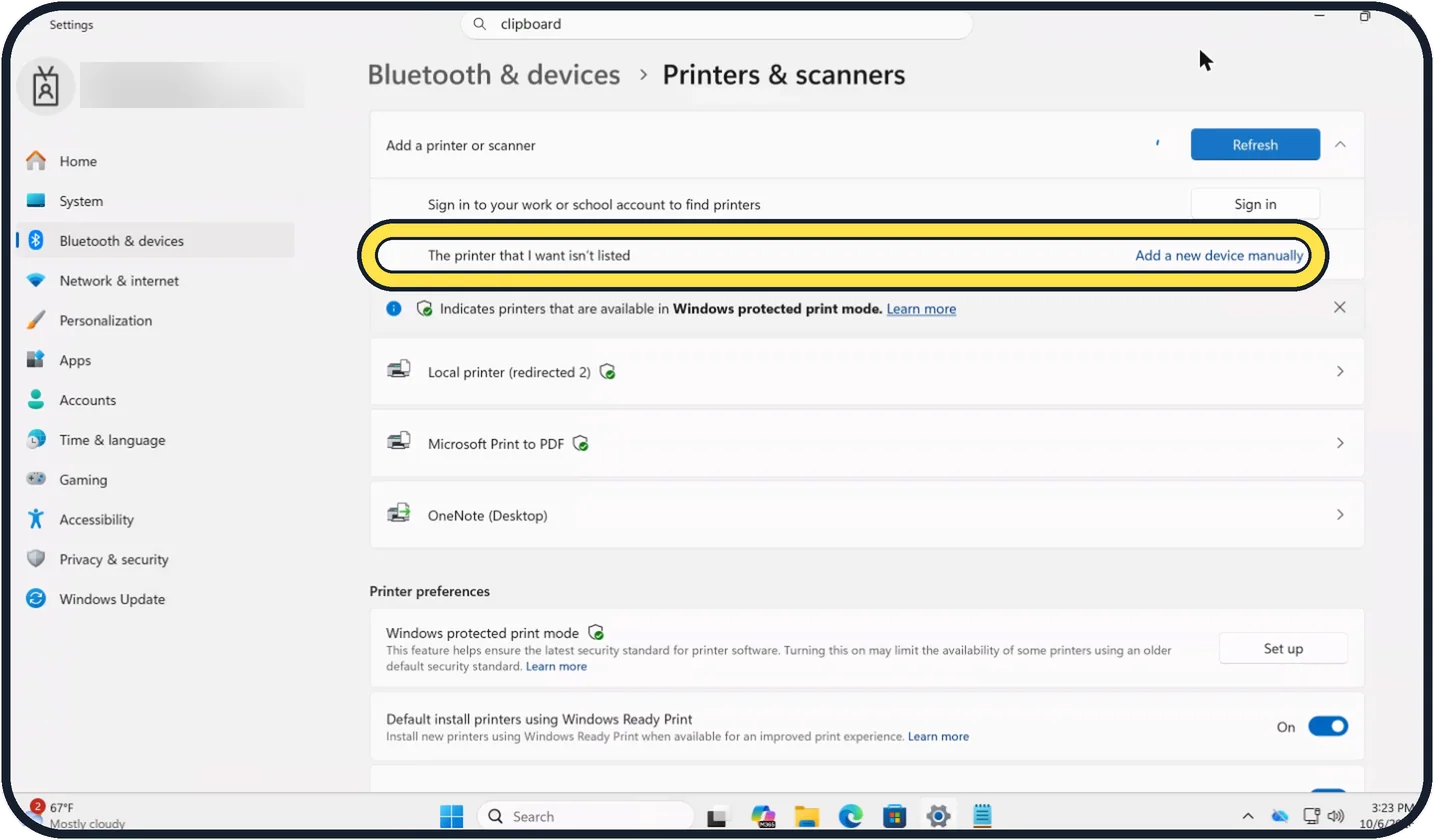
Tap the picture to see it full size If your printer is not listed
Click Add a new device manually next to The printer that I want isn't listed. Windows then lets you add it by its name or IP address, or as an older printer.
About this guide
Windows finds most current printers by itself and installs what it needs. The printer only has to be switched on and on the same network as the PC, or connected by cable.
Good to know
If the printer is not found, click "The printer that I want isn't listed" and choose "Add a new device manually", then follow the window that opens.
A printer on a guest Wi-Fi network cannot be seen from the main network. Put both on the same one.
If it was working and has stopped: printer not working.
In short: Settings, Bluetooth & devices, Printers & scanners, Add device, choose the printer.
Links checked in October 2026. Menus and features can change after software updates. These steps match the version named at the top.
Did this guide work for you?
Sorry about that. What happened?