
howtosimply.com/guides/how-to-split-the-screen-on-windows-11-with-snap-layouts/ · Checked October 2026 · Windows 11 Enterprise 25H2 (build 26200.9457), Microsoft Cloud PC
In this guide
Hold the pointer over the maximise button of a window, or press Windows + Z, and click a position in one of the layouts. Then click the window you want in each remaining space. You can also drag a window to the top centre of the screen.
3 of 5 steps with real screenshots · 1 official source below
- Device
- Windows
- Shown on
- Windows 11 Enterprise 25H2 (build 26200.9457), Microsoft Cloud PC
- App
- Settings
- Real screenshots
- 3 of 5 steps
- Checked
- October 2026
- Sources
- 1 official, linked below
Step by step
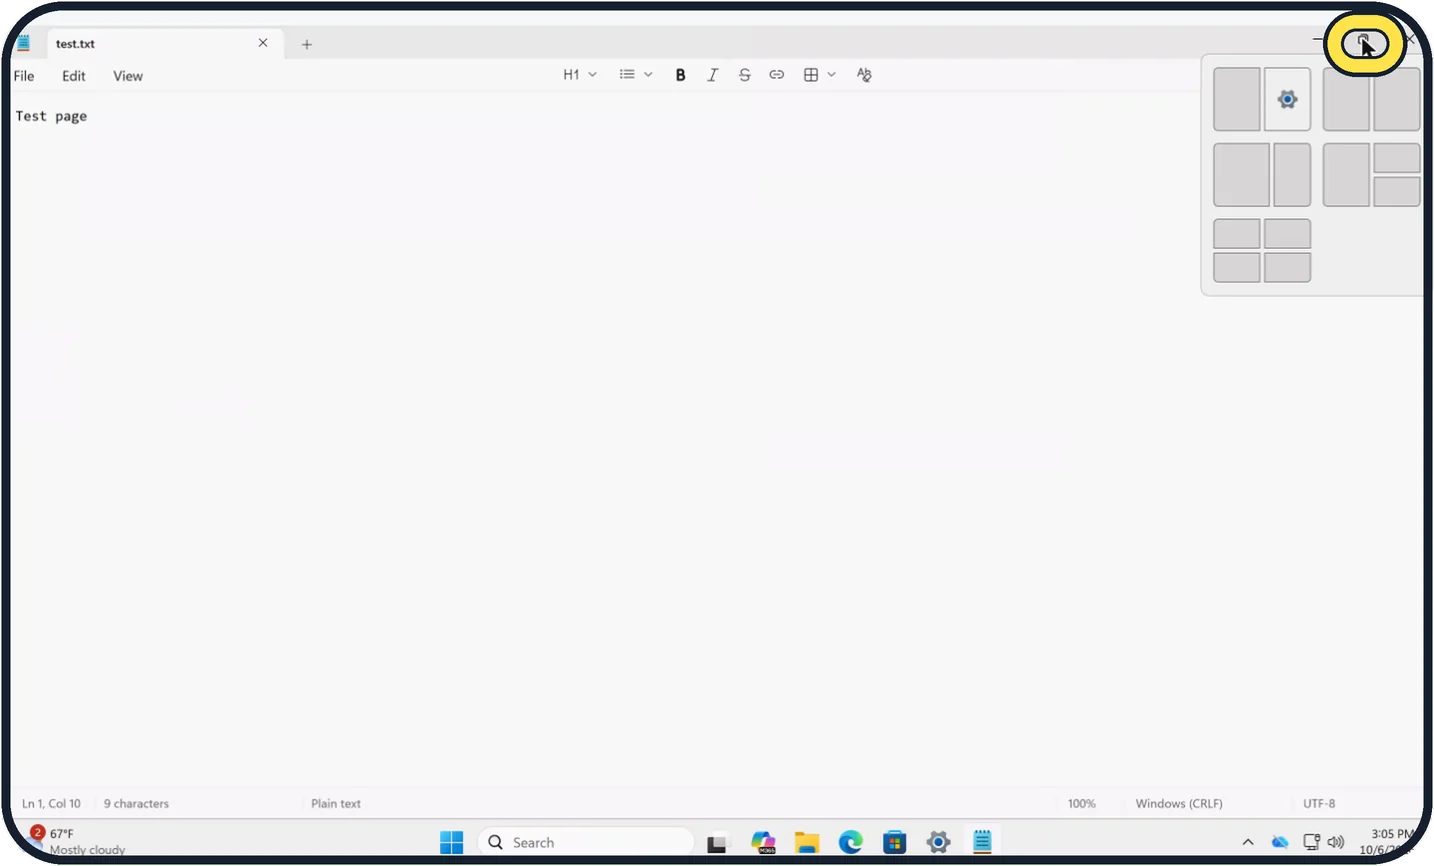
Zoomed in on the setting. Tap to see the whole screenTap the picture to see it full size Open the layout menu
Hold the pointer over the maximise button at the top right of a window, between the minimise and close buttons. Or click the window and press Windows + Z.
Watch these steps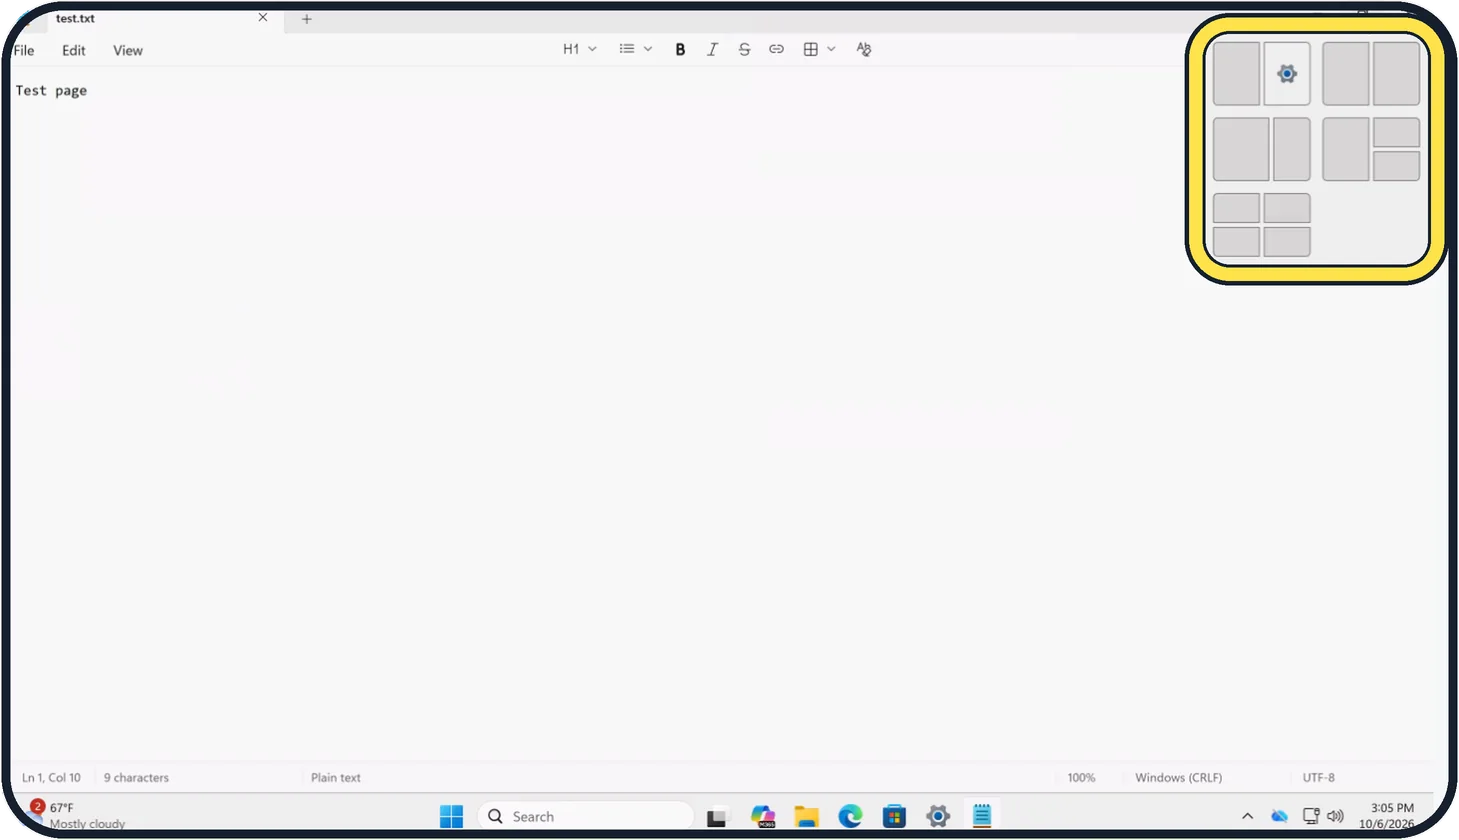
Zoomed in on the setting. Tap to see the whole screenTap the picture to see it full size Click a position in a layout
Each small grid is a layout: for example two halves, or one large part next to two stacked parts. Click the part where this window should go. Our Cloud PC screen offered five layouts; smaller screens show fewer.
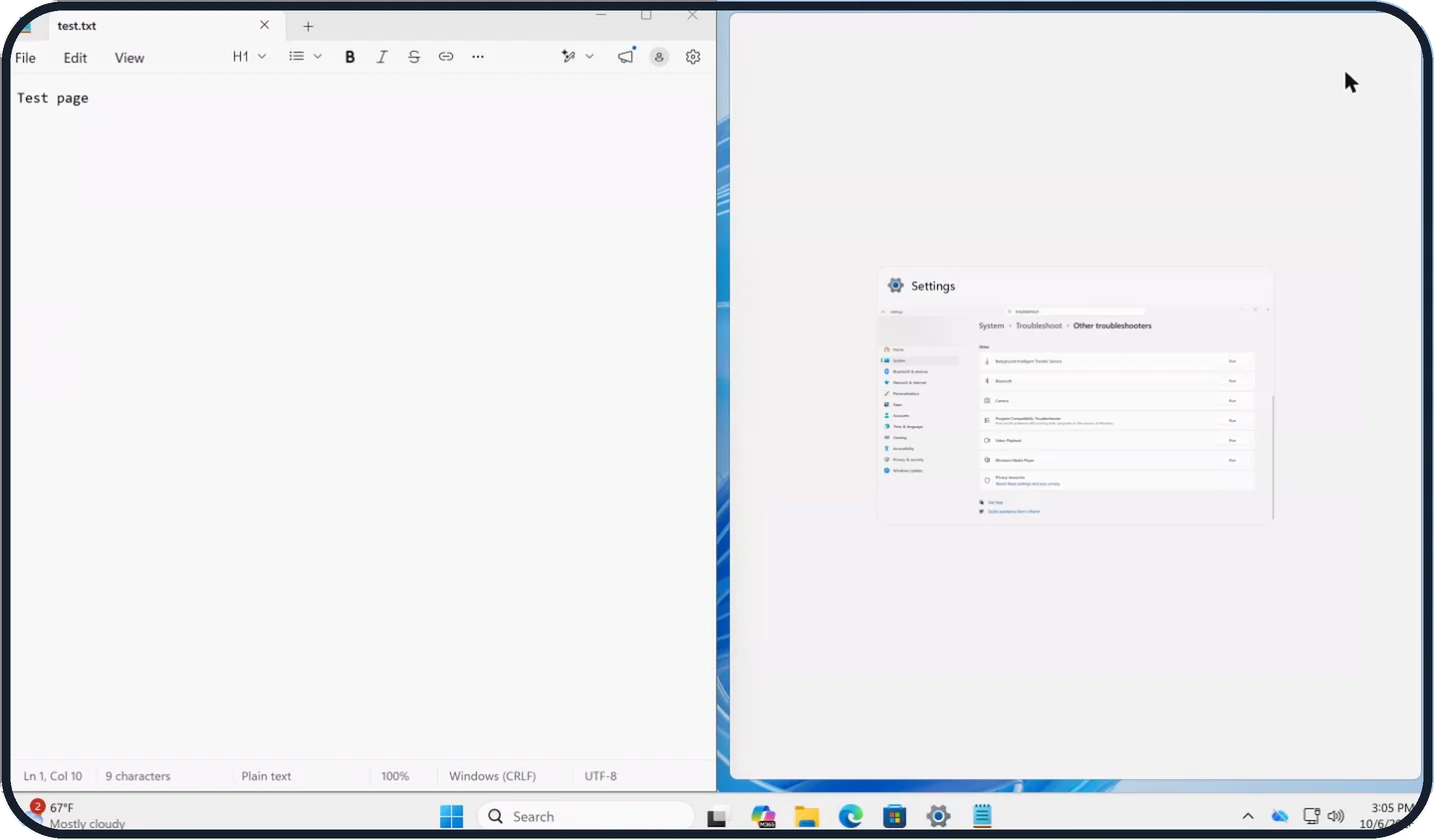
Tap the picture to see it full size Fill the other spaces
The window moves there, and Windows shows your other open windows in the empty part. Click the one you want in each space. Here Notepad took the left half and Settings is offered for the right.
Or drag to the top of the screen
Drag a window by its title bar to the top centre. The layouts drop down, and you let go on the position you want.
Resize
Drag the line between two snapped windows. Both change size together.
Watch these steps
About this guide
Snap layouts arrange two, three or four windows so they fill the screen without overlapping. It is the quickest way to work with two documents side by side.
Good to know
The snapped windows form a Snap group. Hold the pointer over one of the apps on the taskbar to bring the whole group back at once.
To switch snapping on or off, open Settings, System, Multitasking and use Snap windows.
On a small laptop screen, two windows side by side is usually the practical limit.
In short: Hover over maximise or press Windows + Z, pick a position, choose the other windows.
Links checked in October 2026. Menus and features can change after software updates. These steps match the version named at the top.
Did this guide work for you?
Sorry about that. What happened?