
howtosimply.com/guides/how-to-make-the-mouse-pointer-bigger-on-a-mac/ · Checked October 2026 · MacBook Pro · macOS Tahoe 26
In this guide
Open System Settings, click Accessibility, then Display, and drag the Pointer size slider to the right. To find a lost pointer quickly, keep Shake mouse pointer to locate switched on: move the mouse or your finger on the trackpad quickly back and forth, and the pointer grows for a moment.
4 of 4 steps with real screenshots · 1 official source below
- Device
- Mac
- Shown on
- macOS Tahoe 26 (MacBook Pro)
- App
- System Settings
- Path
- System Settings › Accessibility › Display › Pointer size
- Real screenshots
- 4 of 4 steps
- Checked
- October 2026
- Sources
- 1 official, linked below
Step by step
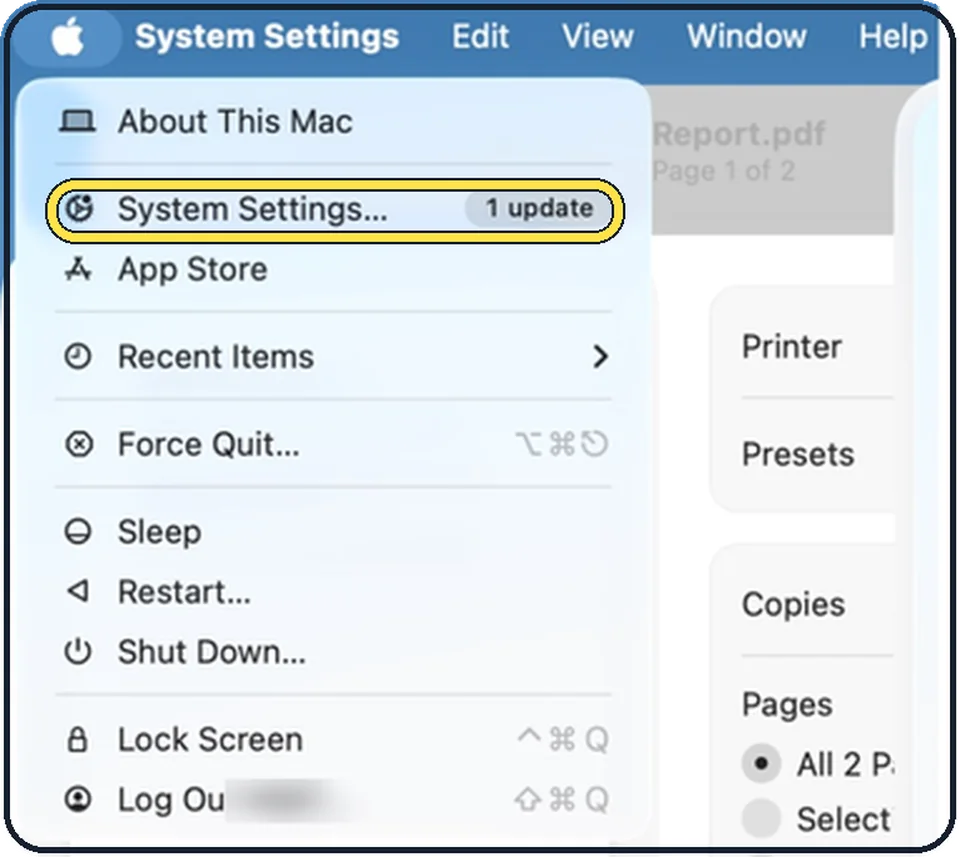
Tap the picture to see it full size Open System Settings
Click the Apple menu in the top left corner of the screen and choose System Settings.
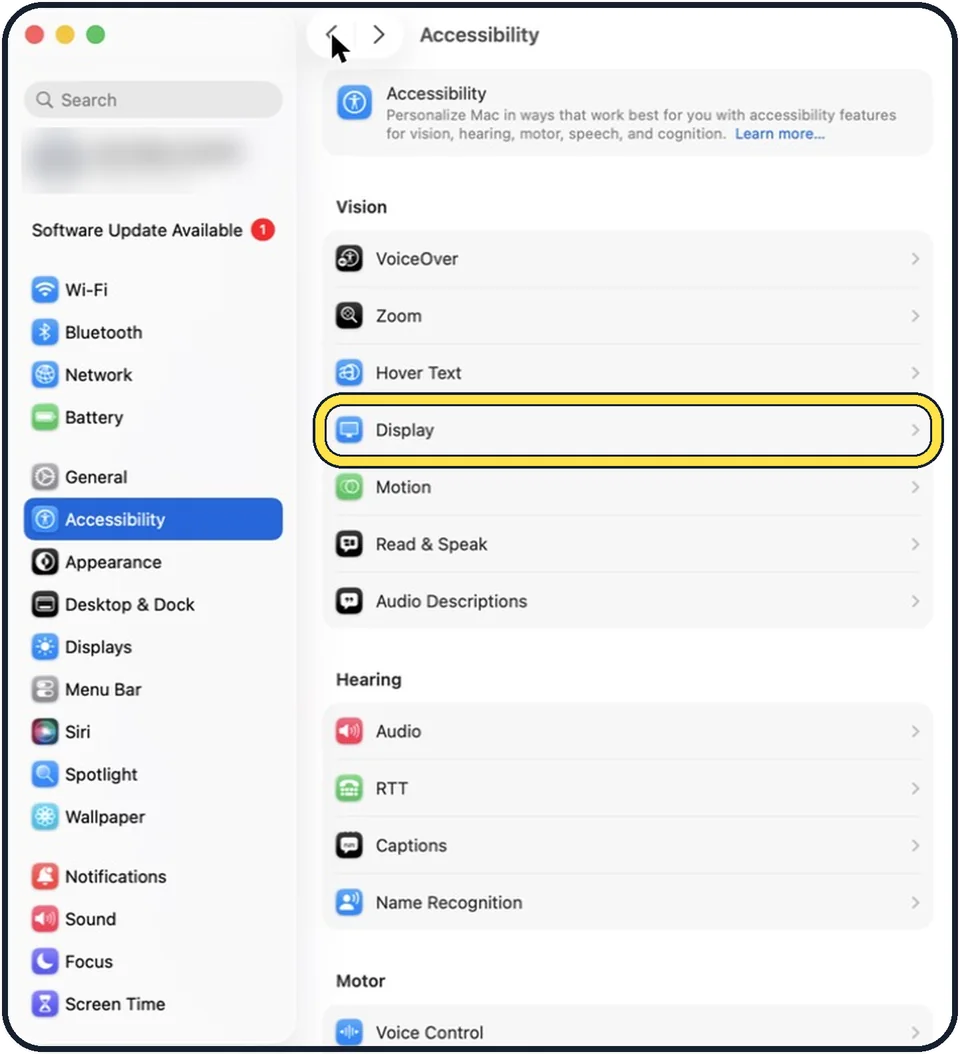
Tap the picture to see it full size Click Accessibility, then Display
Accessibility is in the sidebar on the left. Display is in the Vision group on the right. You may need to scroll down in the sidebar.
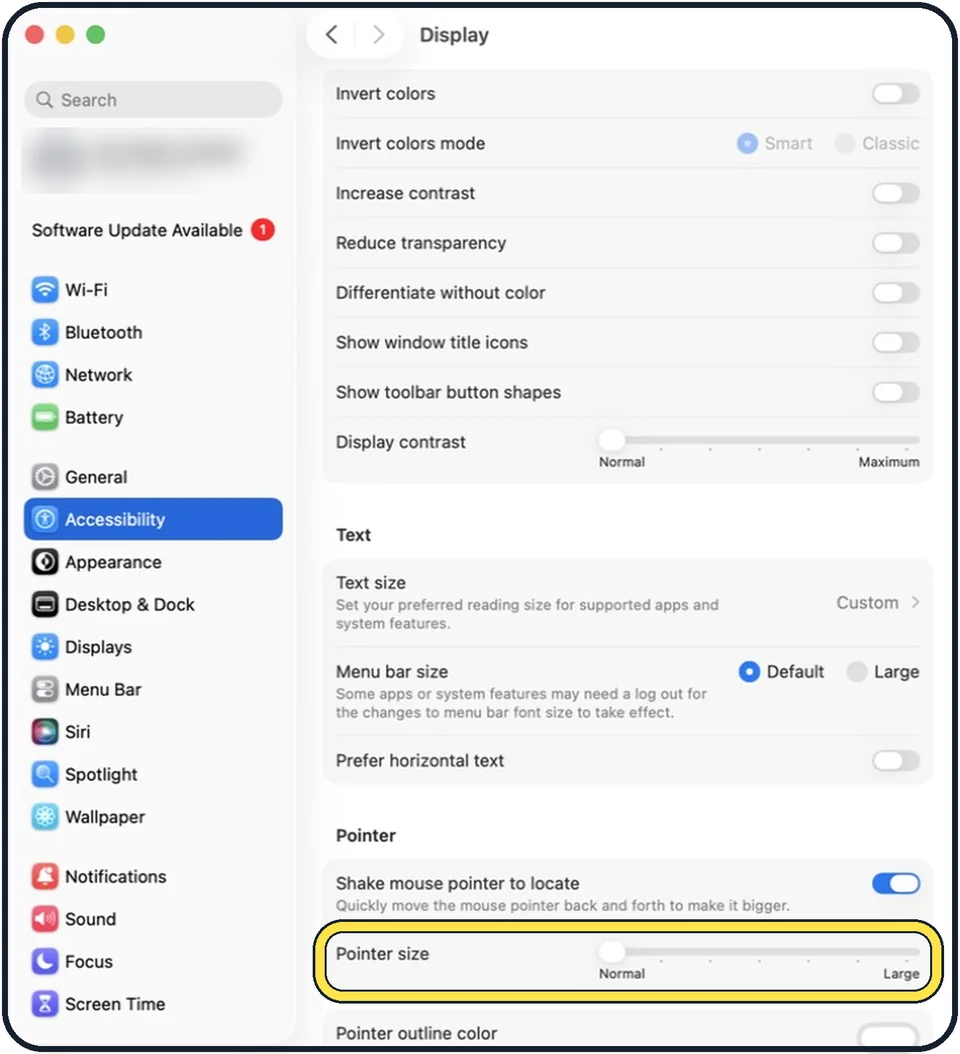
Tap the picture to see it full size Drag the Pointer size slider
Scroll down to the Pointer group. The slider goes from Normal to Large.
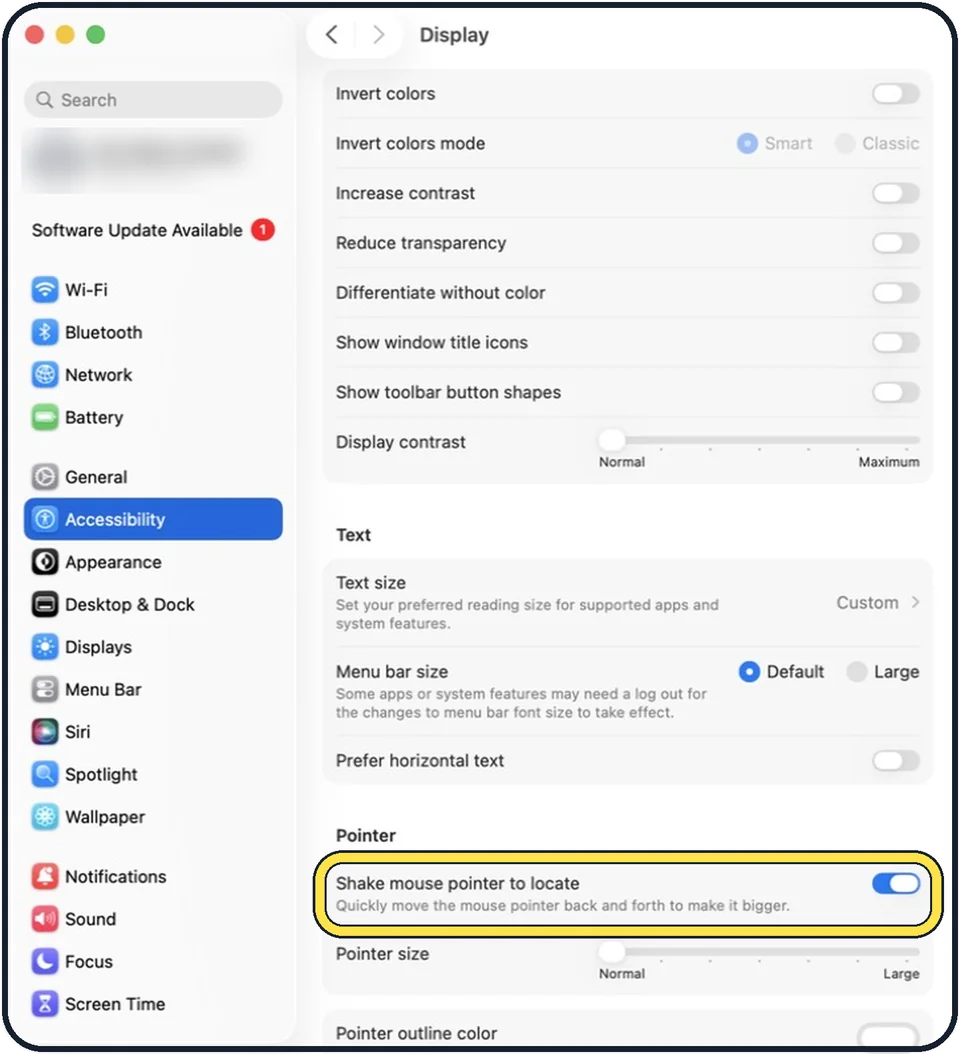
Tap the picture to see it full size Keep Shake mouse pointer to locate on
It is the row above the slider and is on in the picture. Quickly move the mouse pointer back and forth to make it bigger.
About this guide
On a large or very sharp screen the pointer is small and easy to lose. macOS has a slider for its size and a trick for finding it. Both are in the Accessibility settings, under Display.
The screenshots show System Settings on macOS Tahoe 26.
Good to know
Below the slider you can choose a colour for the outline of the pointer and for its inside. Reset Colors brings back the white outline and black fill.
In short: System Settings, Accessibility, Display, Pointer size.
Links checked in October 2026. Menus and features can change after software updates. These steps match the version named at the top.
Did this guide work for you?
Sorry about that. What happened?