
macOS 27 compared with macOS 26: We rewrote steps 1, 2 and 3 to match the macOS 27 screens. The macOS 26 page keeps the steps and screenshots as they were.
howtosimply.com/guides/how-to-always-show-scroll-bars-on-a-mac/ · Checked October 2026 · MacBook Neo · macOS 27.0.1
In this guide
Open System Settings, click Appearance, and under Show scroll bars in the Windows section select Always. Apple says scroll bars then stay visible in windows whose content does not fit, not only while you scroll.
3 of 3 steps with real screenshots · 2 official sources below
- Device
- Mac
- Shown on
- macOS 27.0.1 (MacBook Neo)
- App
- System Settings
- Real screenshots
- 3 of 3 steps
- Checked
- October 2026
- Sources
- 2 official, linked below
Step by step
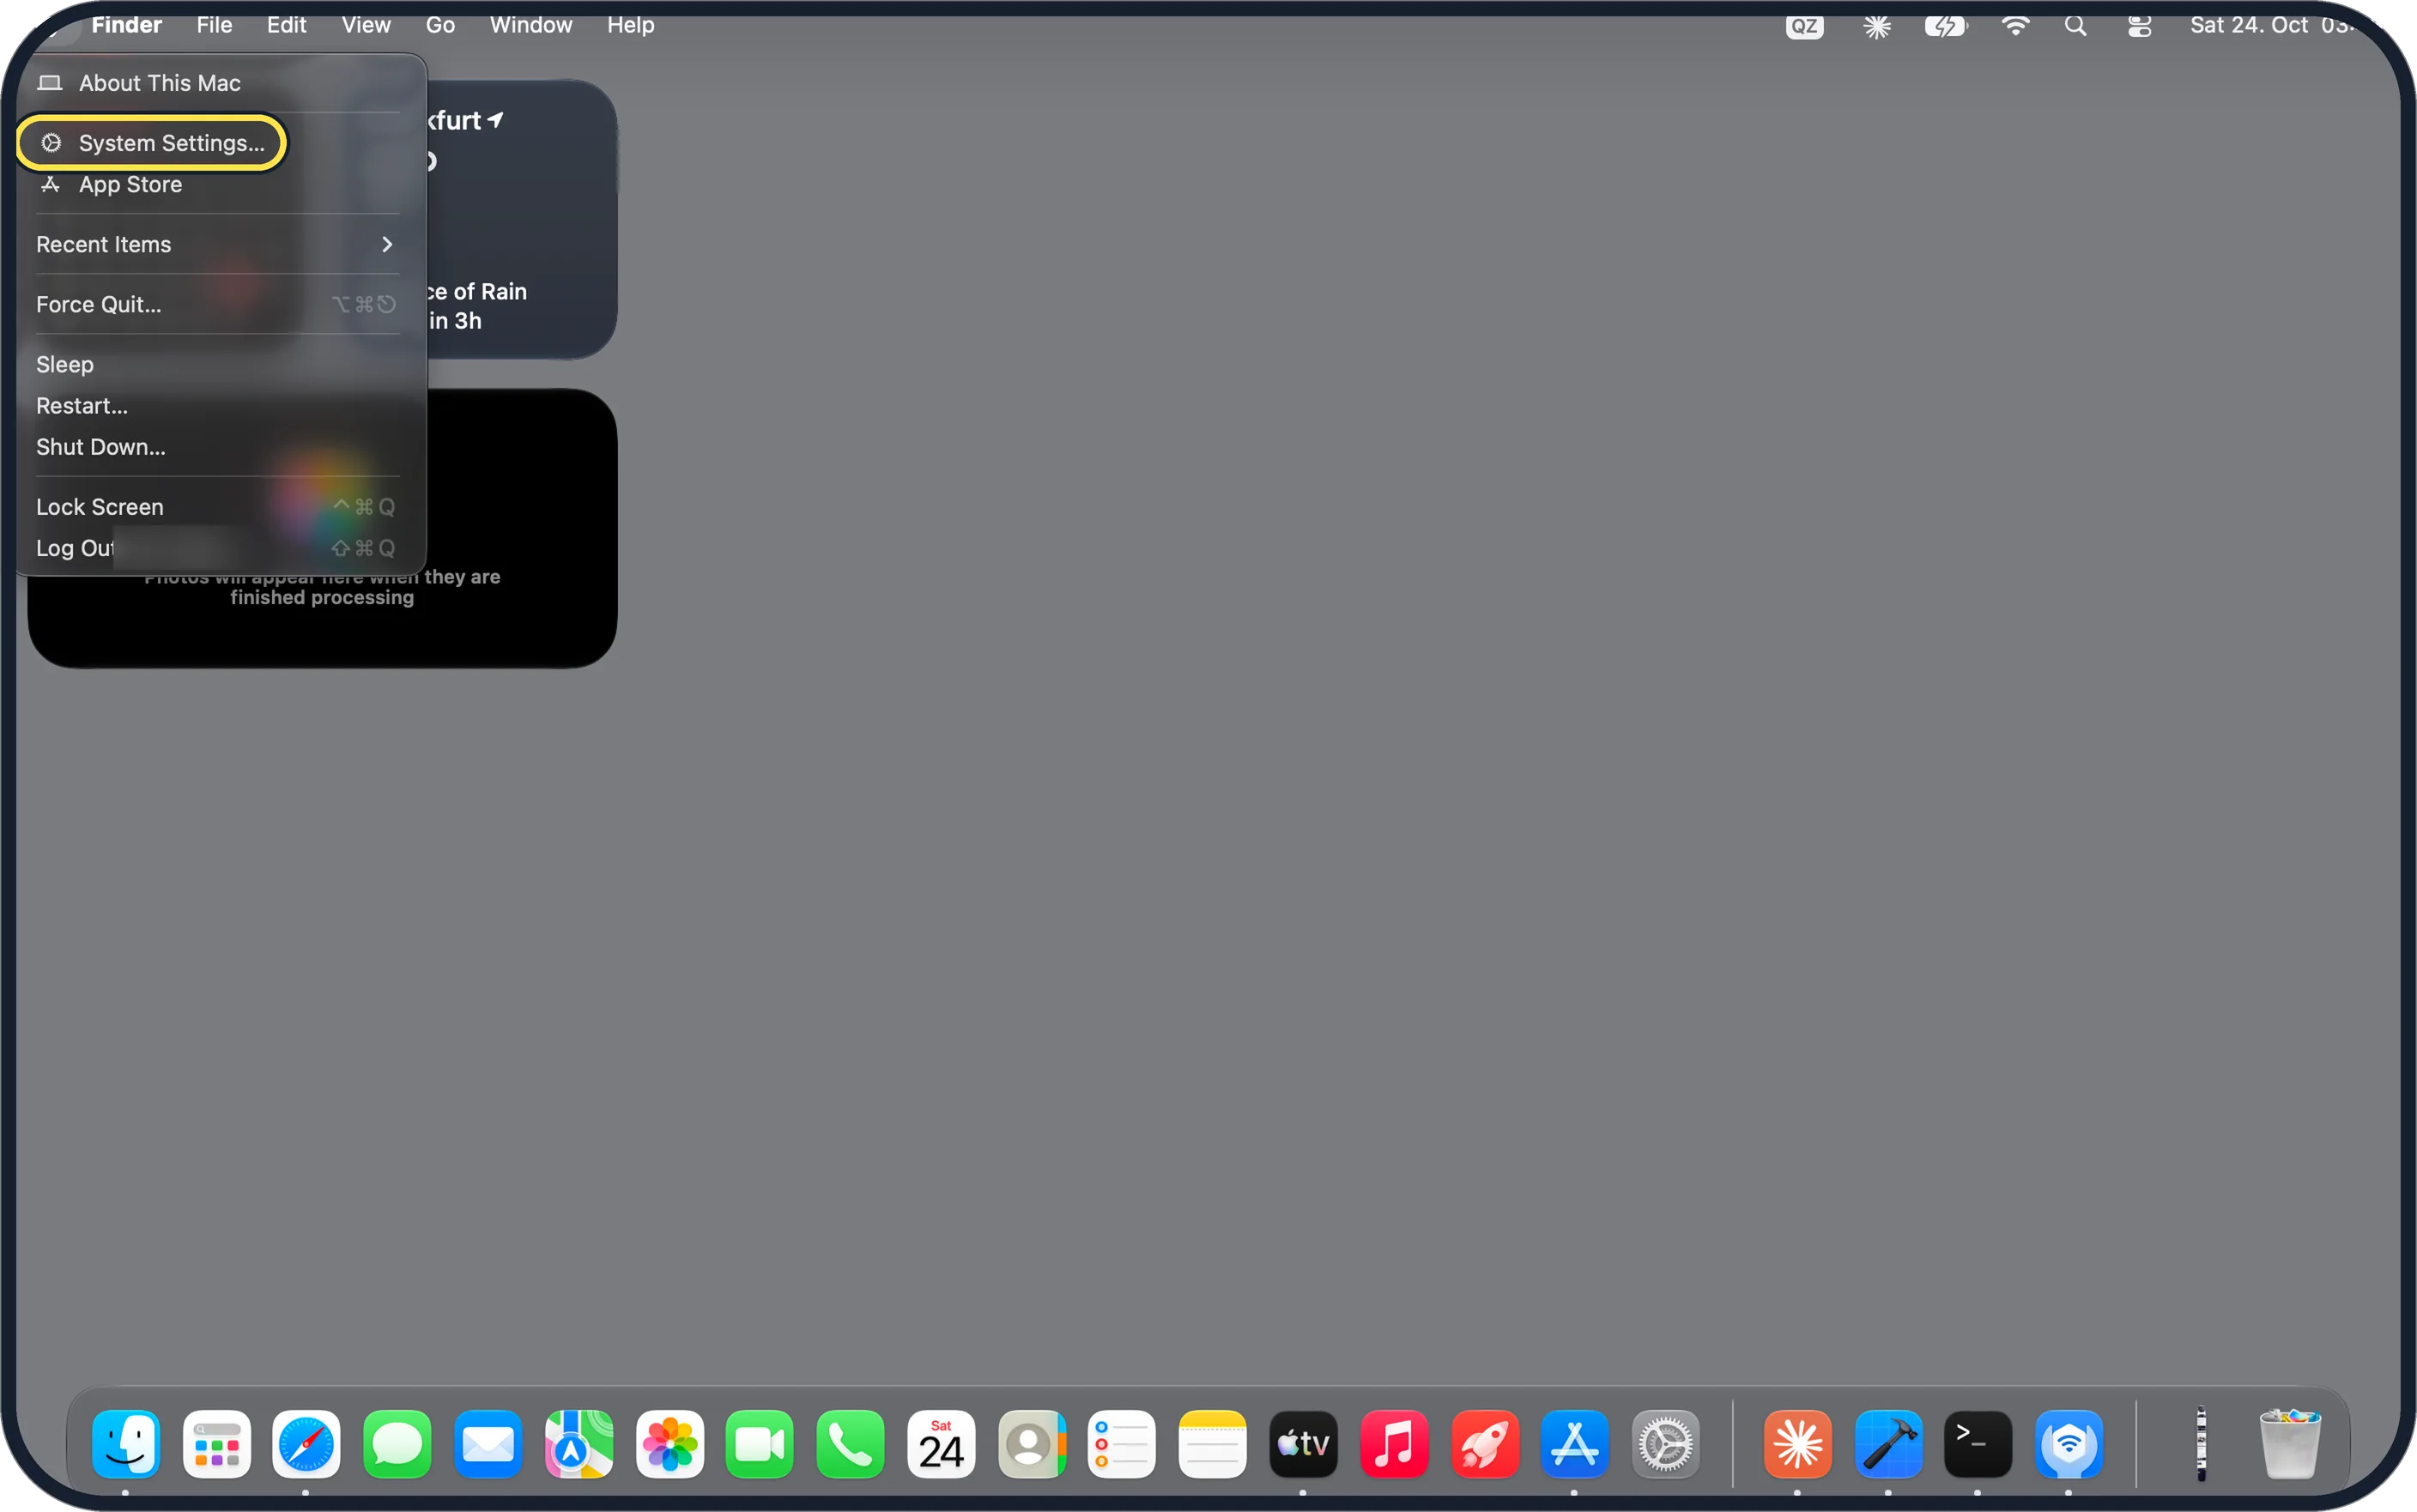
Zoomed in on the setting. Tap to see the whole screenTap the picture to see it full size Open System Settings
Click the Apple menu in the top-left corner of the screen and choose System Settings….
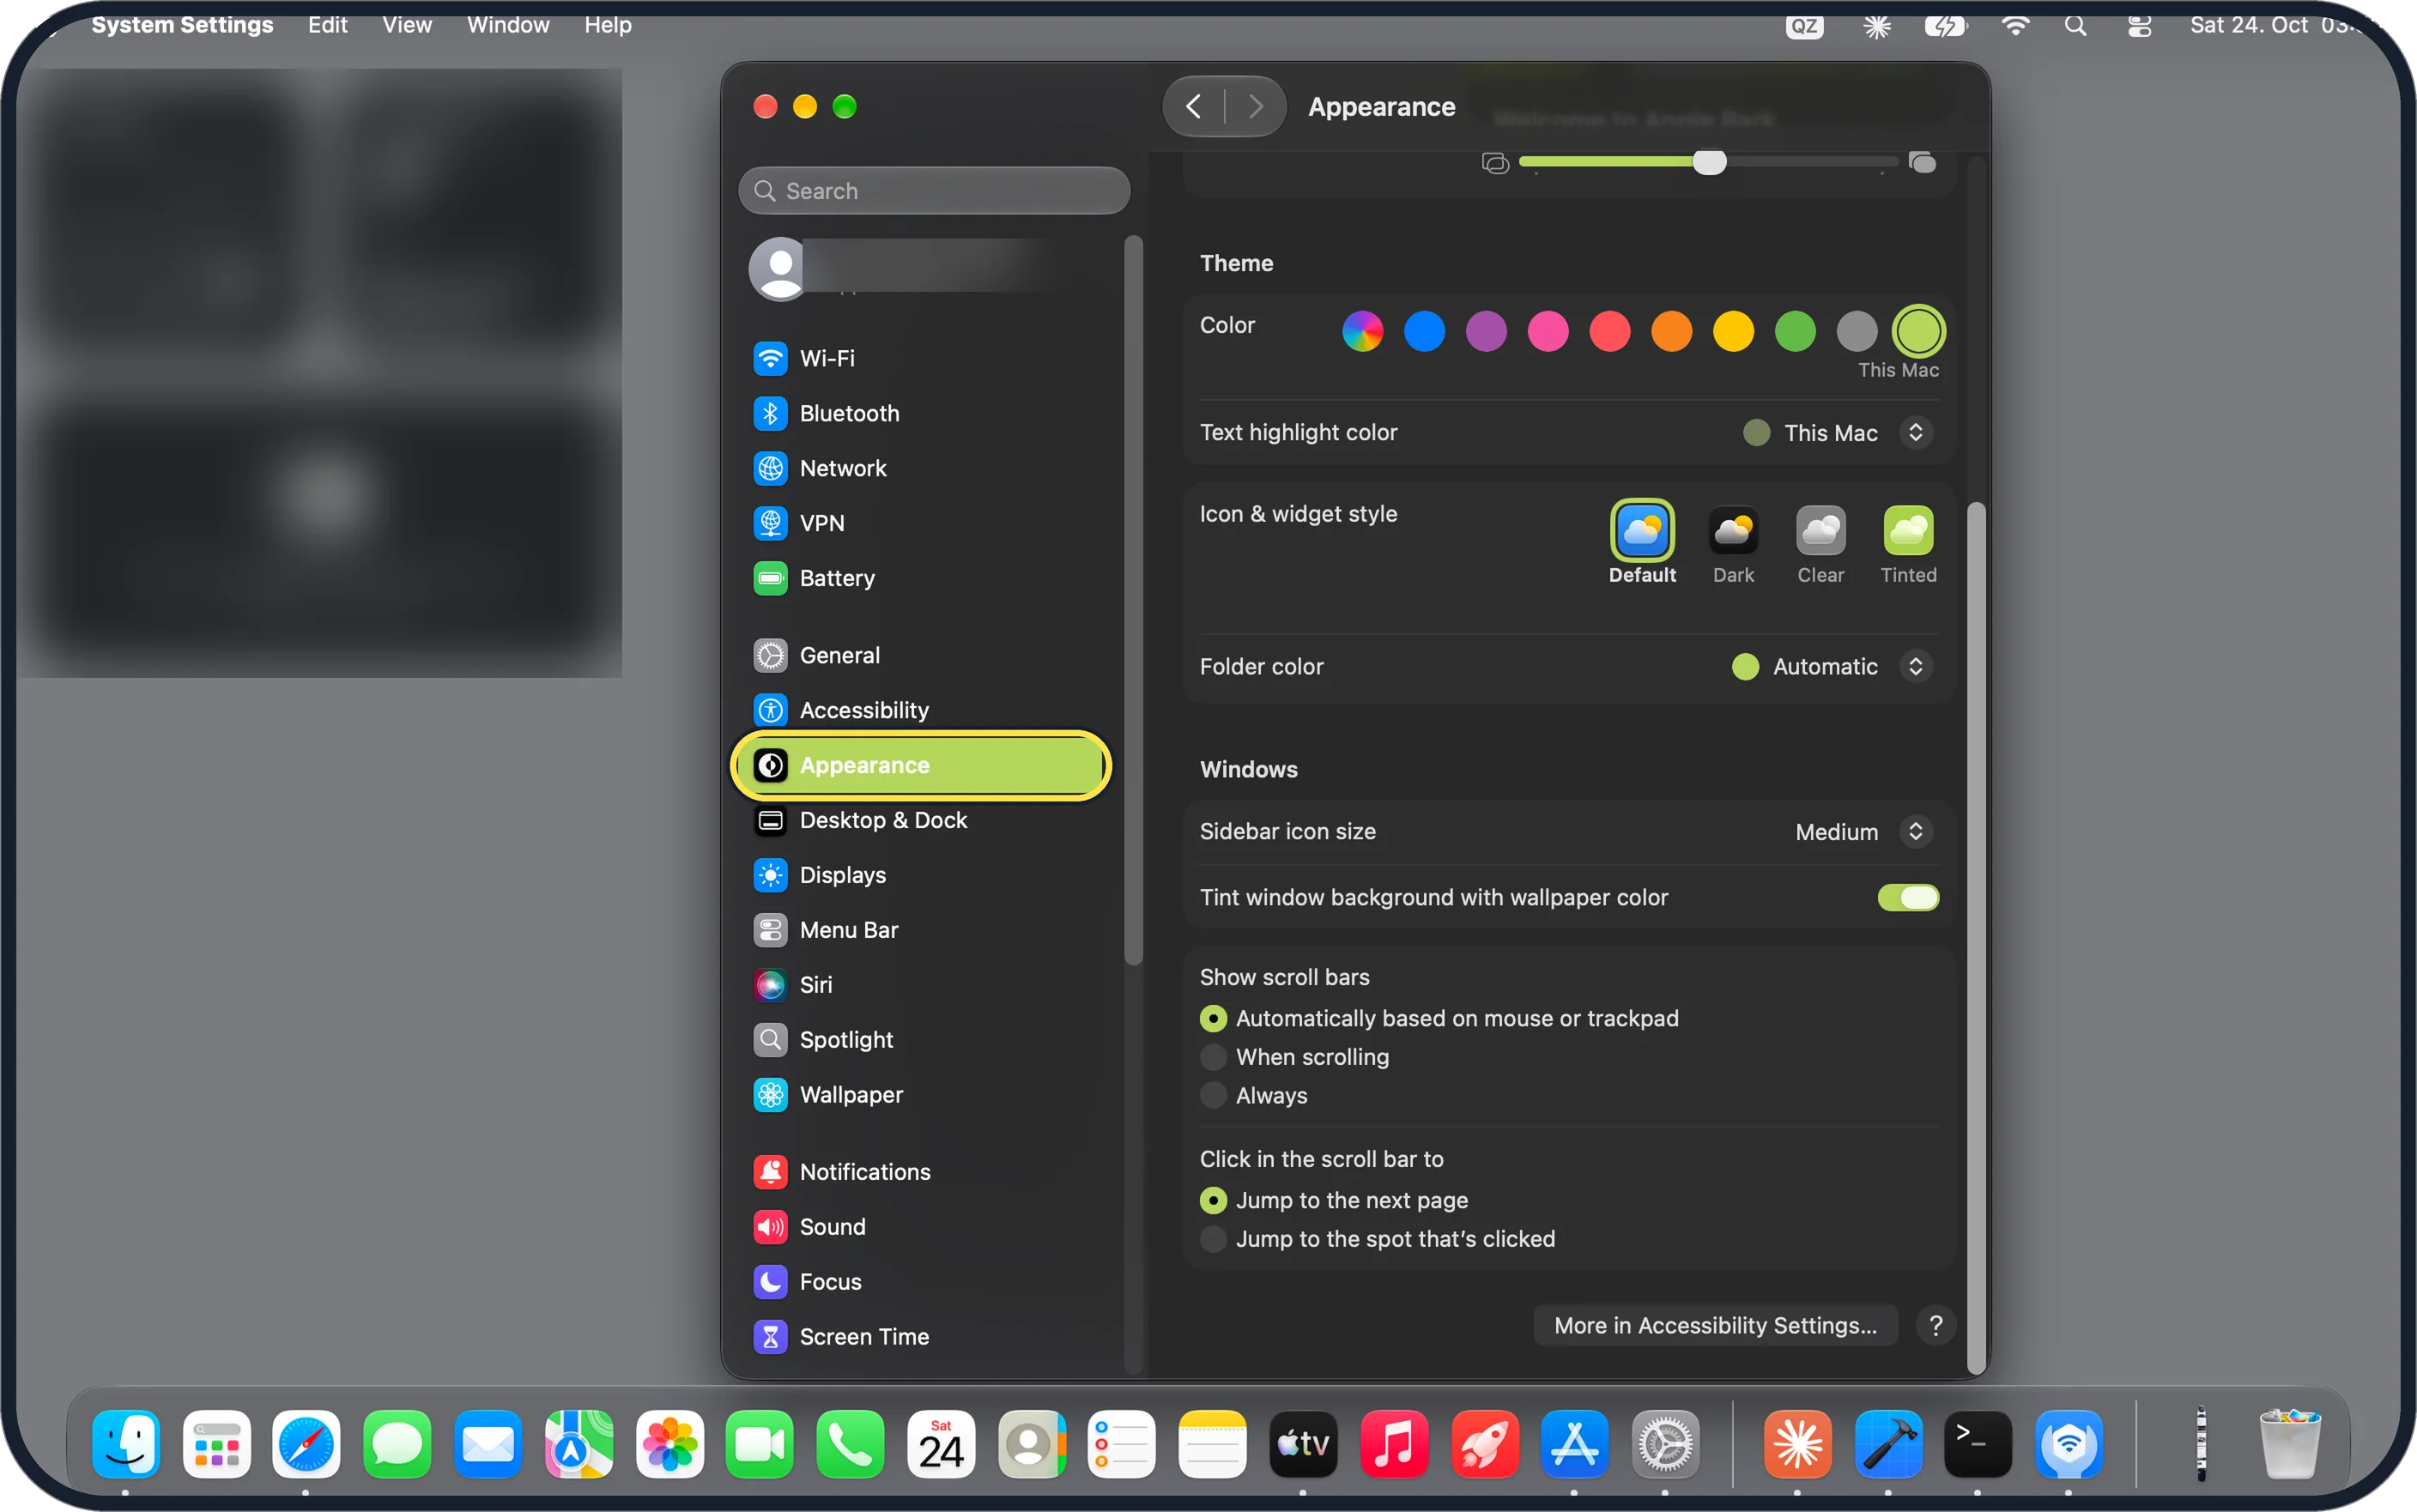
Zoomed in on the setting. Tap to see the whole screenTap the picture to see it full size Click Appearance in the sidebar
On our MacBook Neo, Appearance is below Accessibility in the sidebar.
Scroll down the page to the Windows heading, where Show scroll bars sits below Sidebar icon size and Tint window background with wallpaper color.
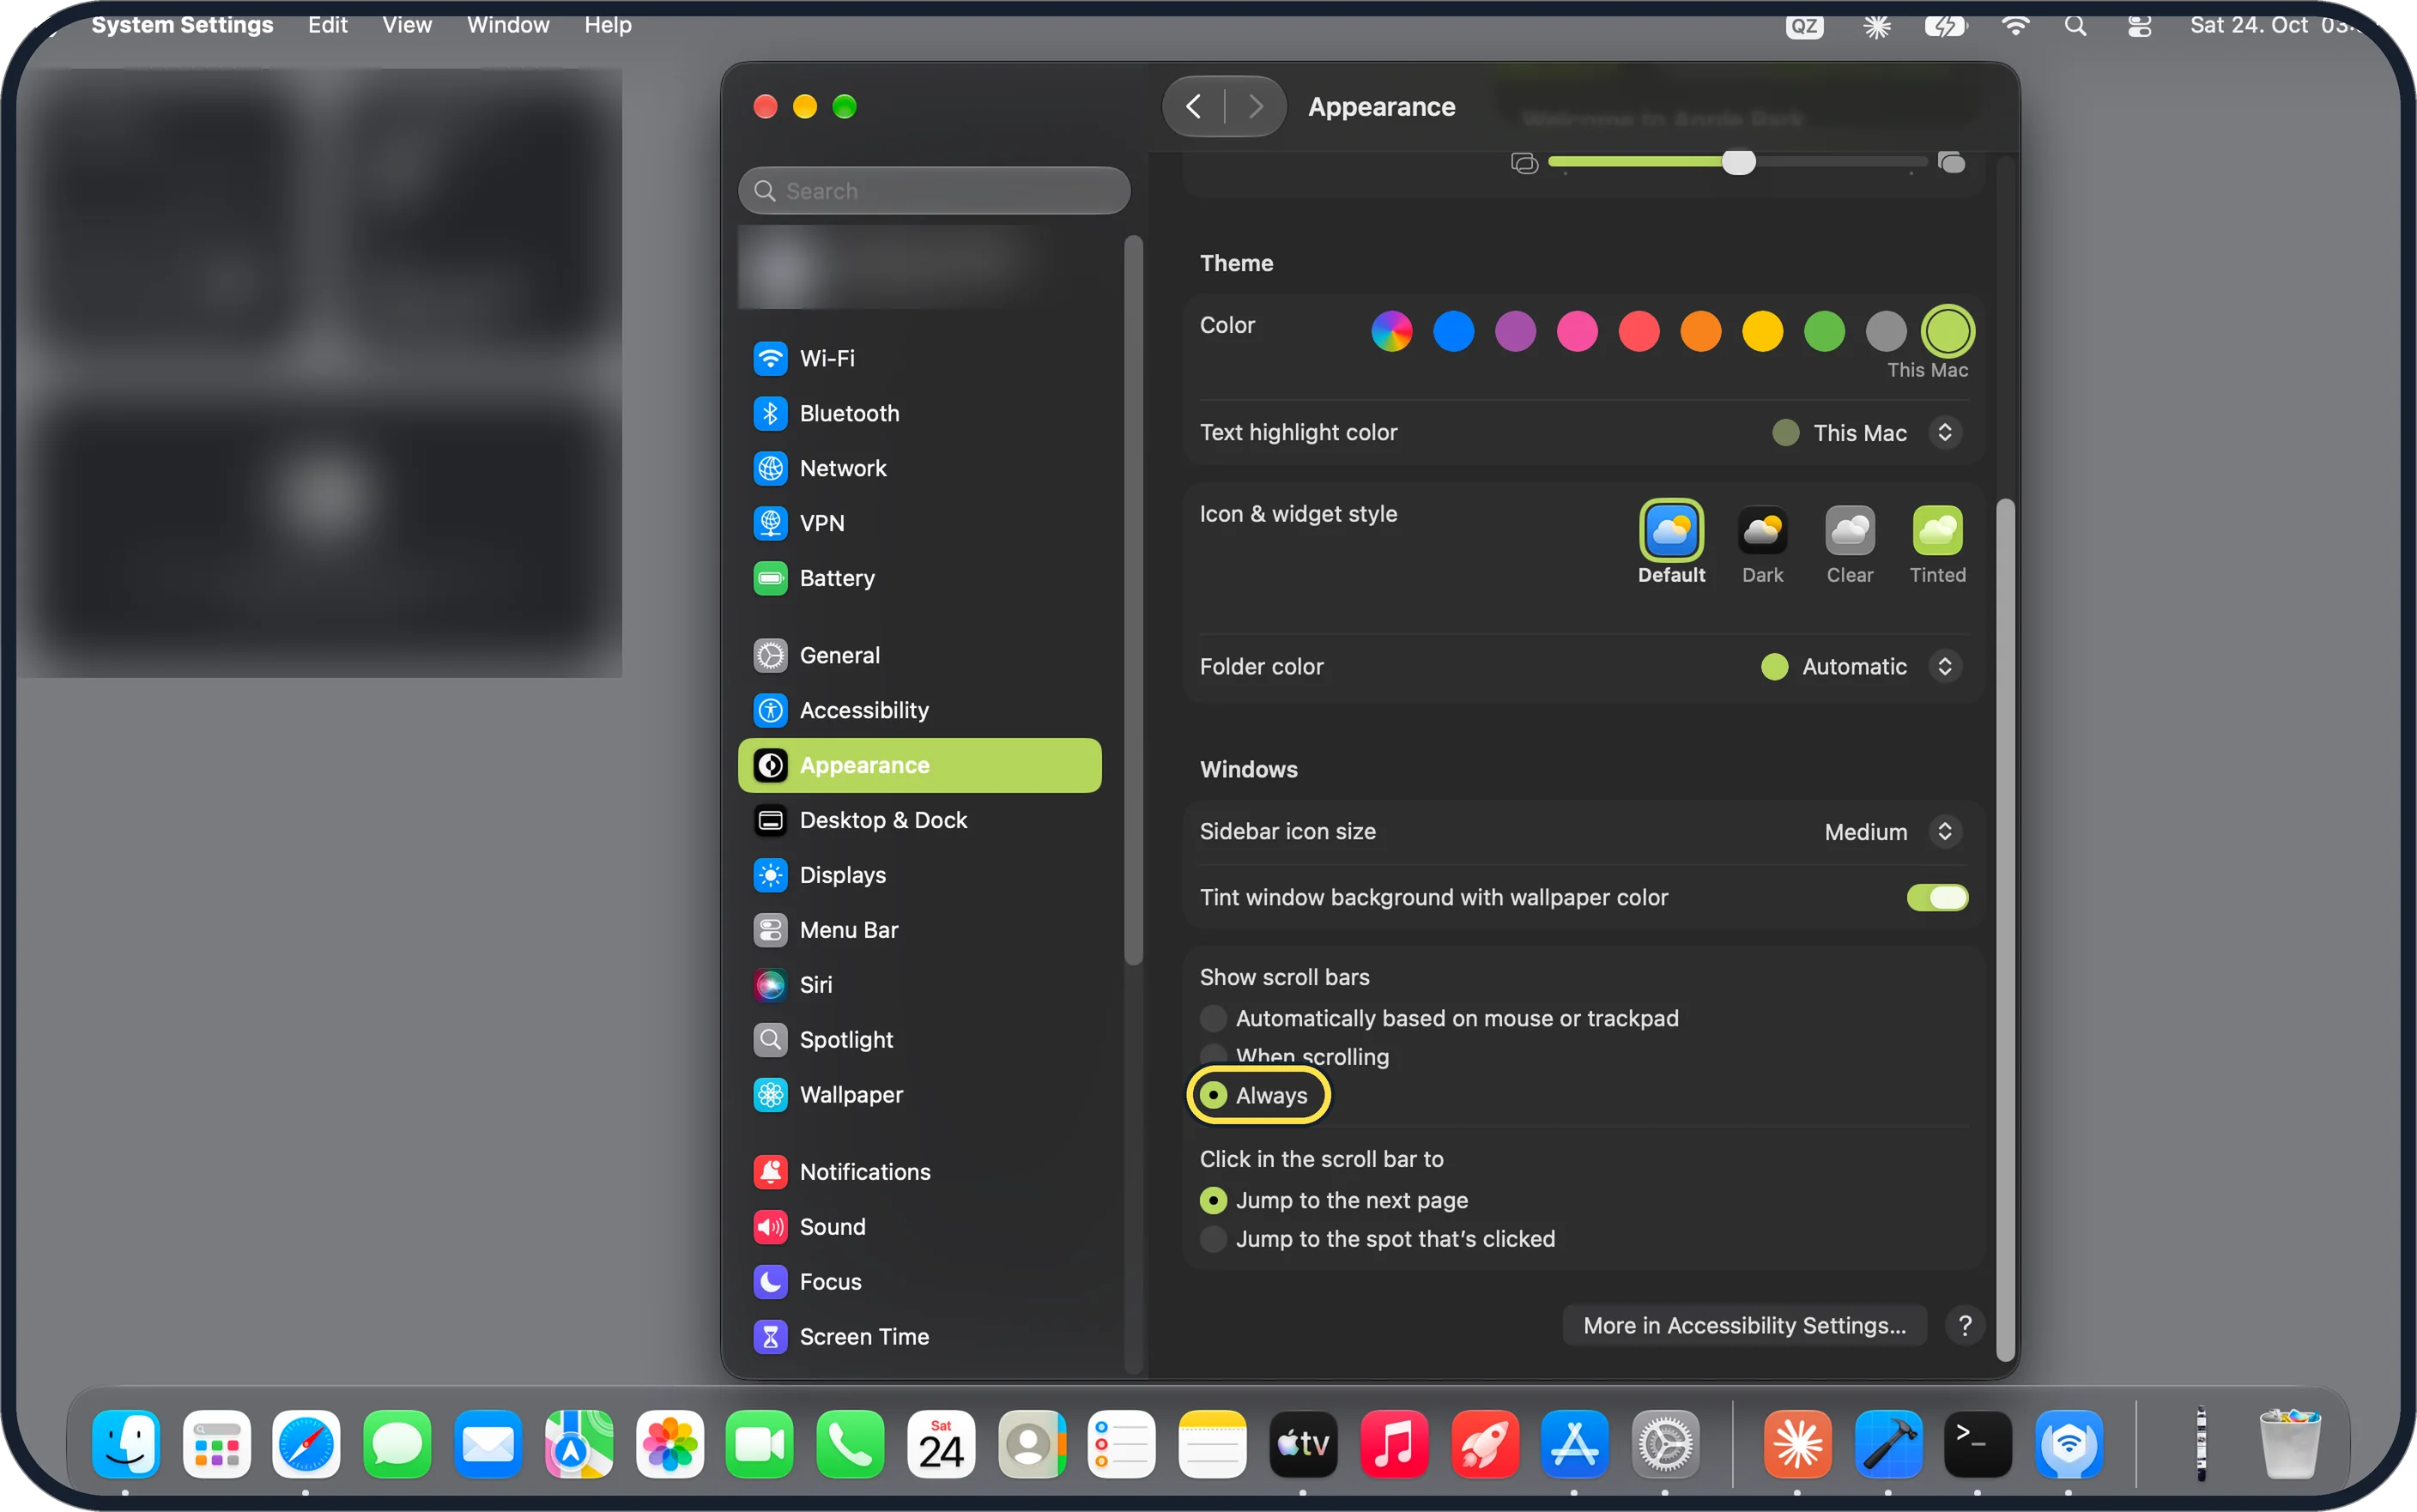
Zoomed in on the setting. Tap to see the whole screenTap the picture to see it full size Select Always under Show scroll bars
There are three choices: Automatically based on mouse or trackpad, When scrolling and Always.
On our MacBook Neo, Automatically based on mouse or trackpad was selected to begin with; the chosen option shows a filled green button.
If you do not see this option
- You cannot find Show scroll bars Scroll down the Appearance page. On our MacBook Neo it is in the Windows section, below the Theme settings.
- Scroll bars already stay visible Apple says with Automatically based on mouse or trackpad, scroll bars are shown all the time if your mouse or trackpad does not allow gestures. Source: Change Appearance settings on Mac · Source: Change General preferences on Mac
- Your Mac has System Preferences Apple's guide for macOS Monterey 12 says Show scroll bars is in System Preferences, General, with the same three choices. Source: Change Appearance settings on Mac · Source: Change General preferences on Mac
If this does not work
- No scroll bar appears Apple says scroll bars appear only when a window's content does not fit its current size. Source: Change Appearance settings on Mac · Source: Change General preferences on Mac
- Scroll bars still hide Go back to Appearance and check that the button next to Always is filled, not the one next to When scrolling.
- Clicking the bar jumps the wrong way Apple says to hold Option while clicking in the scroll bar to switch for a moment between jumping a page and jumping to the spot. Source: Change Appearance settings on Mac · Source: Change General preferences on Mac
About this guide
With a trackpad, macOS hides scroll bars until you scroll, so you cannot see at a glance how long a page is or where you are in it; one setting keeps them visible.
Screenshots: MacBook Neo, macOS 27.0.1, dark mode.
Good to know
Click in the scroll bar to, the setting below, decides whether a click in the scroll bar jumps to the next page or to the spot that is clicked.
On our MacBook Neo, its two options are Jump to the next page, which was selected, and Jump to the spot that's clicked.
In short: Apple menu > System Settings… > Appearance > Show scroll bars: Always.
Links checked in October 2026. Menus and features can change after software updates. These steps match the version named at the top.
Did this guide work for you?
Sorry about that. What happened?