How to change the default video quality in YouTube on Android
By Abu Bakar Saadat · Reviewed by Saadat Rafiq · 2 min read · 4 steps · Published 7 October 2026
In YouTube tap You, the gear, Video quality preferences. Choose Auto, Higher picture quality or Data saver, separately for mobile networks and for Wi-Fi. For one video, tap the gear in the player and then Quality.
- Device
- Android
- Shown on
- Samsung Galaxy A57 5G (SM-A576B), One UI 8.5, Android 16
- Real screenshots
- 4 of 4 steps
- Checked
- October 2026
- Sources
- 1 official, linked below
Step by step
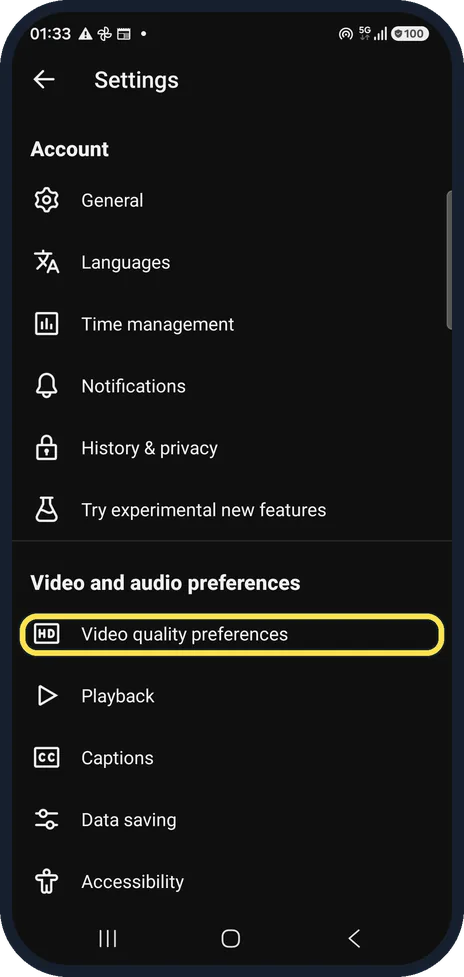
Open Video quality preferences
In YouTube tap You at the bottom right, then the gear at the top right. Tap Video quality preferences.
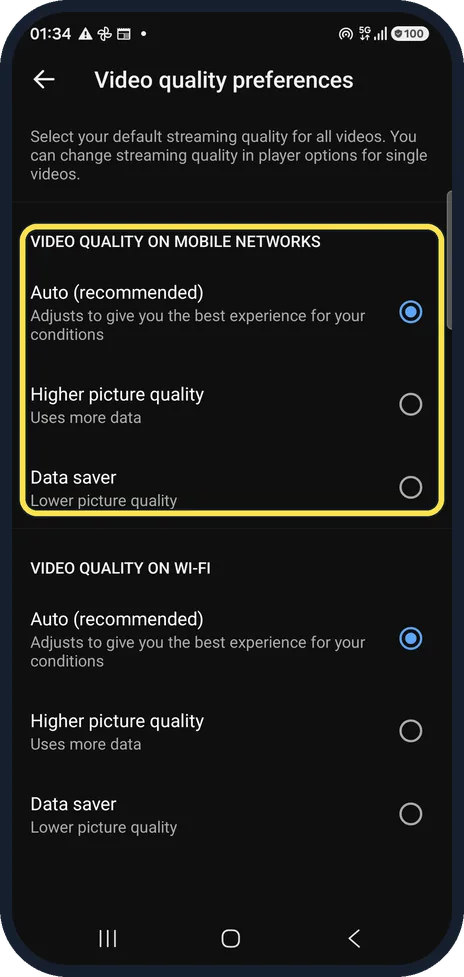
Set mobile network quality
Under Video quality on mobile networks: Auto (recommended), Higher picture quality (uses more data) or Data saver (lower picture quality).
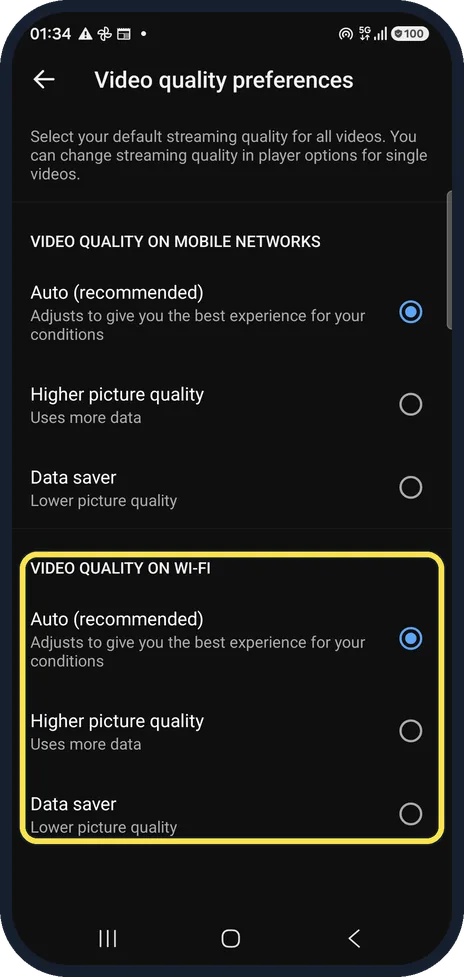
Set Wi-Fi quality
The same three choices under Video quality on Wi-Fi. Ours were both on Auto.
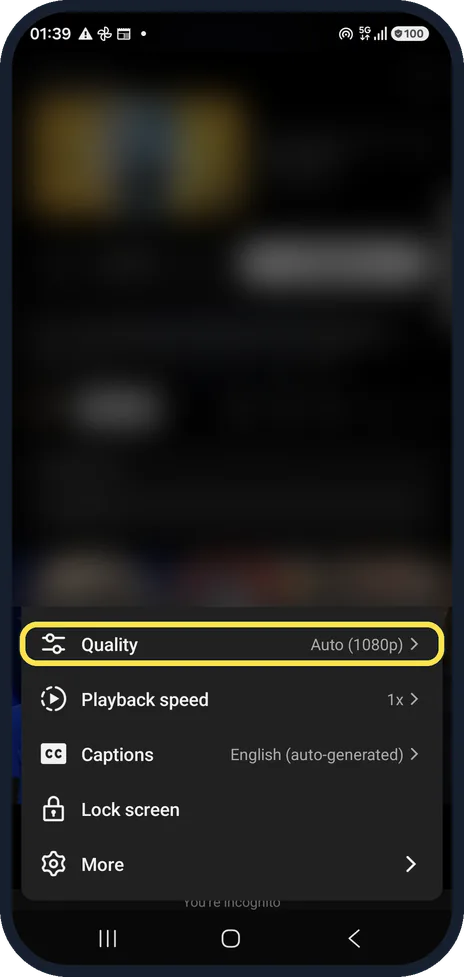
Change it for one video
Tap the video, then the gear. Quality shows the current setting, ours Auto (1080p); tap it to pick another.
About this guide
YouTube picks the quality for you, which can mean blurry video on a good connection or a lot of mobile data on a bad one.
The screenshots are from the YouTube app, version 21.39.522, on a Samsung Galaxy A57 5G with Android 16 and One UI 8.5, in dark mode. Other people's videos, ads and comments are blurred.
Good to know
None of these settings picks an exact resolution for every video; YouTube still adapts within the choice.
In short: YouTube, gear, Video quality preferences: mobile and Wi-Fi. One video: player gear, Quality.
Links checked in October 2026. Rules and prices change. Check the official source before you act.
Did this guide work for you?
Sorry about that. What happened?