
macOS 27 compared with macOS 26: We rewrote this guide on macOS 27.0.1 (MacBook Neo): it now has 4 steps instead of 5. The macOS 26 page keeps the steps and screenshots as they were.
howtosimply.com/guides/how-to-reduce-motion-and-animations-on-a-mac/ · Checked October 2026 · MacBook Neo · macOS 27.0.1
In this guide
Open System Settings, click Accessibility, then Motion, and switch on Reduce motion. On the same page you can also switch off Auto-play animated images and switch on Prefer non-blinking cursor.
4 of 4 steps with real screenshots · 1 official source below
- Device
- Mac
- Shown on
- macOS 27.0.1 (MacBook Neo)
- App
- System Settings
- Real screenshots
- 4 of 4 steps
- Checked
- October 2026
- Sources
- 1 official, linked below
Step by step
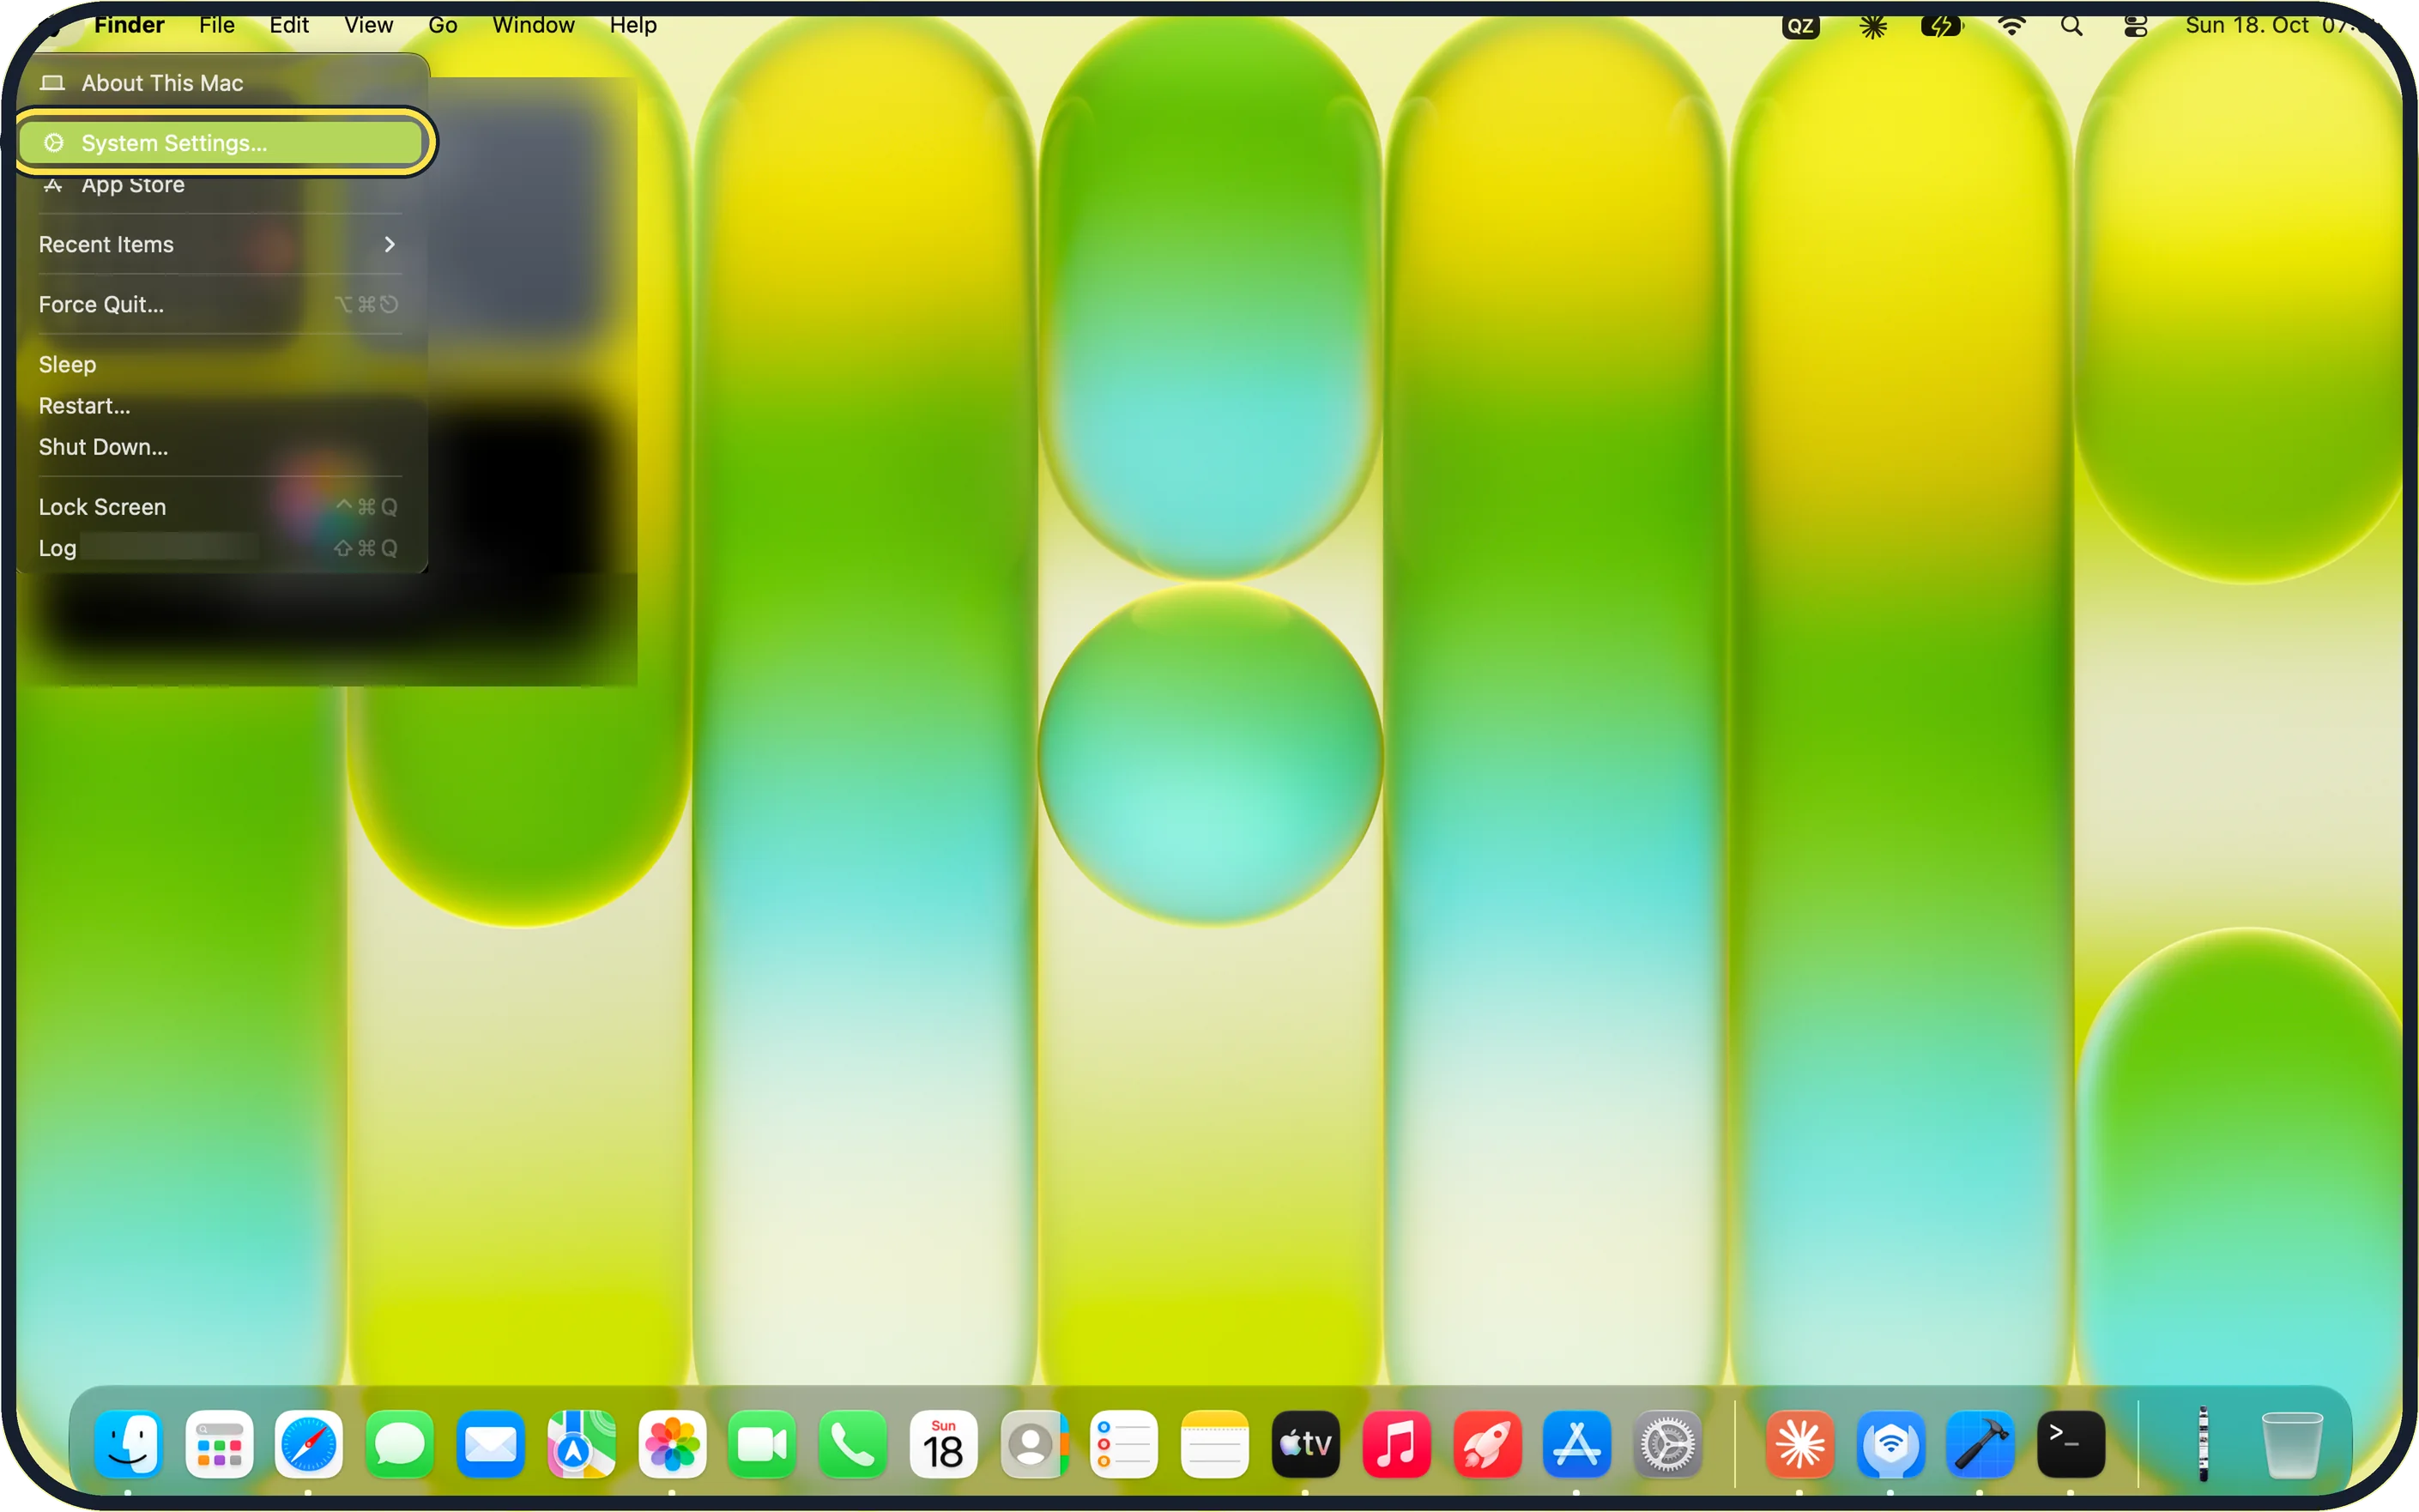
Zoomed in on the setting. Tap to see the whole screenTap the picture to see it full size Open System Settings
Click the Apple menu in the top left corner of the screen and choose System Settings.
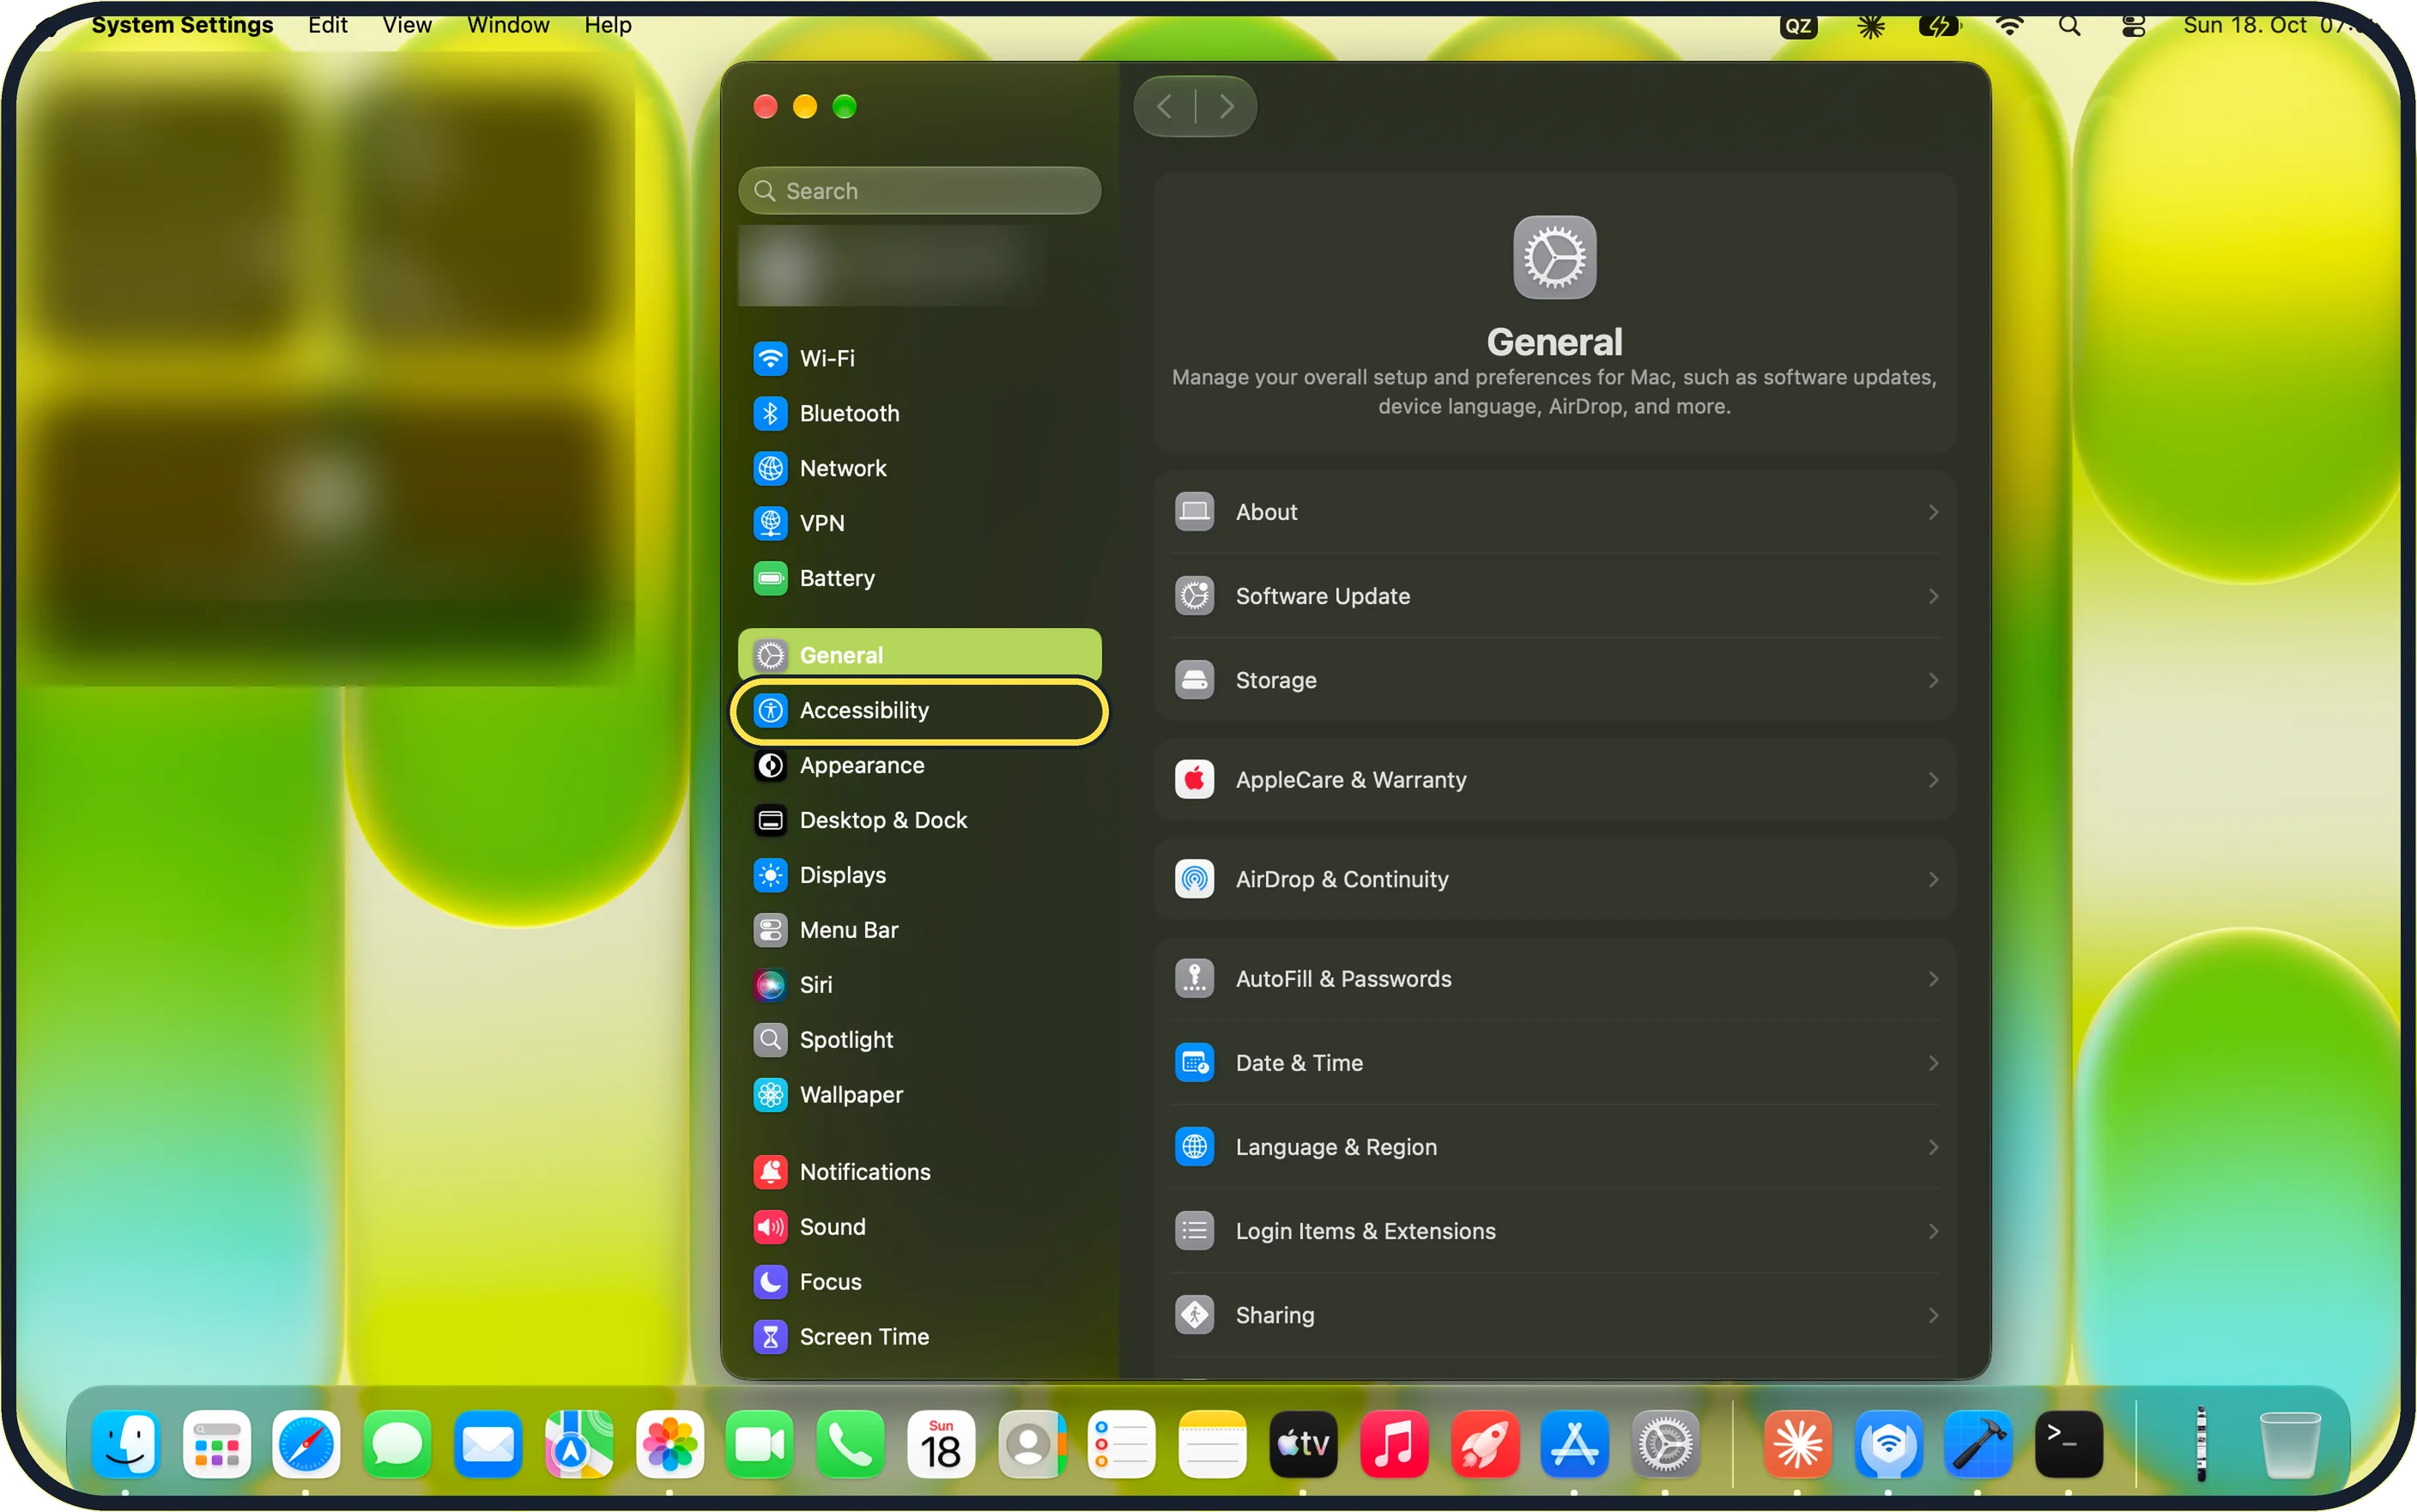
Zoomed in on the setting. Tap to see the whole screenTap the picture to see it full size Click Accessibility in the sidebar
On our MacBook Neo, Accessibility is near the top of the sidebar, just below General.
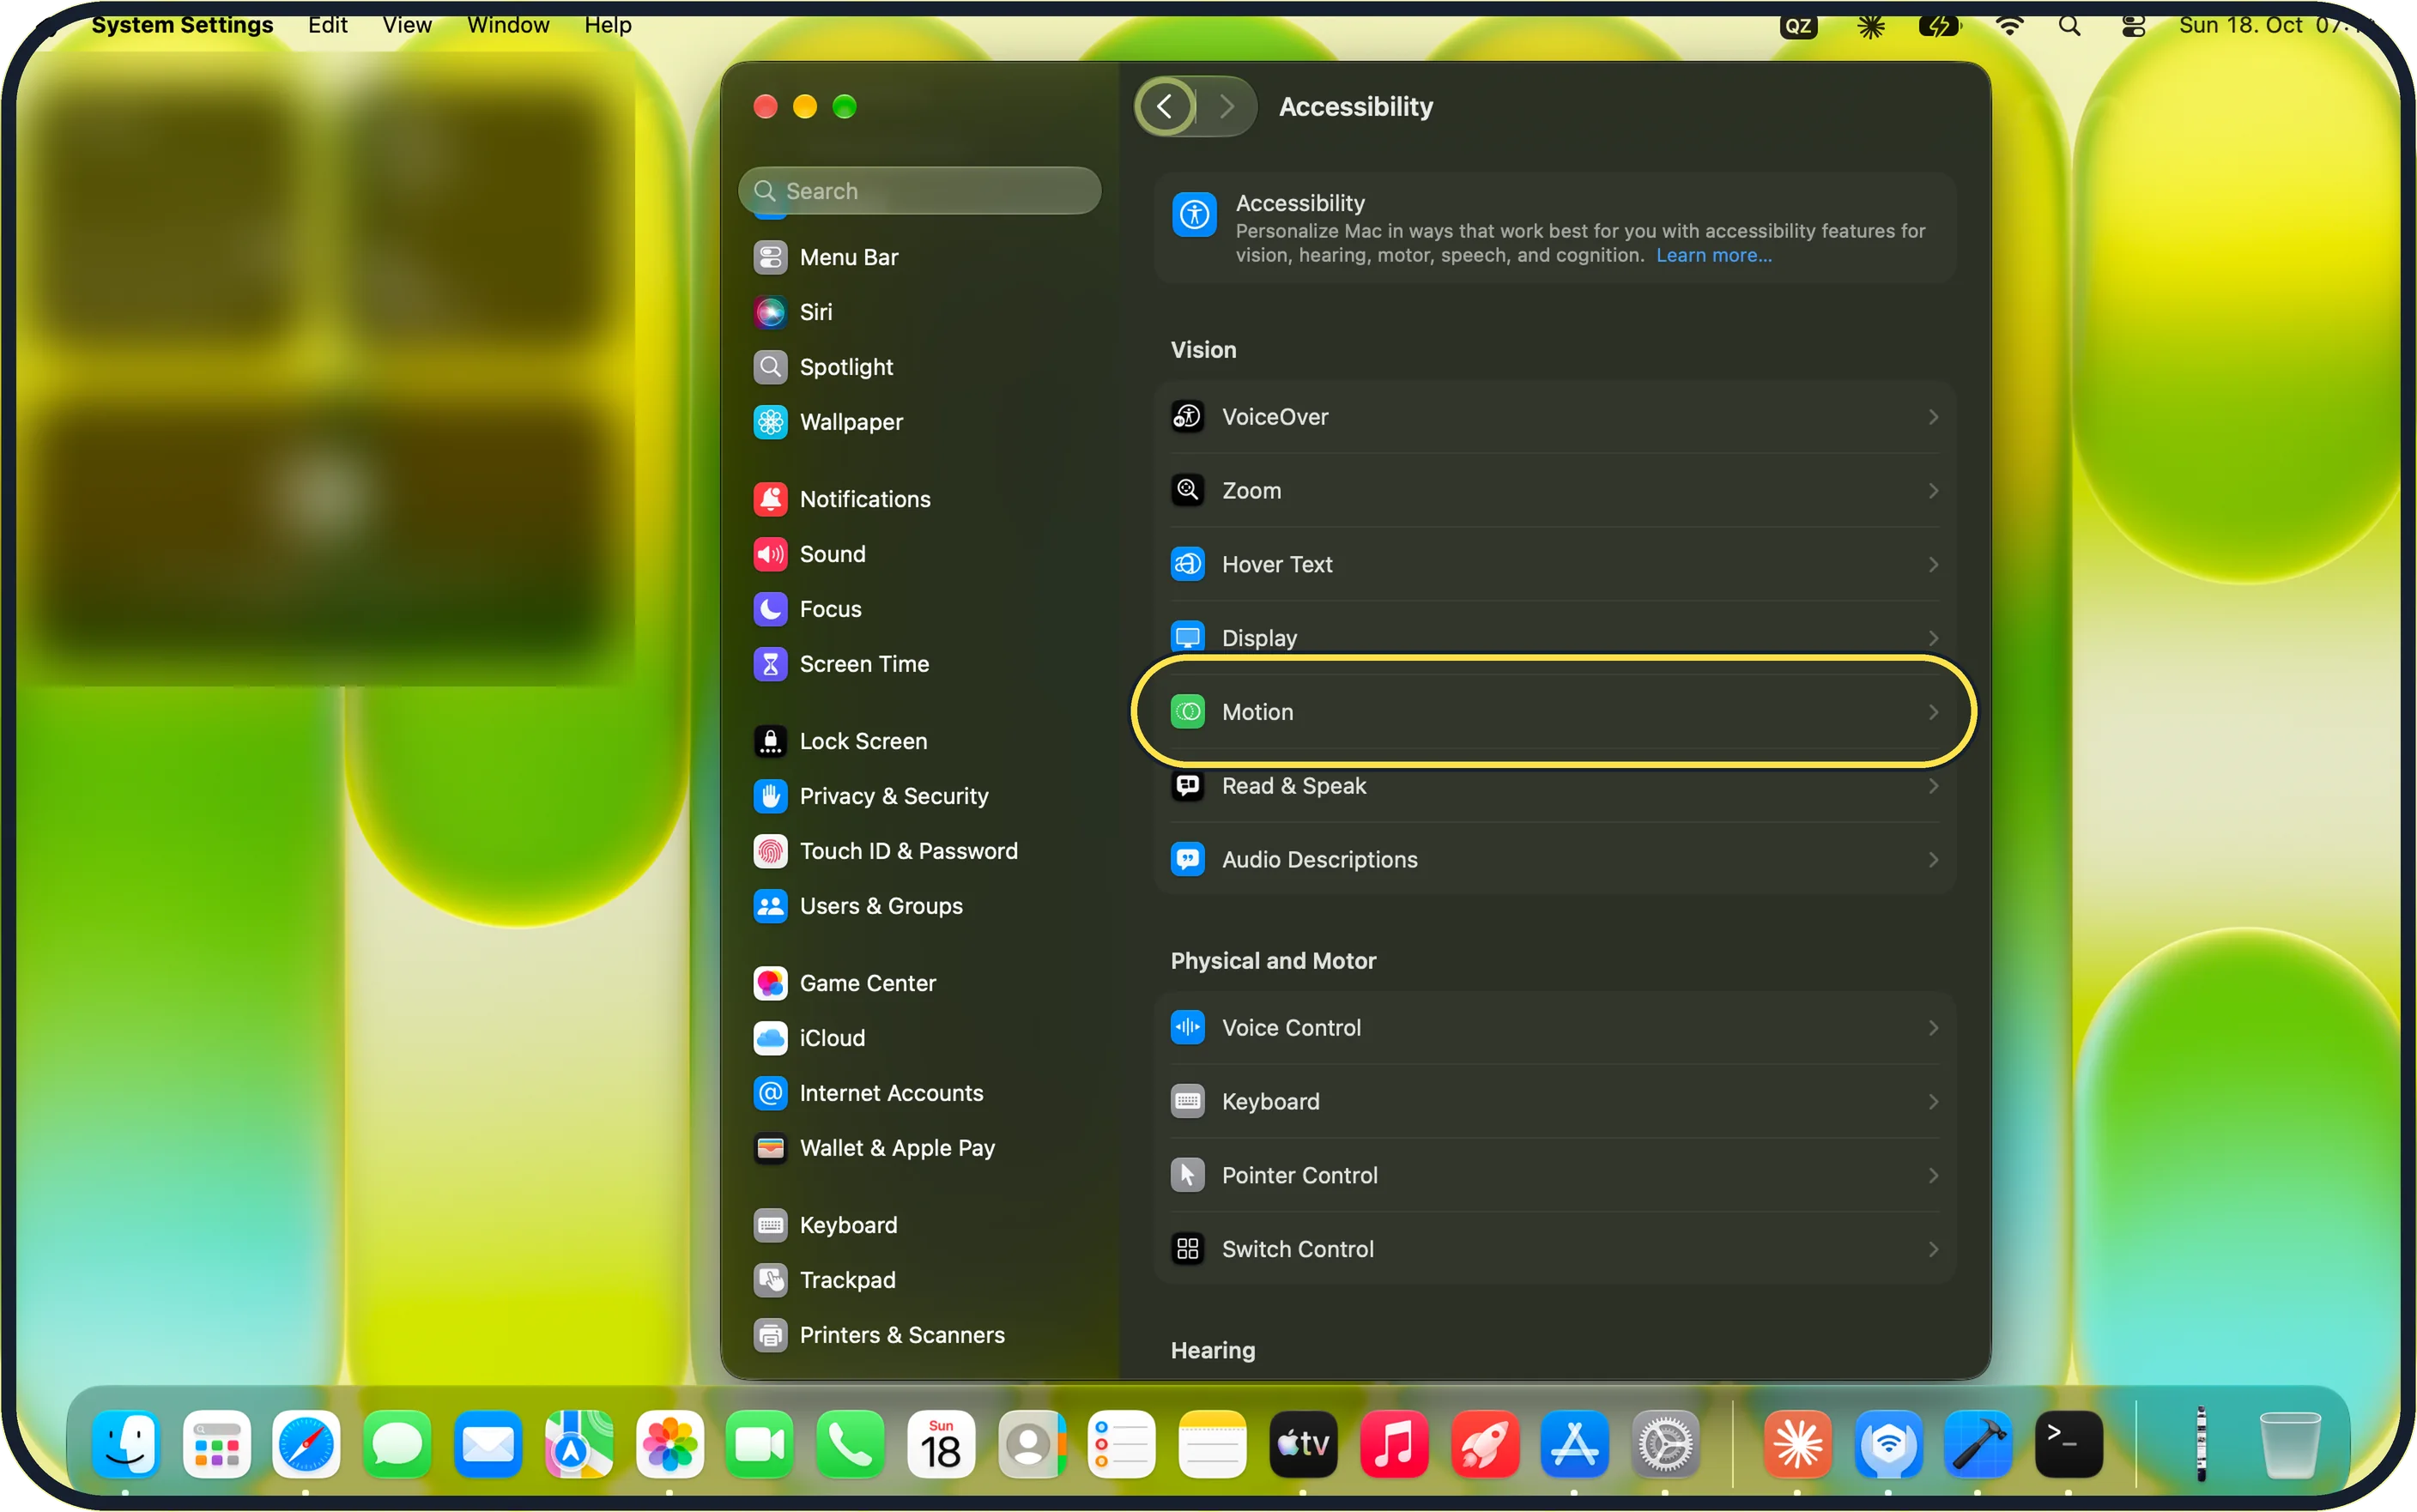
Zoomed in on the setting. Tap to see the whole screenTap the picture to see it full size Click Motion
On our MacBook Neo, Motion is in the Vision group, between Display and Read & Speak.
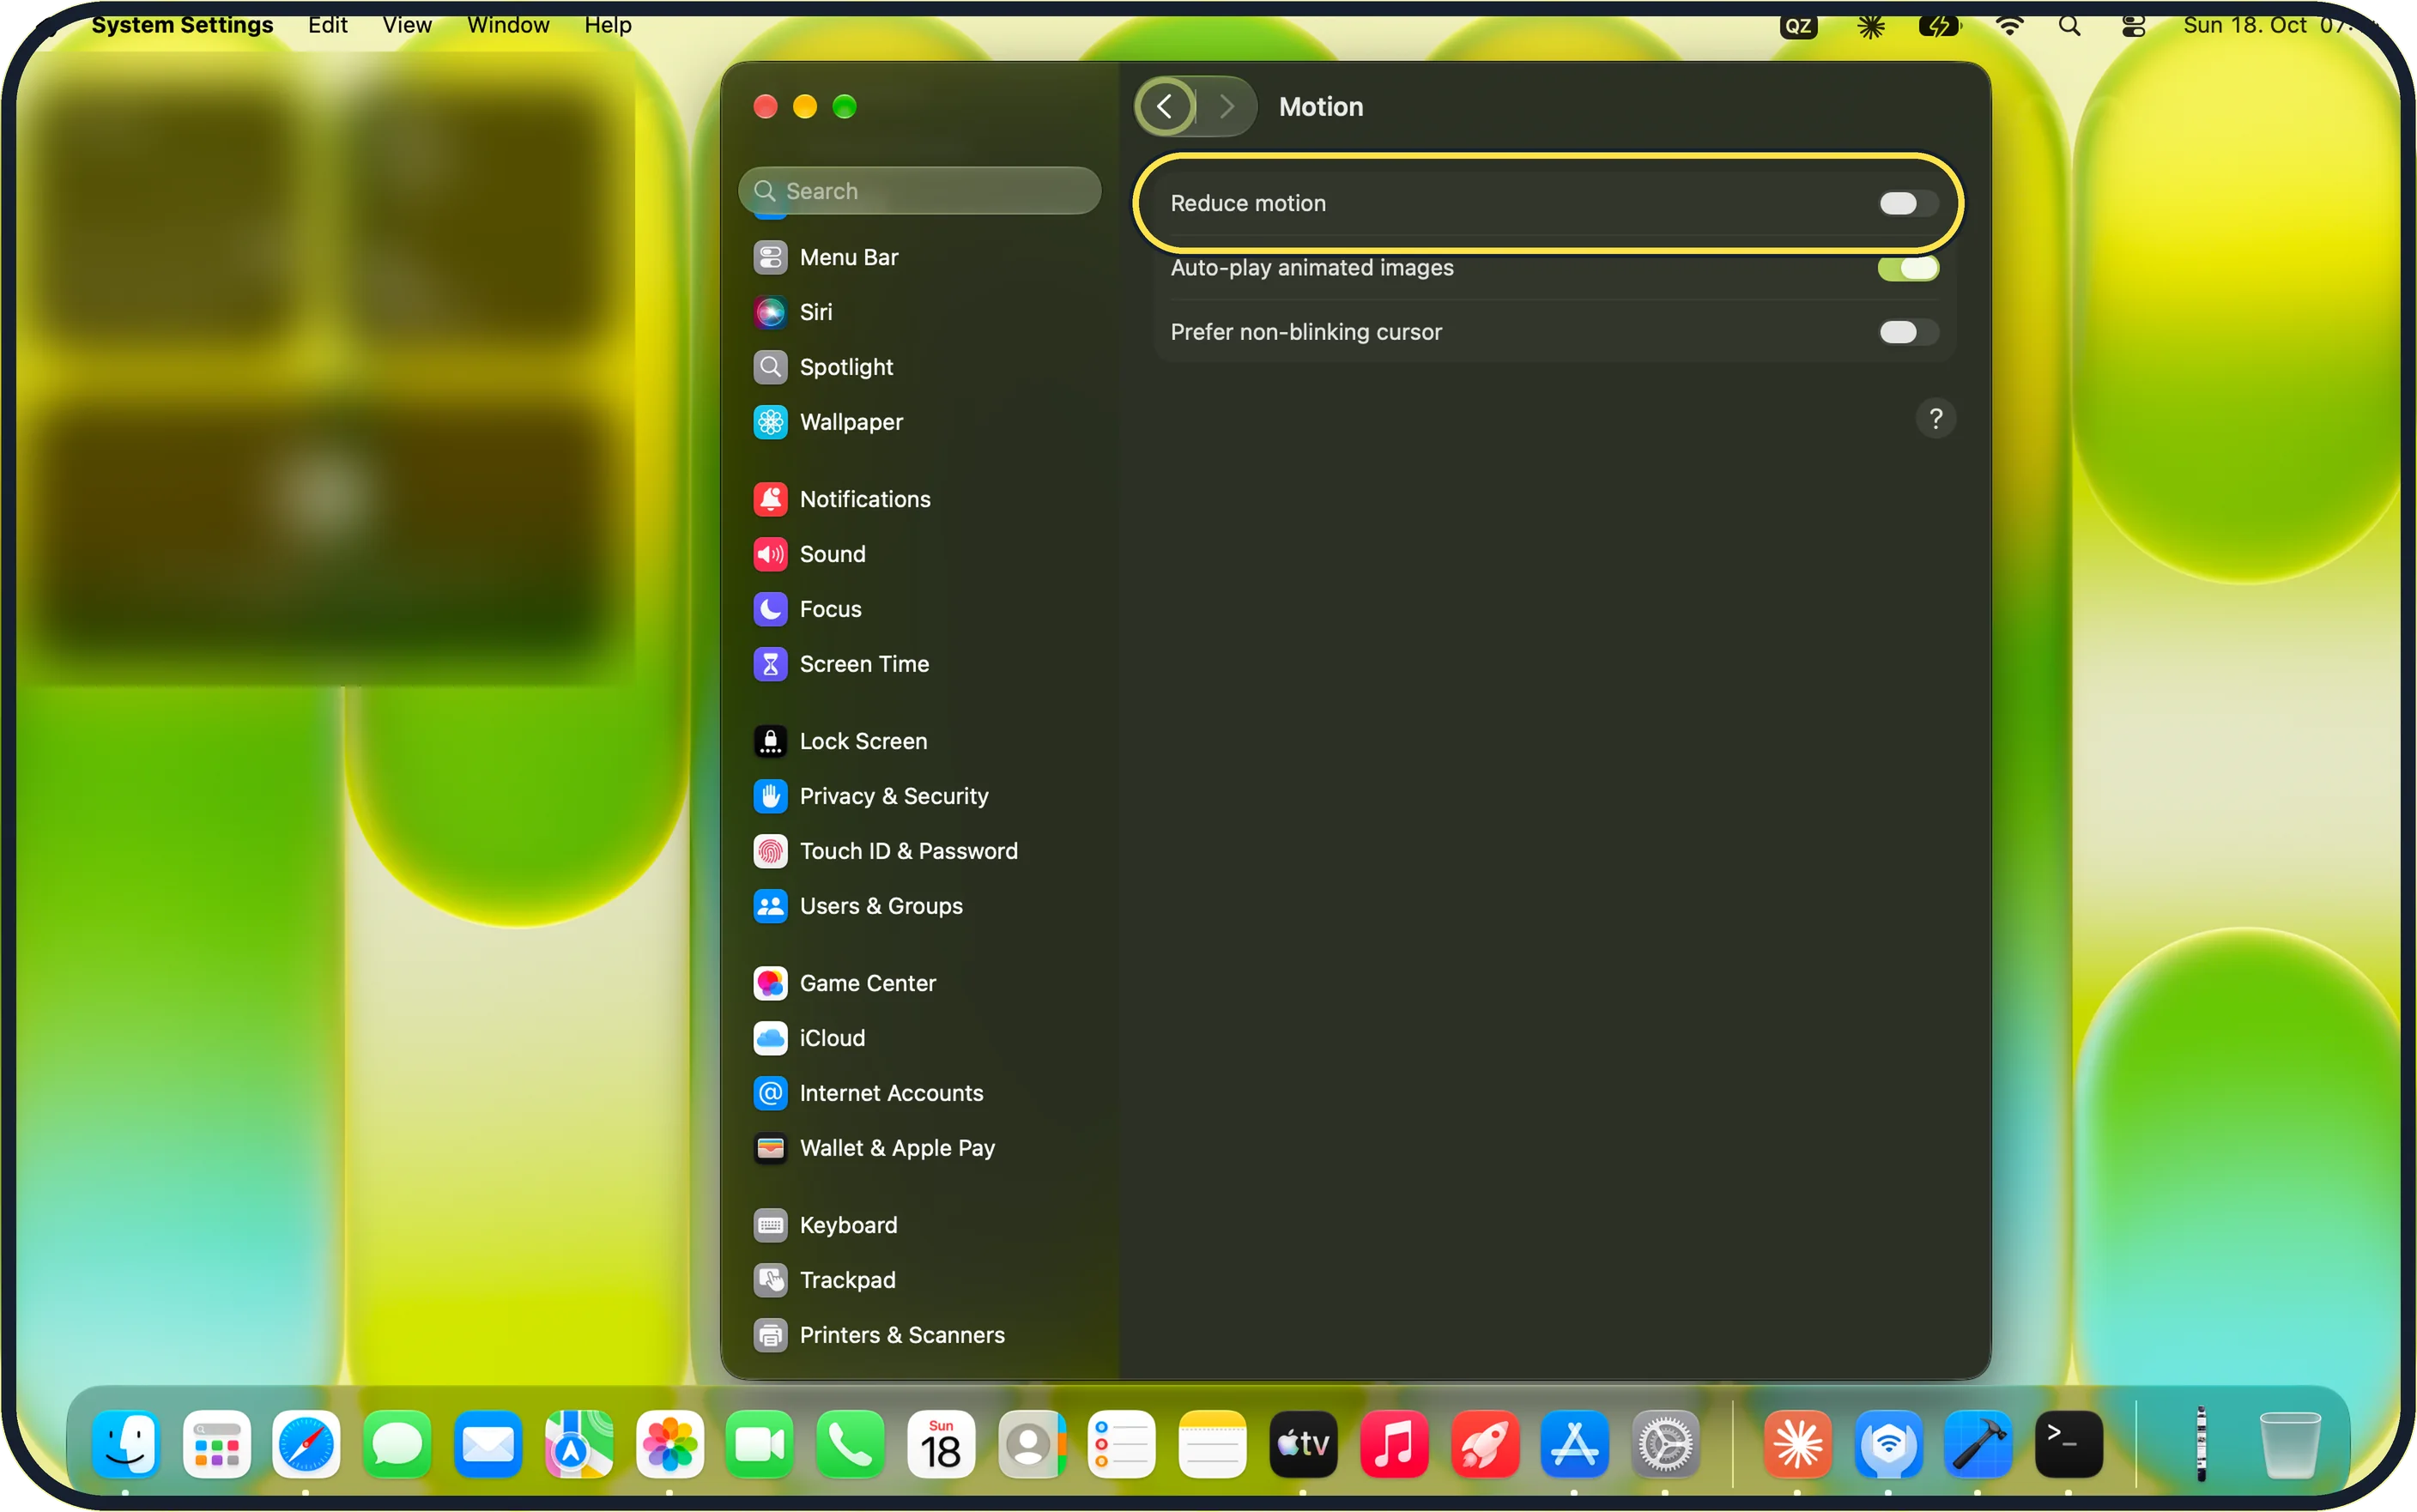
Zoomed in on the setting. Tap to see the whole screenTap the picture to see it full size Switch on Reduce motion
Reduce motion is the first switch on the page. On our MacBook Neo it was off at first.
If you like, switch off Auto-play animated images (on at first) to pause animated images, such as GIFs in Messages and Safari, and switch on Prefer non-blinking cursor to stop the typing cursor blinking.
If you do not see this option
- Accessibility is not in the sidebar Scroll down in the sidebar, or type Accessibility in the Search field at the top of the sidebar.
- Dim flashing lights or Vehicle Motion Cues is missing Apple says these only appear on some Macs. On our MacBook Neo, the Motion page had only three switches. Source: Change Motion settings for accessibility on Mac
If this does not work
- Things still move Apple says Reduce motion changes the movement of elements on the screen, for example when you open apps, switch between desktops, or open and close Notification Center. It tones movement down rather than removing it everywhere. Source: Change Motion settings for accessibility on Mac
- GIFs still play Check that Auto-play animated images is off. On our MacBook Neo the switch shows green when it is on and grey when it is off.
- The cursor still blinks Check that Prefer non-blinking cursor is switched on. On our MacBook Neo it was off at first.
About this guide
Windows that zoom open and desktops that slide sideways look smooth, but some people find the movement tiring. One switch tones it down, and two more on the same page stop animated images and the blinking cursor.
Screenshots: MacBook Neo, macOS 27.0.1, dark mode.
Good to know
Apple lists two more options that do not appear on every Mac: Dim flashing lights, only on Mac computers with Apple silicon, and Vehicle Motion Cues, on Mac laptops. On our MacBook Neo, the Motion page showed neither, only Reduce motion, Auto-play animated images and Prefer non-blinking cursor.
To make things larger instead of calmer: how to zoom in on the screen on a Mac.
In short: System Settings > Accessibility > Motion > Reduce motion on.
Links checked in October 2026. Menus and features can change after software updates. These steps match the version named at the top.
Did this guide work for you?
Sorry about that. What happened?