
macOS 27 compared with macOS 26: We rewrote this guide on macOS 27.0.1 (MacBook Neo): it now has 4 steps instead of 5. The macOS 26 page keeps the steps and screenshots as they were.
howtosimply.com/guides/how-to-customise-the-menu-bar-on-a-mac/ · Checked October 2026 · MacBook Neo · macOS 27.0.1
In this guide
Open System Settings and click Menu Bar. Tick the icons you want at the top of the screen and untick the rest. To add more controls, click Add Controls… on the same page.
2 of 4 steps with real screenshots · 2 official sources below
- Device
- Mac
- Shown on
- macOS 27.0.1 (MacBook Neo)
- App
- System Settings
- Path
- System Settings › Menu Bar
- Real screenshots
- 2 of 4 steps
- Checked
- October 2026
- Sources
- 2 official, linked below
Step by step
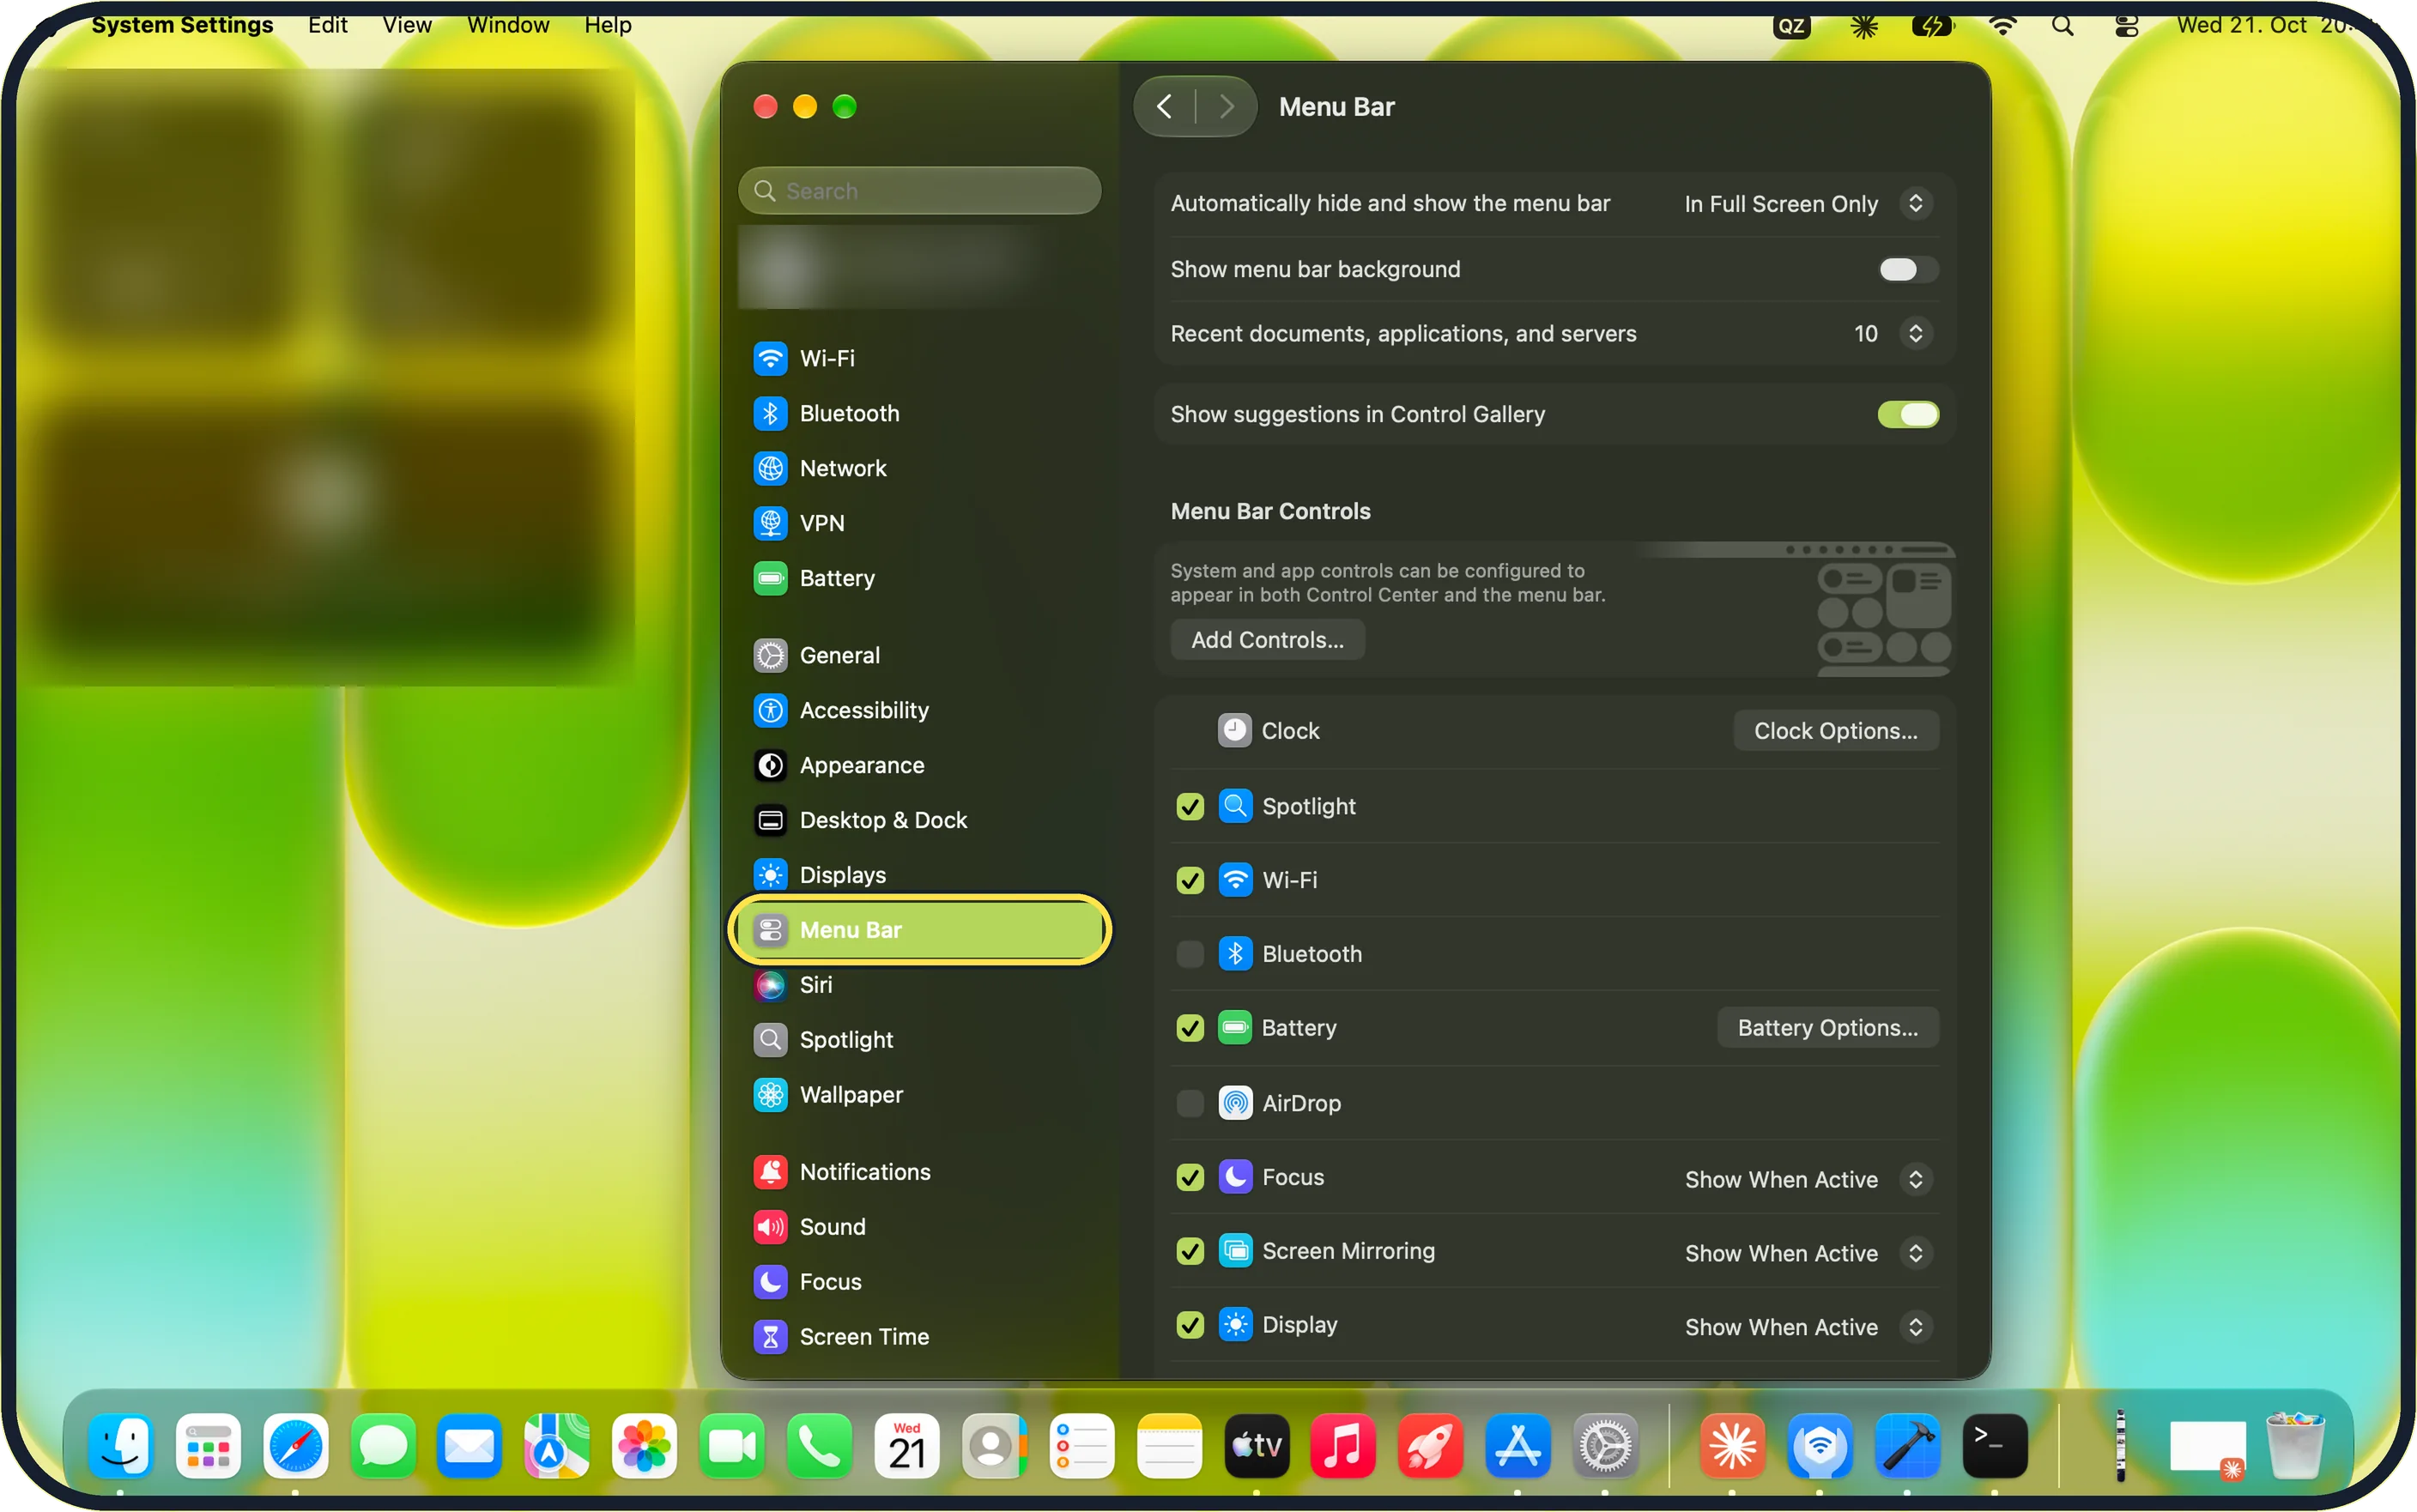
Zoomed in on the setting. Tap to see the whole screenTap the picture to see it full size Open System Settings and click Menu Bar
Click the Apple menu in the top left corner and choose System Settings.
Click Menu Bar in the sidebar, below Desktop & Dock and Displays.
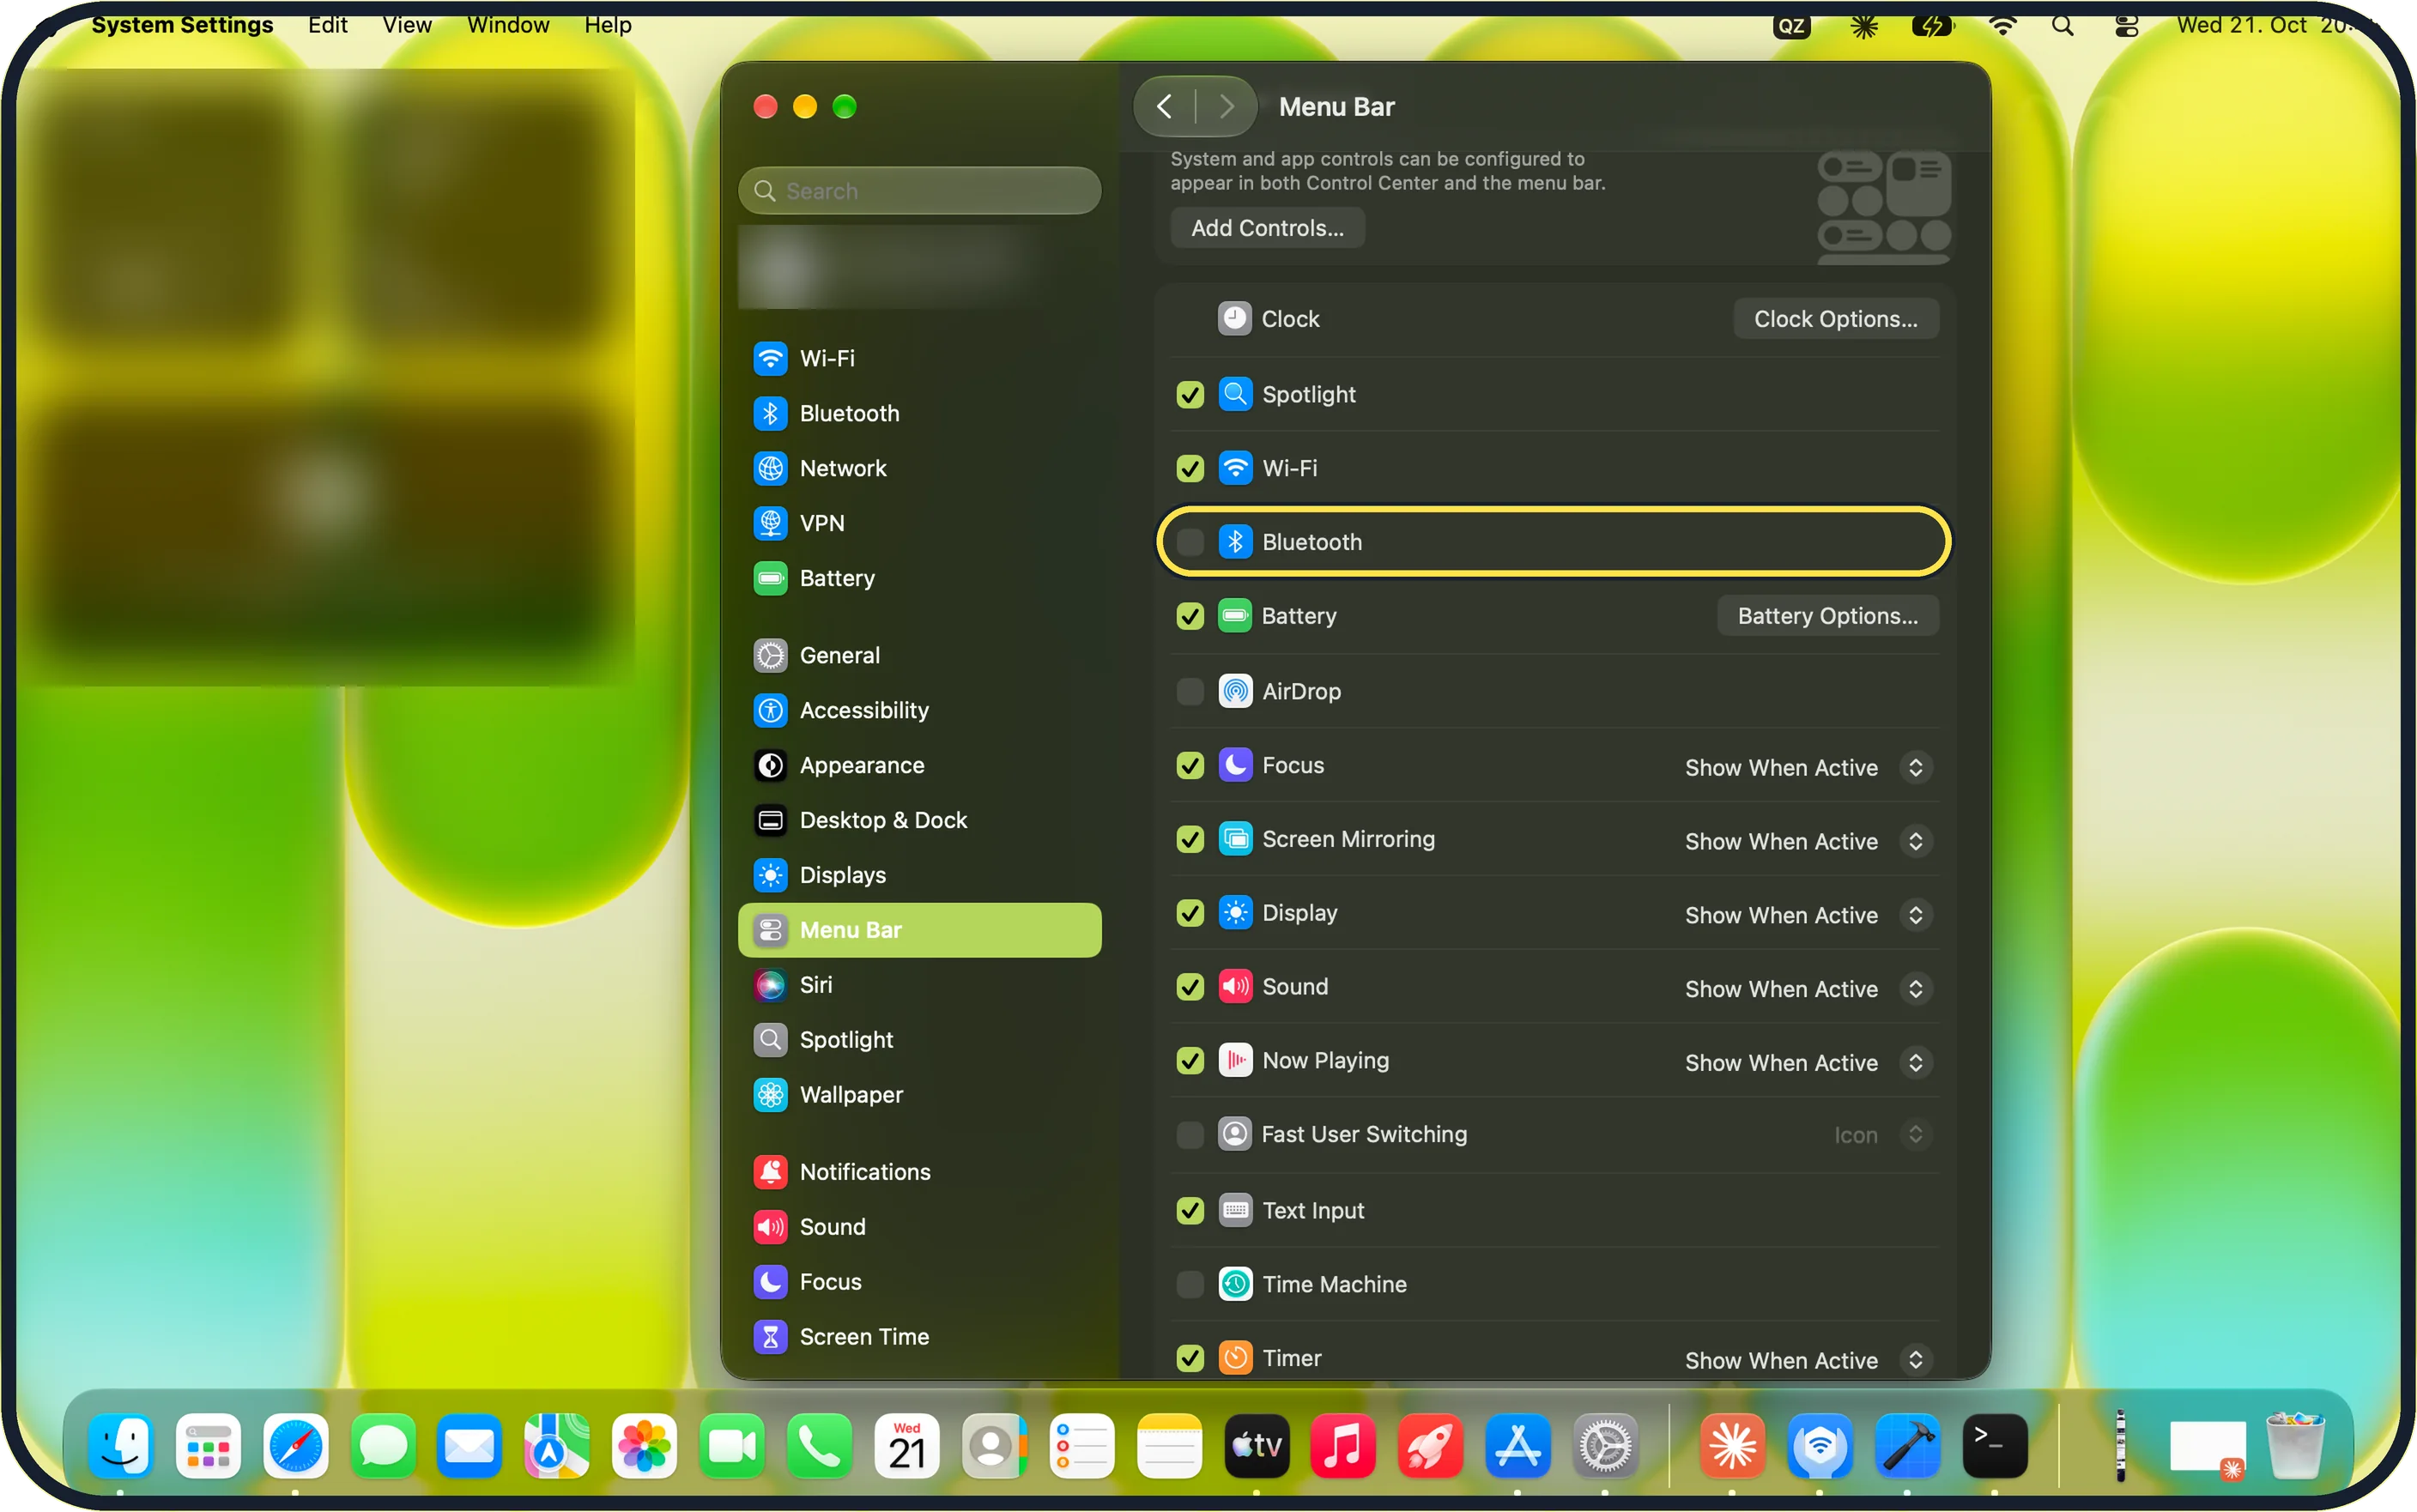
Zoomed in on the setting. Tap to see the whole screenTap the picture to see it full size Tick the icons you want and untick the rest
Scroll to the list under Menu Bar Controls and tick each item you want in the menu bar. On our MacBook Neo, Bluetooth, AirDrop, Fast User Switching and Time Machine were unticked.
Clock has no tick box, only Clock Options…, and Battery also has Battery Options…. Items such as Focus, Sound and Now Playing have a pop-up menu set to Show When Active.
Add a control
Click Add Controls… under Menu Bar Controls. On our MacBook Neo the page says controls can appear in both Control Center and the menu bar.
Apple says you then drag an item from the gallery up to the menu bar.
Remove a control again
Apple says you open the same gallery (Edit Controls in Control Centre) and drag the item off the menu bar.
If you do not see this option
- Menu Bar is not in the sidebar On macOS versions before Tahoe the same choices are under System Settings, Control Centre. You can also type Menu Bar into the Search field at the top of the sidebar.
- Clock has no tick box That is normal. On our MacBook Neo the Clock row only has a Clock Options… button.
- An option is greyed out On our MacBook Neo, Fast User Switching showed a greyed-out Icon menu while it was unticked. Tick the item first.
If this does not work
- An icon only appears some of the time It is set to Show When Active, so it shows only while in use. Click that pop-up menu next to the item to choose another option.
- The whole menu bar keeps disappearing Check Automatically hide and show the menu bar at the top of the Menu Bar page. On our MacBook Neo it was set to In Full Screen Only.
- Dragging a control does not work Apple says you can also Control-click an item in Control Centre and choose Add to Menu Bar or Copy to Menu Bar. Source: Customise the menu bar on Mac · Source: Use Control Centre on Mac
About this guide
The menu bar is the strip at the top of the screen, and you choose which small icons, such as Wi-Fi, battery and sound, appear on its right side.
Screenshots: MacBook Neo, macOS 27.0.1, dark mode.
Good to know
Inside Control Centre you can also Control-click an item and choose Add to Menu Bar or Copy to Menu Bar.
On macOS versions before Tahoe the same choices are under System Settings, Control Centre.
More on the panel itself: how to customise Control Centre on a Mac.
On our MacBook Neo the top of the Menu Bar page also has Automatically hide and show the menu bar (set to In Full Screen Only), Show menu bar background (off), Recent documents, applications, and servers (10) and Show suggestions in Control Gallery (on).
On our MacBook Neo, macOS 27 spells it Control Center on screen and calls the gallery Control Gallery.
In short: System Settings, Menu Bar, tick or untick icons; Add Controls… for more.
Links checked in October 2026. Menus and features can change after software updates. These steps match the version named at the top.
Did this guide work for you?
Sorry about that. What happened?