How to make pear and ginger tray cake
Researched by Abu Bakar Saadat5 min read
Last updated: 21 November 2026References
 Illustration
On this page 7 sections
In short
Whisk a brown-sugar ginger batter with oil and yogurt, spread it in a 30 × 20 cm tin, press in six peeled pear halves, bake at 180°C (160°C fan) for 32–42 minutes and brush the pears with warm apricot jam.
Overview
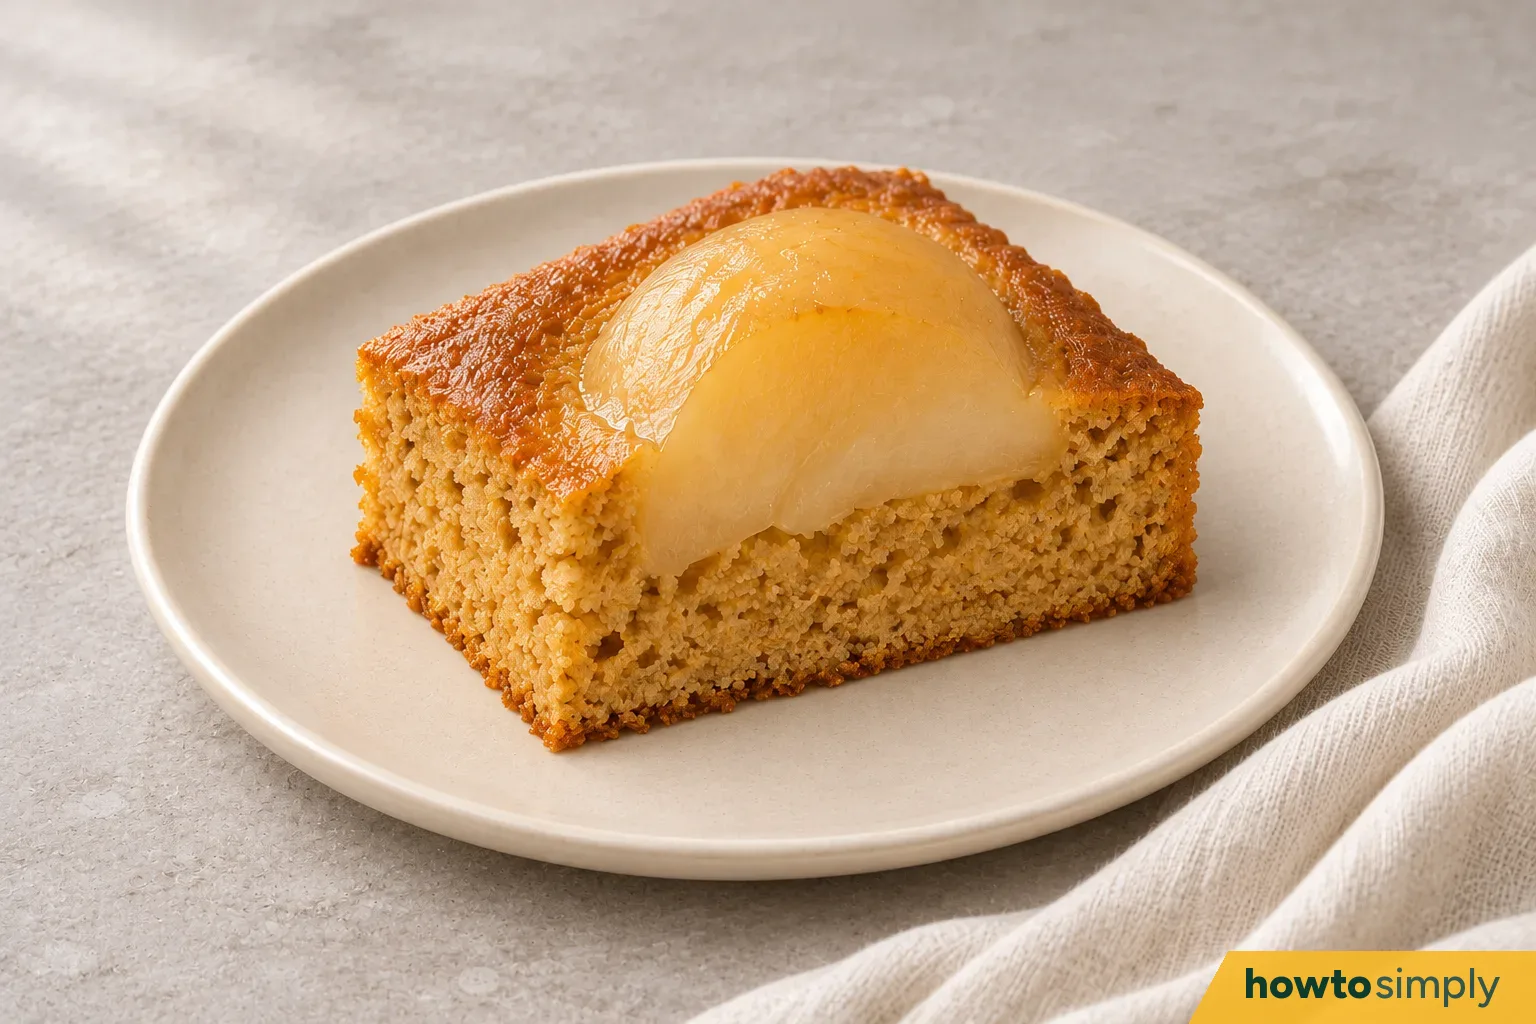
A soft brown-sugar ginger sponge baked in a rectangular tin with six pear halves pressed into the top, one for each square. After baking, the pears get a thin brush of warm apricot jam so they shine. The sponge is made with oil and yogurt, so it mixes by hand in two bowls with no butter to soften.
| What | This recipe |
|---|---|
| Makes | One 30 × 20 cm (12 × 8 inch) cake: 6 large squares or 12 smaller pieces |
| Oven | 180°C conventional, 160°C fan (about 350°F), middle shelf |
| Prep | 25 minutes, including heating the oven |
| Baking | 32–42 minutes |
| Cooling | 30 minutes, including glazing |
| Total | 1 hour 27 minutes to 1 hour 37 minutes |
| Allergens | Contains egg, milk (yogurt) and wheat (gluten). |
Before you start
- You'll need: a 30 × 20 cm (12 × 8 inch) rectangular metal baking tin at least 4 cm (1½ inches) deep, baking paper, a vegetable peeler, a small knife, a chopping board, a teaspoon, kitchen scales, a measuring jug, two mixing bowls, a whisk, a silicone spatula, a wooden skewer, a cooling rack, a small saucepan and a pastry brush.
- Pick pears that are ripe but still firm. They should give a little when you press near the stem. Very soft pears turn mushy in the oven.
- Each step picture below shows four moments of its step. Read it from top left to bottom right.
Ingredients
- 3 small pears, about 120–140 g each before peeling
- 2 large eggs, about 100–110 g without their shells
- 155 g soft light brown sugar
- 100 ml (about 7 tablespoons) sunflower oil
- 150 g plain whole-milk yogurt
- 220 g (about 1¾ cups plus 1 tablespoon) plain flour (all-purpose flour)
- 5 g (about 2½ level teaspoons) ground ginger
- 8 g (2 level teaspoons) baking powder
- 2 g (about ⅓ teaspoon) fine salt
- 40 g smooth apricot jam
- 5 ml (1 teaspoon) water
Steps
Line the tin and prepare the pears
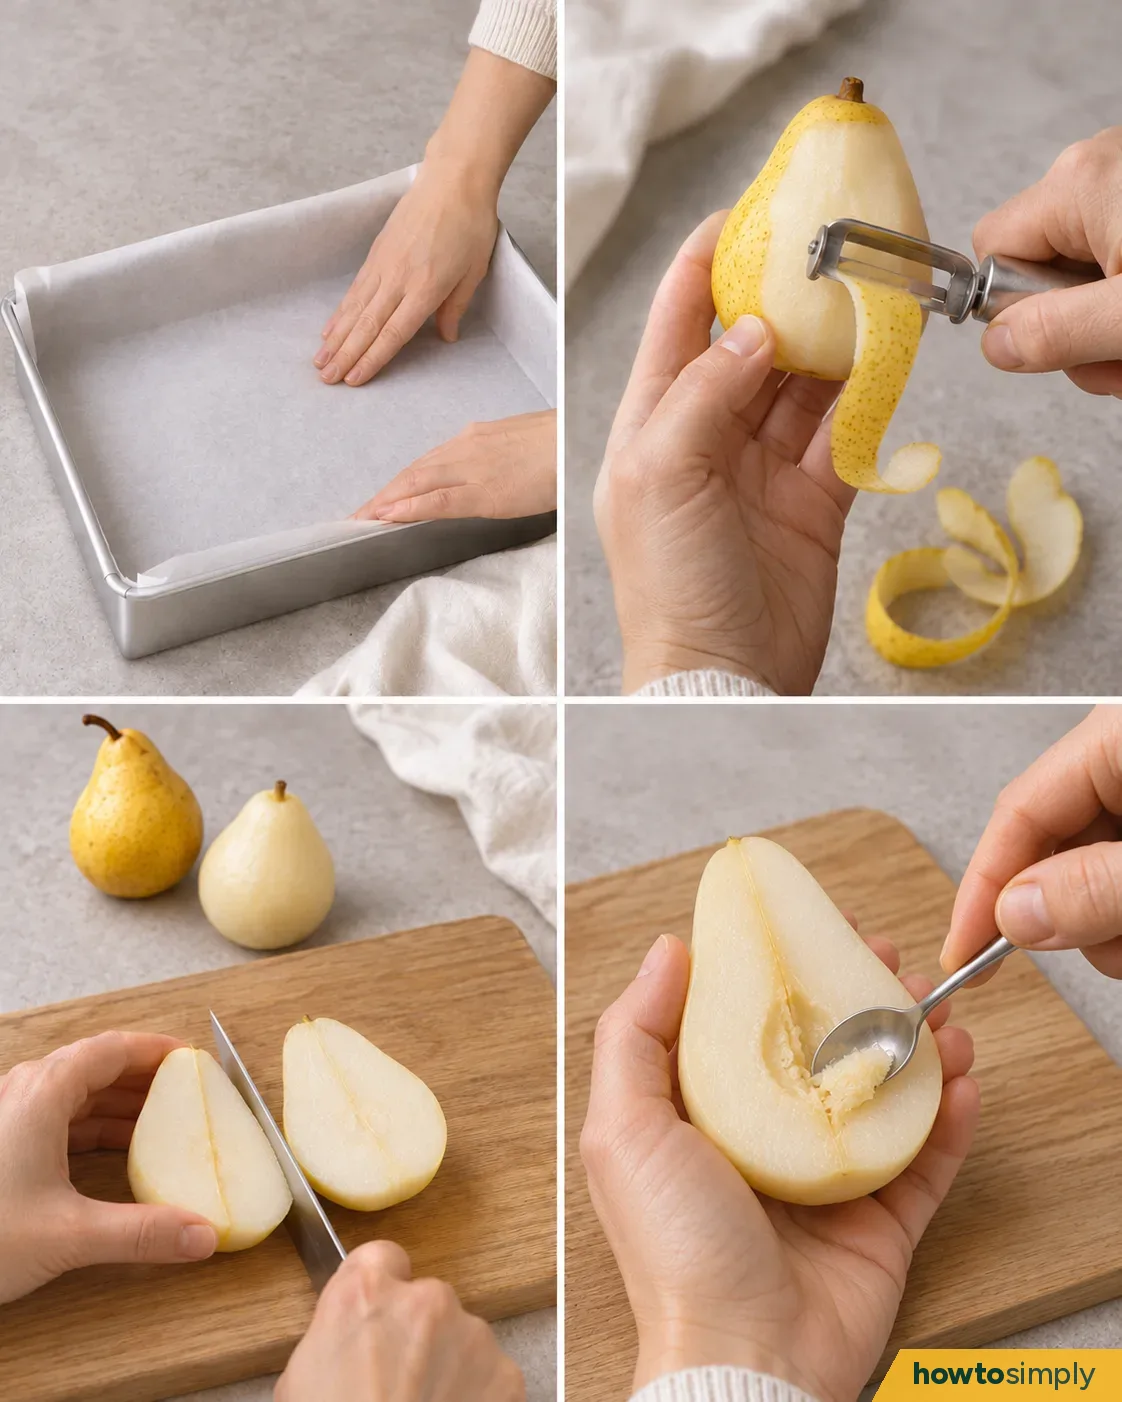
Heat the oven to 180°C conventional or 160°C fan (about 350°F), with a shelf in the middle. Press baking paper into the tin, creasing it into the corners. Leave some paper standing up above two opposite sides so you can lift the cake out later.
Peel the pears and cut each one in half lengthways, from stem to base. Scoop out the seeds with the teaspoon, then trim off the stem and the tough strip of fibre running from it to the core. You should end up with six halves, each with a smooth rounded back and a small hollow in the cut side. This takes 5–7 minutes.
Mix the ginger batter
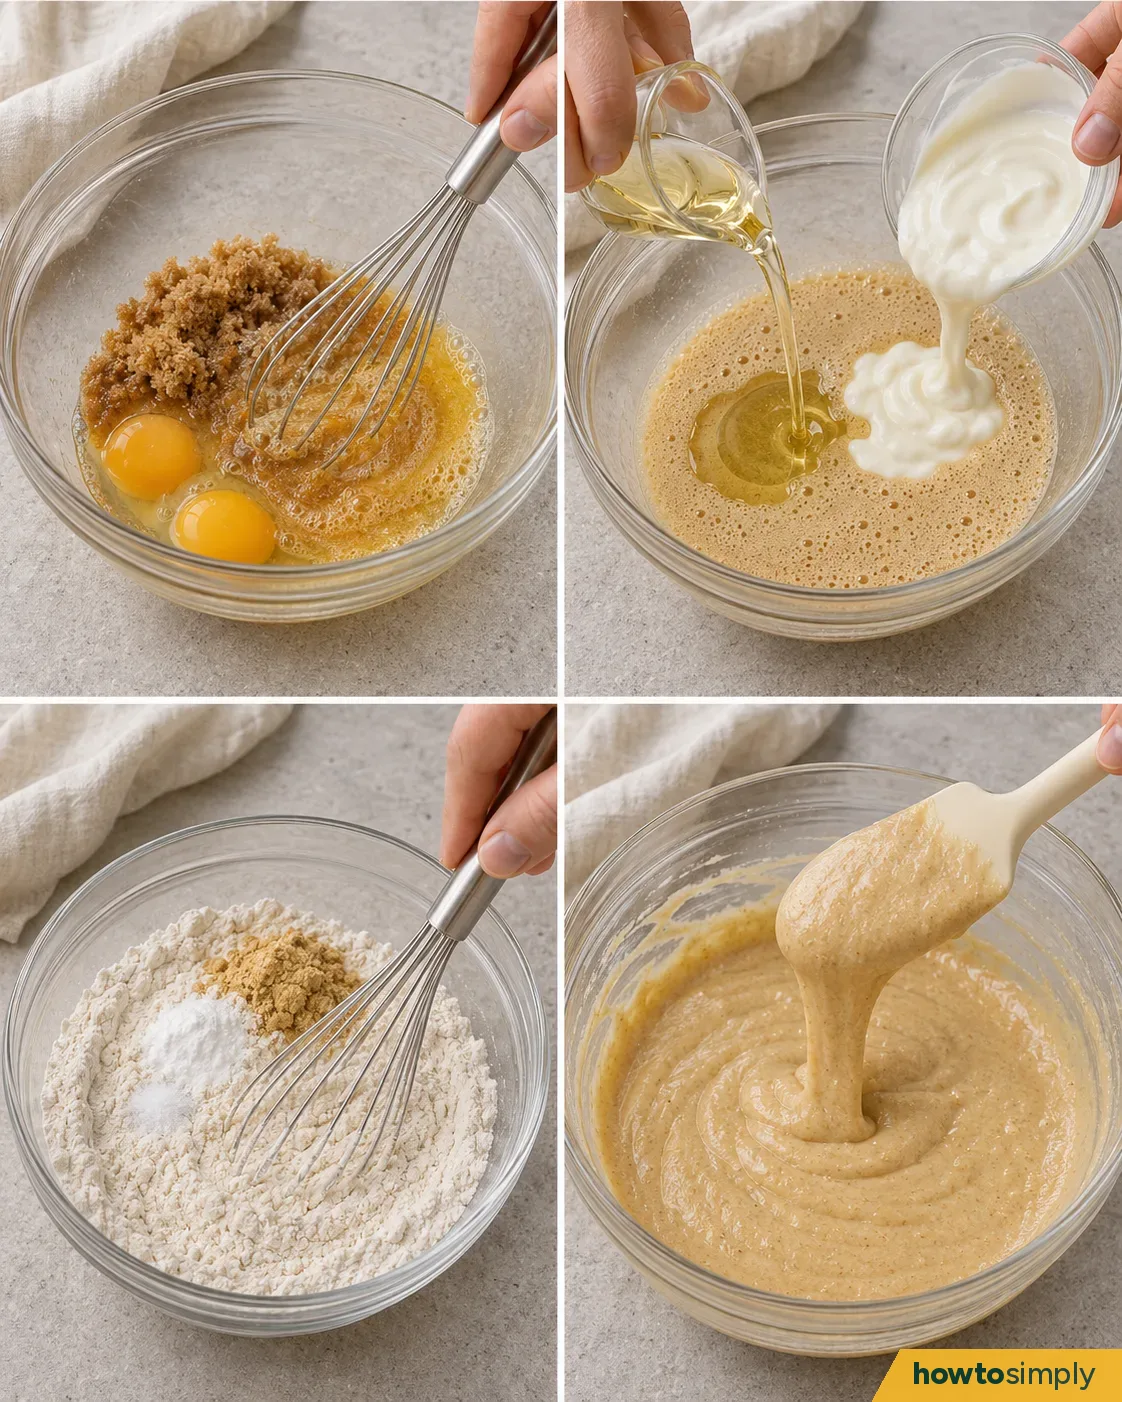
Whisk the eggs and sugar together for 1–2 minutes, until foamy with no lumps of sugar left. Whisk in the oil and yogurt until the surface looks even, with no shiny pools of oil.
In the second bowl, whisk the flour, ginger, baking powder and salt together. Tip them into the egg mixture. With the spatula, scrape along the bottom of the bowl and lift the batter up over the flour. Keep going for about 30 seconds and stop as soon as the last dry patches disappear. The batter should fall off the spatula in a thick, wide ribbon.
Spread the batter and add the pears
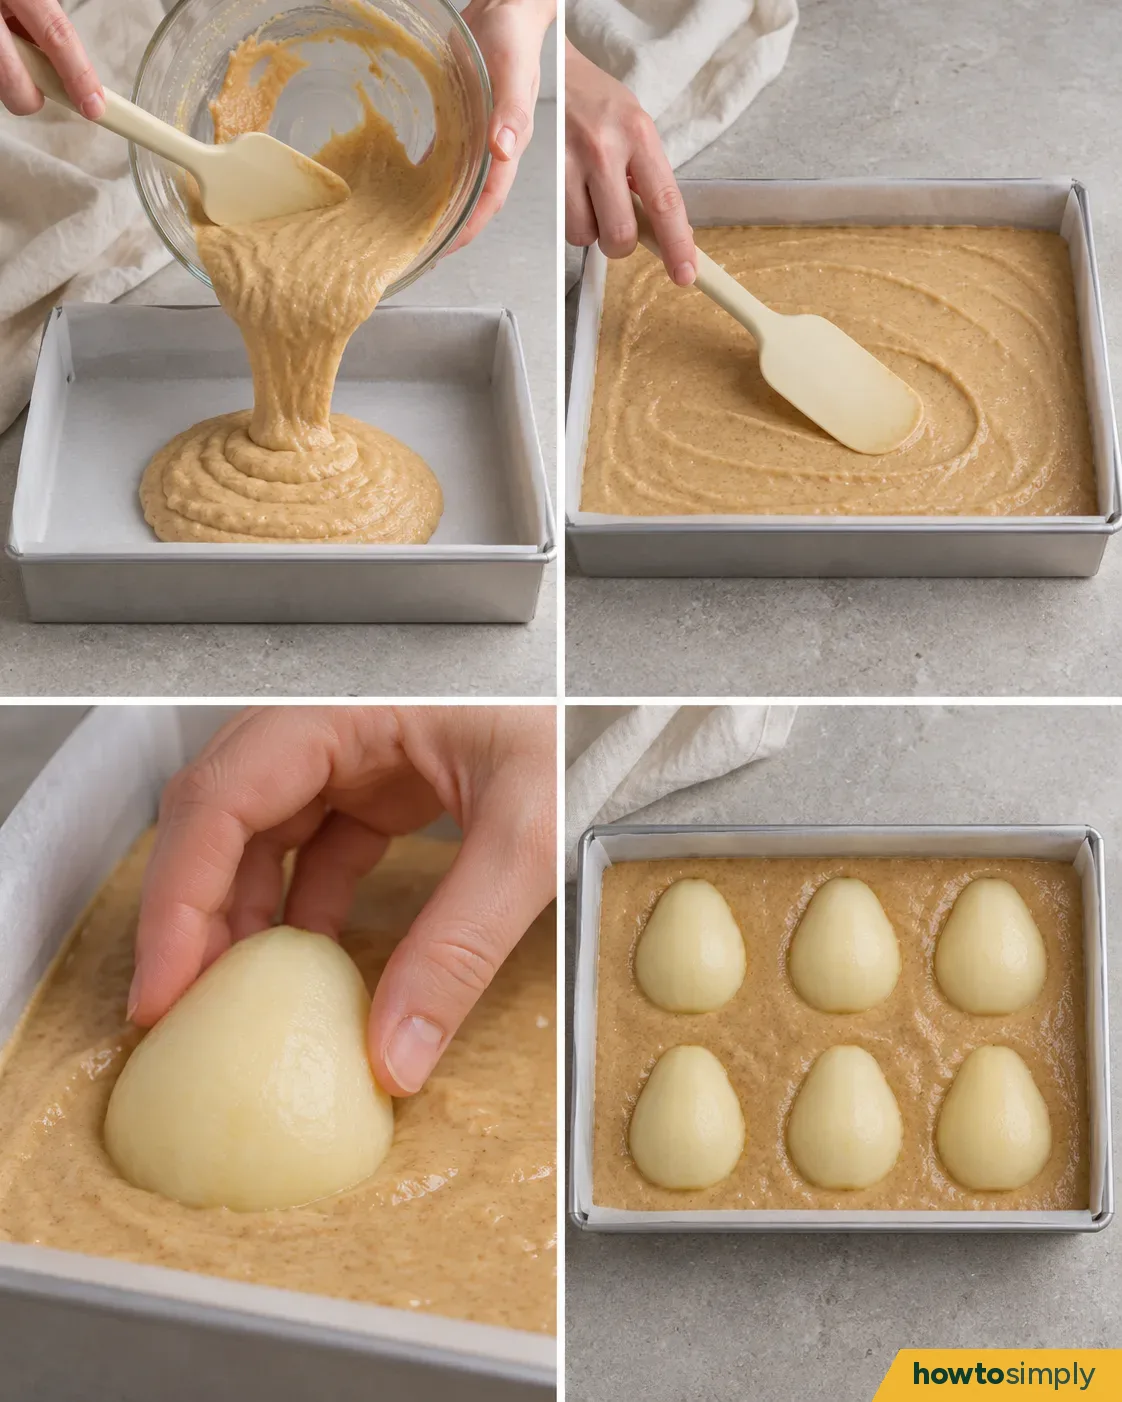
Scrape the batter into the tin and spread it level, right into the corners. Lay each pear half on top cut side down, so the rounded back faces up. Make two rows of three along the long side of the tin. Leave a strip of batter showing between the pears: that's where you'll test the cake and cut it later.
Bake and glaze
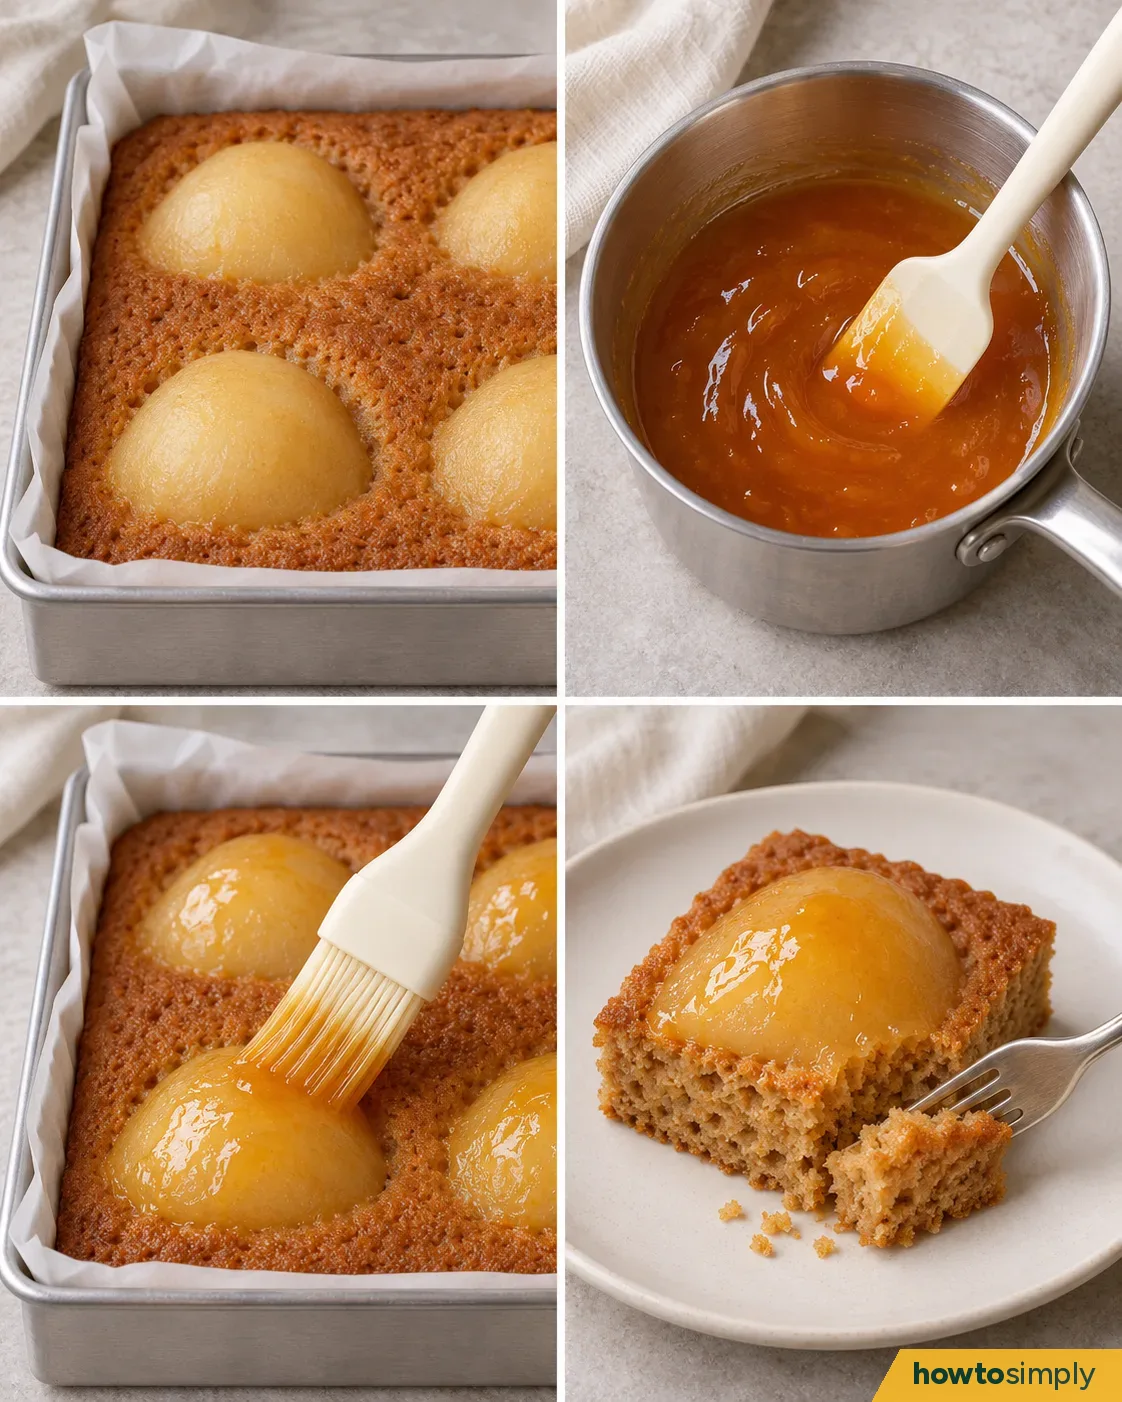
Bake for 32–42 minutes, checking from 32 minutes. Push a skewer into the sponge next to one of the middle pears. It should come out clean or with a few moist crumbs. The top should be golden, and the tip of a knife should slide easily into a pear.
Put the tin on the rack. While it starts to cool, stir the jam and water in the saucepan over a low heat for 1–2 minutes, until runny enough to brush. Brush a thin coat over all six warm pears. Leave the cake for 30 minutes in total, then lift it out by the paper, supporting the base with your hand, or cut it in the tin.
If this doesn't work
- The skewer comes out wet: pear juice can make it shine even when the cake is done. Test again in the sponge about 1 cm away from the fruit. If thick raw batter still clings to it, bake for another 3–5 minutes and check again.
- The edges are dark but the middle isn't ready: lay a loose sheet of foil over the top for the last few minutes.
- The jam is too thick to brush: add a few more drops of water and warm it again. If it has bits of fruit in it, push it through a sieve first.
Serving and storing
Cut between the pears to get six large squares, each with its own pear. For twelve pieces, cut each square in half through the pear. Serve just warm or at room temperature. Once cool, cover the cake and keep it in the fridge. Take pieces out about 20 minutes before serving so the sponge softens again.
Related
- How to make pear and cardamom crumble
- How to make gingerbread snacking cake
- How to make apple and cinnamon crumble loaf cake
The pictures in this recipe are illustrations.
Sources and method
- Researched by
- Abu Bakar Saadat
- Pictures
- 5 illustrations drawn for this article: drawings, not photos.
Did this solve the problem?
Where did you get stuck?
Get new guides by email
Our newest guides, sent to your inbox. Free, and you can unsubscribe in one click.
We'll email you to confirm. How we use your email
Follow howtosimply on Facebook
We share every new article on our Facebook page, so the next fix turns up in your feed.
Follow on FacebookWhat did you think?
Reaction counts are loading.