How to make chocolate peppermint pots
Researched by Abu Bakar Saadat3 min read
Last updated: 20 November 2026References
 Illustration
On this page 7 sections
In short
Pour 220 ml of just-steaming cream over 140 g of chopped dark chocolate, wait 3 minutes, stir until glossy, then chill in 4 small ramekins for at least 3 hours and top with crushed candy cane just before serving.
At a glance
Overview
Small, rich chocolate desserts made from just three ingredients: dark chocolate, cream and one candy cane. You can make the pots the day before and chill them overnight. On the day, the only job is crushing the peppermint topping. Every spoonful has smooth chocolate underneath and crunchy candy cane on top.
| What | This recipe |
|---|---|
| Makes | 4 small pots, about 85–90 ml each |
| Prep | 10 minutes |
| Heating the cream | 3–5 minutes |
| Melting | 3 minutes standing, then 1–2 minutes stirring |
| Chilling | at least 3 hours, or overnight |
| Total | about 3 hours 20 minutes |
| Allergens | Contains milk. Check the chocolate and candy cane wrappers for others. |
Before you start
- You'll need: kitchen scales, a measuring jug, a knife and chopping board, a medium heatproof bowl, a 14–16 cm (about 6 inch) saucepan, a silicone spatula, four 120 ml (4 fl oz) ramekins (small ovenproof dessert dishes), a small tray, a sealable food bag and a rolling pin.
- Use a bar of plain dark chocolate, not chocolate chips. Bars melt more smoothly.
- Some of the first pictures show a bowl of crushed candy cane in the background. You don't need it yet: crush yours just before serving, in step 3, so it stays crunchy.
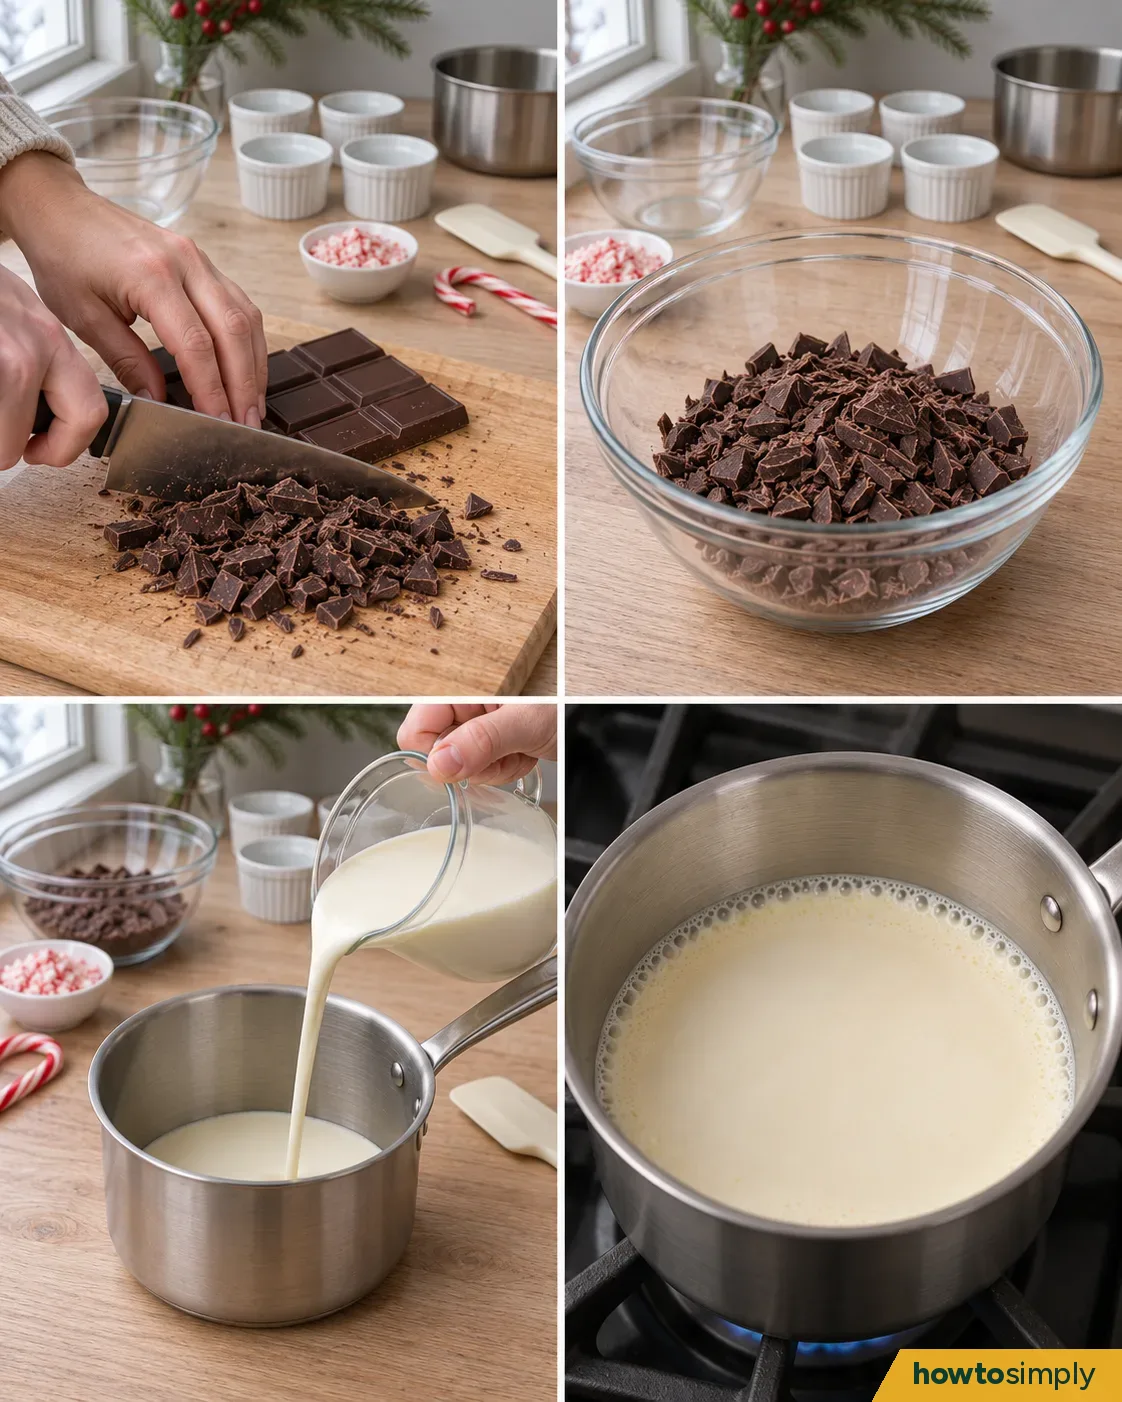
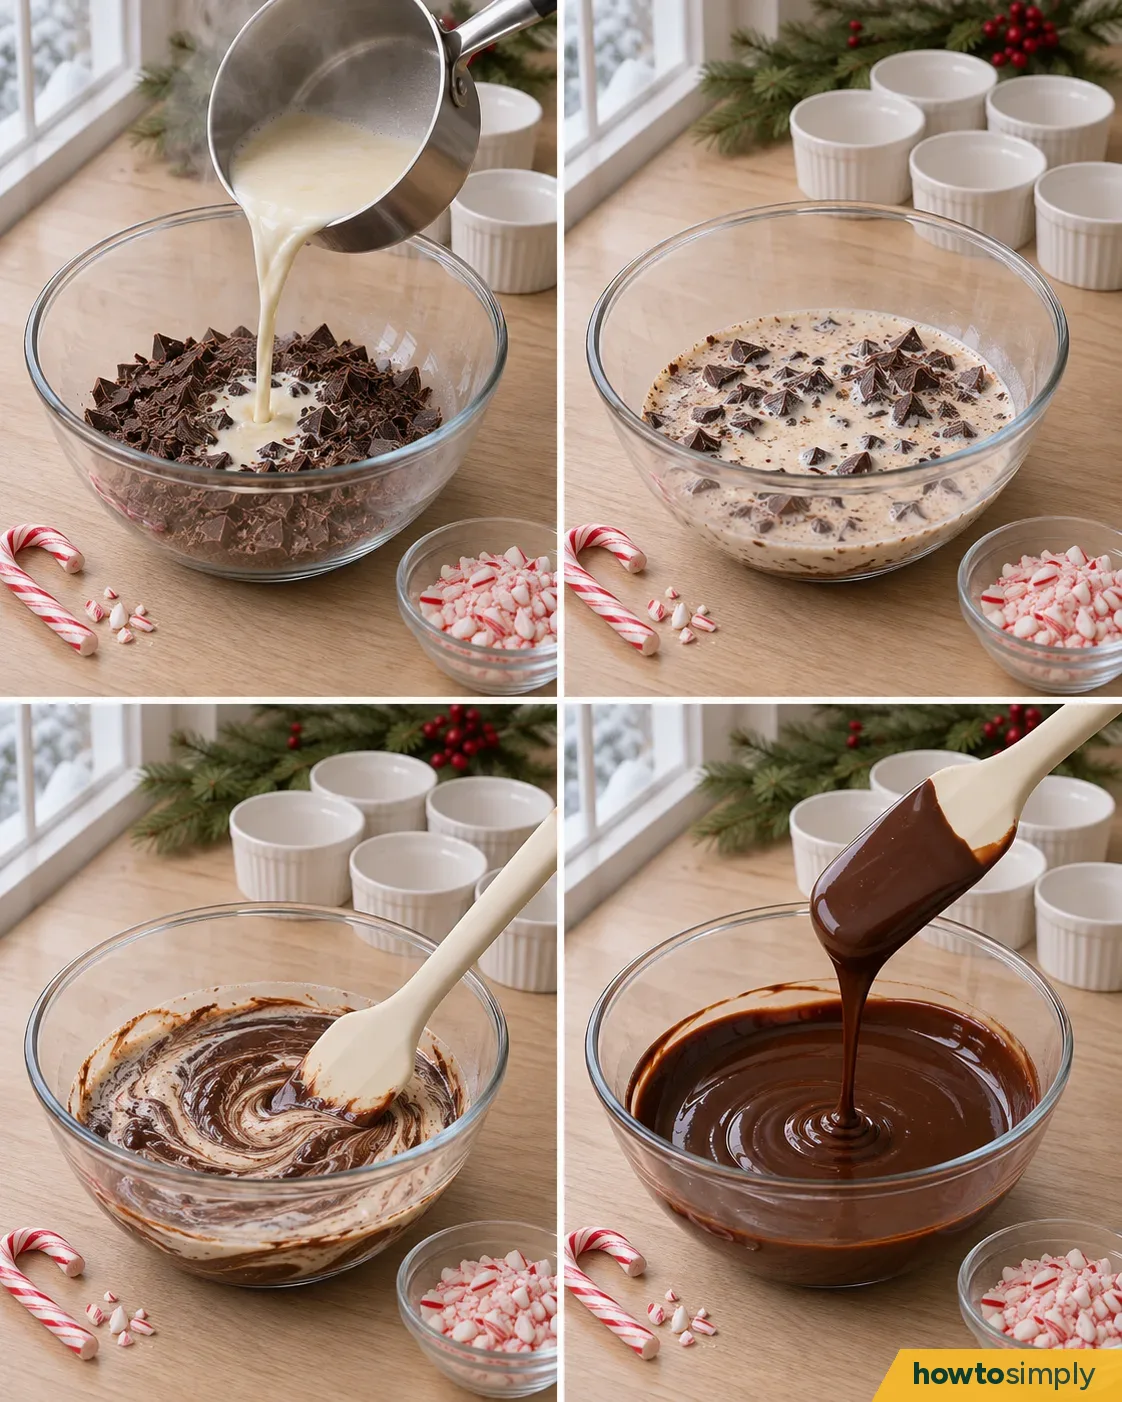
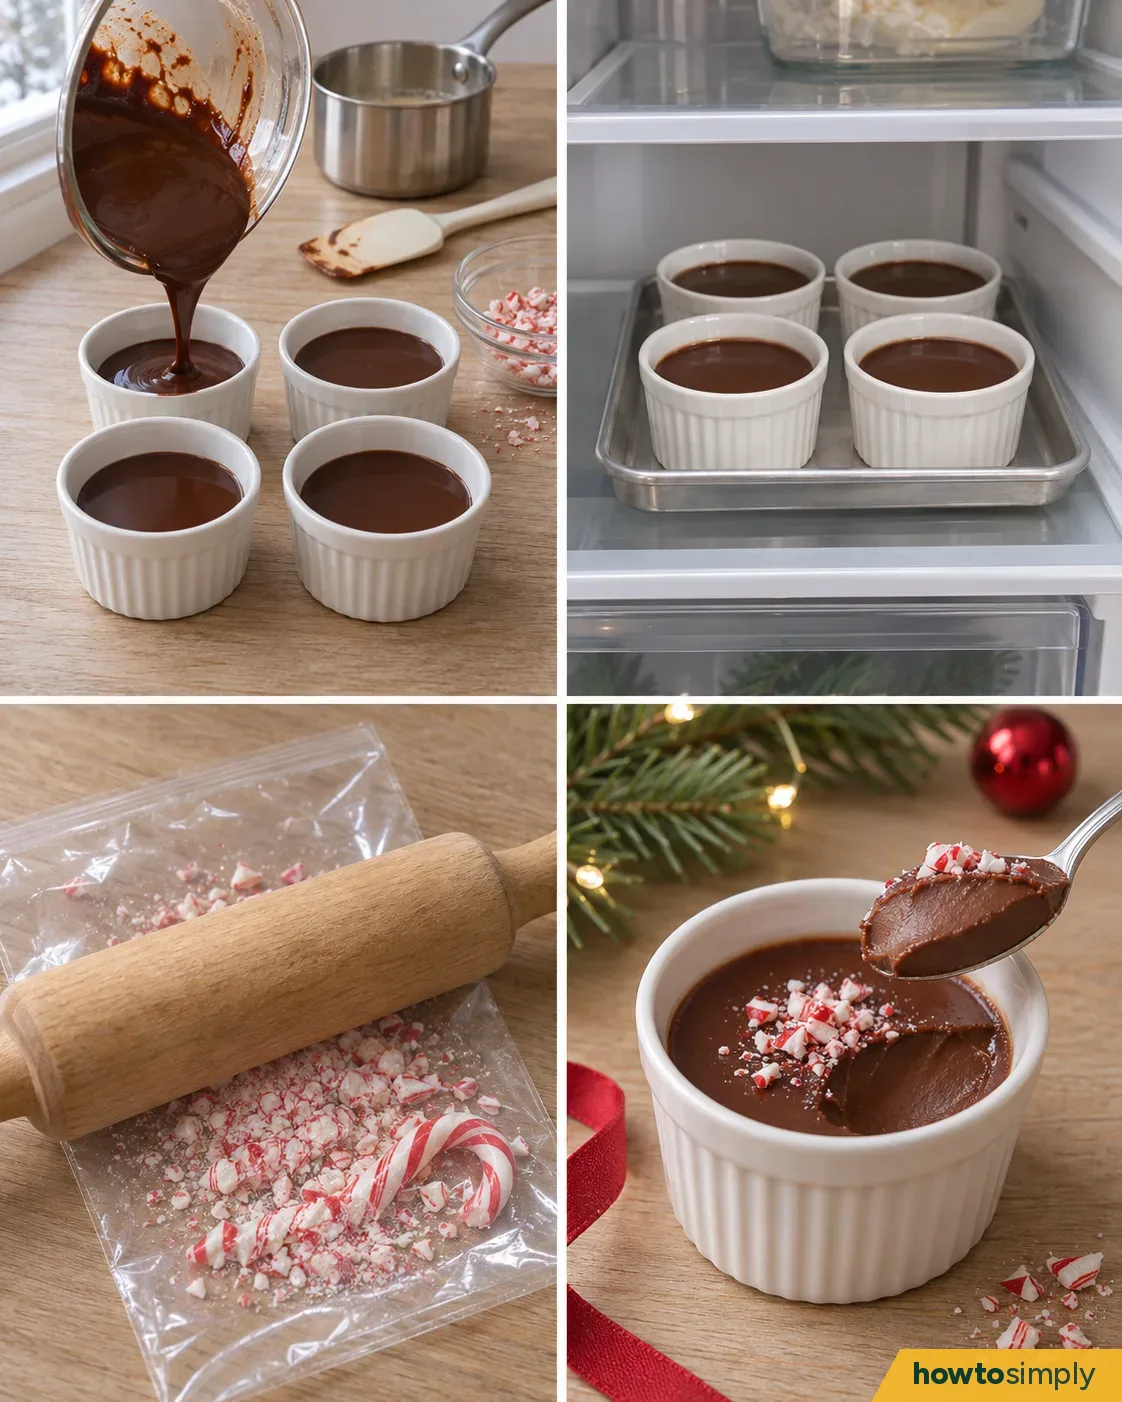
- Each picture below shows four moments of its step. Read it from top left to bottom right.
Ingredients
- 140 g (about 5 oz) plain dark chocolate from a bar, about 60% cocoa
- 220 ml (a scant 1 cup) whipping cream (heavy whipping cream), about 35% fat
- 1 small peppermint candy cane, about 12 g, unwrapped
Steps
Chop the chocolate and heat the cream
Chop the chocolate into pieces the size of peas or smaller. Scrape all the pieces and fine shavings into the heatproof bowl. Small pieces melt evenly in the next step.
Pour the cream into the saucepan and warm it over a medium-low heat for 3–5 minutes, stirring now and then. As soon as a ring of little bubbles forms around the edge and steam rises from the middle, take the pan off the heat. Don't let it boil.
Stir until the chocolate turns glossy
Pour all the hot cream over the chocolate. Push any pieces poking out down under the cream with the spatula, then leave the bowl alone for 3 minutes while the chocolate softens.
Stir slowly in small circles in the middle of the bowl. As a dark, glossy patch forms, make the circles wider to pull in the cream around the edge. After 1–2 minutes the mixture should fall from the spatula in one smooth ribbon, with no pale streaks left.
Chill the pots and add the peppermint
Share the mixture evenly between the four ramekins. Set them on the tray and put them in the fridge for at least 3 hours, or overnight. They're ready when the surface barely moves as you gently tilt a ramekin, and a teaspoon cuts out a smooth scoop.
Just before serving, seal the candy cane in the bag and tap it lightly with the rolling pin for 20–30 seconds, until the pieces are small enough to sprinkle. Share the crumbs between the pots. Adding them at the last minute keeps them crunchy.
If this doesn't work
- A few bits of chocolate won't melt: set the heatproof bowl over a saucepan of barely simmering water, with the bottom of the bowl above the water. Stir for 10–15 seconds at a time, and lift the bowl off as soon as the last pieces melt. Then fill the ramekins and chill as above.
Serving and making ahead
Serve chilled, with small spoons. To make them ahead, keep the plain pots covered in the fridge and add the topping on the day. Store any crushed candy separately in a dry, sealed container so it doesn't go sticky.
Related
- How to make cinnamon shortbread fingers
- How to make gingerbread snacking cake
- How to make a mushroom and chestnut tart
The pictures in this recipe are illustrations.
Sources and method
- Researched by
- Abu Bakar Saadat
- Pictures
- 3 illustrations drawn for this article: drawings, not photos.
Did this solve the problem?
Where did you get stuck?
Get new guides by email
Our newest guides, sent to your inbox. Free, and you can unsubscribe in one click.
We'll email you to confirm. How we use your email
Follow howtosimply on Facebook
We share every new article on our Facebook page, so the next fix turns up in your feed.
Follow on FacebookWhat did you think?
Reaction counts are loading.