 Illustration
You are viewing the macOS 26 version of this guide, recorded on macOS Tahoe 26 (MacBook Pro) on 4 October 2026. It is kept as it was and not updated. See the macOS 27 version.
howtosimply.com/guides/how-to-increase-contrast-and-reduce-transparency-on-a-mac/ · Checked 4 October 2026 · MacBook Pro · macOS Tahoe 26
In this guide
Open System Settings, click Accessibility, then Display, and switch on Increase contrast, Reduce transparency or both. Increase contrast makes borders around buttons and boxes stand out. Reduce transparency replaces see-through backgrounds with a solid background.
5 of 5 steps with real screenshots · 3 official sources below
- Device
- Mac
- Shown on
- macOS Tahoe 26 (MacBook Pro)
- App
- System Settings
- Real screenshots
- 5 of 5 steps
- Checked
- 4 October 2026
- Sources
- 3 official, linked below
Step by step
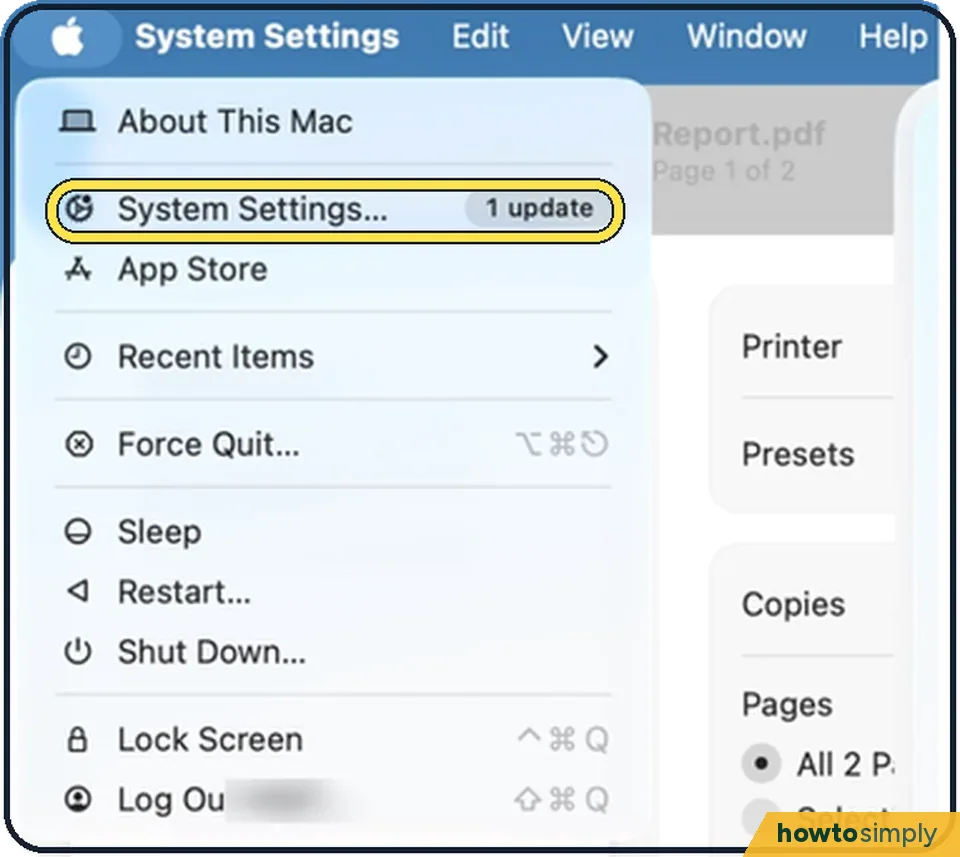
Tap the picture to see it full size Open System Settings
Click the Apple menu in the top left corner of the screen and choose System Settings.
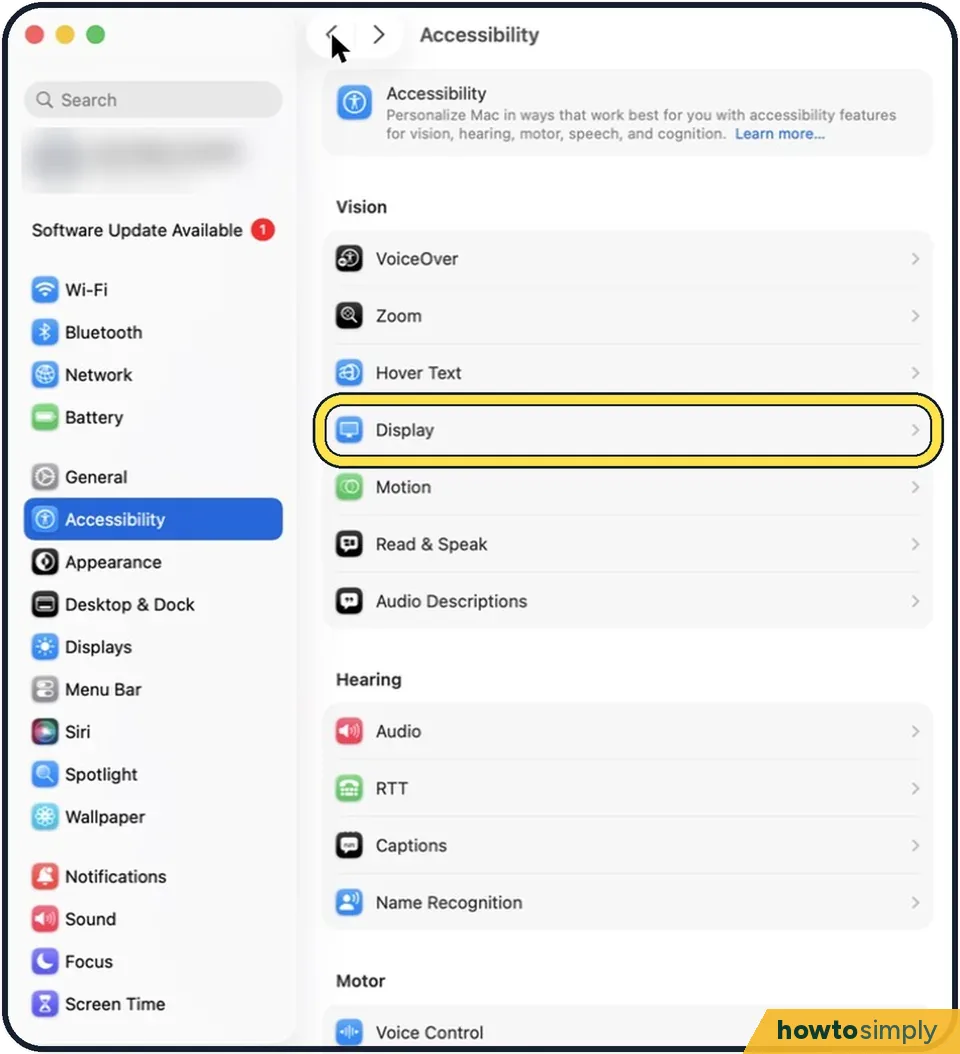
Tap the picture to see it full size Click Accessibility, then Display
Accessibility is in the sidebar on the left. Display is in the Vision group on the right. You may need to scroll down in the sidebar.
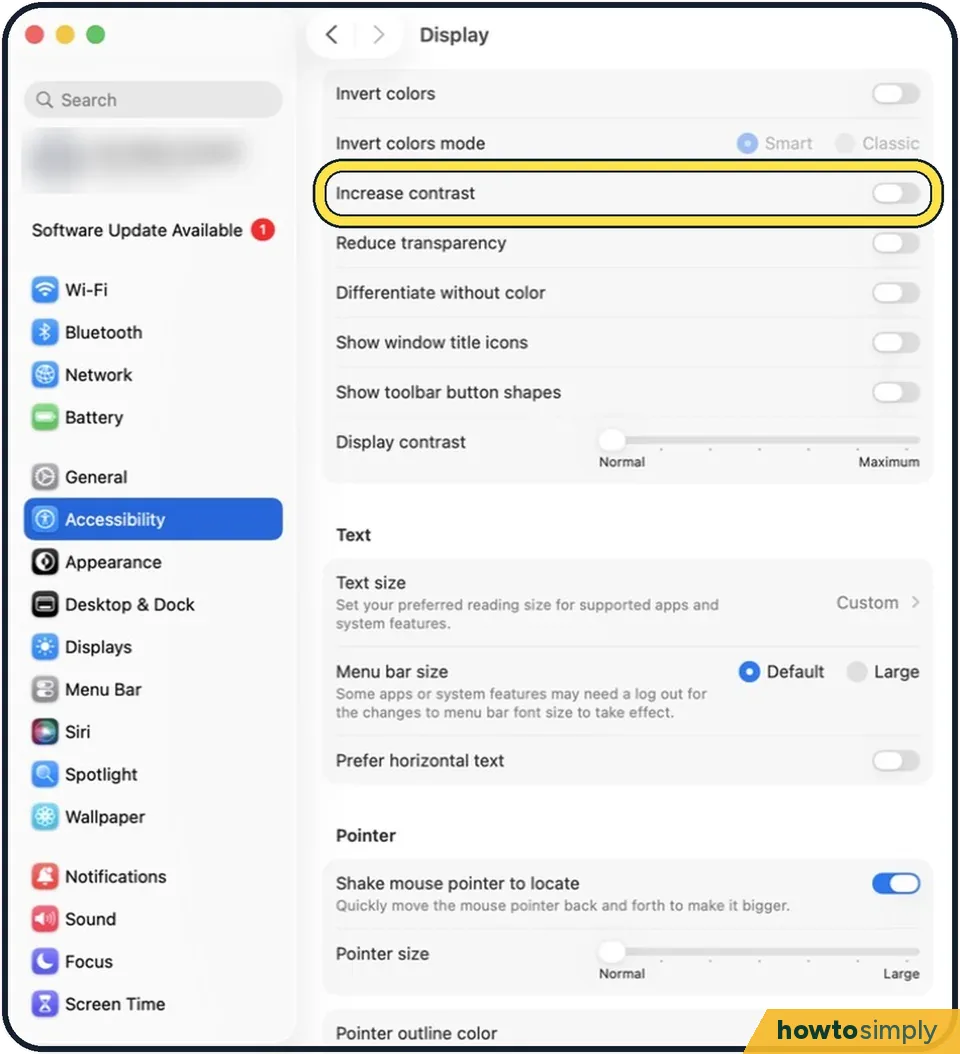
Tap the picture to see it full size Switch on Increase contrast
It increases the contrast of items on the screen, such as borders around buttons or boxes, without changing the contrast of the screen itself.
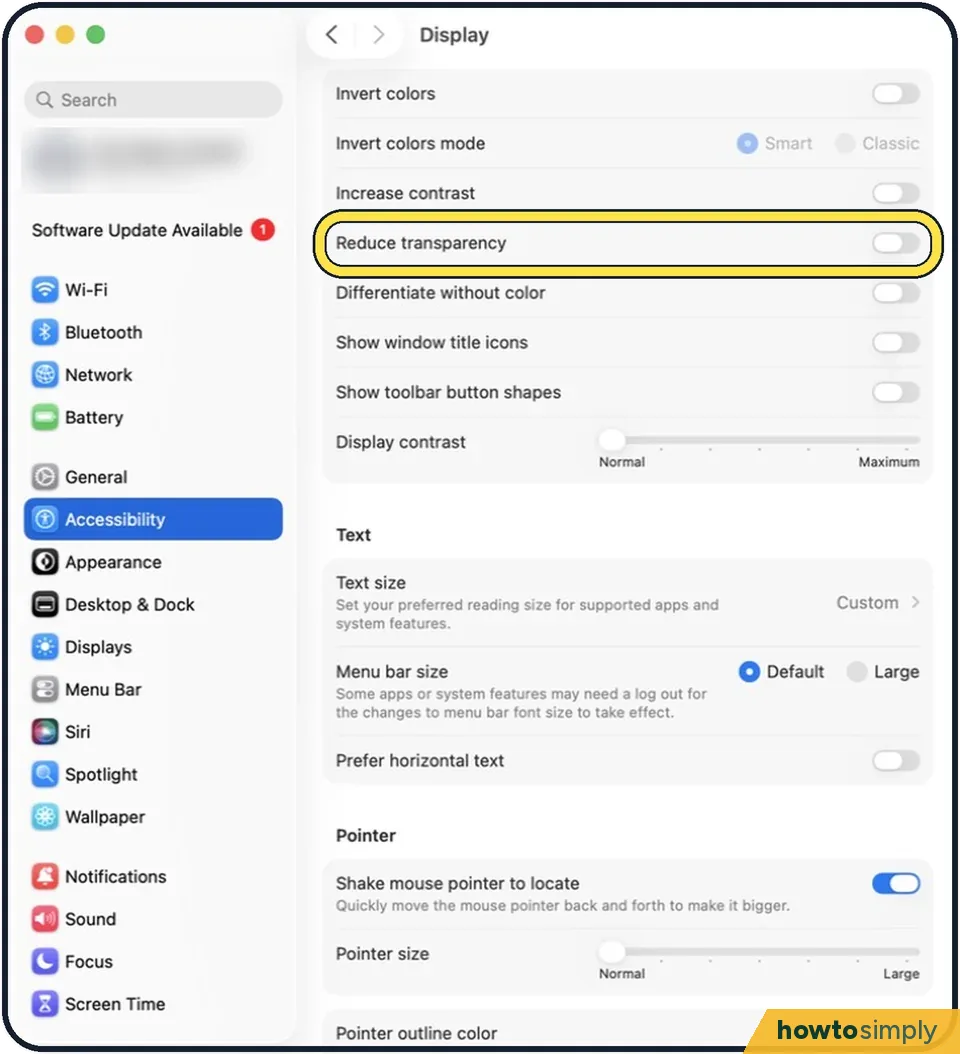
Tap the picture to see it full size Switch on Reduce transparency
It replaces the transparent effect used on some backgrounds in macOS with a solid background, to improve contrast and readability.
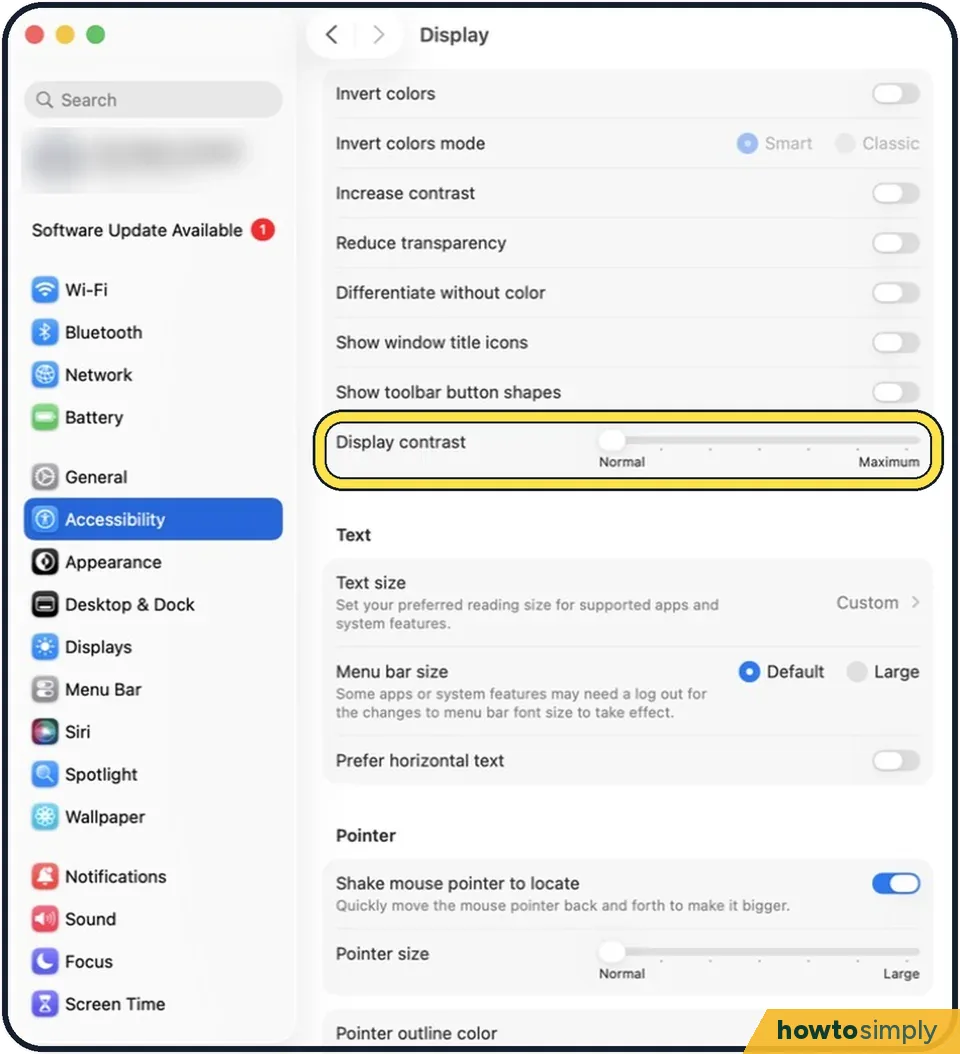
Tap the picture to see it full size Fine-tune with Display contrast
The slider at the bottom of the group goes from Normal to Maximum and changes the contrast of the screen as a whole.
About this guide
Menus and sidebars in macOS let the picture behind them shine through, and buttons have faint borders. If that makes the screen hard to read, two switches give it firmer outlines and solid backgrounds.
The screenshots show System Settings on macOS Tahoe 26.
Good to know
Differentiate without color, in the same group, uses shapes in addition to or instead of colour to show a status.
Show toolbar button shapes draws a subtle border around toolbar buttons, so you see where to click.
In short: Apple menu > System Settings… > Accessibility > Display > Increase contrast and Reduce transparency.
Links checked in October 2026. Menus and features can change after software updates. These steps match the version named at the top.
📷 Camera Lab: the same 6 scenes photographed with 11 phones, side by side.
Did this guide work for you?
Sorry about that. What happened?