
macOS 27 compared with macOS 26: We rewrote steps 2 and 3 to match the macOS 27 screens. The macOS 26 page keeps the steps and screenshots as they were.
howtosimply.com/guides/how-to-hide-the-dock-automatically-on-a-mac/ · Checked October 2026 · MacBook Neo · macOS 27.0.1
In this guide
Open System Settings, click Desktop & Dock, and switch on Automatically hide and show the Dock. To bring the hidden Dock back, move the pointer to the edge of the screen where the Dock sits.
3 of 3 steps with real screenshots · 1 official source below
- Device
- Mac
- Shown on
- macOS 27.0.1 (MacBook Neo)
- App
- System Settings
- Real screenshots
- 3 of 3 steps
- Checked
- October 2026
- Sources
- 1 official, linked below
Step by step
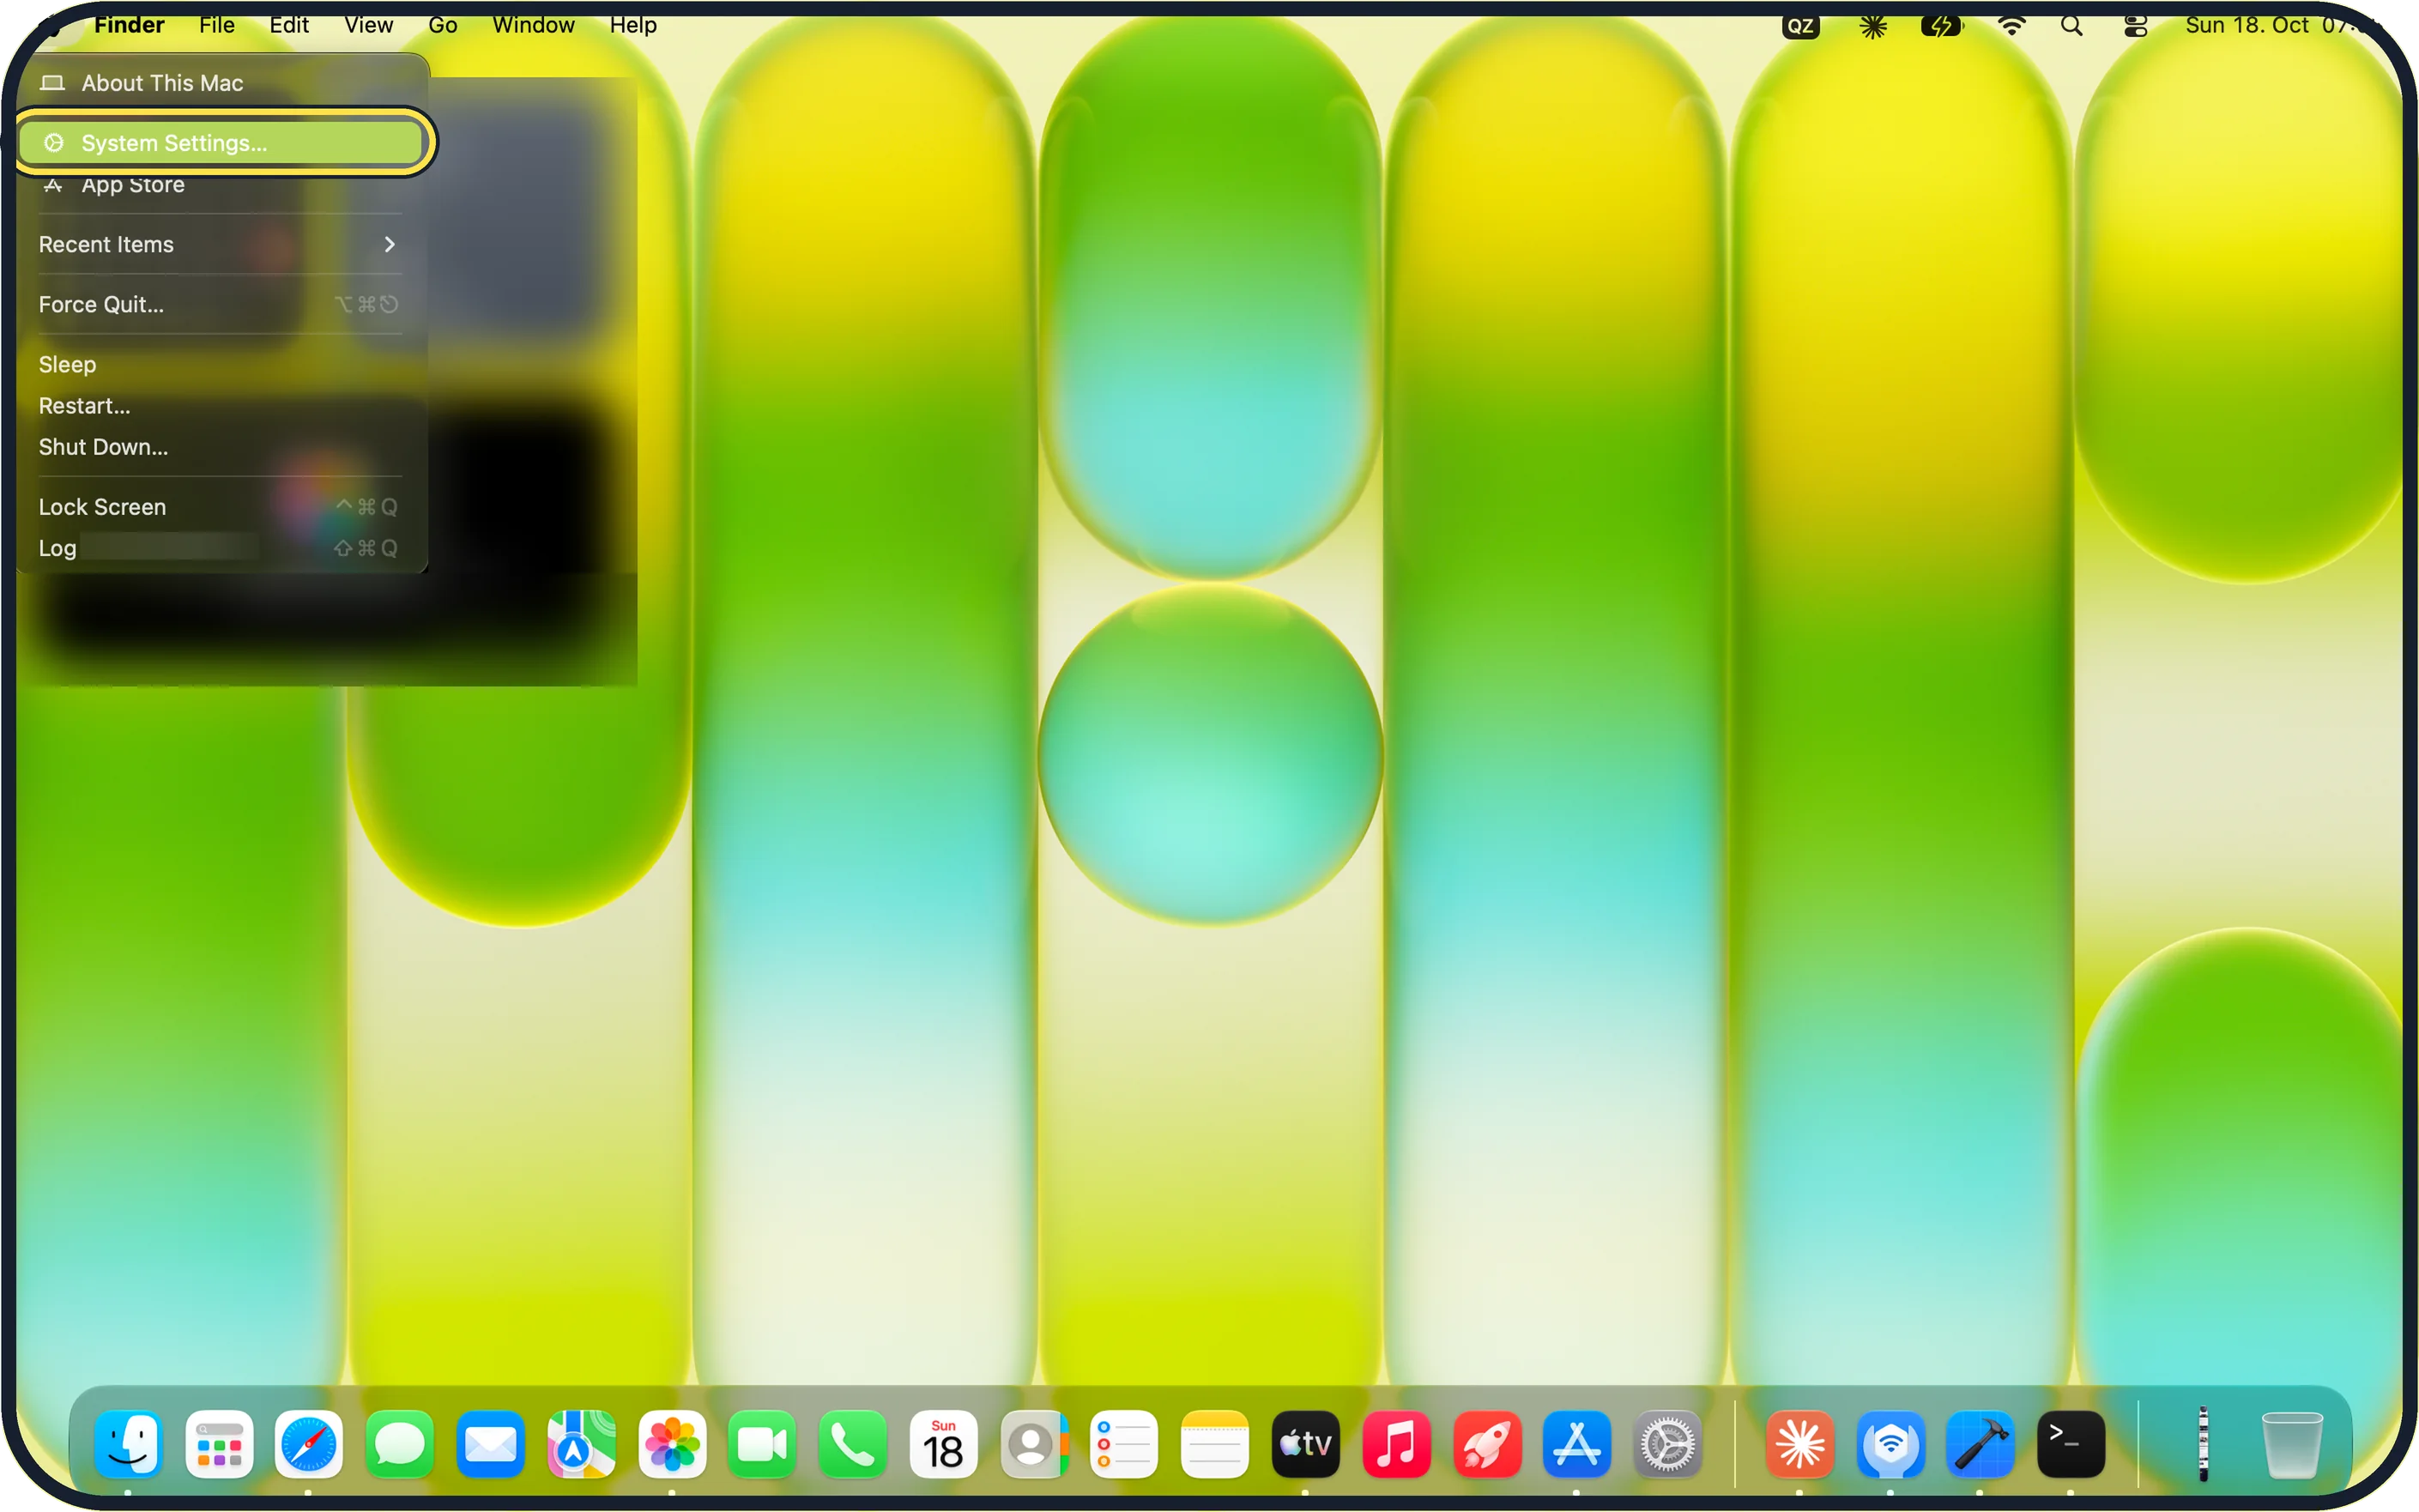
Zoomed in on the setting. Tap to see the whole screenTap the picture to see it full size Open System Settings
Click the Apple menu in the top left corner of the screen and choose System Settings.
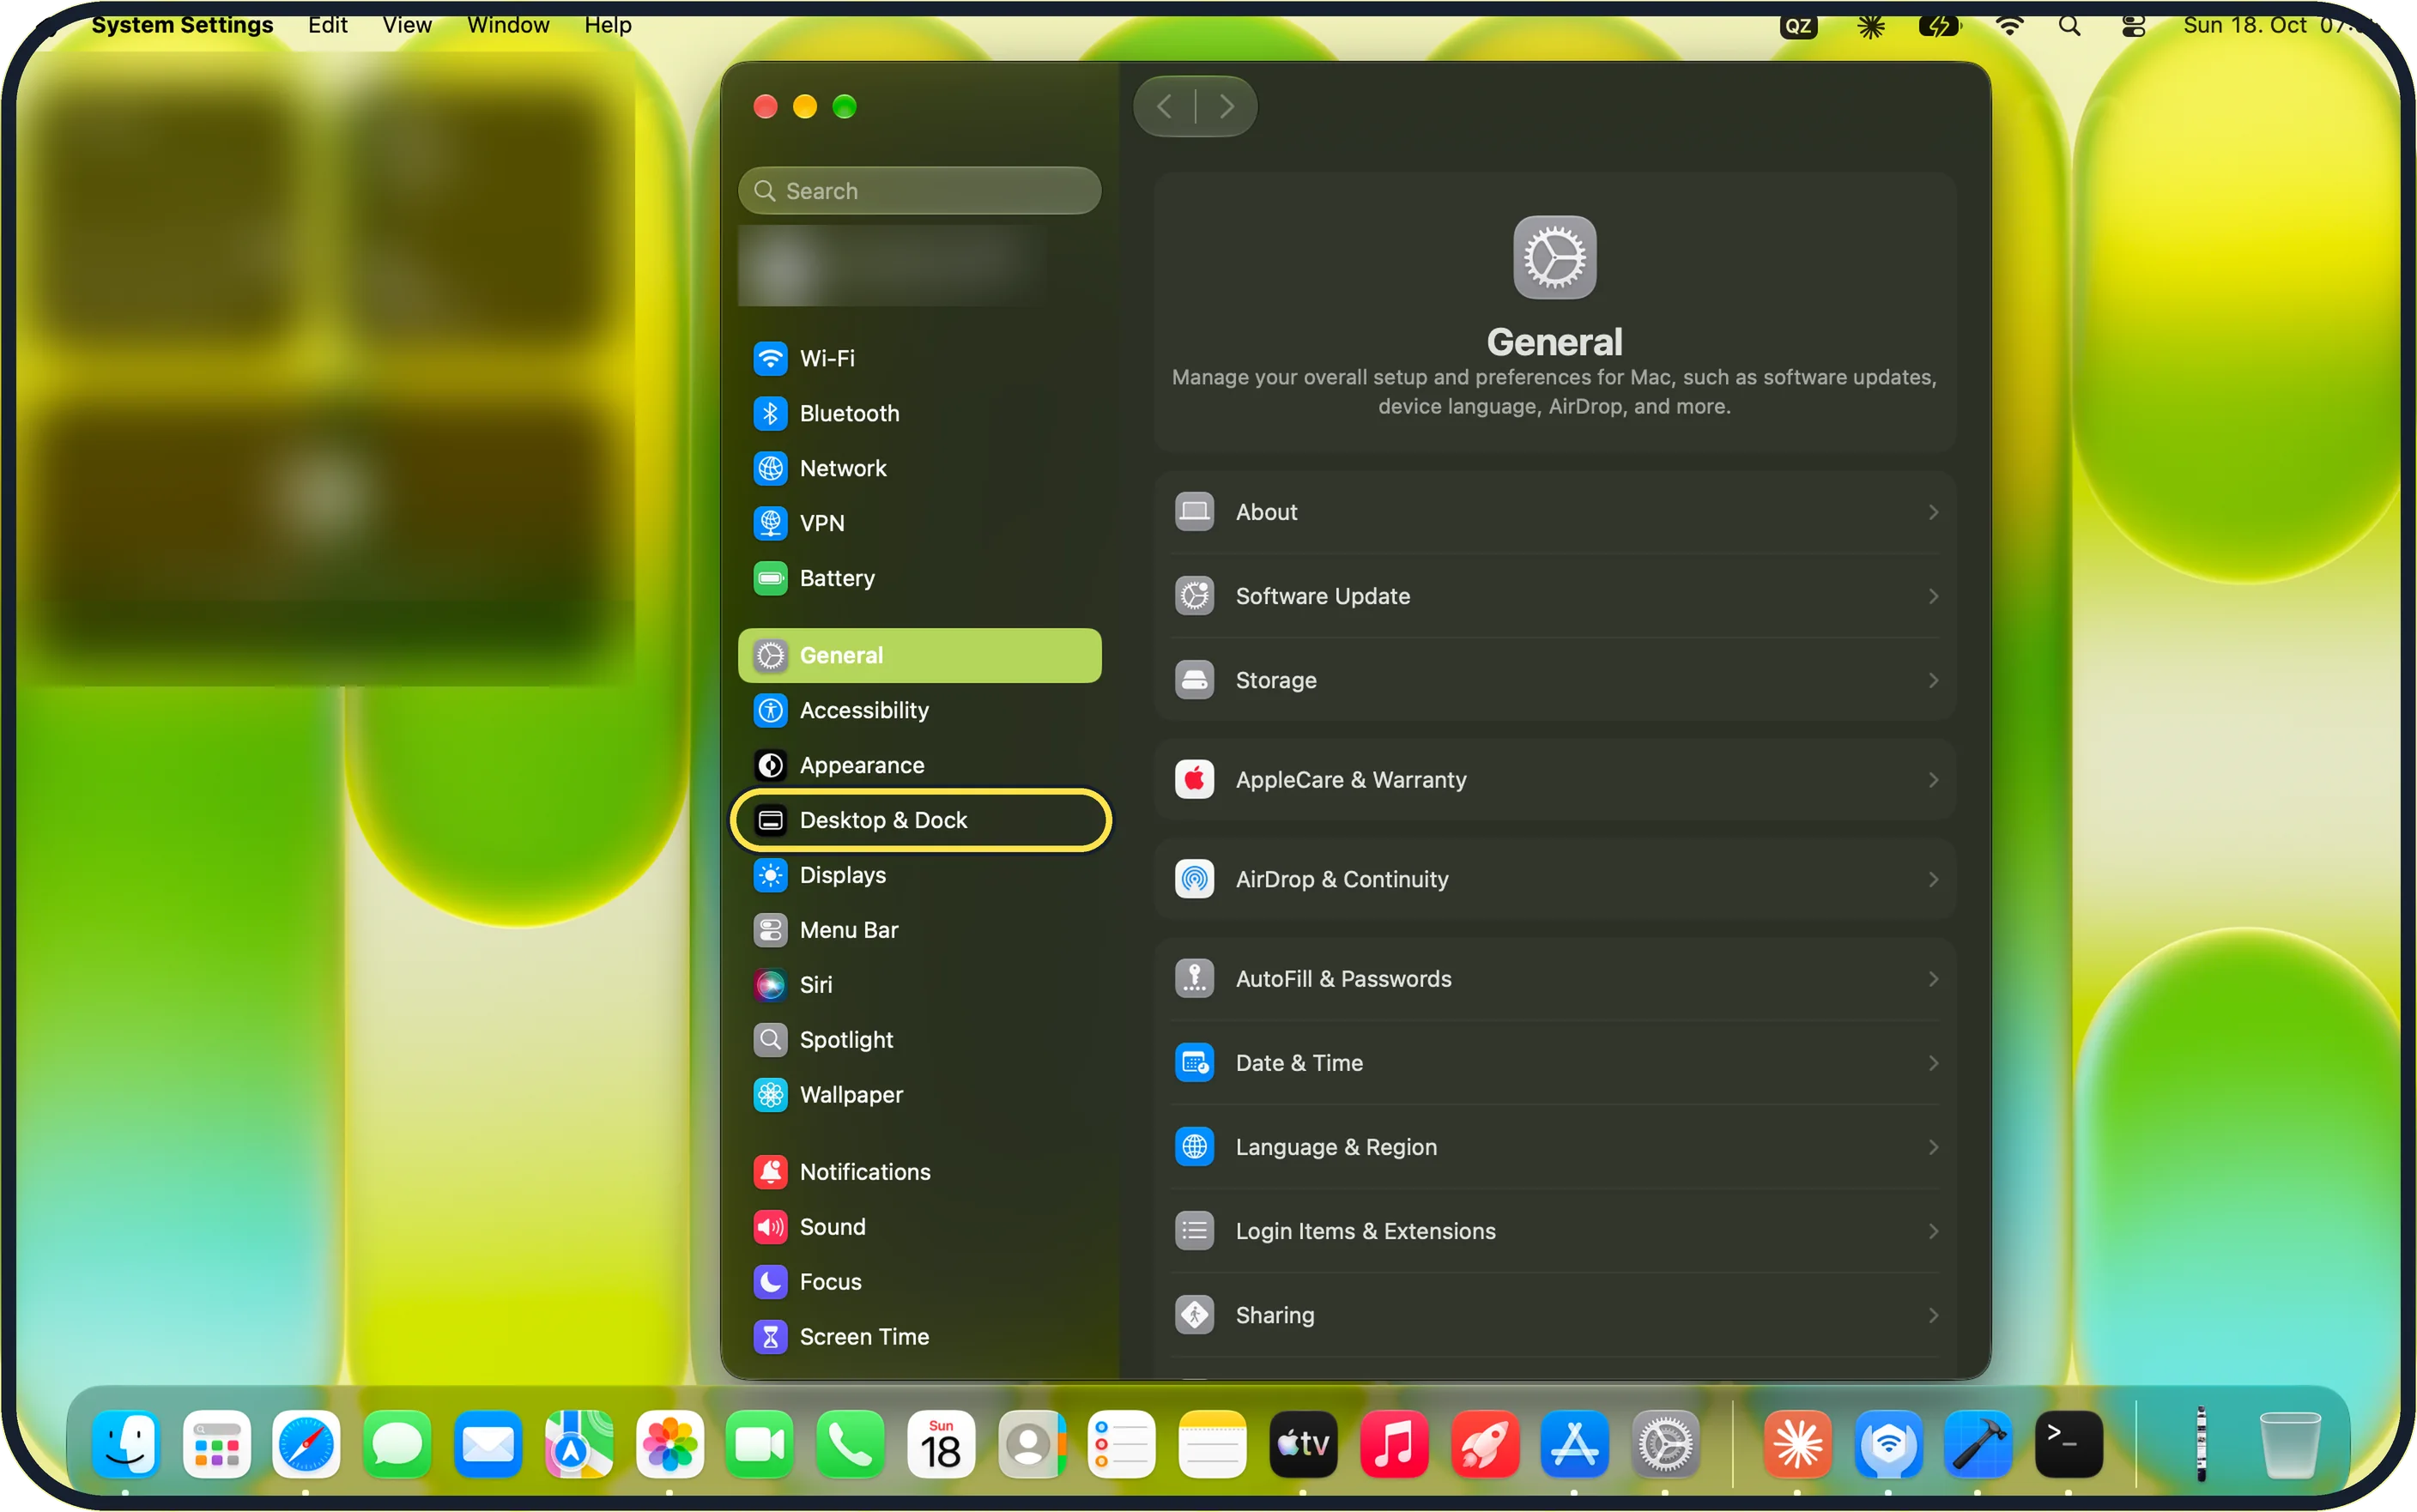
Zoomed in on the setting. Tap to see the whole screenTap the picture to see it full size Click Desktop & Dock in the sidebar
Desktop & Dock is in the sidebar, just below Appearance. On our MacBook Neo it was visible without scrolling.
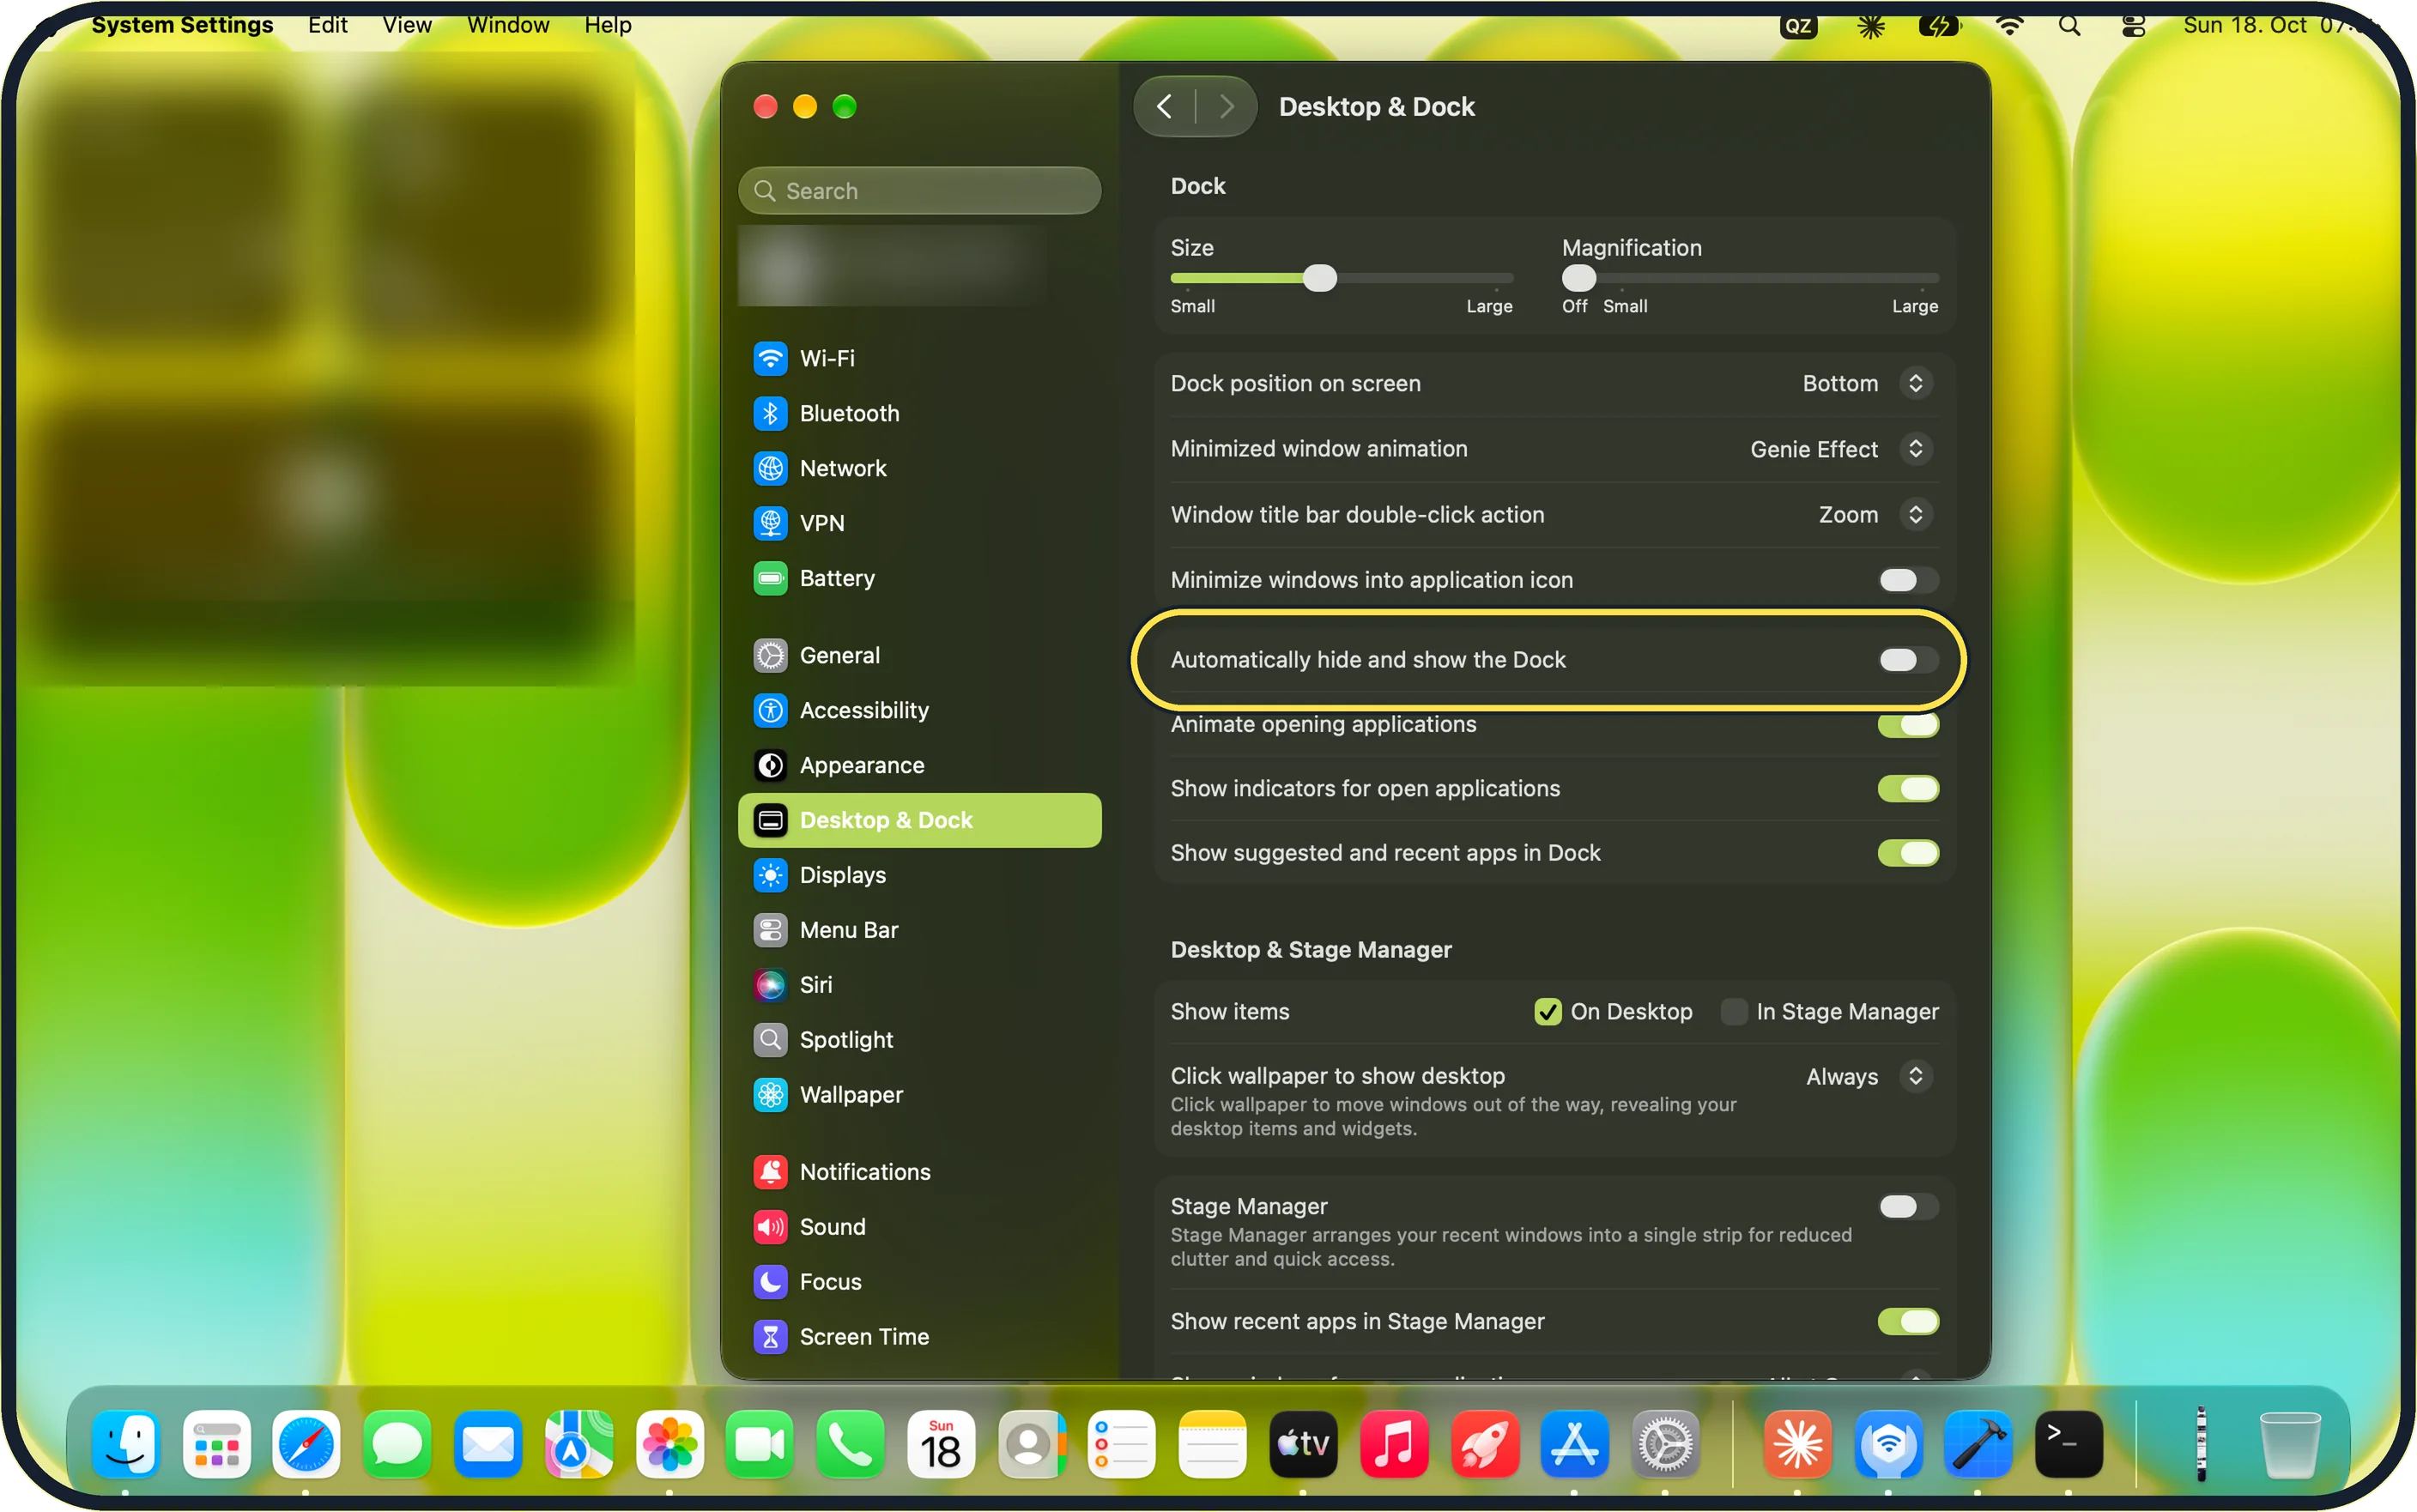
Zoomed in on the setting. Tap to see the whole screenTap the picture to see it full size Switch on Automatically hide and show the Dock
On the Desktop & Dock page, Automatically hide and show the Dock starts the group below Minimize windows into application icon. On our MacBook Neo it was off, so click the switch to turn it on.
If you do not see this option
- Desktop & Dock is not in the sidebar Type Dock into the Search field at the top of the System Settings sidebar and choose Desktop & Dock from the results.
- You cannot find the switch On our MacBook Neo, Automatically hide and show the Dock is in the Dock section at the top of the page, not under Desktop & Stage Manager further down.
If this does not work
- The Dock does not come back Apple says to move the pointer to the edge of the screen where the Dock is located. Check Dock position on screen on the same page to see which edge that is. Source: Change Desktop & Dock settings on Mac
- The Dock still shows all the time Check that the Automatically hide and show the Dock switch is on; on our MacBook Neo it was off by default.
About this guide
On a small laptop screen the Dock takes a strip of space that windows could use; hidden, it stays out of the way and slides in when the pointer reaches its edge.
Screenshots: MacBook Neo, macOS 27.0.1, dark mode.
Good to know
A smaller Dock is another way to gain space: drag the Size slider at the top of the same page.
The Dock can also sit at the side: how to move the Dock to the side of the screen on a Mac.
On our MacBook Neo, Dock position on screen was set to Bottom, so the hidden Dock appears when the pointer reaches the bottom edge.
In short: System Settings > Desktop & Dock > Automatically hide and show the Dock.
Links checked in October 2026. Menus and features can change after software updates. These steps match the version named at the top.
Did this guide work for you?
Sorry about that. What happened?