 Illustration
In short
A bow tie and a shoelace bow are both the same knot.
At a glance
Wondering whether it's difficult? No, it isn't! A bow tie and a shoelace bow are both the same knot. The only difference is that in this case you're working with a wide, flat piece of fabric under your chin. So let's learn how to do one; the instructions below refer to your left and right.
Place the tie around your neck and set the length.
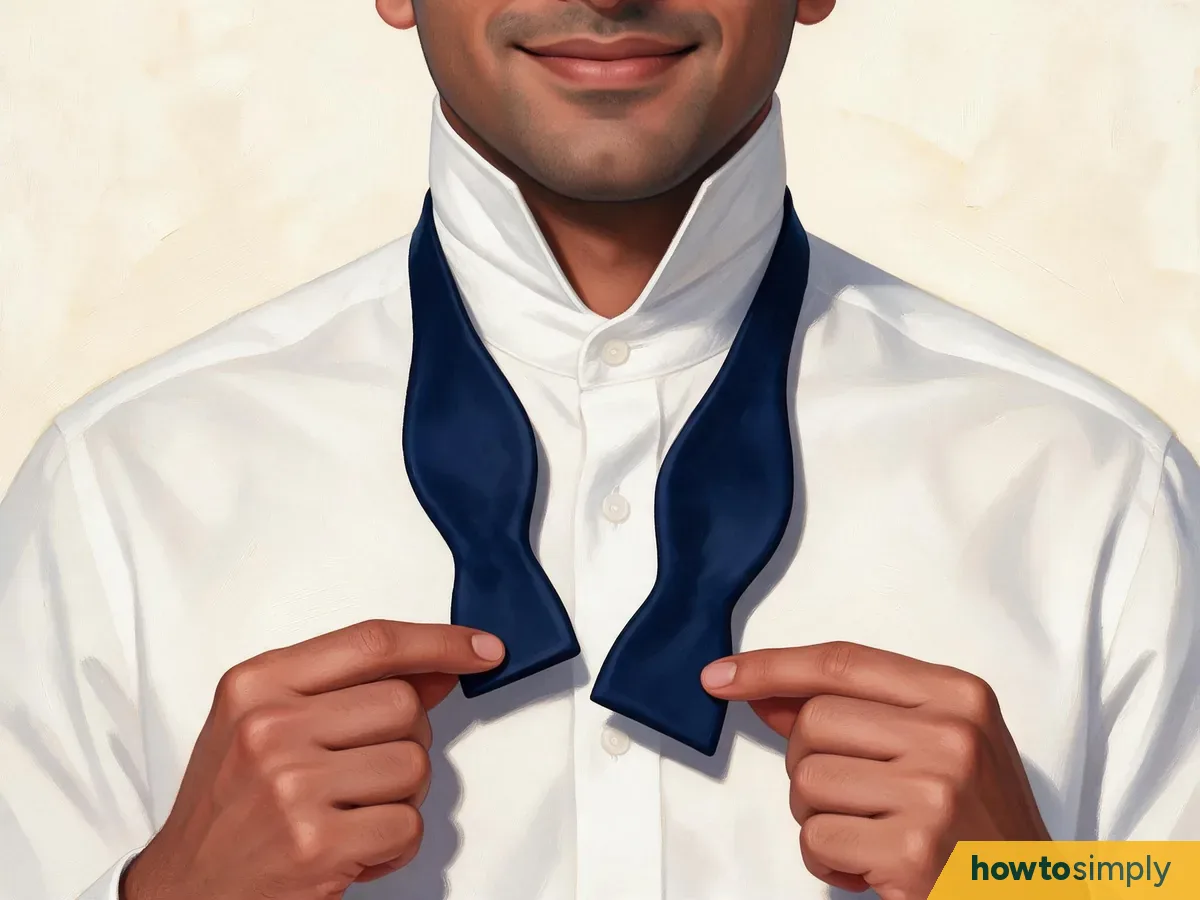
Illustration First, close the top button of your shirt and turn your collar up. With the band flat, drape it around your neck. Let the end on your right be 4 cm (1½ inches) higher than the end on your left.
Cross the long end over the short end.
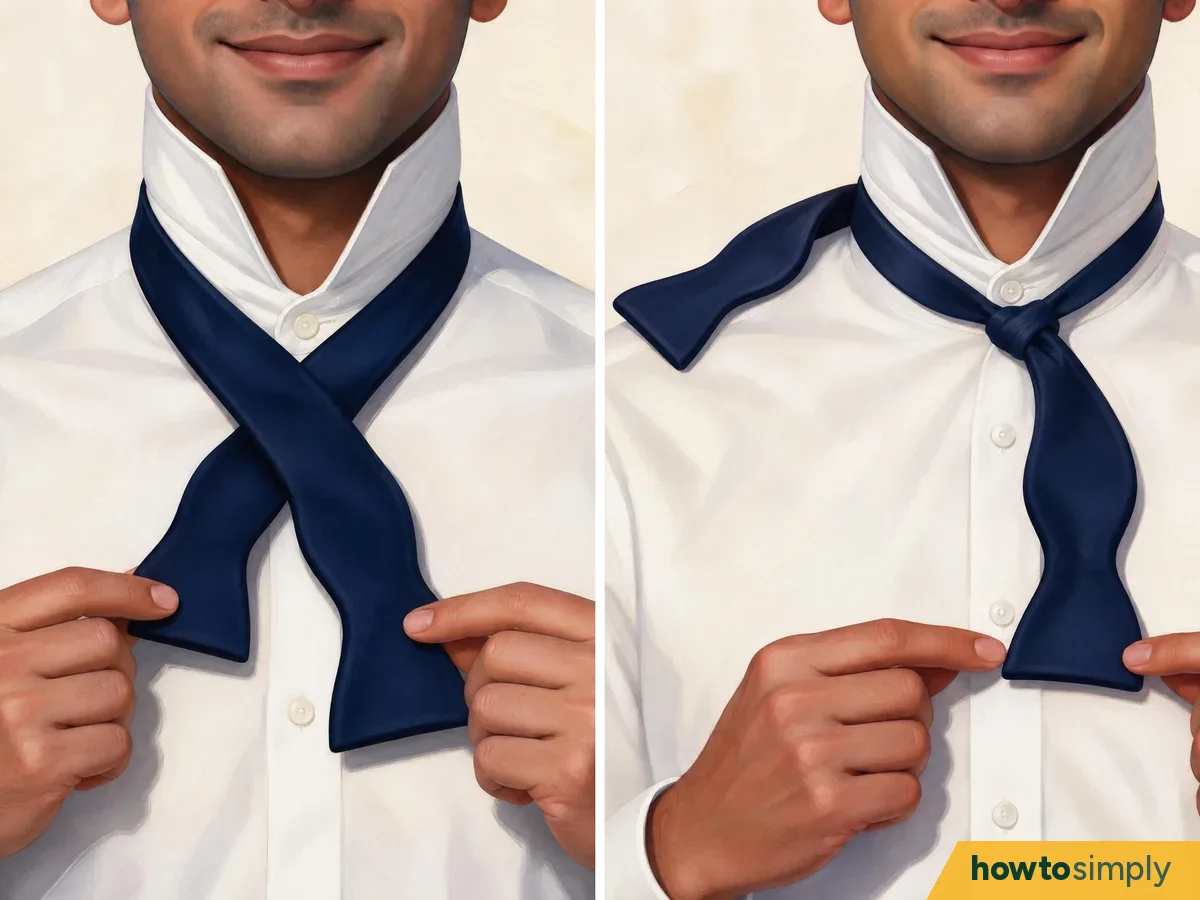
Illustration Start by bringing the long left end across the front of the short right end. It should make an X-shaped cross; hold it with your fingertips. Through the space between the tie and your collar, take the long end, tuck it under the X, and bring it up toward your chin. Until the crossing rests comfortably against your shirt, gently draw the ends apart. To free your hands, flip the long end over your right shoulder.
With the short end, shape the front bow.

Illustration Pick up the end hanging against your chest. Bring its broad section up to your collar and lay it horizontally. Double it back on itself so the loose tip points to your left and the rounded fold is on your right. With your left thumb and index finger, pinch the middle directly over your top button. Pause here. Your fingers should be holding the spot where the center band will go, and you should already see the outline of a bow.
Drop the long end straight down the middle.

Illustration Bring the long end off your shoulder with your right hand. Letting the rest hang toward your shirt buttons, lay it straight down over the spot you’re pinching. The narrow strip crossing the front now forms the visible center of the bow. Keep it flat so it makes a smooth band.
Behind the bow, find the small opening.

Illustration Like closing a book around the hanging strip, bring the left and right wings of the front bow forward toward each other. With your left hand, hold the wings together in front. This draws the bow slightly away from your shirt. Feel along the right side of the knot with your right index finger, immediately behind the pinched bow. You’re looking for a small passage that runs sideways. If you can’t feel it, ease the hanging strip upward a little to give yourself room.
Push a fold through that opening.

Illustration Look for the widest part of the hanging end. Make a U-shaped fold by bending the fabric back on itself. Guide the rounded bend behind the front bow, then push it through the opening from right to left. When the fold peeks out on your left, catch it with your fingertips and draw it through just far enough to form a wing. Leave the loose tip on your right. You should now have one loose tip on each and one side-folded loop.
Tighten the knot by pulling the two loops.

Illustration Release the front wings. On your right, find the folded edge of the front bow. On your left, find the folded edge of the back bow you just pushed through. Slip a fingertip into each loop and gently pull your hands apart. You’ll feel the center knot firm up. If a wing starts to disappear, you’ve caught a loose tip. Release it, find the doubled edge, and pull again.
Balance the wings and lower your collar.
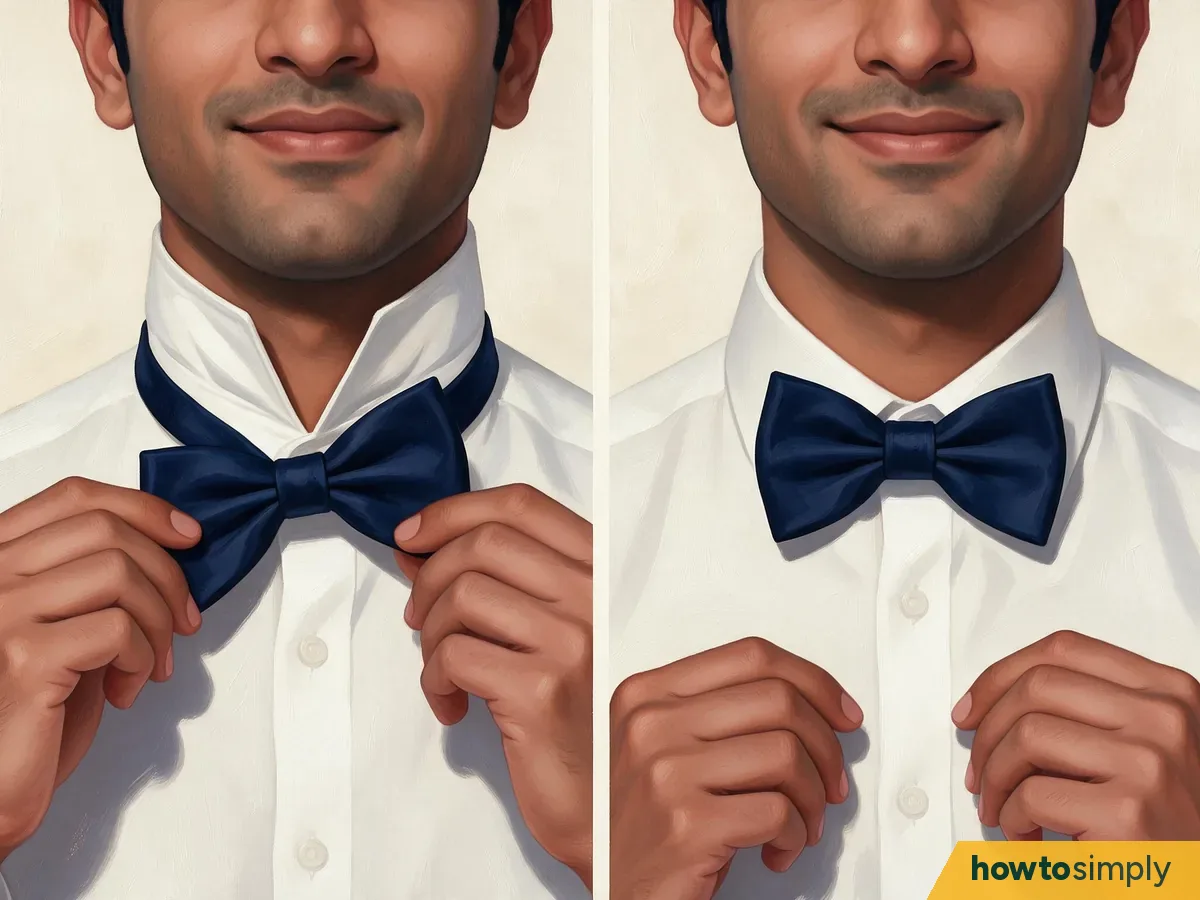
Illustration Hold the center knot lightly. If one wing looks short, ease that piece outward a few millimeters at a time. Alternate between adjusting the shape and gently tugging the two loops to keep the center secure. Straighten the wings with small tugs, then fold your collar down.
If this article helped you, please give us a like or follow us on our social media platforms. Since we don’t use AI to write our content, your encouragement will greatly help our authors.
About this article
- Written by
- howtosimply staff
- Pictures
- 9 illustrations drawn for this article, each marked Illustration (drawings, not photos).
Did this solve the problem?
What needs work?
What did you think?
Reaction counts are loading.