How to change the DNS server on a Mac
2 min read · 6 steps · Updated 2 October 2026
Open System Settings, click Network, click the connection you use (usually Wi-Fi), click Details and then DNS. Click the plus button under the DNS servers list, type the address of the new server and click OK.
A DNS server turns a web address such as howtosimply.com into the number that computers use. Normally your internet provider supplies one automatically. Some people change it to a public DNS service because it is faster, more reliable or filters harmful sites.
These steps are for recent versions of macOS, where the settings app is called System Settings. The pictures are our own screenshots from macOS Tahoe 26 on a MacBook Pro.
Step by step
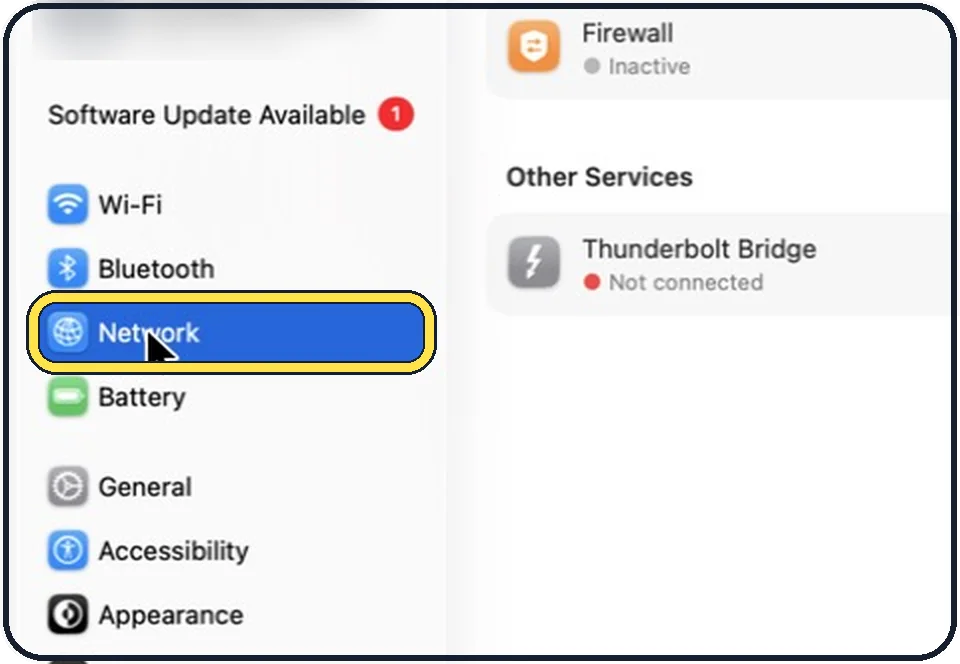
Open System Settings and click Network
Click the Apple menu, then System Settings, then Network in the sidebar.
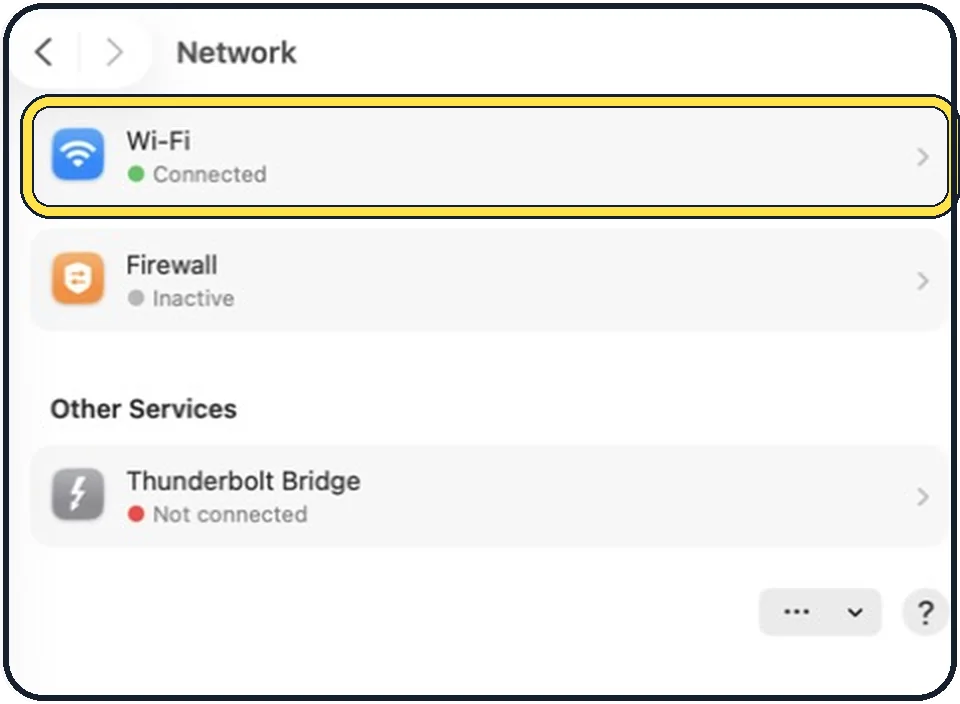
Click the connection you use
For most people that is Wi-Fi. With a cable it is Ethernet.
Click Details
On the Wi-Fi page the Details button is next to the network you are connected to.
Click DNS
It is in the list on the left of the window that opens. You may need to scroll down.
Add the new server
Click the plus button at the bottom of the DNS servers list and type the address. It can be an IPv4 or an IPv6 address. Add a second address as a reserve if the service gives you two.
Click OK and test
Open a website. If nothing loads, check the address for typing mistakes.
Good to know
To go back to the automatic setting, select each address you added and click the minus button.
The change applies only to this connection. Another Wi-Fi network has its own setting.
Take the addresses from the website of the DNS service you have chosen. Do not use an address from an email or an advert.
To change DNS for every device at home, the setting belongs in the router instead.
In short: System Settings, Network, Wi-Fi, Details, DNS, plus, address, OK.
- Apple Support: Change DNS settings on Mac
Rules and prices change. Check the official source before you act.